manuals.online logo
Brands
  1. Home
  2. •
  3. Brands
  4. •
  5. Monacor
  6. •
  7. Microphone System
  8. •
  9. Monacor IMG STAGELINE DMS-1 User manual

Monacor IMG STAGELINE DMS-1 User manual

DMS-1
Best.-Nr. 23.3490
www.imgstageline.com
DMS-3
Best.-Nr. 23.3500
®
MONACOR INTERNATIONAL GmbH & Co. KG
•
Zum Falsch 36
•
28307 Bremen
•
Germany
Copyright
©
by MONACOR INTERNATIONAL. All rights reserved. A-0196.99.02.06.2011
Mikrofon-Tischfuß
Bitte lesen Sie diese Bedienungsanleitung vor
dem Betrieb gründlich durch und heben Sie sie
für ein späteres Nachlesen auf.
Einsatzmöglichkeiten
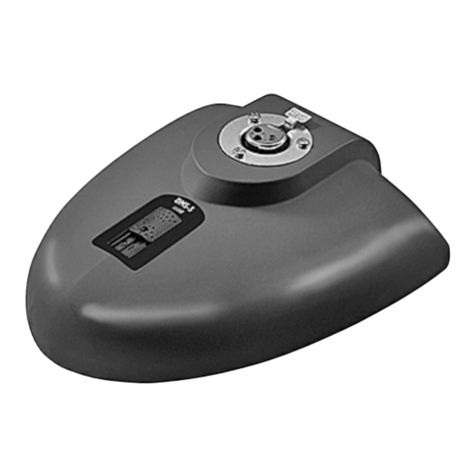
Dieser rutschfeste und stabile Mikrofon-Tisch-
fuß – Modell DMS-1 mit Ein- /Ausschalter, Mo-
dell DMS-3 mit verriegelbarer Sprechtaste –
dient zum Aufstecken eines Schwanenhalsmi-
krofons mit XLR-Anschluss. Ein- und Ausgang
des Tischfußes sind symmetrisch beschaltet.
Hinweise für den sicheren Gebrauch
GDer Mikrofon-Tischfuß ist nur zur Verwen-
dung im Innenbereich geeignet. Schützen Sie
ihn vor Feuchtigkeit und Hitze (zulässiger Ein-
satztemperaturbereich 0 – 40 °C).
GVerwenden Sie für die Reinigung nur ein tro-
ckenes, weiches Tuch, niemals Chemikalien
oder Wasser.
GWird der Mikrofon-Tischfuß zweckentfremdet,
nicht richtig angeschlossen oder nicht fach-
gerecht repariert, kann keine Haftung für
daraus resultierende Sach- oder Personen-
schäden und keine Garantie für den Tischfuß
übernommen werden.
Inbetriebnahme
1) Das Schwanenhalsmikrofon in die XLR-Buch-
se auf der Oberseite des Tischfußes stecken.
Die Buchse besitzt eine Verriegelung, die
beim Herausziehen des Steckers durch Her-
unterdrücken des PUSH-Hebels wieder ge-
löst wird.
Soll der Mikrofon-Tischfuß endgültig
aus dem Betrieb genommen werden,
übergeben Sie ihn zur umweltgerech-
ten Entsorgung einem örtlichen Recyc-
lingbetrieb.
2) Den XLR-Ausgang hinten am Tischfuß über
ein Anschlusskabel (z. B. ein Kabel der MEC-
Serie von „img Stage Line“) mit einem sym-
metrischen Mikrofoneingang am Audiogerät
(z. B. Mischpult, Verstärker) verbinden.
3) Bei dem Modell DMS-1 zum Einschalten des
Mikrofons den Schalter unter der XLR-Buchse
ganz nach oben schieben. Steht der Schalter
in der unteren Position (Schriftzug OFF sicht-
bar), ist das Mikrofon ausgeschaltet.
Bei dem Modell DMS-3 zum Einschalten
des Mikrofons für die Dauer einer Durchsage
die Sprechtaste TALK gedrückt gehalten und
in das Mikrofon sprechen. Nach der Durch-
sage die Taste lösen. Soll das Mikrofon für
längere Zeit eingeschaltet bleiben, die Taste
drücken und gleichzeitig den darüber liegen-
den Schalter nach links schieben (Position
LOCK). Im Sichtfenster des Schalters er-
scheint dann eine rote Markierung und die
Taste ist verriegelt. Zum Entriegeln der Taste
den Schalter wieder nach rechts schieben.
Desk Microphone Base
Please read these operating instructions care-
fully prior to operation and keep them for later
use.
Applications
This sturdy, non-slip desk microphone base
(model DMS-1 with on-off switch, model DMS-3
with lockable talk button) serves for accommo-
dating a gooseneck microphone with XLR con-
nection. The input and output of the base are
balanced.
Safety Notes
GThe desk microphone base is suitable for
indoor use only. Protect it against humidity
and heat (admissible ambient temperature
range 0 – 40 °C).
GFor cleaning only use a dry, soft cloth; never
use chemicals or water.
GNo guarantee claims for the desk microphone
base and no liability for any resulting personal
damage or material damage will be accepted
if the base is used for other purposes than
originally intended, if it is not correctly con-
nected, or not repaired in an expert way.
Operation
1) Connect the gooseneck microphone to the
XLR jack on the upper side of the base. The
jack is provided with a latching device. Press
down the PUSH lever to release it for remov-
ing the plug.
2) Connect the XLR output at the rear of the
base via a connection cable (e. g. a cable of
If the desk microphone base is to be
put out of operation definitively, take it
to a local recycling plant for a disposal
which is not harmful to the environ-
ment.
the MEC series by “img Stage Line”) to a bal-
anced microphone input on the audio unit
(e. g. mixer, amplifier).
3) Model DMS-1: For switching on the micro-
phone, slide the switch below the XLR jack
fully to the upper position. With the switch in
the lower position (lettering OFF visible), the
microphone is switched off.
Model DMS-3: For switching on the micro-
phone for an announcement, keep the button
TALK pressed and speak into the micro-
phone. Release the button after the an-
nouncement. For keeping the microphone
switched on for a longer period, press the but-
ton while simultaneously sliding the switch
above it fully to the left (position LOCK). In
this case, a red marking will appear in the
small window of the switch to show that the
button is locked. To unlock the button, slide
the switch to the right again.
Pied de micro
de table
Veuillez lire la présente notice avec attention
avant le fonctionnement et conservez-la pour
pouvoir vous y reporter ultérieurement.
Possibilités dʼutilisation
Le pied de micro de table stable et anti-dérapant
– modèle DMS-1 avec interrupteur marche/
arrêt, modèle DMS-3 avec touche parole ver-
rouillable – sert pour recevoir un microphone col
de cygne avec branchement XLR. Lʼentrée et la
sortie du pied sont symétriques.
Conseils dʼutilisation et de sécurité
GLe pied de micro nʼest conçu que pour une
utilisation en intérieur. Protégez-le de lʼhumi-
dité et de la chaleur (plage de température de
fonctionnement autorisée 0 – 40 °C).
GPour le nettoyer, utilisez uniquement un chif-
fon sec et doux, en aucun cas de produits chi-
miques ou dʼeau.
GNous déclinons toute responsabilité en cas de
dommages matériels ou corporels résultants
si le pied de micro est utilisé dans un but autre
que celui pour lequel il a été conçu, sʼil nʼest
pas correctement branché ou sʼil nʼest pas
réparé par une personne habilitée ; en outre,
la garantie deviendrait caduque.
Utilisation
1) Placez le micro col de cygne dans la prise
XLR femelle sur la face supérieure du pied. La
prise possède un verrouillage qui se désen-
clenche lorsque le levier PUSH est abaissé
pour sortir la fiche.
2) Reliez la sortie XLR à lʼarrière du pied via un
cordon de branchement (par exemple un cor-
don de la série MEC-… de “img Stage Line”)
Lorsque le pied de micro est définitive-
ment retiré du circuit de distribution,
vous devez le déposer dans une usine
de recyclage adaptée pour contribuer
à son élimination non polluante.
à une entrée micro symétrique sur lʼappareil
audio (p. ex. table de mixage, amplificateur).
3) Sur le modèle DMS-1, pour allumer le micro-
phone, poussez lʼinterrupteur sous la prise
XLR entièrement vers le haut. Si lʼinterrupteur
est dans la position inférieure (repérage OFF
visible), le micro est éteint.
Sur le modèle DMS-3, pour allumer le mi-
crophone, maintenez la touche de parole
TALK enfoncée pendant la durée dʼune an-
nonce et parlez dans le micro. A la fin de lʼan-
nonce, relâchez la touche. Si le microphone
doit rester allumé plus longtemps, enfoncez
la touche et simultanément poussez lʼinter-
rupteur situé au-dessus vers la gauche (posi-
tion LOCK). Dans la fenêtre de lʼinterrupteur,
un repère rouge apparaît et la touche est ver-
rouillée. Pour déverrouiller la touche, pous-
sez à nouveau lʼinterrupteur vers la droite.
D A CH
F B CH
GB
Base da tavolo per microfono
Vi preghiamo di leggere attentamente le pre-
senti istruzioni prima della messa in funzione e
di conservarle per un uso futuro.
Possibilità dʼimpiego
Questa base da tavolo per microfono, robusta e
antiscivolo – modello DMS-1 con interruttore on/
off, modello DMS-3 con tasto voce bloccabile –
serve per inserirvi un microfono a collo di cigno
con connessione XLR. Lʼingresso e lʼuscita della
base sono simmetrici.
Avvertenze di sicurezza
GLa base da tavolo per microfono è adatta solo
per lʼuso allʼinterno di locali. Proteggerla dallʼ
umidità e dal calore (temperatura dʼimpiego
ammessa fra 0 e 40 °C).
GPer la pulizia usare solo un panno morbido,
asciutto; non impiegare in nessun caso pro-
dotti chimici o acqua.
GNel caso dʼuso improprio, di collegamenti sba-
gliati o di riparazione scorretta della base non
si assume nessuna responsabilità per even-
tuali danni consequenziali a persone o a cose
e non si assume nessuna garanzia per la
base.
Messa in funzione
1) Inserire il microfono a collo di cigno nella
presa XLR posta sul lato superiore della base.
La presa è provvista di un bloccaggio che
viene aperto spingendo in basso la levetta
PUSH quando si sfila il connettore.
Se si desidera eliminare la base defini-
tivamente, consegnarla per lo smalti-
mento ad unʼistituzione locale per il ri-
ciclaggio.
2) Collegare lʼuscita XLR sul lato posteriore della
base con un ingresso microfono simmetrico
dellʼapparecchio audio (p. es. mixer, amplifi-
catore) servendosi di un cavo di collegamento
(p. es. di un cavo della serie MEC di “img
Stage Line”).
3) Nel modello DMS-1, per attivare il microfono,
spostare lʼinterruttore sotto la presa XLR com-
pletamente in alto. Nella posizione inferiore
(si vede OFF), il microfono è spento.
Nel modello DMS-3, per attivare il
microfono solo per un avviso, tenere premuto
il tasto voce TALK e parlare nel microfono.
Alla fine dellʼavviso liberare il tasto. Per
lasciare acceso il microfono per un periodo
prolungato, premere lo stesso tasto e spo-
stare lʼinterruttore sovrastante a sinistra
(posizione LOCK). Nella finestrina dellʼinter-
ruttore si vede il contrassegno rosso per
segnalare che il tasto è bloccato. Per sbloc-
care il tasto spostare lʼinterruttore nuova-
mente a destra.
Pie de micro de sobremesa
Por favor, lea estas instrucciones de funciona-
miento cuidadosamente antes de usar el apa-
rato y guárdelas para usos posteriores.
Posibilidades de utilización
El pie de micro de sobremesa es estable y anti-
deslizante – el modelo DMS-1 dispone de un
interruptor ON/OFF, el modelo DMS-3 dispone
de una tecla para hablar que se puede bloquear
– y se puede utilizar para conectar un micro cue-
llo de cisne con conexión XLR. La entrada y la
salida del pie son simétricas.
Consejos de utilización y seguridad
GEl pie de micro está fabricado solo para una
utilización en interior. Protéjalo de la hume-
dad y del calor (temperatura e funcionamiento
autorizada 0 – 40 °C).
GPara limpiarlo utilice únicamente un trapo
seco y suave, no utilice en ningún caso pro-
ductos químicos o agua.
GRechazamos toda responsabilidad en caso de
daños materiales o corporales si el pie de micro
se utiliza en un fin distinto para el cual ha sido
fabricado, si no está correctamente conectado
o reparado por una persona habilitada; ade-
más por todos estos mismos motivos el pie de
micro carecería de todo tipo de garantía.
Utilización
1) Conecte el micro cuello de cisne en la toma
XLR hembra de la parte superior del pie. La
toma dispone de un bloqueo que se suelta
cuando se baja la palanca PUSH para sacar
la toma.
Cuando el pie de micro está definitiva-
mente sacado del servicio, deposítelo
en una fábrica de reciclaje adaptada
para contribuir a una eliminación no
contaminante.
2) Conecte la salida XLR a la trasera del pie vía
un cable de conexión (por ejemplo un cable
de la serie MEC-… de “img Stage Line”) con
una entrada micro simétrica del aparato audio
(por ejemplo mesa de mezcla, amplificador).
3) En el modelo DMS-1, pulse totalmente hacia
arriba el interruptor bajo de la toma XLR para
conectar el micro. Si el interruptor está en la
posición inferior (señal OFF visible), el micro
está apagado.
En el modelo DMS-3, para conectar el
micro, mantenga la tecla de palabra TALK
pulsada durante todo el discurso y hable en
el micro. Al final del anuncio, suelte la tecla.
Si el micro debe estar conectado más tiempo,
pulse la tecla y simultáneamente pulse el
interruptor situado encima hacia la izquierda
(posición LOCK). En la ventanilla del inter-
ruptor, una señal roja aparece y la tecla está
bloqueada. Para desbloquear la tecla, pulse
de nuevo el interruptor hacia la derecha.
DMS-1
Best.-Nr. 23.3490
www.imgstageline.com
Podstawa Mikrofonu
Prosimy o uważne przeczytanie poniższej
instrukcji przed użyciem urządzenia, oraz o
zachowanie tekstu do wglądu.
Zastosowanie
Urządzenie to służy jako podstawa mikrofonu
zamocowanego na gęsiej szyi wyposażonej w
łącze XLR. Model DMS-1 wyposażony jest w
przełącznik ON / OFF, a model DMS-3 w przy-
cisk TALK. Zarówno wejście, jak i wyjście urzą-
dzenia jest symetryczne.
Informacje Dotyczące
Bezpieczeństwa
GUrządzenie nadaje się do użytku wewnątrz
pomieszczeń. Należy chronić je przed wilgo-
cią oraz gorącem (dopuszczalna temperatura
otoczenia pracy wynosi 0 – 40 °C).
GDo czyszczenia urządzenia zawsze używać
czystego i suchego kawałka materiału; nigdy
nie należy używać wody, ani środków che-
micznych.
GDostawca oraz producent nie ponoszą odpo-
wiedzialności za ewentualnie wynikłe szkody
materialne lub uszczerbki na zdrowiu, jeśli
urządzenie było używane niezgodnie z prze-
znaczeniem, zostało niepoprawnie zainstalo-
wane lub obsługiwane oraz było poddawane
naprawom przez nieautoryzowany personel.
Obsługa
1) Podłączyć mikrofon na gęsiej szyi do wtyku
XLR znajdującego się w górnej części pod-
stawy. Wtyk wyposażony jest w zatrzask
mocujący. Aby odłączyć gęsią szyję od pod-
stawy, należy wcisnąć dźwignię oznaczoną
napisem PUSH.
Jeśli urządzenie nie będzie już nigdy
więcej używane, wskazane jest prze-
kazanie go do miejsca utylizacji odpa-
dów, aby zostało zniszczone bez
szkody dla środowiska.
2) Połączyć podstawę za pomocą wtyku XLR
znajdującego się w jej tylnej części do syme-
trycznego wejścia mikrofonowego urządzenia
audio (np.: wzmacniacza, czy miksera). Do
tego celu można posłużyć się jednym
z przewodów serii MEC z oferty “img Stage
Line”.
3) Model DMS-1: Aby włączyć mikrofon należy
przesunąć przełącznik znajdujący się poniżej
wtyku XLR maksymalnie w górę. Przełącznik
ustawiony w dolnej pozycji (widoczne ozna-
czenie OFF) oznacza, że mikrofon jest wyłą-
czony.
Model DMS-3: W celu włączenia mikro-
fonu należy wcisnąć przycisk TALK. Po
zakończeniu przemawiania należy zwolnić
przycisk. Aby zablokować przycisk należy
wcisnąć go oraz przesunąć w lewo (pozycja
LOCK). Widoczne będzie czerwone ozna-
czenie sygnalizujące zablokowanie klawisza
TALK. Aby odblokować przycisk należy prze-
sunąć go w prawo.
DMS-3
Best.-Nr. 23.3500
I
PL
E
®
MONACOR INTERNATIONAL GmbH & Co. KG
•
Zum Falsch 36
•
28307 Bremen
•
Germany
Copyright
©
by MONACOR INTERNATIONAL. All rights reserved. A-0196.99.02.06.2011

This manual suits for next models

3

Other Monacor Microphone System manuals

Monacor AV-3030TX User manual

Monacor

Monacor AV-3030TX User manual

Monacor DH-95N User manual

Monacor

Monacor DH-95N User manual

Monacor DMS-5 User manual

Monacor

Monacor DMS-5 User manual

Monacor AV-5800TVG User manual

Monacor

Monacor AV-5800TVG User manual

Monacor IMG STAGELINE ATS-42R User manual

Monacor

Monacor IMG STAGELINE ATS-42R User manual

Monacor VB-210AV User manual

Monacor

Monacor VB-210AV User manual

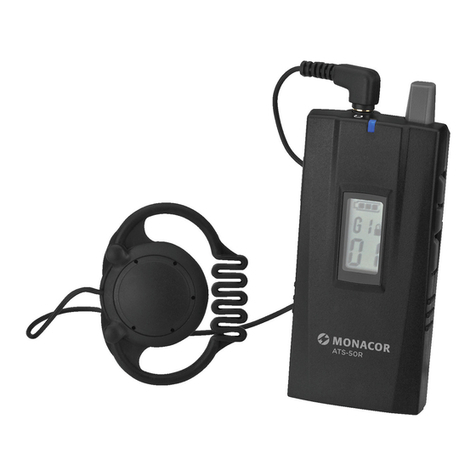
Monacor ATS-50R User manual

Monacor

Monacor ATS-50R User manual

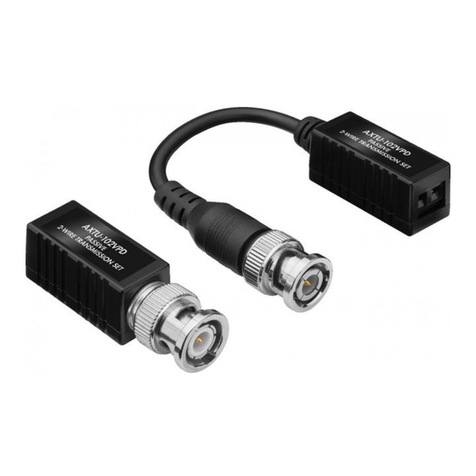
Monacor AXTU-102VPD User manual

Monacor

Monacor AXTU-102VPD User manual

Monacor JTS SIEM-111/5 User manual

Monacor

Monacor JTS SIEM-111/5 User manual

Monacor IMG STAGELINE FLY-16R User manual

Monacor

Monacor IMG STAGELINE FLY-16R User manual

Monacor IMG STAGELINE WDMX-3F User manual

Monacor

Monacor IMG STAGELINE WDMX-3F User manual

Monacor DRM-884DTM User manual

Monacor

Monacor DRM-884DTM User manual

Monacor VB-400V User manual

Monacor

Monacor VB-400V User manual

Monacor HDMA-220DONG User manual

Monacor

Monacor HDMA-220DONG User manual

Monacor IMG STAGELINE DIB-100 User manual

Monacor

Monacor IMG STAGELINE DIB-100 User manual

Monacor JTS KA-10/1PACK User manual

Monacor

Monacor JTS KA-10/1PACK User manual

Monacor img Stage Line ATS-50R User manual

Monacor

Monacor img Stage Line ATS-50R User manual

Monacor TRAVEL-CLIP User manual

Monacor

Monacor TRAVEL-CLIP User manual

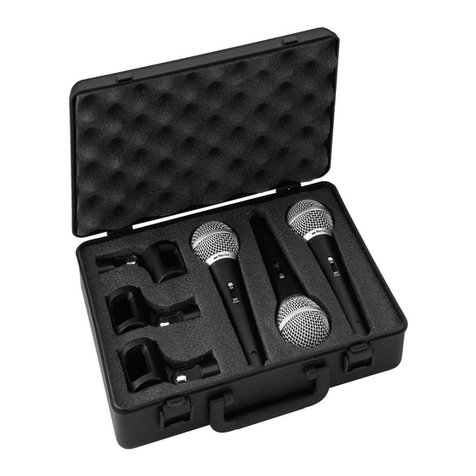
Monacor img Stage Line DM-3SET User manual

Monacor

Monacor img Stage Line DM-3SET User manual

Monacor JTS TG-10R User manual

Monacor

Monacor JTS TG-10R User manual

Monacor JTS SIEM-111/2 User manual

Monacor

Monacor JTS SIEM-111/2 User manual

Monacor ATS-42R User manual

Monacor

Monacor ATS-42R User manual

Monacor IMG STAGE LINE DMS-1 User manual

Monacor

Monacor IMG STAGE LINE DMS-1 User manual

Monacor ATS-42R User manual

Monacor

Monacor ATS-42R User manual

Popular Microphone System manuals by other brands

Brigade DW-1000-TX User & fitting guide

Brigade

Brigade DW-1000-TX User & fitting guide

PCB Piezotronics 37 7 Series Installation and operating manual

PCB Piezotronics

PCB Piezotronics 37 7 Series Installation and operating manual

VocoPro Silent PA owner's manual

VocoPro

VocoPro Silent PA owner's manual

FAME ARU-03 user manual

FAME

FAME ARU-03 user manual

EXMAX EX-200N user manual

EXMAX

EXMAX EX-200N user manual

AKG WMS 450 - SERVICE Setup guide

AKG

AKG WMS 450 - SERVICE Setup guide

OWI CRS-101 Specification sheet

OWI

OWI CRS-101 Specification sheet

LD LDU50 R Series user manual

LD

LD LDU50 R Series user manual

FDUCE W-19II owner's manual

FDUCE

FDUCE W-19II owner's manual

ZKTeco UR10RW-E quick start guide

ZKTeco

ZKTeco UR10RW-E quick start guide

Neumann KM 120 Operating	 instruction

Neumann

Neumann KM 120 Operating instruction

Eikon WM100 user manual

Eikon

Eikon WM100 user manual

Chiayo AIR-812 Operation manual

Chiayo

Chiayo AIR-812 Operation manual

Samson Concert 288x owner's manual

Samson

Samson Concert 288x owner's manual

Invotone WM-210 user manual

Invotone

Invotone WM-210 user manual

AKG WMS40 FLEXX User instructions

AKG

AKG WMS40 FLEXX User instructions

TP-Link Deco Troubleshooting steps

TP-Link

TP-Link Deco Troubleshooting steps

Bogen ENHANCER ESYS1 Specifications

Bogen

Bogen ENHANCER ESYS1 Specifications

manuals.online logo
manuals.online logoBrands
  • About & Mission
  • Contact us
  • Privacy Policy
  • Terms and Conditions

Copyright 2025 Manuals.Online. All Rights Reserved.