manuals.online logo
Brands
  1. Home
  2. •
  3. Brands
  4. •
  5. Monacor
  6. •
  7. Speakers System
  8. •
  9. Monacor EUL-75-WS User manual

Monacor EUL-75-WS User manual

ELECTRONICS FOR SPECIALISTS ELECTRONICS FOR SPECIALISTS ELECTRONICS FOR SPECIALISTS ELECTRONICS FOR SPECIALISTS ELECTRONICS FOR SPECIALISTS ELECTRONICS
MONACOR INTERNATIONAL GmbH & Co. KG • Zum Falsch 36 • 28307 Bremen • Germany
Copyright©by MONACOR INTERNATIONAL. All rights reserved. A-0911.99.03.08.2019
EUL-75/WS
Bestell-Nr. •Order No. 16.2500
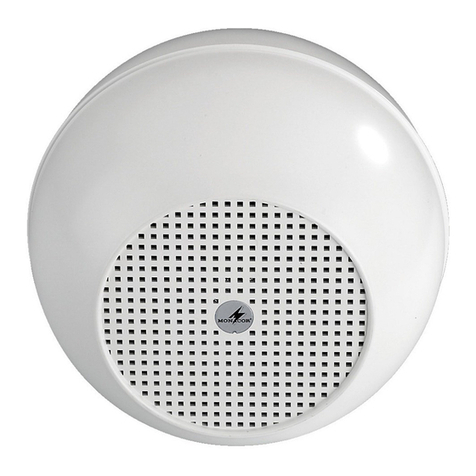
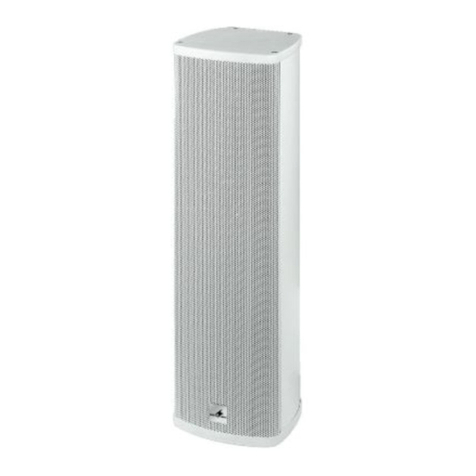
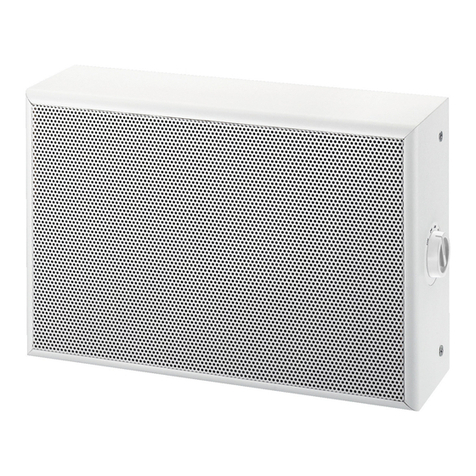
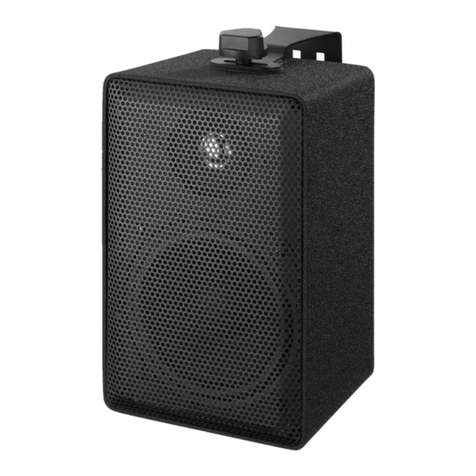
PA Speaker System
These instructions are intended for installers
with specific knowledge of sound reproduc-
tion using 100V technology. Please read
the instructions carefully prior to installation
and keep them for later reference.
1 Applications
This speaker system with excellent sound qual-
ity is designed for applications in PA systems
operating with 100V technology. It can be
used as a standing speaker or be mounted to
the wall via the suspension device provided.
2 Important Notes
The speaker corresponds to all relevant direc-
tives of the EU and is therefore marked with .
•
The speaker is suitable for indoor use only.
Protect it against dripping water and splash
water, high air humidity and heat (admissible
ambient temperature range 0–40°C).
•
For cleaning only use a soft, dry cloth; never
use water or chemicals.
•
No guarantee claims for the speaker and no
liability for any resulting personal damage
or material damage will be accepted if the
speaker is used for other purposes than orig-
inally intended, if it is not correctly installed
or connected, or if it is overloaded.
If the speaker is to be put out of op-
eration definitively, take it to a local
recycling plant for a disposal which is
not harmful to the environment.
3 Installation
WARNING During operation, there is a haz-
ard of contact with a dangerous
voltage of up to 100V at the
connection cable. Installation
must be carried out by skilled
personnel only.
Observe the load of the PA amplifier by the
speakers. An overload may damage the am-
plifier! The total power of all speakers con-
nected must not exceed the amplifier power.
1) First switch off the amplifier intended for
connecting the speaker system!
2) Connect the speaker to the speaker output
of the amplifier (red terminal = positive pole,
black terminal = negative pole). Adjust the
desired power rating with the control at the
front side of the unit.
When connecting several speakers,
make sure that all speakers have the same
polarity.
3) After connection, set up the speaker system
at a suitable place or suspend it from the
wall.
Subject to technical modifications.
ELA-Lautsprecherbox
Diese Anleitung richtet sich an Installateure
mit Fachkenntnissen in der 100-V-Beschal-
lungstechnik. Bitte lesen Sie die Anleitung
vor der Installation gründlich durch und
heben Sie sie für ein späteres Nachlesen
auf.
1 Verwendungsmöglichkeiten
Diese Lautsprecherbox mit ausgezeichneter
Klangqualität ist für den Einsatz in Beschal-
lungsanlagen konzipiert, die mit 100-V-Technik
arbeiten. Sie kann als Standlautsprecher einge-
setzt oder über die mitgelieferte Aufhängevor-
richtung an der Wand montiert werden.
2 Wichtige Hinweise
Der Lautsprecher entspricht allen relevanten
Richtlinien der EU und trägt deshalb das -
Zeichen.
•
Der Lautsprecher ist nur zur Verwendung im
Innenbereich geeignet. Schützen Sie ihn vor
Tropf- und Spritzwasser, hoher Luftfeuchtig-
keit und Hitze (zulässiger Einsatztemperatur-
bereich 0–40°C).
•
Verwenden Sie zum Reinigen nur ein trocke-
nes, weiches Tuch, nie Wasser oder Chemi-
kalien.
•
Wird der Lautsprecher zweckentfremdet,
nicht fachgerecht montiert, falsch ange-
schlossen oder überlastet, kann keine Haf-
tung für daraus resultierende Sach- oder
Personenschäden und keine Garantie für den
Lautsprecher übernommen werden.
Soll der Lautsprecher endgültig aus
dem Betrieb genommen werden,
übergeben Sie in zur umweltgerech-
ten Entsorgung einem örtlichen Recy-
clingbetrieb.
3 Installation
WARNUNG Im Betrieb liegt berührungsge-
fährliche Spannung bis 100V
an der Anschlussleitung an. Die
Installation darf nur durch Fach-
personal erfolgen.
Achten Sie auf die Belastung des ELA-Ver-
stärkers durch die Lautsprecher. Eine Überlas-
tung kann den Verstärker beschädigen! Die
Summe der Leistungen aller angeschlossenen
Lautsprecher darf die Verstärkerleistung nicht
überschreiten.
1) Zuerst den Verstärker, an den die Lautspre-
cherbox angeschlossen werden soll, aus-
schalten!
2) Den Lautsprecher an den Lautsprecheraus-
gang des Verstärkers anschließen (roter
Klemmanschluss = Pluspol, schwarzer Klem-
manschluss = Minuspol). Mit dem Regler
an der Gerätevorderseite die gewünschte
Nennbelastung einstellen.
Beim Anschluss von mehreren Lautspre-
chern darauf achten, dass die Lautsprecher
alle gleich gepolt werden.
3) Nach dem Anschluss die Lautsprecherbox
an geeigneter Stelle aufstellen oder an der
Wand aufhängen.
Änderungen vorbehalten.
DeutschEnglish
Technische Daten Specifications EUL-75/WS
Nennbelastbarkeit Power rating 10/5/2,5/1,25/0,675W
Frequenzbereich Frequency range 10–18 000 Hz
Kennschalldruck (1W/1 m) SPL (1W/1 m) 86 dB
Max. Nennschalldruck Max. SPL 96dB
Lautsprecher Speaker Hi-Fi-Breitbandlautsprecher
Hi-fi full-range speaker
Abmessungen (B × H × T), Gewicht Dimensions (W × H × D), weight 180 × 290 × 170mm, 3,7 kg
Einsatztempertur Ambient temperature 0– 40 °C
Anschluss Connection Lautsprecher-Klemmanschluss
Speaker terminal
ELECTRONICS FOR SPECIALISTS ELECTRONICS FOR SPECIALISTS ELECTRONICS FOR SPECIALISTS ELECTRONICS FOR SPECIALISTS ELECTRONICS FOR SPECIALISTS ELECTRONICS
MONACOR INTERNATIONAL GmbH & Co. KG • Zum Falsch 36 • 28307 Bremen • Germany
Copyright©by MONACOR INTERNATIONAL. All rights reserved. A-0911.99.03.08.2019
EUL-75/WS
Réf. num. •Codice 16.2500
Cassa acustica PA
Queste istruzioni sono rivolte agli instal-
latori che possiedono delle conoscenze
specifiche della tecnica di sonorizzazione
a 100V. Vi preghiamo di leggerle attenta-
mente prima dell‘installazione e di conser-
varle per un uso futuro.
1 Possibilità d’impiego
Questa cassa acustica con eccellente qualità so-
nora è stata realizzata per l’impiego in impianti
di sonorizzazione che funzionano con tecnica
100V. La cassa acustica può essere usata come
diffusore da pavimento oppure può essere
montata alla parete per mezzo del supporto in
dotazione.
2 Avvertenze importanti
La cassa acustica è conforme a tutte le direttive
rilevanti dell’UE e pertanto porta la sigla .
•
La cassa acustica è adatta solo all’uso all’in-
terno di locali. Proteggerla dall’acqua goccio-
lante e dagli spruzzi d’acqua, da alta umidità
dell’aria e dal calore (temperatura d’impiego
ammessa fra 0 e 40°C).
•
Per la pulizia usare solo un panno morbido,
asciutto; non impiegare in nessun caso pro-
dotti chimici o acqua.
•
Nel caso d’uso improprio, di montaggio non
a regola d’arte, di collegamenti sbagliati o
di sovraccarico della cassa acustica, non si
assume nessuna responsabilità per eventuali
danni consequenziali a persone o a cose e
non si assume nessuna garanzia per la cassa
acustica.
Se si desidera eliminare la cassa acu-
stica definitivamente, consegnarla per
lo smaltimento ad un’istituzione locale
per il riciclaggio.
3 Installazione
AVVERTIMENTO Durante il funzionamento,
al cavo di collegamento è
presente una tensione fino a
100 V, pericolosa in caso di
contatto. L’installazione deve
essere fatta sola da perso-
nale qualificato.
Tener presente il carico dell’amplificatore PA
da parte degli altoparlanti. Un sovraccarico
può danneggiare l’amplificatore! La somma
delle potenze di tutti gli altoparlanti non deve
superare la potenza dell’amplificatore.
1) Per prima cosa spegnere l’amplificatore al
quale si deve collegare la cassa acustica!
2) Collegare l’altoparlante con l’uscita per al-
toparlanti dell’amplificatore (morsetto rosso
= polo positivo, morsetto nero = polo nega-
tivo). Con il regolatore sul pannello frontale
impostare la potenza nominale desiderata.
Collegando più altoparlanti fare atten-
zione all’identica polarità di tutti gli altopar-
lanti.
3) Dopo il collegamento sistemare la cassa acu-
stica in un luogo adatto oppure appenderla
alla parete.
Con riserva di modifiche tecniche.
Enceinte Public Adress
Cette notice s’adresse aux installateurs
possédant des connaissances en technique
de sonorisation ligne 100V. Veuillez lire la
présente notice avec attention avant l‘ins-
tallation et conservez-la pour pouvoir vous
y reporter ultérieurement.
1 Possibilités d’utilisation
Cette enceinte avec une qualité sonore excep-
tionnelle est conçue pour une utilisation dans
des installations de sonorisation fonctionnant
en ligne 100V. Elle peut être posée ou montée
sur un mur grâce au système de montage livré.
2 Conseils importants
L’enceinte répond à toutes les directives néces-
saires de l’Union européenne et porte donc le
symbole .
•
L’enceinte n’est conçue que pour une utilisa-
tion en intérieur. Protégez-la des éclabous-
sures, de tout type de projections d’eau,
d’une humidité élevée de l’air et de la chaleur
(température ambiante admissible 0– 40 °C).
•
Pour le nettoyage, utilisez uniquement un
chiffon sec et doux, en aucun cas de produits
chimiques ou d’eau.
•
Nous déclinons toute responsabilité en cas
de dommages matériels ou corporels résul-
tants si l’enceinte est utilisée dans un but
autre que celui pour lequel elle a été conçue,
si elle n’est pas correctement installée, bran-
chée ou s’il y a surcharge; en outre, la ga-
rantie deviendrait caduque.
Lorsque l’enceinte est définitivement
retirée du service, vous devez la dépo-
ser dans une usine de recyclage adap-
tée pour contribuer à son élimination
non polluante.
3 Installation
AVERTISSEMENT
Pendant le fonctionnement,
une tension de contact dan-
gereuse jusqu’à 100V est
présente au câble de branche-
ment. Seul un personnel quali-
fié peut effectuer l’installation.
Faites attention à la charge de l’amplificateur
PA par les haut-parleurs. Une surcharge peut
endommager l’amplificateur. La somme des
puissances de l’ensemble des haut-parleurs
reliés ne doit pas dépasser la puissance de
l’amplificateur.
1) Eteignez tout d’abord l’amplificateur auquel
l’enceinte doit être reliée.
2) Reliez le haut-parleur à la sortie haut-parleur
de l’amplificateur (borne rouge = pôle plus,
borne noire = pôle moins). Réglez la puis-
sance nominale souhaitée avec le réglage
sur la face avant de l’appareil.
Si vous branchez plusieurs haut-parleurs,
veillez à que qu’ils aient tous la même po-
larité.
3) Après le branchement, positionnez l’en-
ceinte à l’endroit voulu ou suspendez-la au
mur.
Tout droit de modification réservé.
Italiano Français
CARTONS ET EMBALLAGE
PAPIER À TRIER
Caractéristiques techniques Dati tecnici EUL-75/WS
Puissance nominale Potenza nominale 10/ 5 / 2,5 / 1,25/0,675W
Bande passante Gamma di frequenze 10–18 000 Hz
Pression sonore nominale (1 W/1 m) Pressione sonora nominale (1W/1 m) 86 dB
Pression sonore nominale maximale Pressione sonora nominale max. 96dB
Haut-parleur Altoparlante Haut-parleur Hi-Fi large bande
Altoparlante hifi a larga banda
Dimensions (l × h × p), poids Dimensioni (l × h × p), peso 180 × 290 × 170mm, 3,7 kg
Température fonctionnement Temperatura d’esercizio 0– 40 °C
Branchement Collegamento Borne à pince pour haut-parleur
Morsetto per altoparlanti
ELECTRONICS FOR SPECIALISTS ELECTRONICS FOR SPECIALISTS ELECTRONICS FOR SPECIALISTS ELECTRONICS FOR SPECIALISTS ELECTRONICS FOR SPECIALISTS ELECTRONICS
MONACOR INTERNATIONAL GmbH & Co. KG • Zum Falsch 36 • 28307 Bremen • Germany
Copyright©by MONACOR INTERNATIONAL. All rights reserved. A-0911.99.03.08.2019
EUL-75/WS
Ref. Núm. •Numer kat. 16.2500
Zestawy głośnikowe PA
Niniejsza instrukcja przeznaczona jest in-
stalatorów posiadających wiedzę w zakre-
sie systemów PA pracujących w technice
100V. Przed rozpoczęciem użytkowania
proszę zapoznać się z instrukcją, a następ-
nie zachować ją do wglądu.
1 Zastosowanie
Niniejszy zestaw głośnikowy, charakteryzuje
się doskonałej jakości dźwiękiem, przezna-
czony jest do pracy w systemach PA. Zestaw
głosnikowy moze pracować jako głośnik wol-
nostojący lub zostać podwieszony za pomocą
dołączonych uchwytów montażowych.
2 Środki bezpieczeństwa
Głośnik spełnia wszystkie wymagania norm UE
i dlatego posiada oznaczenie symbolem .
•
Głośnik przeznaczony jest do instalacji wyłącz-
nie wewnątrz pomieszczeń. Należy chronić
go przed działaniem wody, dużej wilgotno-
ści oraz wysokiej temperatury (dopuszczalny
zakres 0–40°C).
•
Do czyszczenia należy używać suchej i mięk-
kiej ściereczki, nie używać wody ani środków
chemicznych.
•
Dostawca oraz producent nie ponoszą odpo-
wiedzialności za ewentualnie wynikłe szkody
materialne lub uszczerbki na zdrowiu, jeśli
urządzenie było używane niezgodnie z prze-
znaczeniem, zostało niepoprawnie zainstalo-
wane lub było poddawane naprawom przez
nieautoryzowany personel.
Jeśli urządzenie nie będzie już więcej
używane, wskazane jest przekazanie
go do miejsca utylizacji odpadów, aby
zostało zniszczone bez szkody dla śro-
dowiska.
3 Montaż
UWAGA W czasie pracy, na zaciskach
występuje wysokie napięcie do
100V. Instalacja powinna być
wykonywana wyłącznie przez
przeszkolony personel!
Należy zwrócić uwagę na obciążenie wzmac-
niacza przez głośniki. Przeciążenie wzmac-
niacza spowoduje jego uszkodzenie! Suma-
ryczna moc głośników nie może przekraczać
mocy wzmacniacza.
1) Przed przystąpieniem do podłączania głośni-
ków należy odłączyć zasilanie wzmacniacza!
2) Podłączyć głośnik do wyjścia wzmacnia-
cza (czerwony terminal = dodatni biegun,
czarny terminal = ujemny biegun). Regulacja
mocy znamionowej odbywa się za pomocą
regulatora na przednim panelu głośnika.
W przypadku podłączania większej liczby
głośników, upewnić się że wszystkie zostały
podłączone z jednakową polaryzacją.
3) Przymocować głośnik poprzez jego uchwyt
montażowy w odpowiednim miejscu.
Z zastrzeżeniem możliwości zmian.
Recinto de Megafonía
Estas instrucciones van dirigidas a instala-
dores con un conocimiento suficiente sobre
la tecnología de 100V en aplicaciones para
megafonía. Lea atentamente estas instruc-
ciones antes de la instalación y guárdelas
para usos posteriores.
1 Aplicaciones
Este recinto con una excelente calidad sonora
está diseñado para utilizarse en sistemas de
megafonía que funcionan con tecnología de
100V. Este recinto puede utilizar como altavoz
de pie o bien montarse en paredes mediante el
aparato de suspensión entregado.
2 Notas Importantes
El altavoz cumple con todas las directivas re-
levantes de la UE y por lo tanto está marcado
con el símbolo .
•
El altavoz está adecuado para utilizarlo sólo
en interiores. Protéjalo de goteos y de salpi-
caduras, de la elevada humedad del aire y
del calor (temperatura ambiente admisible:
0–40ºC).
•
Utilice sólo un paño suave y seco para la lim-
pieza; no utilice nunca ni agua ni productos
químicos.
•
No podrá reclamarse garantía o responsabi-
lidad alguna por cualquier daño personal o
material resultante si se utiliza el altavoz para
fines diferentes a los originalmente concebi-
dos, si no se instala o conecta correctamente,
o si se sobrecarga.
Si va a poner el altavoz definitiva-
mente fuera de servicio, llévelo a la
planta de reciclaje más cercana para
que su eliminación no sea perjudicial
para el medioambiente.
3 Instalación
ADVERTENCIA Durante el funcionamiento,
existe el peligro de contacto
con un voltaje de hasta 100V
en el cable de conexión. Sólo
un técnico debe realizar la ins-
talación.
Preste atención a la carga del amplificador
de megafonía mediante los altavoces. Una
sobrecarga puede dañar el amplificador. La
potencia total de todos los altavoces conec-
tados no puede sobrepasar la potencia del
amplificador.
1) Desconecte primero el amplificador al que
quiere conectar el recinto.
2) Conecte el altavoz a la salida de altavoz del
amplificador (terminal rojo = polo positivo,
terminal negro = polo negativo). Ajuste la
potencia nominal deseada con el control de
la parte frontal del aparato.
Cuando conecte varios altavoces, ase-
gúrese de que todos los altavoces tienen la
misma polaridad.
3) Después de la conexión, coloque el recinto
en un lugar adecuado o cuélguelo en la
pared.
Sujeto a modificaciones técnicas.
EspañolPolski
Especificaciones Specyfikacja EUL-75/WS
Potencia nominal Moc znamionowa RMS 10/ 5 / 2,5 / 1,25/0,675W
Rango de frecuencias Pasmo przenoszenia 10–18 000 Hz
SPL (1W/1 m) SPL (1W/1 m) 86 dB
SPL máx. Max. SPL 96dB
Altavoz Głośnik Altavoz HiFi Full Range
Pełnopasmowy głośnik HiFi
Dimensiones (B × H × P), peso Wymiary (S × W × G), waga 180 × 290 × 170mm, 3,7 kg
Temperatura ambiente Zakres temperatur 0– 40 °C
Conexión Złącze Terminal de altavoz
Terminale głośnikowe

This manual suits for next models

1

Other Monacor Speakers System manuals

Monacor JTS TG-10R/1 User manual

Monacor

Monacor JTS TG-10R/1 User manual

Monacor EDL-112/WS User manual

Monacor

Monacor EDL-112/WS User manual

Monacor PROEL TPR-8A User manual

Monacor

Monacor PROEL TPR-8A User manual

Monacor SP-1/SW User manual

Monacor

Monacor SP-1/SW User manual

Monacor MKS-26/SW User manual

Monacor

Monacor MKS-26/SW User manual

Monacor CARPOWER PRESET-1 User manual

Monacor

Monacor CARPOWER PRESET-1 User manual

Monacor EDL-606 User manual

Monacor

Monacor EDL-606 User manual

Monacor ESP-360/WS User manual

Monacor

Monacor ESP-360/WS User manual

Monacor IMG STAGELINE PAK-312M/SW User manual

Monacor

Monacor IMG STAGELINE PAK-312M/SW User manual

Monacor IMG StageLine MEGA-110MK2 User manual

Monacor

Monacor IMG StageLine MEGA-110MK2 User manual

Monacor ESP-200/WS User manual

Monacor

Monacor ESP-200/WS User manual

Monacor SP-2/SW User manual

Monacor

Monacor SP-2/SW User manual

Monacor MEGA-110MK2 User manual

Monacor

Monacor MEGA-110MK2 User manual

Monacor EDL-224AB User manual

Monacor

Monacor EDL-224AB User manual

Monacor DNL-660 User manual

Monacor

Monacor DNL-660 User manual

Monacor MKA-40SET/SW User manual

Monacor

Monacor MKA-40SET/SW User manual

Monacor TXA-400 User manual

Monacor

Monacor TXA-400 User manual

Monacor EUL-30/SW User manual

Monacor

Monacor EUL-30/SW User manual

Monacor EDL-412/WS User manual

Monacor

Monacor EDL-412/WS User manual

Monacor ESP-215/WS User manual

Monacor

Monacor ESP-215/WS User manual

Monacor EUL-2/SW User manual

Monacor

Monacor EUL-2/SW User manual

Monacor EX-1W User manual

Monacor

Monacor EX-1W User manual

Monacor ESP-130/SI User manual

Monacor

Monacor ESP-130/SI User manual

Monacor IMG STAGELINE LR-1000SAT User manual

Monacor

Monacor IMG STAGELINE LR-1000SAT User manual

Popular Speakers System manuals by other brands

JBL MS-8 Installing

JBL

JBL MS-8 Installing

IHOS Dilos user manual

IHOS

IHOS Dilos user manual

Phonic SAFARI 3000 user manual

Phonic

Phonic SAFARI 3000 user manual

Sony SS-CS5 user manual

Sony

Sony SS-CS5 user manual

Infinity Primus Series Primus Theater Pack II owner's guide

Infinity

Infinity Primus Series Primus Theater Pack II owner's guide

Microlab H-300 user manual

Microlab

Microlab H-300 user manual

JVC CA-MXKB1 instructions

JVC

JVC CA-MXKB1 instructions

Samsung HW-E550 user manual

Samsung

Samsung HW-E550 user manual

LG SN6Y Simple manual

LG

LG SN6Y Simple manual

Philips HTL2163B quick start guide

Philips

Philips HTL2163B quick start guide

Dcm CX-Center Owner's instructions

Dcm

Dcm CX-Center Owner's instructions

Klipsch ROOMGROOVE brochure

Klipsch

Klipsch ROOMGROOVE brochure

Harman JBLBAR300PROBLKEP owner's manual

Harman

Harman JBLBAR300PROBLKEP owner's manual

Soundcast OutCast 1.2 owner's manual

Soundcast

Soundcast OutCast 1.2 owner's manual

Mackie SA1521 brochure

Mackie

Mackie SA1521 brochure

Nuke 5 EM98803 instructions

Nuke 5

Nuke 5 EM98803 instructions

Atlantic Technology Compact Theater High Performance Compact manual

Atlantic Technology

Atlantic Technology Compact Theater High Performance Compact manual

ION ANYROOM quick start guide

ION

ION ANYROOM quick start guide

manuals.online logo
manuals.online logoBrands
  • About & Mission
  • Contact us
  • Privacy Policy
  • Terms and Conditions

Copyright 2025 Manuals.Online. All Rights Reserved.