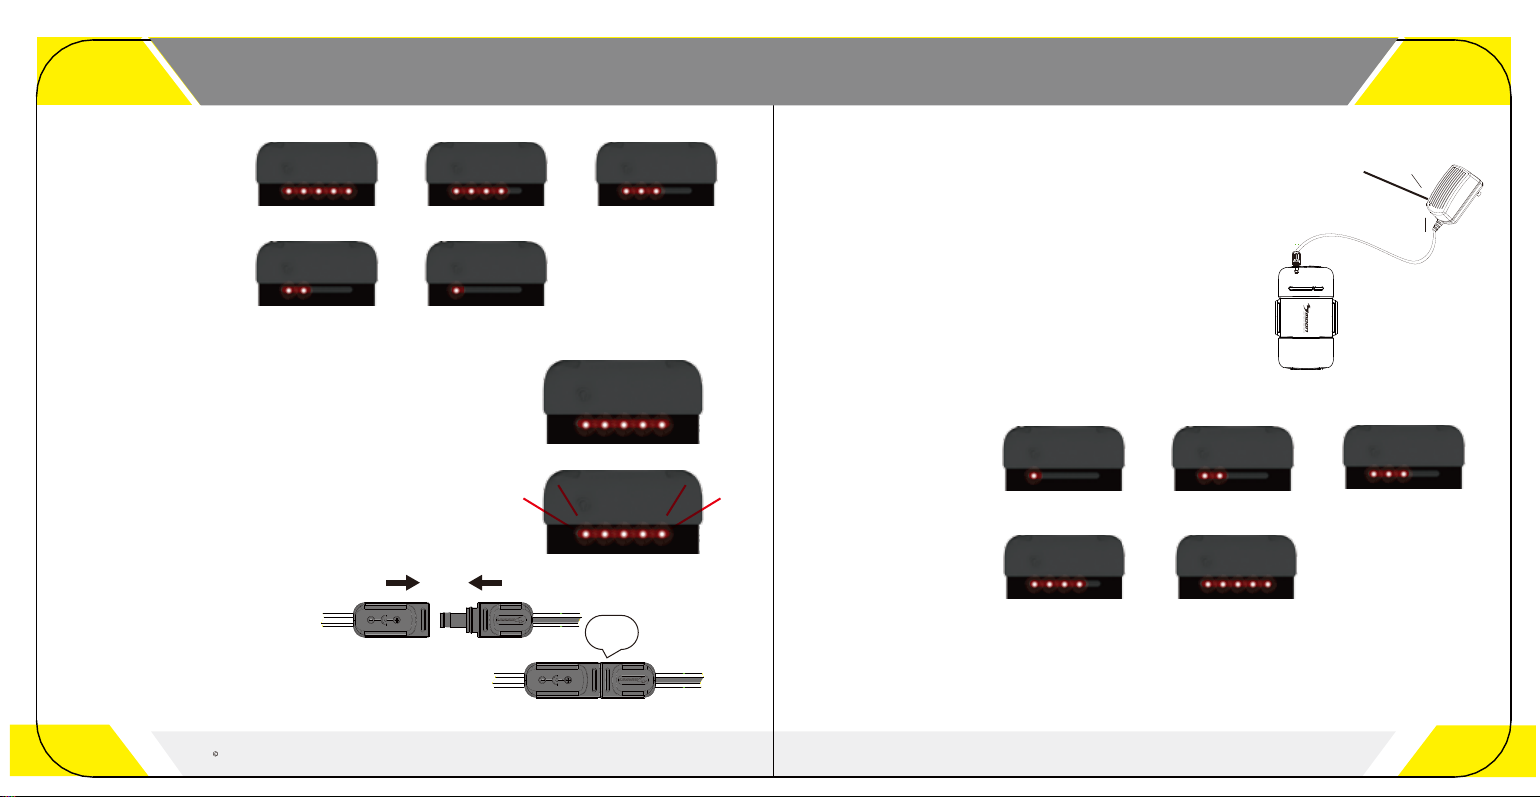
BATTERY CHARGING
Attention: MOON would like to recommend you to use the original
supplied charger to charge the battery. The battery will be harmed if
you use any other chargers. Unplug the charger once the battery is
fully charged. Never use the smart charger at outdoor.
INDICATOR
TAILLIGHT FUNCTION
XP-BS-S4
XP-BS-SS4
EXTENSION DC CABLE
1 3 14
XP-BS-S4 / SS4 BATTERY INDICATOR
www.moon-sport.com
copyright 2009-2017 Moon Sport Ltd. All rights reserved.
100% = 5 LED
80%= 4 LED
60%= 3 LED
40%= 2 LED
20%= 1 LED
100% = 5 LED 80% = 4 LED
40% = 2 LED 20% = 1 LED
60% = 3 LED
There are two modes in tail light function.
1. Steady -- 6 LUMENS ,70 hours runtime(in full capacity)
2. Flashing-- 100 hours runtime
There are two modes in tail light function.
1. Steady -- 6 LUMENS ,55 hours runtime(in full capacity)
2. Flashing-- 78 hours runtime
BATTERY CHARGING – CONTINUED
1.Connect the battery and the charger.
2.Connect the charger to the wall outlet.
3.The charger shows steady red when charging.
4.After fully charged it changes to steady green.
5.Smart charging ensures longer battery life.
6.Wall charger is compatible with 100 to 240 volts, for worldwide use.
Charging indicator
CHARGING INDICATOR
100% = 5 LED
80%= 4 LED
60%= 3 LED
40%= 2 LED
20%= 1 LED
100% = 5 LED80% = 4 LED
20% = 1 LED 60% = 3 LED
40% = 2 LED
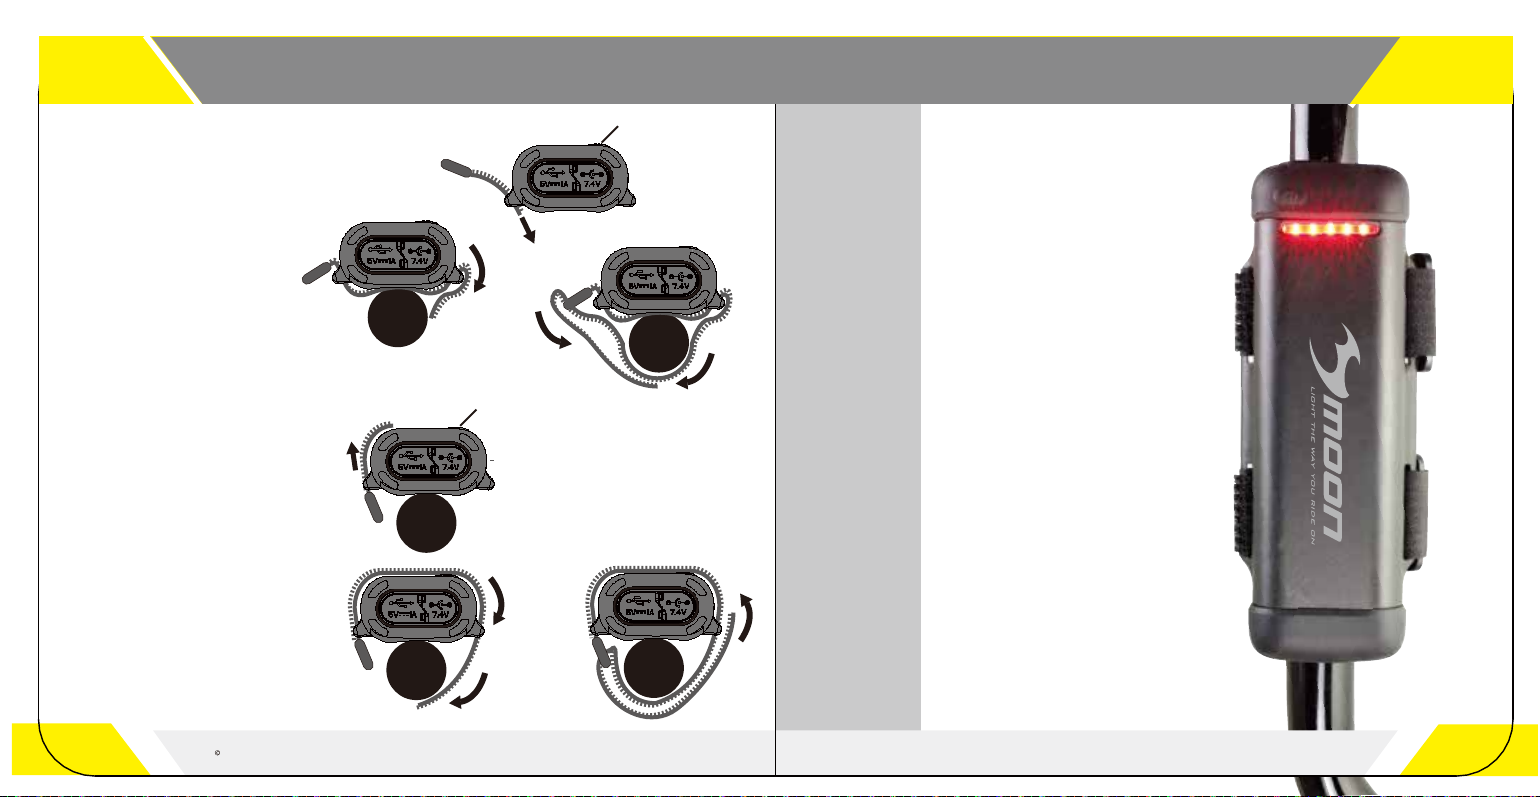
click
If the distance between the
headlamp and the battery is very far
away, you can use the extension DC
cable provided.
Insert one end of the extension cable
to the headlamp cable port and
insert the other end to the battery
cable port until you hear a click
sound.
XP-BS-S4 / XP-BS-SS4
It is normal that the battery may get high temperatures during charging (up to 104°F/40°C), as the chemical in battery is in reaction. If
the battery is not drained completely before charging, it may also get warm.
Several factors can influence the battery’s durability: type of cell strain, the maintenance routine, the temperature and etc.
Normally, the higher the battery capacity, the longer the running time.
The battery capacity may become less effectiveness; about 80% of its value after 300-500 charge/discharge cycles. The battery may
have 3 years life span under good care.
The battery voltage and capacity decrease apparently at low temperatures, especially near or below ice point. The capacity
decreases 5%-10% at freezing. At -20°C,the capacity decreases 30%. The battery performance will return normal when the
temperature gets up to 70°F/20°C.
The battery will lose around 1% of its capacity per day when you store the battery at normal room temperature. Battery temperature
should never exceed 104°F/40°C, it will lose about 5% of its capacity per day.
If you donot use the battery for a long time, be sure to make it a fully recharge every 3 months before storing again. Please keep the
battery in cool and dry place when storing.
®