manuals.online logo
Brands
  1. Home
  2. •
  3. Brands
  4. •
  5. Morita
  6. •
  7. Dental Equipment
  8. •
  9. Morita Signo Treffert TU97 User manual

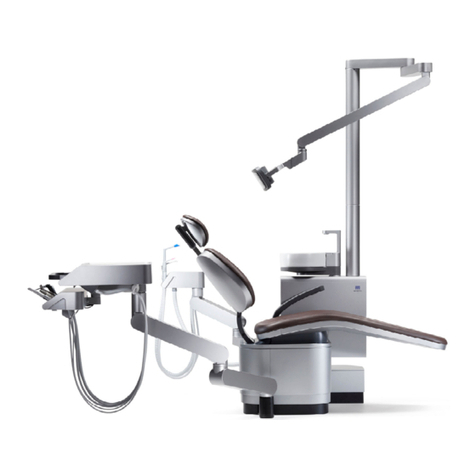
Morita Signo Treffert TU97 User manual

Model
Dental Treatment Unit
Model TU97
Thank you for purchasing the SIGNO TREFFERT.
For optimum safety and performance, read this manual thoroughly before using
the unit.
Pay close attention to the warnings and cautions.
Keep this manual in a handy location for ready reference.
TU97(EX),05-CE. 15.12 TO
CONTENTS
2
Attention・・・・・・・・・・・・・・・・・・・・・・・・・・・・・・・・・・・・・・・・・・・・・・・・・・・・・・・・・・・・・・・・・・・・・・3
[1] General Safety and Operation Instructions・・・・・・・・・・・・・・・・・・・・・・・・4
[2] Parts Identification・・・・・・・・・・・・・・・・・・・・・・・・・・・・・・・・・・・・・・・・・・・・・・5
<Main Unit >・・・・・・・・・・・・・・・・・・・・・・・・・・・・・・・・・・・・・・・・・・・・・・・・・・・・・・・・・・・・・・・5
<Main Options >< Accessories >・・・・・・・・・・・・・・・・・・・・・・・・・・・・・・・・・・・・・・・・・・・・・6
[3] Installation・・・・・・・・・・・・・・・・・・・・・・・・・・・・・・・・・・・・・・・・・・・・・・・・・・・・・7
[4] Preliminary Adjustments and Connections・・・・・・・・・・・・・・・・・・・・・・・・・8
[5] Operation・・・・・・・・・・・・・・・・・・・・・・・・・・・・・・・・・・・・・・・・・・・・・・・・・・・・10
◆Illustrated Guide to Cautionary Points during chair movement・・・・・・・・・・・・・・・・・・・11
1. Main Switch・・・・・・・・・・・・・・・・・・・・・・・・・・・・・・・・・・・・・・・・・・・・・・・・・・・・・・・・・12
2. Foot Control・・・・・・・・・・・・・・・・・・・・・・・・・・・・・・・・・・・・・・・・・・・・・・・・・・・・・・・・・13
3. Dentist’s Switch Panel・・・・・・・・・・・・・・・・・・・・・・・・・・・・・・・・・・・・・・・・・・・・・・・・15
4. Assistant’s Switch Panel・・・・・・・・・・・・・・・・・・・・・・・・・・・・・・・・・・・・・・・・・・・・・・39
5. Instrument Holders・・・・・・・・・・・・・・・・・・・・・・・・・・・・・・・・・・・・・・・・・・・・・・・・・・・41
6. Instruments・・・・・・・・・・・・・・・・・・・・・・・・・・・・・・・・・・・・・・・・・・・・・・・・・・・・・・・・・47
7. Basin Unit・・・・・・・・・・・・・・・・・・・・・・・・・・・・・・・・・・・・・・・・・・・・・・・・・・・・・・・・・・58
8. Water Fountain・・・・・・・・・・・・・・・・・・・・・・・・・・・・・・・・・・・・・・・・・・・・・・・・・・・・・・66
9. Dentist’s Tray・・・・・・・・・・・・・・・・・・・・・・・・・・・・・・・・・・・・・・・・・・・・・・・・・・・・・・・68
10. Amalgam separator・・・・・・・・・・・・・・・・・・・・・・・・・・・・・・・・・・・・・・・・・・・・・・・・・72
11. Spittoon Valbe・・・・・・・・・・・・・・・・・・・・・・・・・・・・・・・・・・・・・・・・・・・・・・・・・・・・・73
12. Tube Lifters・・・・・・・・・・・・・・・・・・・・・・・・・・・・・・・・・・・・・・・・・・・・・・・・・・・・・・・・74
13. Operating Light・・・・・・・・・・・・・・・・・・・・・・・・・・・・・・・・・・・・・・・・・・・・・・・・・・・・・75
14. Head rest・・・・・・・・・・・・・・・・・・・・・・・・・・・・・・・・・・・・・・・・・・・・・・・・・・・・・・・・・79
15. Armrest・・・・・・・・・・・・・・・・・・・・・・・・・・・・・・・・・・・・・・・・・・・・・・・・・・・・・・・・・・・81
16. (Optional Parts)・・・・・・・・・・・・・・・・・・・・・・・・・・・・・・・・・・・・・・・・・・・・・・・・・・・・81
17. Display・・・・・・・・・・・・・・・・・・・・・・・・・・・・・・・・・・・・・・・・・・・・・・・・・・・・・・・・・・・82
18. After use・・・・・・・・・・・・・・・・・・・・・・・・・・・・・・・・・・・・・・・・・・・・・・・・・・・・・・・・・・83
19. Fuses・・・・・・・・・・・・・・・・・・・・・・・・・・・・・・・・・・・・・・・・・・・・・・・・・・・・・・・・・・・・・85
[6] Maintenance・・・・・・・・・・・・・・・・・・・・・・・・・・・・・・・・・・・・・・・・・・・・・・・・・・86
Everyday or As Frequently As Necessary
1. Autoclave Sterilization・・・・・・・・・・・・・・・・・・・・・・・・・・・・・・・・・・・・・・・・・・・86
<Autoclave Sterilization >< Alcohol Disinfection >Instrument and Component Char・・・・・・87
2. Alcohol Disinfection・・・・・・・・・・・・・・・・・・・・・・・・・・・・・・・・・・・・・・・・・・・・・89
3. Other Method of Disinfection and Sterilization・・・・・・・・・・・・・・・・・・・・・・・90
4. Basin Unit Component Disinfection and Sterilization・・・・・・・・・・・・・・・・・・91
5. Flushing Out the Water System・・・・・・・・・・・・・・・・・・・・・・・・・・・・・・・・・・93
6. Cleaning Other Components and Surfaces・・・・・・・・・・・・・・・・・・・・・・・・・・95
Once a Month
7. Vacuum Tank Inspection and Cleaning・・・・・・・・・・・・・・・・・・・・・・・・・・・・・97
8. Clean the Drain Trap・・・・・・・・・・・・・・・・・・・・・・・・・・・・・・・・・・・・・・・・・・・・98
9. Inspect and Clean the Oil Drain Filter・・・・・・・・・・・・・・・・・・・・・・・・・・・・・100
3
Attention:
1.CE Labeling
CE-Symbol of conformity. This symbol of conformity guarantees that this appliance conforms to the
relevant safty guidelines of the European Union.
2.Guidelines
This appliance conforms to the following safety guidelines: Medical device guidelines 93/42/EEC, with
amendments.
3.The manufacturer will not be responsible for accidents, equipment damage, or bodily injury resulting
from the conditions and actions specified below:
(1)Repairs,maintenance,modifications,handling,or installation performed by personnel who hove not been
authorized by the manufacturer.
(2)Use of parts or components other than those specified by the manufacturer,or that are not in their original
condition, is not permitted.
(3)Repairs, maintenance, modifications, etc. using supplementary components other than those noted in
the operating procedures described in this manual or resulting from a failure to follow the cautionary
remarks and warnings in this manual.
(4)Operating the equipment in ways other than those described in the operating procedures in this manual,
or resulting from a failure to follow the cautionary remarks and warnings in this manual.
(5)Workplace conditions and environment or installation conditions that do not conform to those stated in
this manual.
(6)Fires, earthquakes, floods, lightning, natural disasters, or Acts of God.
4.The operation and maintenance of medical devices is the responsibility of the user (hospital,clinic,laboratory
etc.). This equipment must not be operated by any individual except doctors and dental technicians who
are legally qualified to do so.
5.This equipment is accompanied by a warranty. The warranty must be filled out with the date of purchase,
purchaser’s name(hospital,clinic,laboratory, etc.) address, postal code, telephone number, and the dealer’s
name and signed by the purchaser. The dealer should receive a copy of the warranty and the purchaser
should keep and carefully save the original.
CONTENTS/ATTENTION
Once Every 6 Months 10. Clean Vacuum Tank・・・・・・・・・・・・・・・・・・・・・・・・・・・・・・・101
Once a Year 11. Replacing the Bacteria Filters and their Cases・・・・・・・・・102
[7]Inspection・・・・・・・・・・・・・・・・・・・・・・・・・・・・・・・・・・・・・・・・・・・・・・・・・・・・・・・104
[8]Troubleshooting・・・・・・・・・・・・・・・・・・・・・・・・・・・・・・・・・・・・・・・・・・・・・・・・・・109
[9]Warranty and Repairs・・・・・・・・・・・・・・・・・・・・・・・・・・・・・・・・・・・・・・・・・・・・・110
[10]Disposal of Medical Devices and Equipment・・・・・・・・・・・・・・・・・・・・・・・・111
[11]Specifications・・・・・・・・・・・・・・・・・・・・・・・・・・・・・・・・・・・・・・・・・・・・・・・・・・112
* * *
4
[1]General Safety and Operating Instructions
[1] General Safety and Operating Instructions
1.Safety Symbols and Indicators
This manual uses a system of safety symbols to promote and ensure safe operation, and
to prevent injuries, accidents and damage.
(1)Learn to recognize and understand the meanings of the various symbols shown below.
(2)After reading this manual, keep it in a handy location for ready reference.
(3)Follow all safety instructions without exception.
Following the above instruction should result in smooth operation of the appliance.
The SIGNO TREFFERT is a dental treatment unit and must not be used for
any other purpose.
>>Use for any purpose not designated is dangerous and could result in accidents
or damage to equipment.
2. Operation Advice and Hints
Certain key points concerning operation are indicated by
the symbols shown in the chart to the right. These are
points to make it easier for the operator to use the
equipment.
3.Operational Purpose of Equipment
WARNING
ADVICE
CHECK
Advice Hints Symbols Chart
Indicates advice concerning
operation.
Indicates points that should be
checked during operation.
Symbols
SAFETY SYMBOLS CHART
This indicates the possibility of serious bodily injury or death and serious
damage occurring if the safety instructions are not followed.
This symbol indicates a WARNING or CAUTION instruction.
This symbol indicates an operation or procedure that MUST NOT be performed.
This symbol indicates an instruction that MUST BE followed.
This symbol indicates a warning for high temperatures that MUST BE followed.
This symbol indicates an instruction a pay attention to dangerous voltage.
This symbol indicates the B type cavity that MUST BE followed.
This symbol indicates an instruction Main Switch(ON/OFF).
This symbol indicates that reference to the operation manual is needed.
This indicates the possibility of minor bodily injury or damage occurring if
the safety instructions are not followed.
WARNING
CAUTION
5
[2]Parts Identification
No. Identification
1Operating Light
2Basin Unit
3Auto Filler
4Basin
5Assistant’s Instrument Holder
6Basin Unit Door
7Assistant’s side Arm Rest
8Water and Air Snap-on Connections
9Back Rest
10 Head Rest
11 Foot Switch
12 Seat
13 Tray Arm
14 Film Viewer *
15 Leg Rest **
16 Dentist’s Tray
17 Dentist’s Switch Panel
18 Dentist’s Instrument Holder
19 Tray Handle
20 Main Switch
21 Plumbing Pit and Bacteria Filter
22 Safety Mat **
<Main Unit>
No. Identification
* : Option
**: Step Type only
10
9
14 4
6
16
17
15 21
22
-Floor Arm-
-Over Arm-
1
13
3
8
5
2 12
7
19
18
20
11
-Communication Model-
<Cabinet>
-Cart Type-
[2]Parts Identification
6
[2]Parts Identification
<Accessories>
1)Tray Paper :1Package
2)Paper Cups :1Package
3)Star Caps for Paper Cups :1Package
4)Silicone Vial Holder :1
5)Head Rest Cover :1
6) Extra Fuses :1set
7)Cleaner Solution “Denta coco” :1
<Options>
8)Operation Manual :1
9)Installation Manual :1
10)Warranty :1
Also parts and components for the instruments
selected.
Regarding the Communication Model Specification,
please refer to the ‘Communication Model Operator
Manual’ beside this manual.
2
1
CHECK
No. Parts Identification
1 Movable Arm Rest
on Dentist’s side
2 Re-Trak Mirror
7
[3]Installation
[3]Installation
The equipment must be installed by a qualified and trained professional speci-
fied by J.Morita Corp. according to the conditions specified in the Installation
Standards Manual.
>>Otherwise, there is a lisk that an accident or damage to equipment may occur.
The unit must be fastened and fixed to the floor securely as specified in the instal-
lation manual.
>>Otherwise, the chair could fall over resulting in injury or damage.
The equipment MUST NEVER be connected to an electrical supply source that does not
have the specified voltage, current, frequency and power characteristics.
Each unit must have its own devoted electrical circuit connection and should not
share a circuit with other units or other types of equipment.
>>Otherwise, short-circuiting or overheating may result in injury or damage.
Never splash the equipment with water or place it in an area where it could get
wet.
>>This will create the danger of short-circuiting or overheating, which may result in injury
or damage.
Do not install the unit in an area where chemicals are stored or where gas could
be released.
>>This would create the danger of fire or electric shock resulting in injury or damage.
Do not route the power supply cord, the earth lead or the foot control cord through
areas such as doorways and halls where they could be damaged.
>>This would create the danger of short-circuiting and electric shocks,which may result
in injury or damage.
WARNING
CAUTION
Do not tilt the equipment or place it in an unstable position; do not expose it to
excessive vibrations, bumps or shocks.
>>Doing so could cause it to malfunction or damage it.
Do not install the equipment in areas where it will be exposed to excessive atmo-
spheric pressure, humidity, temperatures, wind, direct sunlight, dust, salts or sul-
fur compounds.
>>Any of the above conditions could cause the equipment to malfunction or damage it.
The unit must be installed in a room appropriate for dental treatment.
>>If the installation location is not suitable, the unit may not only fail to perform optimally,
but it could malfunction as well.
Please take note of the following system requirements:
1)Temperature : 10~40℃
2)Humidity : 30~75%RH (not be dewy)
3)Air pressure: 700~1060hPa
>>Deviation from any of the above conditions could cause the equipment to malfunction or
result in damage.
8
[4]Preliminary Adjustments and Connections
[4]Preliminary Adjustments and Connections
1. Various Adjustments and Settings
The items in the diagrams and chart below can be adjusted in various ways.
To adjust an item, refer to the chart and then consult the part of the Operation
section (5.Operation) of this manual noted there or the installation manual.
Contact your local dealer or J.Morita Corp.concerning any points that are not clear,
or items not appearing in the diagrams and chart below.
1
2
8 (9)
10 (12)
11
13
15
16
14
3
4
5
6
7
No. Item Reference No. Item Reference
1
2
3
4
5
6
7
8
9
Light Arm Movement
Light Focal Distance
Water Volume
Warmer Temperature
Water Volume for Snap On Connection Auto
Filler Water Volume
Three-way Syringe Air Temperature
Chair Movement Speed
Over Arm Brake
Floor Arm Brake
Installation
Manual
13 (1)
8 (1)
7 (2)
7 (3)
6 (4)
3 (1)
Installation
Manual
Installation
Manual
10
11
12
13
14
15
16
17
Tray Arm Motion
Tray Arm Angle
Height for Cart Tray
Tube Lifter Wire Length
Dentist’s Instrument Holder Angle
Auto Position
Instrument Air and Spray Volume
Communication Model various setting.
9 (1)
9 (2)
12 (3)
Installation
Manual
3 (1)
6 (9)
Extra num-
ber
Installation
Manual
9
2. Instrument Connections
3. Install the Filters
The chart shows the various filters that are required and supplied with the
equipment.
Refer to Section [6] Maintenance in this manual for installation instructions.
CAUTION
Before using the equipment, connect all the main in-
strument tubes. The three-way syringes should also be
connected (except for the one-touch detachable WS90,
option).
>>Otherwise, air or water could leak out.
All instruments must be in their specified holders ex-
cept when in use.
>>Otherwise, an injury or damage could result from using
the vacuum syringe or some other instrument.
Connect the main tubes for the doctor’s instruments to their tray and those
for the assistant to the assistant’s tray.
Then put all the instruments in their specified holders. Refer to the chart at
the right and the instructions below.
Main Tube Connections: See section [5]5 of this manual.
>>Three-way Syringe Body and Nozzle Attachment: Section [5] 6. (5) of
this manual
>>Vacuum Syringe and Saliva Ejector: Section [5] 6. (6) and (7) of this
manual
>>Various Instruments: Individual operator’s manuals for each instrument
CAUTION
All the filters must be installed before the equipment is
used.
>>If the filters and their covers are not correctly installed, the
equipment may not perform satisfactorily or could be
damaged. Also water, air or vacuum lines could become
blocked.
[4]Preliminary Adjustments and Connections
Main Tube Connections
Blue: Three-way Syringe
Yellow: Air Turbine (with light)
Green: Air Turbine (without light)
Red: Micro motor (with light)
White: Micro motor (without light)
Purple: Ultra Sonic Scaler
Filters
1 Vacuum Cut Filter
2 Basin Filter
3 Drain Trap Filter
4 Oil Drain Filter
5 Water Bacteria Filter
6 Air Bacteria Filter
10
[5] Operation
WARNING
Do not place any objects below or near moving parts such as the seat and back rest or
within the range of their movement. Keep hands, fingers and feet clear of all moving
parts.(See “Illustrated Guide to Cautionary Points”)
>>Otherwise, fingers or other body parts could be pinched resulting in injury or damage.
Do not place heavy objects, sit or exert excessive force on the edges of the seat,back
rest, head rest, light or tray. Never stand on, climb on or jump on or off the equipment.
>>These actions could cause the equipment to fall over resulting in injury or damage.
Do not spill fluids or place flammable or metal objects inside the equipment.
>>This could result in injury or damage due to fire, electric shock or other accidents.
Avoid accidents that could result in bodily injury or equipment damage by paying
attention to the points listed below:
1)Ensure the equipment is only used by specified and qualified operators. Do not allow
anyone to operate the equipment randomly or play with it.
2)Keep an eye on the patient at all times.
3)Do not let patients assume risky positions
(legs sticking out, standing on seat, sitting with their legs folded under them etc.)
4)Do not require patients to sit or move in stressful ways. (E.g., sudden head rest movement
if patient has a sore neck or lying face up if patient has a sore lower back etc.)
5)Keep fingers and other parts of the body, bags and other personal belongings clear of moving
parts and the areas in which these parts move (e.g., joints in tray arm, back rest etc.)
6)Only one person at a time should occupy the seat; do not allow children to sit with their
mother or father during treatment.
7)Do not allow people especially children to loiter or play near the chair.
8)Do not allow the light, tray, or other parts of the equipment to lean on or make contact with
walls, windows, cabinets or other equipment and objects. (Avoid hitting things,etc.)
9)Avoid any other actions that seem dangerous.
10)Avoid any other conditions that seem dangerous.
>>Not paying sufficient attention to the above points could result in injury or damage.
If the danger of an injury or accident occurring suddenly arises while auto-position-
ing is being carried out, stop the chair immediately using any one of the emergency
stop procedures listed below:
A)Step on the foot panel
B)Operate any of the manual positioning levers on the foot control.
(Operating the leaves for the seat or back rest, up or down, will all stop the chair.)
C)Turn the main switch off.
>>Not taking timely action to stop the chair could result in injury or damage.
Do not use pointed tools to push the various panel switches or scratch the surface
covering of the switches.
>>Doing so could cause a malfunction or lead to abnormal operation.
CAUTION
[5]Operation
11
◆Illustrated Guide to Cautionary Points
(During chair movement)
Always check for safety before moving the chair manually or with
auto-positioning.
In particular,pay attention to the points noted in the illus tration
below so that the patient or other equipment is not hit or pinched,
etc.
<Tray Cart>
Main Cart Unit
(clear off all objects to
prevent falling, tipping,
etc.)
Accordion Cord Area
(do not trip)
Caster Area
(no obstructions)
Gap between back rest
and seat (exercise care not
to be pinched)
Arm joints
(exercise care not to be pinched, etc.)
Housing Sliders
(exercise care not to be
pinched)
Area between
back rest and basin-
unit and armrest
(exercise care not be
pinched)
Head rest Movement
Area (exercise care not
to be pinched)
Area under seat
(ensure patients leg is clear
and there are not objects or
obstacles in the way)
Tray Position
(ensure it is clear)
As s ista nts Ho lder
Area (ensure patient
will not fall or lean in
this direction)
Operating light position
(ensure it is clear)
×
<Step Type> <Basic Type/Step Type>
Step (no standing)
Basin Swing
(exersise care not to
be pinched)
Between step and
safety mat
(clear off all objects)
Seat Movement Joints
(exercise care not to be
pinched)
[5]Operation
▲: Watch out for moving
or rotating parts etc.
△: IIndicates an emrgency
stop is required
12
1. Main Switch
(1)Operation
The main switch is located on the lower part of the housing.
Press it to turn the unit on. It lights up when it is turned on and all the
instruments etc. can then be operated. Press it again to turn the unit off.
(2)Save Power Function
For both safety and economy, the unit automatically enters the save
power mode if it has not been used for the set period of time.
In the save power mode,
>>The operating light goes out.**
>>The operating light and its indicator go out.
>>The power for chair operation and the gas burner is turned off.
>>The water is turned off.
When in save power mode, normal operation can be restored by pressing
any of the doctor or assistant’s operation switches, stepping of the foot
pedal, or picking up an instrument.
**: The save power mode can be turned off, or it can be set to activate
after 60 or 120 minutes. See section [5]5 3. (7) 7)User Settings” of this
manual.
* : Ootion
CAUTION
Never bump or bang the equipment or expose it to excessive vibration while
the main switch is on.
>>Doing so could cause an accident resulting in injury or damage.
Always turn the main switch off after treatment, during breaks in treatment
or whenever the unit is not in actual use.
>>Otherwise, an accident could occur resulting in injury or damage.
Turn the main switch off before using an electric scalpel in the immediate
vicinity of the equipment.
>>Otherwise, electromagnetic waves emitted by the electric scalpel could cause
the equipment to operate in a sporadic or abnormal way resulting in an accident
causing injury or damage.
[5]Operation 1.
display is off during save
power mode
Main Switch
○
Main Switch
(green lamp lights up when on)
13
2. Foot Control
[5]Operation 2.
(1)Manual Chair Operation Levers
1)Operation
Use these levers to raise or lower the back rest and seat.
The chair moves only while one of the levers is actually being pressed.
The seat and back rest will stop automatically if they reach their upper
or lower limits. Release the lever when this happens.
2)Maximum Back rest Angle
The back rest normally goes up to a 70°angle, but it can be raised
up to 78° in the following way:
a) Hold the back rest lever until the backrest automatically stops at
70°.
b) Release the lever and then press it again to raise it up to 70°.
Back Up
CAUTION
Please do not assume any dangerous positions when riding on the foot control,
foot pedal or operation levers.
>>Not paying sufficient attention to the above points could result in injury or damage.
Once the foot control gets wet, do not use the same place again while it is still wet.
Please restart use after moisture has been wiped off with the main switch turned
off, and after it has dried naturally.
>>Not observing the above could result in injury, damage, electric shock or other
accidents.
Never place a load greater than 10N (1kgf) on the foot control, foot pedal or
operation levers.
>>Doing so could cause a malfunction or load to abnormal operation.
Please do not place the foot control on an incline or upside down.
>>Doing so could cause a malfunction or load to abnormal operation.
Seat Up
Seat Down
Back
Down
Back up
14
(2)Foot Pedal
1)Instrument Operation
Use this pedal to operate the doctor’s instruments.
Step on the pedal to operate whichever instrument has been selected.
A safety circuit prevents the chair from moving whenever the foot
pedal is being used.
(3)Extended Function Levers(FC97NA)*
The functions of these levers depend on whether an instrument has been
picked up or not. Each lever has 4 possible functions.
1) Auto-positionig Switches**
Chair Auto-Positioning (Some functions may not be possible depend-
ing on the combination of various options.) If all instruments are put
away, the levers can be used for auto-positioning. (See illustration to
the right.) For details,see section [5] 3. (1) of this manual.
The lever must be held for at least 1 second be
fore the chair starts to move. This is to prevent
accidental activation.
2)Instrument Settings**
Instrument Control (Some functions may not be possible depending
on the combination of various options.) If an instrument has been picked
up, these levers can be used to make various adjustments. (See illus
tration to the right.) For details, see section[5] 3. (5) of this manual.
**: Some functions may not be possible depending on the combination
of various options.)
(4)Head Rest Motor Control(FC97ND/DA)*
Use this to control the head rest motor. For details, see section [5] 14 of
this manual.
1)Lever 1
↑ Memory
↓ Reset
1)Lever 2
↑ Position 1
↓ Position 2
2)Lever 1
↑ Speed
↓ Light
2)Lever 2
↑Rotation
direction
↓ Spray
Depress Pedal
Lever 1
Lever 2
Head Rest
Control
*: Option
[5]Operation 2.
ADVICE
15
3. Dentist’s Switch Panel
Do not use pointed tools to push the various panel switches or scratch the
surface covering of the switches.
>>Doing so could cause a malfunction or load to abnormal operation.
CAUTION
[5]Operation 3.
16
<Dentist’s Switch Panel>
Display
(1)Auto-positioning Switches
(3)Manual Positioning
Switches
(4)Set Switches
(5)Instrument Settings (6)Timer Switch
[5]Operation 3.
17
(1)Auto-positioning Switches
These switches are used to raise and lower the seat and back rest.
The seat and back rest automatically move into one of the preset
positions when one these switches is pressed once.
1)Treatment Positions 1 and 2
These are usually used for treatment.
The chair moves into the preset position when the switch is pressed.
These positions can be adjusted. (See below.)
<Setting the Treatment Positions>
a) Use the levers on the foot control or the manual switches to position
the chair at the desired angle. [Section (3) below]
b) Hold down the switch that corresponds to this position (1, 2 or
reset) for 5 seconds.
c) Keep holding the switch down until a beep sounds to indicate that
the position has been stored in memory.
2)Reset
Used before and after treatment.
Seat goes down to its lowest position and back rest goes up to
about 70°. (Factory settings.)
This position can be adjusted. (See below.)
<Setting the Treatment Positions>
a) Use the levers on the foot control or the manual switches to
position the chair at the desired angle. [Section (3) below]
b) Hold down the switch that corresponds to this position (1, 2 or
reset) for 5 seconds.
c) Keep holding the switch down until a beep sounds to indicate that
the position has been stored in memory.
Green lamp flashes
while moving,stays on
when stopped
Green lamp flashes
while moving,stays on
when stopped
[5]Operation 3.
or
a)
or
b)
or
a)
b)
1)Position 1
1)Position 2
2)Reset
4)Speed
Control
3)Memory
○
18
3)Memory
This is used when the patient needs to rinse his/her mouth.
The chair temporarily stores its present position in memory and will
return to it when the patient has finished rinsing his/her mouth.
Press this switch to raise the backrest up to about 70°.
Press it again after the patient has finished rinsing his/her mouth to
return the back rest to its original treatment position.
4) Two speed Control
The chair has two speeds. This is the same for both auto and manual
positioning.
Press the switch to go into Slow Speed. (Lamp is amber.)
Use this mode for senior citizens or patients who have been
anesthetized.
Press the switch again to go back to Standard Speed.
(Lamp is green.)
5) Shock-free Mechanism
Chair speed is controlled to reduce the jerking when the chair stops.
This is the same for both auto and manual positioning.
However, it does not work in the case of an emergency stop. [See
(2) below.]
With shock-free motion, the chair’s stopping
position may be slightly different.
Standaed Speed : Green Lamp
Slow Speed : Amber Lamp ON
ADVICE
A green lamp flashes
while moving,and stays
on when stopped
[5]Operation 3.(1)
↑↓
Reduced jerking
when chair stops
19
2)Cancel
Use this to stop the chair during auto-positioning. If the chair has a
shock-free stop function, it will function normally. Use any one of the
following methods:
(A)Press any of the auto-positioning switches on either the
doctor or assistant’s side.
(B)Press any of the manual positioning switches on the doctor’s
switch panel.
Even if the chair does not have speed control,
pressing the speed control switch will stop it.
(C)Operate any of the manual positioning functions on the foot
control.
(Seat or back rests, up or down, will all stop the chair.)
(2)Emergency Stop for Auto-positioning,
Cancel, and afety Stop
Use the procedures listed below to stop the chair in the midst of auto-
positioning is being carried out. In the case of a Safety Stop, the chair
stops automatically and goes into Avoidance Mode. This means it will
reverse its direction slightly after stopping. Whenever the chair stops
while auto-positionig is being carried out, the color of the lamp for the
positioning switch changes to amber.
1)Emergency Stop
Use this in the case of imminent danger.
Even if the chair has a shock-free stop function, it will stop instantly
when either of the following methods is used:
(A) Stepping on the foot pedal.
(B) Turning off the main switch.
(B)
(B)
(both doctor and assistant side)
(C)
(doctor side)
(A)
(A)
ADVICE
[5]Operation 3.(2)
Lamp color
changes to
amber for
emergency
stop
(Auto-positioning Switch)
20
3)Safety Stop and Avoidance Mode
Auto-positioning will stop if something presses up against on the
assistant’s instrument holder (A) or the back rest (B).
The display will indicate either a safety stop or a
safety lock. After checking the appropriate areas
and removing any obstacles, resume normal
operation.
After a safety stop has been executed, the unit goes into Avoidance
Mode. This allows one to reverse the direction of the chair’s movement
to release any objects that have been accidentally caught by it.
Reverse the chair’s movement using any of the following methods:
(a) Step once on the foot pedal
(b) Operate one of the positioning levers on the foot control
(Seat or back rest, up or down, will all work)
(c) Press any one of the auto-positioning switches on either the
drentist or assistant’s side.
(d) Press one of the manual positioning switches on the dentist’s
side.
4)Safety Lock
The safety lock works hereafter, the chair operation stops and will not
re-start in the case of cinditions (A) and (B) below.
The display will indication if the safety lock works
hereafter.
After checking the appropriate areas do return it
appropriately.
(A)Remove the moving basin to the patient side.
>>Returns it to former position.
(B)Pressure hangs to the safety mat under the step.
(Step Type)
>>Remove objects on the safety mat. (B)
(A) ↑(B)
↑
(A)
ADVICE
ADVICE
[5]Operation 3.(2)
Lamp color
changes to
amber for
emergency
stop
(Auto-positioning Switch)
(d) (c)
(b)
(a)

Other Morita Dental Equipment manuals

Morita ROOT ZX II User manual

Morita

Morita ROOT ZX II User manual

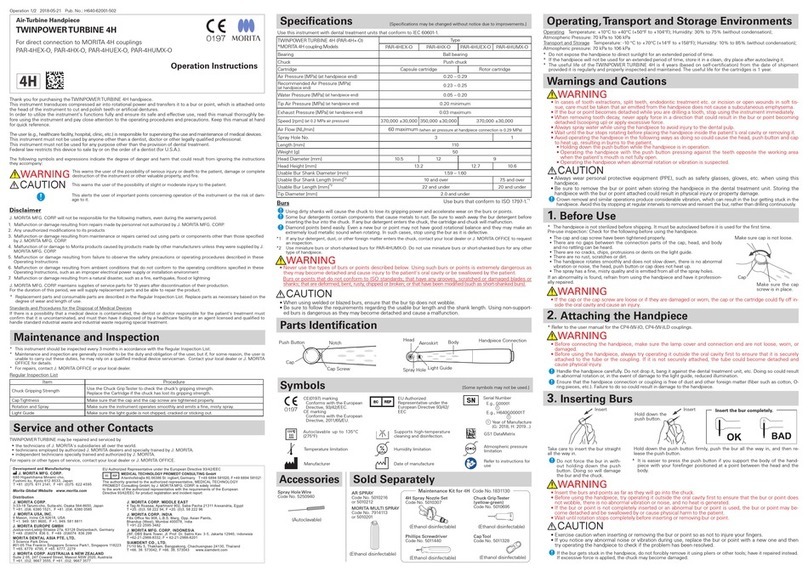
Morita TWINPOWERTURBINE 4H User manual

Morita

Morita TWINPOWERTURBINE 4H User manual

Morita Veraview iX User manual

Morita

Morita Veraview iX User manual

Morita Signo T500 User manual

Morita

Morita Signo T500 User manual

Morita Signo T500 User manual

Morita

Morita Signo T500 User manual

Morita SIGNO G10 II TU101 User manual

Morita

Morita SIGNO G10 II TU101 User manual

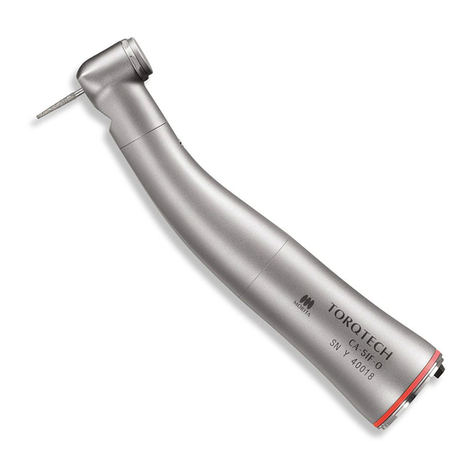
Morita TORQTECH CA-5IF-O User manual

Morita

Morita TORQTECH CA-5IF-O User manual

Morita DENTA PORT ZX User manual

Morita

Morita DENTA PORT ZX User manual

Morita Lubrina HIM-1 User manual

Morita

Morita Lubrina HIM-1 User manual

Morita TORQTECH CA-DC User manual

Morita

Morita TORQTECH CA-DC User manual

Morita Tri auto mini Manual

Morita

Morita Tri auto mini Manual

Morita TORQTECH CA-10RC User manual

Morita

Morita TORQTECH CA-10RC User manual

Morita Lubrina 2 User manual

Morita

Morita Lubrina 2 User manual

Morita Torqtech CA-4R-PP Series User manual

Morita

Morita Torqtech CA-4R-PP Series User manual

Morita TorqTech ST-DH Series User manual

Morita

Morita TorqTech ST-DH Series User manual

Morita Tri auto mini User manual

Morita

Morita Tri auto mini User manual

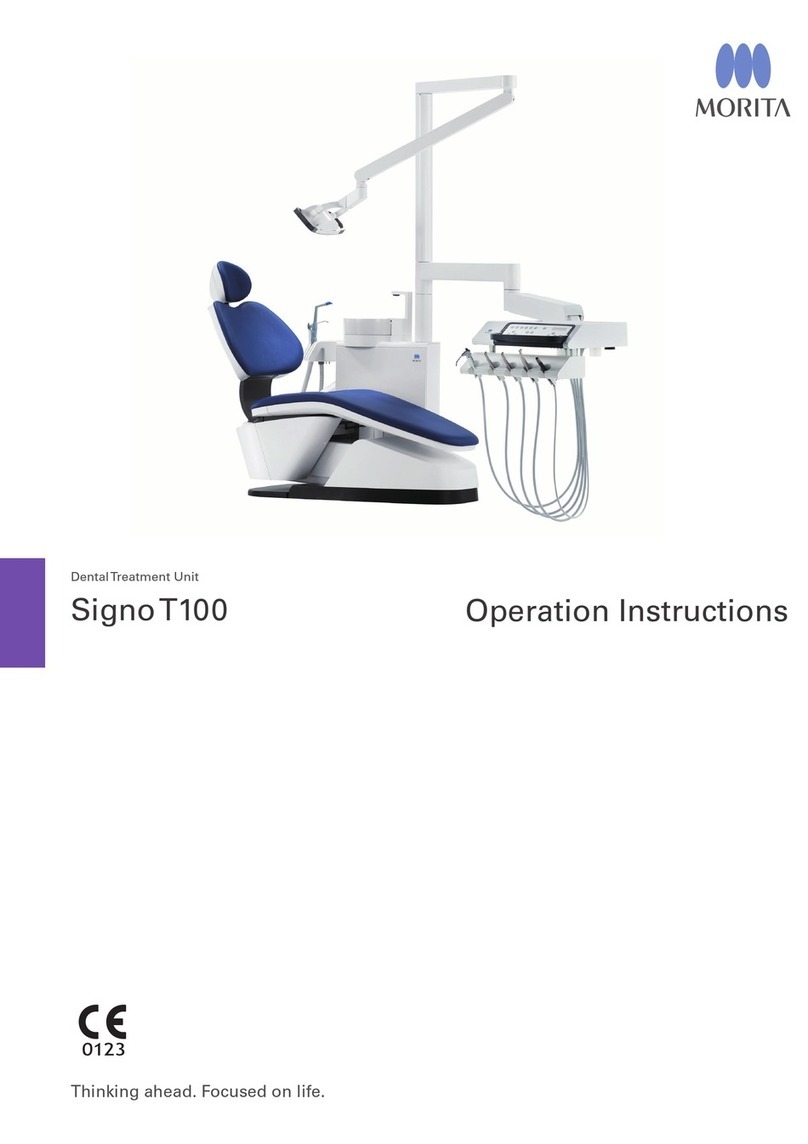
Morita Signo T100 User manual

Morita

Morita Signo T100 User manual

Morita Tri Auto ZX2 User manual

Morita

Morita Tri Auto ZX2 User manual

Morita ROOT ZX II User manual

Morita

Morita ROOT ZX II User manual

Morita Tri Auto ZX2 User manual

Morita

Morita Tri Auto ZX2 User manual

Popular Dental Equipment manuals by other brands

Ivoclar Vivadent Programat EP 5000 operating instructions

Ivoclar Vivadent

Ivoclar Vivadent Programat EP 5000 operating instructions

Eighteeth E-CONNECT user manual

Eighteeth

Eighteeth E-CONNECT user manual

CEFLA NewTom GO 2D Technical manual

CEFLA

CEFLA NewTom GO 2D Technical manual

KaVo ESTETICA E50 Life Instructions for use

KaVo

KaVo ESTETICA E50 Life Instructions for use

Belmont Quolis Q5500 Instructions for use

Belmont

Belmont Quolis Q5500 Instructions for use

Renfert Twister Frequently asked questions

Renfert

Renfert Twister Frequently asked questions

3Shape TRIOS S3P-2 Setup guide

3Shape

3Shape TRIOS S3P-2 Setup guide

Orascoptic Spark Series Instructions for use and care

Orascoptic

Orascoptic Spark Series Instructions for use and care

Belmont BEL-20+ operating instructions

Belmont

Belmont BEL-20+ operating instructions

KaVo INTRA K-LUX 200 F Instructions for use

KaVo

KaVo INTRA K-LUX 200 F Instructions for use

Eighteeth Fast-Fill user manual

Eighteeth

Eighteeth Fast-Fill user manual

Anthos A3 Plus Operator's manual

Anthos

Anthos A3 Plus Operator's manual

Satelec SUPRASSON P5 NEWTRON user manual

Satelec

Satelec SUPRASSON P5 NEWTRON user manual

EMS AIR-FLOW handy 3.0 Instructions for use

EMS

EMS AIR-FLOW handy 3.0 Instructions for use

EMS AIR-FLOW handy 3.0 PERIO Operation instructions

EMS

EMS AIR-FLOW handy 3.0 PERIO Operation instructions

Gendex ORTHORALIX 8500 Operator's manual

Gendex

Gendex ORTHORALIX 8500 Operator's manual

Durr Dental Duo Tandem Installation and operating instructions

Durr Dental

Durr Dental Duo Tandem Installation and operating instructions

DentalEZ Heritage Simplicity LED Light user manual

DentalEZ

DentalEZ Heritage Simplicity LED Light user manual

manuals.online logo
manuals.online logoBrands
  • About & Mission
  • Contact us
  • Privacy Policy
  • Terms and Conditions

Copyright 2025 Manuals.Online. All Rights Reserved.