Chuck Spray Nozzle
Lever
2018.054,000PrintedinJapan
K
Operation 2/2 2018-05-21 Pub. No.: H640-62001-502
Spray Hole Wire Syringe Nozzle
Light Guide Light Guide
24 Months
* Replace parts as necessary based on the degree of wear and length of use.
* Order parts from your local dealer or J. MORITA OFFICE.
Be sure to follow the procedure below when performing daily maintenance.
Disinfection
Clean the spray hole with the
spray hole wire provided.
Disconnect the handpiece from the tube.
Clean off the cutting debris in running wa-
ter with a soft brush and then wipe off the
water.
Gently wipe the light guide with a
cotton swab.
Wipe the entire handpiece with a piece of
gauze dampened with Ethanol for Disin-
fection (ethanol 70 to 80 vol%).
Put a little ethanol on a cotton
swab and stick it in the connec-
tion end of the handpiece.
Lightly wipe the light guide with it.
If a medical agent being used for the treatment has adhered to the handpiece, wash it off in running water.
Do not use any cleaning agent other than Ethanol for Disinfection (ethanol 70 to 80 vol%). If too much Ethanol for
Disinfection is applied to the piece of gauze or cotton swab, it will seep into the handpiece and cause a malfunction.
If dust or other impurities enter the handpiece, they may cause poor rotation or poor spray delivery.
Do not clean the handpiece ultrasonically.
Do not immerse the handpiece in or wipe it with any of the following: functional water (acidic electrolyzed water,
strong alkaline solution, and ozone water), medical agents (glutaral, etc.), or any other special types of water
or commercial cleaning liquids. Such liquids may result in metal corrosion and adhesion of the residual medical
agent to the handpiece.
Push the lever on the spray nozzle up in the direction of
the arrow.
Cover the head of the handpiece with gauze, insert the
chuck spray nozzle tip into the bur hole, and then spray for
2 seconds.
Connect the handpiece to its tube.
Operate the handpiece for at least 15 seconds to expel excess lubricant
from the head and then wipe it off with a piece of gauze.
Disconnect the handpiece from the tube.
Chuck Grip Test
Groove
Chuck grip is normal
Stop pulling as soon as you
see the groove, and slowly
return the tester piece to its
original position.
Hold down the push button
firmly and pull the tester out
straight.
Chuck grip is weakened
If you see a groove If you do not see a groove and the tester comes out
Take care to insert the tester straight
all the way in.
Hold down the push button firmly,
push the tester all the way in, and
then release the push button.
Pull the tester slowly until you see
a groove.
Packing
Inspection
Place the handpiece in a sterilization pouch.
Sterilization
• To prevent the spread of serious, life-threatening infections such as HIV and hepatitis B,
the handpiece must be autoclaved after each patient's treatment has been completed.
• Instruments are extremely hot after autoclaving; do not touch them until they cool off.
Do not sterilize the handpiece by any method other than autoclaving.
Remove the bur or point before autoclaving.
Failure to clean and lubricate the handpiece before autoclaving will lead to a malfunction of the handpiece.
The sterilization and drying temperatures must not exceed 135°C (275°F). A drying temperature in excess of
135°C (275°F) will result in contamination of the handpiece or cause it to malfunction.
When autoclaving the handpiece, do not let it come into contact with the heat source or the body of the auto-
clave to avoid damage to the O-rings or other parts due to the high temperature. When autoclaving the handpiece
in an upright position, make sure that it is placed in the autoclave with its head at the top.
Do not leave the handpiece in the autoclave.
6. Replacement Parts
Replacing Cartridges
* For details on replacing the cartridge, refer to the manual accompanying the replacement cartridge.
In the event of any of the following circumstances, replace the cartridge or have it repaired: problems with regard to
insertion, removal or retention of the bur or point; poor rotation; bur wobble; heat generation; or noise.
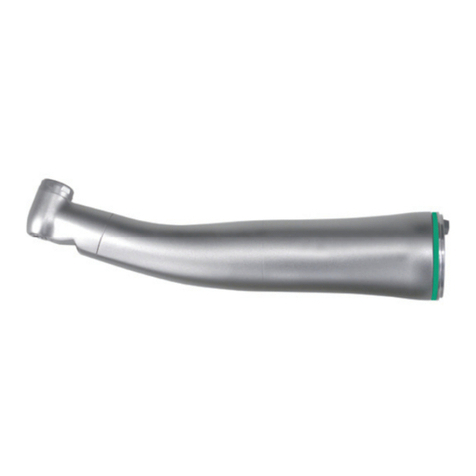
Capsule cartridge Rotor cartridge
PAR-4HEX-O PAR-4HX-O PAR-4HUEX-O PAR-4HUMX-O
Code No. 5010862 Code No. 5010863 Code No. 5011147 Code No. 5011148
A dedicated replacement tool is included.
Insert
Insert
Pull
Chuck Grip
Tester
Hold down the
push button.
Cap (including O-ring and screw)
PAR-4HEX-O PAR-4HX-O PAR-4HUEX-O
PAR-4HUMX-O
Code No. 5011387 Code No. 5011386 Code No. 5011161
TERMS AND CONDITIONS
J. MORITA MFG. CORP. warrants the Product as follows:
1. Warranty Term.
J. MORITA MFG. CORP. warrants that the Product will be free from defects in materials and workmanship for 24 months.
2. Items Not Covered byWarranty.
This Warranty will not cover parts of the Product or consumables which normally need to be replaced such as glass or rubber compo-
nents, lamps, cartridge, ball bearings and the like. Further, this warranty will not cover defects or damage caused by:
a. Failure to operate or use the Product in accordance with the Operation Instructions or warning/cautionary labels.
b. Modifications of the Product, connecting the Product to other products, or using components or replacement parts not specified
or approved by J. MORITA MFG. CORP.
c. Repairs performed by parties not designated by J. MORITA MFG. CORP.
d. Accidents or forces outside of J. MORITA MFG. CORP.’s control, such as dropping the Product or collision of the Product with
other objects, fire, flood, natural disaster, etc.
e. Use or operation of the Product in settings or under conditions not specified by J. MORITA MFG. CORP. or set forth in the
Operation Instructions including, without limitation, unauthorized changes in equipment settings, connection to unauthorized
devices.
3. Remedies of Customer.
Customer must present this Warranty when claiming coverage or application thereof, and either ship or deliver the Product to an
authorized location of J. MORITA MFG. CORP. or its subsidiaries or authorized dealers. Upon receipt and verification of this Warranty,
inspection of the Product, and determination of coverage by this Warranty, J. MORITA MFG. CORP. will, at its sole option, supply the
parts or components either replaced or repaired free of charge to the Customer. Delivery and shipping charges are the responsibility
of the Customer.
4. LIMITATIONS AND EXCLUSIONS FROM WARRANTY.
The remedy set forth in paragraph 3 is the sole and exclusive remedy of Customer. J. MORITA MFG. CORP. MAKES NO OTHER
EXPRESS OR IMPLIED WARRANTIES AND SPECIFICALLY EXCLUDES ALL OTHER WARRANTIES INCLUDING, WITHOUT LIMITA-
TION, ANY IMPLIED WARRANTIES OF MERCHANTABILITY OR FITNESS FOR A PARTICULAR PURPOSE. IN NO EVENT SHALL J.
MORITA MFG. CORP. BE LIABLE FOR ANY INCIDENTAL OR CONSEQUENTIAL, DIRECT OR INDIRECT, OR SPECIAL DAMAGES
OF ANY KIND INCLUDING, WITHOUT LIMITATION, DAMAGES FOR LOSS OF REVENUE, LOSS OF BUSINESS OR BUSINESS
OPPORTUNITY, OR OTHER SIMILAR FINANCIAL LOSS ARISING OUT OF THE PERFORMANCE, USE OR INTERRUPTED USE OF
THE PRODUCT.
5. Repairs Not Covered by Warranty.
With respect to repairs not within the period of this Warranty or otherwise not covered by this Warranty, J. MORITA MFG. CORP. will
perform the same, timely, efficiently, and for an appropriate cost.
4. After Use
Be sure to remove the bur or point from the handpiece after use. If the bur or point is left in the handpiece, it may get stuck.
Cleaning
Cleaning
Disinfection Lubrication Inspection Sterilization
Packing
• Do not point the spray can at anyone.
• Do not use the spray in a closed space without proper ventilation. Open windows and turn on exhaust
fans to make sure the room is well ventilated.
• Do not get the spray in your eyes. If you accidentally get it in your eyes, wash your eyes with plenty of wa-
ter and see a doctor.
• Do not get the spray on your skin. If it gets on your skin, wash it off with soap and water.
• If used in a sink or other enclosed space, a flammable mist could permeate the air; keep the area free of
open flames or other ignition sources.
7. Troubleshooting
If the handpiece does not seem to be working properly, the user should first inspect the locations described below.
For repairs, contact your local dealer or J. MORITA OFFICE.
◆Poor water delivery
If no water is coming out of the spray hole
Disconnect the handpiece from the coupling or the tube and operate the foot control. If water comes out of the
tube, have the handpiece repaired.
If a spray hole does not emit water
Clean the spray hole with the wire provided. If the spray hole still does not emit water, check the O-rings on the
coupling or the tube. In addition, check the water volume control for the coupling or the dental treatment unit.
If water is not emitted as a spray
Have the handpiece repaired.
◆Poor rotation
If air is coming out of the head
After cleaning the handpiece with the spray, attach an unused bur and check again to see if the problem has
been resolved. If abnormal rotation is still observed, replace the cartridge.
If air is not coming out of the head
Disconnect the handpiece from the coupling or the tube and operate the foot control. If air comes out of the
tube, have the handpiece repaired.
Never use any spray other than the AR SPRAY or MORITA MULTI SPRAY.
Use the spray nozzle designed for the handpiece connection.
Always hold the can in an upright position.
Failure to lubricate the handpiece will result in a malfunction.
Insert the spray nozzle tip straight into the bur hole. If the spray nozzle tip is not
inserted straight, it may become damaged.
In order to maintain the performance of the handpiece, make sure that you spray
lubricant both at the handpiece connection and in the bur hole.
When wiping off excess oil from the head, make sure that you do not touch the
push button while the handpiece is running. Doing so will result in wear to the
cap and cartridge, making insertion and removal of the bur difficult.
After cleaning, use the syringe or an air
blow gun to get rid of any moisture left
inside the handpiece.
Unit Name Mode Detergent
(concentration)
Neutralizer*
(concentration)
Rinse
(concentration)
Miele G7881 Vario TD neodisher MediClean
(0.3 – 0.5%)
neodisher Z
(0.1 – 0.2%)
neodisher Mielclear
(0.02 – 0.04%)
* After cleaning there may be streaks or white spots on the instrument.
Use a neutralizer only if there are streaks or white spots.
* When using a high-temperature washer-disinfector to clean the handpiece, strictly adhere to the condi-
tions specified below.
High-temperature cleaning conditions
Operating conditions for high-temperature washer-disinfectors
Operating Precautions
• Always use a handpiece holder when washing the handpiece, making sure to rinse the inside of the handpiece thor-
oughly.
• For details on handling medical agents or adjusting their concentration, refer to the user manual for the washing
device.
• After washing is complete, check to see if the handpiece, including its inside, is completely dry. If any water re-
mains inside the handpiece, expel it with an air gun or another such tool. Failure to do so could result in the remain-
ing water coming out during use and cause poor lubrication or sterilization.
• Always lubricate the handpiece after washing.
Lubrication
Before autoclaving, make sure that you lubricate and clean the handpiece with the AR SPRAY or MORITA MULTI
SPRAY.
Always use a handpiece holder when washing the handpiece; otherwise any medical agent remains inside the
handpiece, it may corrode or clog the air or water pipe, resulting in a malfunction of the handpiece.
Inappropriate cleaning methods and solutions will damage the handpiece.
Do not clean the handpiece using strong acidic or alkaline solutions that could cause the metal to corrode.
Any moisture left inside the handpiece could result in the remaining water coming out during use and cause cor-
rosion, or poor lubrication and sterilization.
Do not leave a handpiece inside the high-temperature washer-disinfector.
Push the lever on the spray nozzle down in the direction
of the arrow.
Insert the nozzle into the connection end of the hand-
piece, hold it firmly and then spray for 2 seconds.
• Weakening of the chuck grip could result in a bur or point causing injury to the patient's oral cavity or in a
bur or point being swallowed by the patient. Test the chuck grip when you sense it is weakened or at least
once a day.
Lubricate the chuck, and then
recheck the chuck grip.
If the chuck still does not pass
the test, replace the cartridge.
Autoclave the handpiece. After the autoclaving, store the handpiece in a dry environment.
Recommended autoclaving conditions: 134°C (273.2°F) in a sterilization pouch for at least 5 minutes
Minimum drying time after sterilization: 10 minutes
CAUTION
◆Cannot insert burs or points / Chuck grip is weakened
Lubricate the chuck and then reinsert an unused bur to check if the problem has been resolved. If this does not resolve
the problem, replace the cartridge (as well as the cap if necessary).
5. Daily Maintenance and Inspection
Do not use any sterile pouches that contain hydrosoluble adhesive
ingredients such as PVA (polyvinyl alcohol). Otherwise, its adhesive
ingredient may elute, seep inside the handpiece during the steriliza-
tion, resulting in a solid residue and a failure to rotate properly.
◆Handpiece does not rotate after autoclaving
Manually rotate the bur inserted into the handpiece. If the bur rotates, the cause of the problem may be caked adhesive in-
gredient inside the handpiece, which seeped from sterile pouches during sterilization. Clean the inside of the handpiece with
a high-temperature washer-disinfector.If this does not resolve the problem, have the handpiece repaired.

