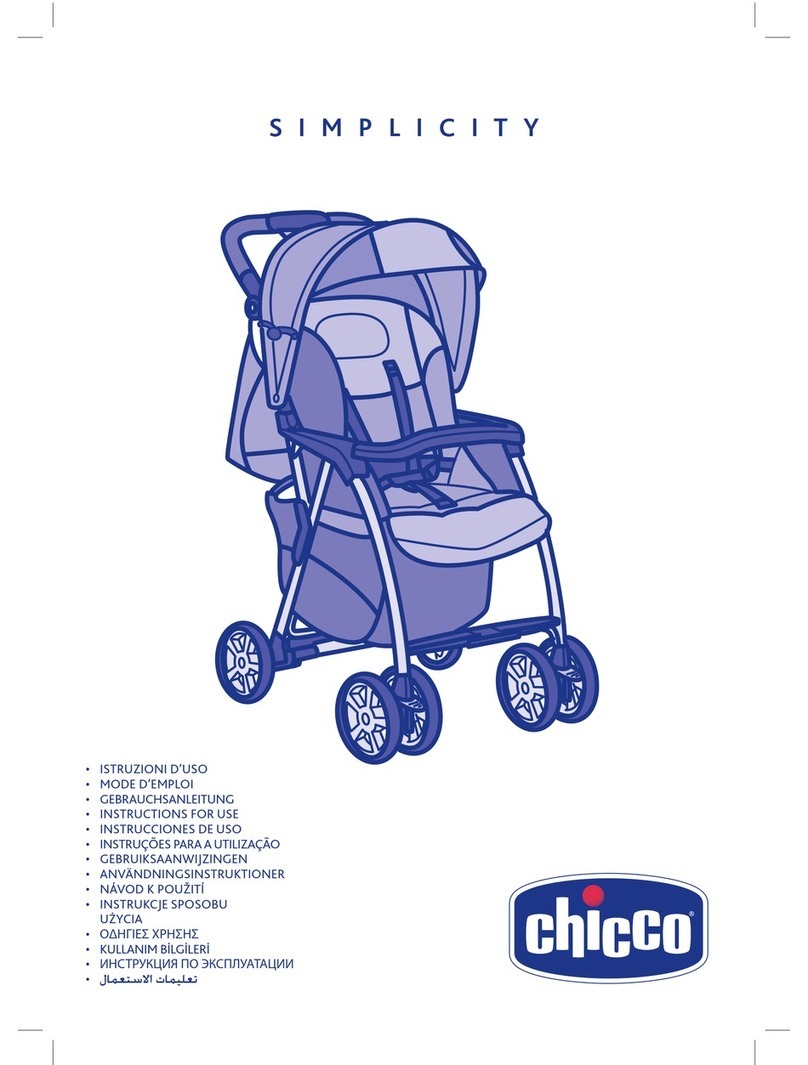
mothercare Mirage Plus User manual

Your Child’s Safety
Is Your Responsibility
If you have a problem with this product or require
any replacement parts, please contact your nearest
Mothercare Store or telephone the Mothercare
Customer Care Line on 019 3 10 10.
Alternatively write to:
Customer Care
Mothercare
Cherry Tree Road
Watford
Herts. WD 4 6SH
La seguridad de su niño es su
responsibilidad
Si surgiera algun problema con este producto o si
necesita piezas de recambio sirvase ponerse en
contacto con almacen Mothercare mas proximo o
llamar a la linea de Atencion al Cliente de Mothercare
numero (+44) 19 3 10 10
Ta bien puede escribir a:
Customer Care
Mothercare
Cherry Tree Road
Watford
Herts. WD 4 6SH
England
Made in China
Hecho en China
UK868-3-01
Mirage Plus
User Guide and
Guarantee
IMPORTA T
KEEP FOR FUTURE
REFERE CE.
Mirage Plus
Guia para el usuario
IMPORTA TE
GUARDELAS COMO
REFERE CIA FUTURA.

Bastidor
Bota
Conjunto del eje
trasero
Conjunto de las
rueda delantera (2)
Rueda trasera (2)
Parts Check List •Catalogo de piezas
Introduction •Introducción
This product is designed to carry a single child in an upright or
reclined position. A basket is supplied to carry shopping and other
baby items. Weight limit for basket is 4.5 kg.
Este producto se diseña para llevar a un solo niño en un montante o
una posición descansada. Una cesta se provee para llevar compras y
otros items del bebé. El límite del peso para la cesta es 4,5 kg.
1
No tools required No requiere herramientas
Chassis
Apron
Rear axle
assembly
Front wheel
assemby (2)
Rear wheel (2)

3
Parts Check List •Catalogo de piezas
Retainer (2, 1 extra)
Cap (2, 1 extra)
Hubcap (2)
Tray
Retén (2, 1 extra)
Tapa (2, 1 extra)
Tapa (2)
Bandeja

4
3
1
Opening the Chassis Abrir el Coche
Preparation for Use •Preparación para el uso
3
Flatten pushchair carton to protect
floor.
Release storage latch.
Aplane la caja de cartón del coche
para proteger el piso.
Desabroche el seguro de cierre.
Open pushchair on carton as shown
until locking latches on both sides
are locked.
Abra el coche en la caja de cartón
como se muestra, hasta que encajen
los seguros de bloqueo de ambos
lados.
Push the footrest down to fix to
the tube.
Deslice el apoya pies hacia abajo,
hasta que tope en el fierro ubicado
abajo.
Storage
latch
Locking
latch
Seguro de
bloqueo
Seguro
de cierre
3
Guarantee (UK & Northern Ireland)
8
Your pushchair is manufactured under a certified Quality Management
System, and is designed and manufactured to meet relevant British
Standards and Regulations, for your child’s safety.
For 12 months from the date of purchase* we offer you the
reassurance that should your baby transport fail to function due to a
manufacturing fault it will be repaired free of charge or replaced. This
does not apply to faults caused by accident, neglect or misuse.
* Your till receipt or guarantee label is required as proof of purchase.
In the event that the pushchair is sent for repair, we will provide you
with a courtesy pushchair while arranging for your’s to be repaired.
We will honour this guarantee provided:
• Proof of purchase is provided (as detailed).
• The pushchair has not been modified or repaired by anyone other
than the original manufacturer or an agent or representative.
• The pushchair has been used for it’s intended purpose, in a
domestic situation and as your child’s transport.
• Your statutory rights are unaffected.
Medidas de seguridad
7
o use su coche para aquelas actividades para las que no ha sido
diseñada.
o deje que los niños juegen con el coche o se cuelguen de ella.
Sujete el coche cuando se encuentre próximo a vehiculos de
carretera móviles o trenes. Aunque tenga puestos los frenos, la
corriente creada por el vehiculo puede mover el coche.
Si su coche es usada por personas que no estén familiarizadas con
ella, por ejemplo, abuelos, muéstreles siempre como utilizarla.
o deje nunca a su niño sin supervision, aunque sólo sea durante
un corto periodo de tiempo.

5
Preparation for Use •Preparación para el uso
3
Fitting Front Wheels Montar las ruedas delanteras
4WARNING: To prevent serious
in ury from choking, remove and
immediately discard plastic end
caps on the front leg pin.
Line up pin on bottom of front
leg with the wheel asembly.
(Plastic tab inside wheel mount
must be nearest the end of pin.)
Push on until assembly clicks
onto pin.
Repeat on other side.
NOTE: Pull firmly on each wheel
assembly to be sure the wheel
assemblies are securely attached.
ADVERTENCIA: Prevenga serios
accidentes o muerte por asfixia,
saque y bote inmediatamente los
extremos plásticos de las patas.
Alinee el pasador de la parte inferior
de la pata delantera con el conjunto
de la rueda. (La pieza plástica en el
extremo del pin debe sacarse.)
Presione hasta que el conjunto
entre en el pasador.
Repita el procedimiento en el otro
lado.
NOTA: Tire firmemente cada
con unto de ruedas para asegurarse
de que se encuentran colocados
correctamente.
Plastic
tab
Pieza
plástica
Medidas de seguridad
7
ADVERTE CIA: La seguridad de un niño es su responsabilidad.
Los niños deben ser enjaezados siempre y deben nunca ser idos
desatendido. El niño debe estar claro de todas las piezas móviles
mientras que hace ajustes. Este vehículo requiere mantenimiento
regular del utilizador. El sobrecargar, el plegamiento incorrecto y el
uso de accesorios non-approved pueden dañar o romper este
vehículo. Lea las instrucciones. BS 7409 : 1996
El uso del pushchair con un niño que pesa más de 18,1 kilogramos
causará desgaste excesivo y tensión en el pushchair. Utilice el
pushchair con solamente un niño al mismo tiempo.
o deje que su niño se suba solo al coche.
Asegúrese de que su niño lleve siempre el arnés correctamente
colocado y adjustado. Para mayor seguridad, se proporcionan anillas
en D para el acoplamiento de un arnés de seguridad separado,
aprobado según BS 6684.
Asegúrese de que los niños estén alejados de las piezas móviles
antes de realizar ajustes.
La sobrecarga, el plegamiento incorrecto y el uso de accesorios que
no cuentan con aprobación podrán resultar en el perjuicio o rotura de
esta coche.
unca deje puestas las cubiertas para la lluvia, capotas y demás
cubiertas dentro de los recintos cerrados, en un ambiente cálido o
cerca de fuents de calor pueden provocar el sobre calentamiento del
bebé.
o use accesorios tales como asientos de niño, enganchess para
bolsas, cubiertas para la lluvia, etc. que no hayan sido aprobados
por Mothercare; pueden poner en peligro la seguridad del coche.
o sobrecargue el coche con más niños, cargas o accesorios.
Las bolsas y otros articulos no deberán colgarse del mango.
Aplique siempre los frenos cuando la sillita se encuentre
estacionaria.
Tenga cuidado al subir y bajar las aceras.
Saque a su niño y pliegue el coche al subir o bajar escaleras
eléctricas.

1 6
Preparation for Use •Preparación para el uso
3
Fitting Rear Axle Montar el eje trasero
5Turn pushchair over as pictured.
Position rear axle assembly as
shown.
Push both brackets on until
plastic tabs click into the slots
on the legs.
NOTE: Pull firmly on each
bracket to be sure they are
securely attached.
Ponga el coche boca abajo
como lo indica el dibujo anterior.
Coloque el conjunto del eje
trasero como se muestra.
Empuje ambos soportes hasta
que las lengüetas de plástico
encajen en las ranuras de las
patas.
NOTA: Tire firmemente cada
soporte para asegurarse de que
se estén bien colocados.
Brake levers point up
Las palancas del freno
apuntan hacia arriba
Rear legs
Patas traseras
Safety Notes
7
Don’t let children play with or hang on to the pushchair.
Hold on to your pushchair when close to moving road vehicles or
trains. Even with the brake on, the draught from the vehicle may
move the pushchair.
If your pushchair is used by anyone unfamiliar with it, e.g.
grandparents, always show them how it works.
ever leave your child unattended, even for the shortest time.

70
Preparation for Use •Preparación para el uso
3
Fitting Rear Wheels Montar las ruedas traseras
6Spokes toward inside
Radios hacia el interior
Rear axle
E e trasero
Retainer (pink)
Retén (rosa)
Cap (white)
Tapa (blanca)
Wheel
Rueda
Place parts in order on rear axle as shown.
Push pink retainer onto axle BEFORE attaching white cap.
Repeat on other side.
Attach cap AFTER retainer is on axle.
Attach hubcap AFTER white cap is on axle.
The wide end of retainer must point toward wheel.
Coloque las piezas en el eje posterior tal como se muestra.
Empuje el retén rosa sobre el eje A TES de fijar la tapa blanca.
Repita en el otro lado.
Fije la capa DESPUÉS de que el retén rosa esté sobre el eje.
Fije la tapa DESPUÉS de que la capa blanca esté sobre el eje.
El extremo ancho del retén debe apuntar en la dirección de la rueda.
Hubcap
Tapa
WAR I G: A child’s safety is your responsibility. Children should be
harnessed at all times and should never be left unattended. The
child should be clear of all moving parts while making adjustments.
This vehicle requires regular maintenance by the user. Overloading,
incorrect folding and the use of non-approved accessories may
damage or break this vehicle. Read the instructions. BS 7409 : 1996
Use of the pushchair with a child weighing more than 18.1 kg will
cause excessive wear and stress on the pushchair. Use the
pushchair with only one child at a time.
Do not allow your child to climb unassisted into the pushchair.
Ensure your child wears a correctly fitted and adjusted harness at all
times. For extra safety, D rings are provided on the harness waist
straps for the attachment of a separate safety harness approved to
BS 6684.
Ensure children are clear of moving parts before making
adjustments.
Overloading, incorrect folding, and the use of non-approved
accessories may damage or break this pushchair.
ever leave raincovers, hoods and aprons on indoors, in a hot
atmosphere or near a heat source - baby may overheat.
It may be unsafe to use accessories e.g. child seats, bag hooks, rain
covers etc. other than those approved by Mothercare.
It may be unsafe to use replacement parts other than those
approved by Mothercare.
Do not overload this pushchair with additional children, goods or
accessories. Bags and other items must not be hung from the
handle.
Always apply the brakes when the pushchair is stationary.
Exercise caution when mounting or dismounting kerbs.
Remove your child and fold the pushchair when ascending or
descending stairs or escalators.
Do not use your pushchair in a manner for which it was not
designed.
Safety Notes
7

8
19
Preparation for Use •Preparación para el uso
3
Opening the Asse bled Pushchair Desplegar el coche
7
8
Release fold latch and begin opening
pushchair.
Desabroche el seguro de cierre y
comience a abrir el coche.
Continue unfolding until all latches
lock.
Siga desplegándolo hasta que los
dos seguros encajen.
Cuidado del producto
Este vehículo requiere un mantenimiento regular por parte del
usuario.
Periódicamente, inspeccione los dispositivos de cierre, los frenos, el
conjuncto del arnés, los enganches, los ajustes del asiento, las juntas
y los accesorios, para asegurarse de que estén fijos y en condiciones
perfectas de funcionamiento.
Los frenos, las ruedas y los neumáticos sufren desgaste y deberán
recambiarse si resulta necesario. Esto podrá realizarse a través de
su tienda Mothercare local.
Si algunas piezas de su sillita se hiceran duras y dificiles de operar,
asegúrese de que la suciedad no es la causa del problema y,
seguidamente, pruebe a aplicar una capa ligera de un pulverizador
lubricante, por ejemplo, WD-40, cerciorándose de que el lubricante
penetre entre los componentes. o aplique lubricante en exceso ya
que ello puede facilitará la acumulación de suciedad.
La lubricación periódica de las piezas móviles extenderá la vida de
su sillita y facilitará la apertura y pliegue de la misma.
Las piezas metálicas y de plástico pueden limpiarse con una esponja,
agua templada y un detergente suave.
Deje secar totalmente antes de guardar.
unca limpie el vehiculo con productos limpiadores abrasivos, con
base de amoniaco, lejia o alcohol.
Las piezas de la tela se pueden limpiar de acuerdo con las escrituras
de la etiqueta del cuidado de la tela.
Su coche deberá ser revisada y reacondicionada antes de utilizarla
con otro bebé, o después de 18 meses, dependiendo del caso que
antes se produzca. Esto puede hacerse a través de su tienda
Mothercare local.
Almacene su coche en un lugar seco y seguro.
Despues de haber sido expuesta a condiciones de humedad, dejela
totalmente abierto y en un ambiente calido. Séquela con un paño
suave. El almacenamiento de una sillita húmeda puede facilitar la
formación de moho.
o deje la coche expuesta a la luz solar durante periods prolongados
de tiempo algunos tejidos se decoloran.
6

918
In Use •Durante su utilización
4
Lift to release.
Levante al desbloquear.
Using the Brake Usar el freno
WAR I G: Always apply brake when
parking pushchair and do not forget to
check the brake.
To operate the brake, push down
firmly on the brake bar MAKI G
SURE IT IS FULLY E GAGED.
After putting the brake on, check it by
gently rocking the pushchair
backwards and forwards.
If your pushchair is used by someone
unfamiliar with it, for example
grandparents, always show them how
the pushchair works.
ADVERTE CIA: Siempre aplique el
freno al parquear el coche y no se
olvide siempre de asegurar el freno.
Para operar el freno, empuje hacia
abajo firmemente en la barra del freno
ASEGURARSE DE QUE ESTÁ
CO TRATADA COMPLETAME TE.
Después de poner el freno encendido,
contrólelo suavemente oscilando el
coche al revés y lo remite.
Si su coche es utilizado por alguien
desconocedor con él, por ejemplo los
abuelos, siempre les muestran cómo
el coche funciona.
1
Lock
Bloquear
Unlock
Desbloquear
This vehicle requires regular maintenance by the user.
Regularly inspect the locking devices, brakes, harness assembly,
catches, seat adjusters, joints and fixings to ensure they are secure
and in full working order.
Brakes, wheels and tyres are subject to wear and should be replaced
if necessary. This can be arranged through your local Mothercare
store.
Should parts of your pushchair become stiff or difficult to operate,
ensure that dirt is not the cause, then try a light application of a spray
lubricant e.g. WD 40, ensuring that the lubricant penetrates between
the components, but do not overspray as this may encourage the
accumulation of dirt.
Regular lubrication of moving parts will extend the life of your
pushchair and make opening and folding easier.
Plastic and metal parts may be sponged clean with warm water and a
mild detergent.
Allow to dry thoroughly before storing.
ever clean with abrasive, ammonia based, bleach based or spirit
type cleaners.
Fabric parts may be cleaned in accordance with the fabric care
labels.
Your pushchair should be serviced and reconditioned before using it
for a second baby, or within 18 months, whichever is the sooner. This
can be arranged by your local Mothercare store.
Store your pushchair in a dry safe place.
After exposure to damp conditions, leave fully opened and in a warm
environment. Dry off with a soft cloth. Storing a damp pushchair will
encourage mildew to form.
Do not leave the pushchair in sunlight for prolonged periods - some
fabrics may fade.
Care of your Product
6

17 10
In Use •Durante su utilización
4
WARNING: Avoid serious in ury.
Always use harness.
To secure your child in the harness,
place crotch strap between child’s
legs and insert the harness buckles
(1) into the centre buckle housing,
making sure child’s fingers are clear.
Adjust strap adjusters (2) to get a
snug fit around your child.
ADVERTENCIA: Evite lesiones
graves. Use siempre el cinturón de
seguridad.
Coloque la correa entrepiernas entre
las piernas del niño e inserte las
hebillas del arnés (1) dentro del
encaje central de hebillas, asegurese
de que los dedos del niño están
claros. Ajuste el cinturón (2) cuanto
sea necesario para lograr que su
bebé se siente cómodo.
To release, squeeze buckle prongs
at top and bottom sides of centre
housing as shown.
Presione los lados de la hebilla para
desabrochar como se muestra.
Rings (3) are fitted should you
wish to attach a separate harness
complying with BS 6684.
Se caben los anillos (3) si usted
desea al harness separado del
attacha que se conforma con
BS 6684.
Securing Your Child Para que su hijo vaya seguro
3
4
11
223
3
2
2
After Use •Después del uso
5
Carrying the Pushchair Transportar el coche
4
A handle is attached to your pushchair for carrying your pushchair as shown.
El coche viene acompañado de un asa para transportar el coche como se
indica en la ilustración.
Carry handle
Asa

11 16
In Use •Durante su utilización
4
Adjusting the Backrest Ajustar el respaldo
WAR I G: Fabric caught in the latches
may prevent them from locking. When
returning seat to upright position, do not
allow fabric to be pinched in the latch.
To recline back, pull up on the wire behind
seat back to unlock. Lower into one of the
two recline positions, either partially or fully
reclined.
To raise seat back, push up until it latches.
ADVERTE CIA: La tela del toldo puede
quedar atrapada en los seguros del
respaldo, impidiendo que éste se fije en su
lugar. Cuando coloque el respaldo en la
posición sentado, no permita que la tela se
enganche en los seguros.
Para reclinar el respaldo, tire hacia arriba la
varilla metálica ubicada detrás del respaldo
y ubíquelo en la posición deseada, parcial o
totalmente reclinado.
Para subir el respaldo a su posición
original, empújelo hacia arriba hasta que
enganche.
5
6
5After Use •Después del uso
Folding the Pushchair Plegar el coche
1
3
OTE: Before folding, 1) fold the hood,
2) remove the apron if fitted.
Fully recline the seat back
OTA: Antes de plegarlo 1) pliegue el
toldo. 2) Retire el folgo si está
instalado.
Recline completamente el respaldo.
Push upward and hold the secondary
lock whilst pulling the locking latches
upward as shown. Fold the handle
down.
Separe el seguro de cierre secundario
y tire hacia arriba de los seguros de
cierre laterales para liberar. Pliegue
la manija hacia abajo.
Close and lock storage latch.
Pliéguelo hasta que el seguro de
cierre se enganche.

1
15
In Use •Durante su utilización
4
Adjusting the Hood Ajustar el toldo
7Push or pull hood to desired position.
Do not place bags or other items onto
the hood as this is a hazard to the child.
Empuje o tire hasta alcanzar la posición
deseada.
o ponga los bolsos u otros items sobre
el toldo pues esto es un peligro al niño.
Place apron under footrest as shown.
Fasten the press studs to inside of hood
as shown.
Your apron is reversible, turn apron over
and refasten to inside of hood.
Fijan los broches de presión dentro del
toldo como se muestra.
Coloque el cubre pies debajo del
apoyapies.
Su cubre pies es reversible, dé la vuelta
al delantal y ligúelo dentro del cubre
pies.
8
Fitting the Apron Instalación del cubre pies
In Use •Durante su utilización
4
Using the Tray Usar la bandeja
1 WARNING: Always secure your
child with the harness. The tray is
not a restraint device.
DO OT lift the pushchair by the
tray.
Clip the tray under the fold latch on
both leg tubes as shown.
ADVERTENCIA: Asegure
siempre su niño con el cinturón
de seguridad. La bande a no es un
dispositivo de su eción.
o levante el coche por la
bandeja.
Abroche la bandeja abajo del
cierre del folgo en ambos tubos,
como se muestra.

In Use •Durante su utilización
4
13 14
Fitting the Apron (cont.) Instalación del cubre pies
Your apron has a newborn feature, roll the bottom of the apron up and tuck it
under the inside of the apron. Make sure apron is tucked under lower edge of
seat. Fasten the press studs (1) on both sides to the short webbing (2) as
shown.
Your apron will appear as shown.
Su cubre pies tiene una característica recién nacida, rueda el fondo del cubre
pies para arriba y lo remete bajo interior del cubre pies. Asegurese de que el
cubre pies esté remetido bajo borde más bajo del asiento. Sujete los postes de
la prensa (1) en ambas caras a las correas cortas (2) según lo mostrado.
Su cubre pies aparecerá según lo mostrado.
9
2
1
In Use •Durante su utilización
4
Swivel Wheel Locks Bloqueos de la rueda del giratorio
Front swivel wheels lock for use on uneven
surfaces such as grass, stones or gravel.
Before locking swivels, first push pushchair
forward a few feet to ensure the wheels are
correctly positioned.
Push buttons up or down to lock or release
swivels. Turn swivel to check that it is locked
or released.
Las ruedas giratorias delanteras se
bloquean para ser utilizadas sobre superficies
desparejas como pasto, piedras o grava.
Antes de fijar la plataforma giratoria, primero
empuje la sillita de paseo hacia adelante unos
cuantos pies para asegurar que las ruedas se
encuentren correctamente posicionadas.
Empuje los botones hacia arriba o abajo para
bloquear o liberar el movimiento giratorio.
Cierre para determinar si está bloqueado o
suelto.
10
11
Lock
Bloquear
Unlock
Desbloquear

In Use •Durante su utilización
4
13 14
Fitting the Apron (cont.) Instalación del cubre pies
Your apron has a newborn feature, roll the bottom of the apron up and tuck it
under the inside of the apron. Make sure apron is tucked under lower edge of
seat. Fasten the press studs (1) on both sides to the short webbing (2) as
shown.
Your apron will appear as shown.
Su cubre pies tiene una característica recién nacida, rueda el fondo del cubre
pies para arriba y lo remete bajo interior del cubre pies. Asegurese de que el
cubre pies esté remetido bajo borde más bajo del asiento. Sujete los postes de
la prensa (1) en ambas caras a las correas cortas (2) según lo mostrado.
Su cubre pies aparecerá según lo mostrado.
9
2
1
In Use •Durante su utilización
4
Swivel Wheel Locks Bloqueos de la rueda del giratorio
Front swivel wheels lock for use on uneven
surfaces such as grass, stones or gravel.
Before locking swivels, first push pushchair
forward a few feet to ensure the wheels are
correctly positioned.
Push buttons up or down to lock or release
swivels. Turn swivel to check that it is locked
or released.
Las ruedas giratorias delanteras se
bloquean para ser utilizadas sobre superficies
desparejas como pasto, piedras o grava.
Antes de fijar la plataforma giratoria, primero
empuje la sillita de paseo hacia adelante unos
cuantos pies para asegurar que las ruedas se
encuentren correctamente posicionadas.
Empuje los botones hacia arriba o abajo para
bloquear o liberar el movimiento giratorio.
Cierre para determinar si está bloqueado o
suelto.
10
11
Lock
Bloquear
Unlock
Desbloquear

1
15
In Use •Durante su utilización
4
Adjusting the Hood Ajustar el toldo
7Push or pull hood to desired position.
Do not place bags or other items onto
the hood as this is a hazard to the child.
Empuje o tire hasta alcanzar la posición
deseada.
o ponga los bolsos u otros items sobre
el toldo pues esto es un peligro al niño.
Place apron under footrest as shown.
Fasten the press studs to inside of hood
as shown.
Your apron is reversible, turn apron over
and refasten to inside of hood.
Fijan los broches de presión dentro del
toldo como se muestra.
Coloque el cubre pies debajo del
apoyapies.
Su cubre pies es reversible, dé la vuelta
al delantal y ligúelo dentro del cubre
pies.
8
Fitting the Apron Instalación del cubre pies
In Use •Durante su utilización
4
Using the Tray Usar la bandeja
1 WARNING: Always secure your
child with the harness. The tray is
not a restraint device.
DO OT lift the pushchair by the
tray.
Clip the tray under the fold latch on
both leg tubes as shown.
ADVERTENCIA: Asegure
siempre su niño con el cinturón
de seguridad. La bande a no es un
dispositivo de su eción.
o levante el coche por la
bandeja.
Abroche la bandeja abajo del
cierre del folgo en ambos tubos,
como se muestra.

11 16
In Use •Durante su utilización
4
Adjusting the Backrest Ajustar el respaldo
WAR I G: Fabric caught in the latches
may prevent them from locking. When
returning seat to upright position, do not
allow fabric to be pinched in the latch.
To recline back, pull up on the wire behind
seat back to unlock. Lower into one of the
two recline positions, either partially or fully
reclined.
To raise seat back, push up until it latches.
ADVERTE CIA: La tela del toldo puede
quedar atrapada en los seguros del
respaldo, impidiendo que éste se fije en su
lugar. Cuando coloque el respaldo en la
posición sentado, no permita que la tela se
enganche en los seguros.
Para reclinar el respaldo, tire hacia arriba la
varilla metálica ubicada detrás del respaldo
y ubíquelo en la posición deseada, parcial o
totalmente reclinado.
Para subir el respaldo a su posición
original, empújelo hacia arriba hasta que
enganche.
5
6
5After Use •Después del uso
Folding the Pushchair Plegar el coche
1
3
OTE: Before folding, 1) fold the hood,
2) remove the apron if fitted.
Fully recline the seat back
OTA: Antes de plegarlo 1) pliegue el
toldo. 2) Retire el folgo si está
instalado.
Recline completamente el respaldo.
Push upward and hold the secondary
lock whilst pulling the locking latches
upward as shown. Fold the handle
down.
Separe el seguro de cierre secundario
y tire hacia arriba de los seguros de
cierre laterales para liberar. Pliegue
la manija hacia abajo.
Close and lock storage latch.
Pliéguelo hasta que el seguro de
cierre se enganche.

17 10
In Use •Durante su utilización
4
WARNING: Avoid serious in ury.
Always use harness.
To secure your child in the harness,
place crotch strap between child’s
legs and insert the harness buckles
(1) into the centre buckle housing,
making sure child’s fingers are clear.
Adjust strap adjusters (2) to get a
snug fit around your child.
ADVERTENCIA: Evite lesiones
graves. Use siempre el cinturón de
seguridad.
Coloque la correa entrepiernas entre
las piernas del niño e inserte las
hebillas del arnés (1) dentro del
encaje central de hebillas, asegurese
de que los dedos del niño están
claros. Ajuste el cinturón (2) cuanto
sea necesario para lograr que su
bebé se siente cómodo.
To release, squeeze buckle prongs
at top and bottom sides of centre
housing as shown.
Presione los lados de la hebilla para
desabrochar como se muestra.
Rings (3) are fitted should you
wish to attach a separate harness
complying with BS 6684.
Se caben los anillos (3) si usted
desea al harness separado del
attacha que se conforma con
BS 6684.
Securing Your Child Para que su hijo vaya seguro
3
4
11
223
3
2
2
After Use •Después del uso
5
Carrying the Pushchair Transportar el coche
4
A handle is attached to your pushchair for carrying your pushchair as shown.
El coche viene acompañado de un asa para transportar el coche como se
indica en la ilustración.
Carry handle
Asa

918
In Use •Durante su utilización
4
Lift to release.
Levante al desbloquear.
Using the Brake Usar el freno
WAR I G: Always apply brake when
parking pushchair and do not forget to
check the brake.
To operate the brake, push down
firmly on the brake bar MAKI G
SURE IT IS FULLY E GAGED.
After putting the brake on, check it by
gently rocking the pushchair
backwards and forwards.
If your pushchair is used by someone
unfamiliar with it, for example
grandparents, always show them how
the pushchair works.
ADVERTE CIA: Siempre aplique el
freno al parquear el coche y no se
olvide siempre de asegurar el freno.
Para operar el freno, empuje hacia
abajo firmemente en la barra del freno
ASEGURARSE DE QUE ESTÁ
CO TRATADA COMPLETAME TE.
Después de poner el freno encendido,
contrólelo suavemente oscilando el
coche al revés y lo remite.
Si su coche es utilizado por alguien
desconocedor con él, por ejemplo los
abuelos, siempre les muestran cómo
el coche funciona.
1
Lock
Bloquear
Unlock
Desbloquear
This vehicle requires regular maintenance by the user.
Regularly inspect the locking devices, brakes, harness assembly,
catches, seat adjusters, joints and fixings to ensure they are secure
and in full working order.
Brakes, wheels and tyres are subject to wear and should be replaced
if necessary. This can be arranged through your local Mothercare
store.
Should parts of your pushchair become stiff or difficult to operate,
ensure that dirt is not the cause, then try a light application of a spray
lubricant e.g. WD 40, ensuring that the lubricant penetrates between
the components, but do not overspray as this may encourage the
accumulation of dirt.
Regular lubrication of moving parts will extend the life of your
pushchair and make opening and folding easier.
Plastic and metal parts may be sponged clean with warm water and a
mild detergent.
Allow to dry thoroughly before storing.
ever clean with abrasive, ammonia based, bleach based or spirit
type cleaners.
Fabric parts may be cleaned in accordance with the fabric care
labels.
Your pushchair should be serviced and reconditioned before using it
for a second baby, or within 18 months, whichever is the sooner. This
can be arranged by your local Mothercare store.
Store your pushchair in a dry safe place.
After exposure to damp conditions, leave fully opened and in a warm
environment. Dry off with a soft cloth. Storing a damp pushchair will
encourage mildew to form.
Do not leave the pushchair in sunlight for prolonged periods - some
fabrics may fade.
Care of your Product
6

8
19
Preparation for Use •Preparación para el uso
3
Opening the Asse bled Pushchair Desplegar el coche
7
8
Release fold latch and begin opening
pushchair.
Desabroche el seguro de cierre y
comience a abrir el coche.
Continue unfolding until all latches
lock.
Siga desplegándolo hasta que los
dos seguros encajen.
Cuidado del producto
Este vehículo requiere un mantenimiento regular por parte del
usuario.
Periódicamente, inspeccione los dispositivos de cierre, los frenos, el
conjuncto del arnés, los enganches, los ajustes del asiento, las juntas
y los accesorios, para asegurarse de que estén fijos y en condiciones
perfectas de funcionamiento.
Los frenos, las ruedas y los neumáticos sufren desgaste y deberán
recambiarse si resulta necesario. Esto podrá realizarse a través de
su tienda Mothercare local.
Si algunas piezas de su sillita se hiceran duras y dificiles de operar,
asegúrese de que la suciedad no es la causa del problema y,
seguidamente, pruebe a aplicar una capa ligera de un pulverizador
lubricante, por ejemplo, WD-40, cerciorándose de que el lubricante
penetre entre los componentes. o aplique lubricante en exceso ya
que ello puede facilitará la acumulación de suciedad.
La lubricación periódica de las piezas móviles extenderá la vida de
su sillita y facilitará la apertura y pliegue de la misma.
Las piezas metálicas y de plástico pueden limpiarse con una esponja,
agua templada y un detergente suave.
Deje secar totalmente antes de guardar.
unca limpie el vehiculo con productos limpiadores abrasivos, con
base de amoniaco, lejia o alcohol.
Las piezas de la tela se pueden limpiar de acuerdo con las escrituras
de la etiqueta del cuidado de la tela.
Su coche deberá ser revisada y reacondicionada antes de utilizarla
con otro bebé, o después de 18 meses, dependiendo del caso que
antes se produzca. Esto puede hacerse a través de su tienda
Mothercare local.
Almacene su coche en un lugar seco y seguro.
Despues de haber sido expuesta a condiciones de humedad, dejela
totalmente abierto y en un ambiente calido. Séquela con un paño
suave. El almacenamiento de una sillita húmeda puede facilitar la
formación de moho.
o deje la coche expuesta a la luz solar durante periods prolongados
de tiempo algunos tejidos se decoloran.
6

70
Preparation for Use •Preparación para el uso
3
Fitting Rear Wheels Montar las ruedas traseras
6Spokes toward inside
Radios hacia el interior
Rear axle
E e trasero
Retainer (pink)
Retén (rosa)
Cap (white)
Tapa (blanca)
Wheel
Rueda
Place parts in order on rear axle as shown.
Push pink retainer onto axle BEFORE attaching white cap.
Repeat on other side.
Attach cap AFTER retainer is on axle.
Attach hubcap AFTER white cap is on axle.
The wide end of retainer must point toward wheel.
Coloque las piezas en el eje posterior tal como se muestra.
Empuje el retén rosa sobre el eje A TES de fijar la tapa blanca.
Repita en el otro lado.
Fije la capa DESPUÉS de que el retén rosa esté sobre el eje.
Fije la tapa DESPUÉS de que la capa blanca esté sobre el eje.
El extremo ancho del retén debe apuntar en la dirección de la rueda.
Hubcap
Tapa
WAR I G: A child’s safety is your responsibility. Children should be
harnessed at all times and should never be left unattended. The
child should be clear of all moving parts while making adjustments.
This vehicle requires regular maintenance by the user. Overloading,
incorrect folding and the use of non-approved accessories may
damage or break this vehicle. Read the instructions. BS 7409 : 1996
Use of the pushchair with a child weighing more than 18.1 kg will
cause excessive wear and stress on the pushchair. Use the
pushchair with only one child at a time.
Do not allow your child to climb unassisted into the pushchair.
Ensure your child wears a correctly fitted and adjusted harness at all
times. For extra safety, D rings are provided on the harness waist
straps for the attachment of a separate safety harness approved to
BS 6684.
Ensure children are clear of moving parts before making
adjustments.
Overloading, incorrect folding, and the use of non-approved
accessories may damage or break this pushchair.
ever leave raincovers, hoods and aprons on indoors, in a hot
atmosphere or near a heat source - baby may overheat.
It may be unsafe to use accessories e.g. child seats, bag hooks, rain
covers etc. other than those approved by Mothercare.
It may be unsafe to use replacement parts other than those
approved by Mothercare.
Do not overload this pushchair with additional children, goods or
accessories. Bags and other items must not be hung from the
handle.
Always apply the brakes when the pushchair is stationary.
Exercise caution when mounting or dismounting kerbs.
Remove your child and fold the pushchair when ascending or
descending stairs or escalators.
Do not use your pushchair in a manner for which it was not
designed.
Safety Notes
7
Table of contents
Other mothercare Stroller manuals

mothercare
mothercare xpedior User manual

mothercare
mothercare Nixi Pushchair User manual

mothercare
mothercare Buggster User manual

mothercare
mothercare orb User manual

mothercare
mothercare xcursion User manual

mothercare
mothercare mino User manual

mothercare
mothercare jive User manual

mothercare
mothercare my3 User manual

mothercare
mothercare Genie User manual

mothercare
mothercare nulo User manual