Motorola S1051C User manual

MOTOROLA
INC.,
COMMUNICATIONS
DIVISIÓN
-
INSTRUCTION
MANUAL
do
ES
ў
hi
Hi
|
DB
|
n
'
“
j
|
Меки
|
(ШЕН
j
|
1
|
!
1
КОЛ!
К
!
К
f
|
|
|
!
|
|
|
| |
|
|
(|
|
[ИИ
ІШІ
|
|
|
|
lg
ON
t
|
а
1
қ
e
y=
]
av
ча
^
61051С
51053С
Ко
ЦА
ҚЫП
ene
ДА
M
INTED
IN’
U.S.A)
|.
:
Ше;
|
АТТА
ТП
ea
|
|
i
Yi
7
Wr
т)
И
MOTOROLA
trans
istorized
voltmeter
-
68P81021A05-C

Wl
PAN
RN
ИД
MM
E
БАП
УАН
DSTI
e
3
ANA
Mi
Di
S
ни
RUN,
ү
Т.
n
ү

AEPD-9830-O(CE2286-V21)
05
MOTOROL
MOTOROLA
MOTOROLA
TRANSISTORIZED
AC
VOLTMETER
A
MODEL
51053С
TRANSISTORIZED
AC
VOLTMETER
INC.
MODELS
51051С
AND
S1053C
COMMUNICATIONS
DIVISION
ENGINEERING
PUBLICATIONS
Copyright
1973
by
Motorola,
Inc.
Printed
in
WS.
A.
2/27/73-UP
1301
E.
ALGONQUIN
ROAD
SCHAUMBURG,
ILLINOIS
60172
68P81021A05
Issue
-
C

GUARANTEED
PERFORMANCE
SPECIFICATIONS
MODELS
$1051C
$1053C
(battery
operated)
(a-c/battery
operated)
MEASUREMENTS
1
millivolt
to
300
volts
full
scale
on
12
ranges.
-72
db
to
+52
db
on
12
ranges.
+2%
of
full
scale
from
50
cps
to
300
kc
and
+3%
of
full
scale
from
20
cps
to
50
cps,
300
kc
to
1
mc;
except
£376
of
full
scale
from
20
cps
to
100
kc
and
+5%
of
full
scale
from
100
kc
to
1
mc
on
the
300
volt
range
(at
259C
(779F)).
1
to
300
mv
range;
greater
than
1
megohm
shunted
by
30
uuf.
ШОШ
ЫОМЕ
E
UE
1
{о
300
volt
range;
greater
than
10
megohms
shunted
by
15
uuf
OVERLOAD
VOLT
range:
Maximum
of
550
volts
(sum
of
d-c
and
a-c
peak
voltages)
PROTECTION
MILLIVOLT
range:
Maximum
of
110
volts
rms
continuous;
220
volts
rms
for
10
seconds
or
less;
600
v
d-c
NOISE
Less
than
0.1
mv
meter
deflection
with
input
terminated
with
100K
ohm
resistor
(shielded)
on
1
mv
range
METER
Linear
voltage
scales:
0-1
and
0-3
(calibrated
to
rms
values
of
a
sine
CALIBRATION
ACCURACY
wave)
Voltage
ranges:
1,
3,
10,
etc.
steps
DB
scale
calibration:
-12
to
42
Zero
level:
1
milliwatt
in
600
ohms
0-50
microampere
taut-band
movement
AC
INPUT
REQUIRE-
105-130
v
а-с,
50-400
cps
at
approximately
5
ma;
or,
using
SKN6009A
MENTS
(51053С
ONLY)
230/117
v
a-c
adapter
cable
kit,
230
v
a-c,
50-400
cps
DC
INPUT
An
8.4
volt
mercury
battery
(Mallory
No.
TR-136
or
equivalent)
REQUIREMENTS
BATTERY
LIFE
Used
as
a
ЕДЕН;
Зоро
шау
400
hours
Used
as
an
amplifier:
approximately
300
hours
METER
Output
voltage
(at
400
cps):
Proportional
to
input
voltage
as
indicated
by
meter
deflection
(meter
and
amplifier
are
separate
functions
and
cannot
be
used
simultaneously),
1.4
volts
(peak
to
peak)
or
0.5
volt
(rms)
into
600
ohm
(or
more)
resistive
load
corresponding
to
full
scale
meter
reading.
AMPLIFIER
CHARACTERISTICS
Frequency
response:
+0.5
db
from
20
cps
to
100
kc,
approx.
3
db
down
at
1
mc
into
600
ohm
or
more
(resistive
load)
and
shunt
capacity
not
more
than
200
uuf,
Distortion
(20-30*C):
Less
than
1%
with
ІК
ohm
(or
more)
resistive
load
shunted
by
not
more
than
200
uuf
from
20
cps
to
20
kc.
Maximum
voltage
gain
(400
cps):
500
(54
db)
on
1
mv
range
WEIGHT
6
1b.
7
oz.
DIMENSIONS
10-1/4"
x
6-1/2"
x
5-3/4"
(approx.)
SPECIFICATIONS
SUBJECT
TO
CHANGE
WITHOUT
NOTICE
ii

MOTOROLA
MODEL
CHART
TRANSISTORIZED
AC
VOLTMETERS
DESCRIPTION
[x]
Ш
ITEM
INCLUDED
230/117
V
ADAPTER
CABLE
KIT
BATTERY
KIT
OPTIONAL
ACCESSORY
«|«|
ај
<
i]
со
|
On}
су
кеј Кеј
oj
o
(е
Ге)
Ko)
Ko}
fo}
Ne}
Re}
ко
:
AAAA
CHASSIS
БАРА
РУР:
MODEL
DESCRIPTION
MODEL
51051С
PORTABLE,
BATTERY
POWERED
SLN6013C
Ој
|
51053С
PORTABLE,
BATTERY
AND
АС
POWERED
SLN6045C
o|
xl
سے
ЖК
SE
Dee
ЖҰП
are
E
E
r
за
жуш
|
u
اا
bi
SS
Iq
liu
ELSE
ET
aS
a
OE
ER
ACRE
Ист
з.
ФИ
ке
ла.
ЖЕЙ!
CS)
E
VI-UIDIONYDUDGNNENEC
ТЕТЕ
ES
BEER
E
Se
[|
еже
с.
zi
ЛЫ
„зле
д.
7
ГІ
a
Say
А
Lee.
ee
eR
GE
Шо
тт
"Ај
SESS
|
ЫС
eee
ee
ee
ЖЕ
су
че
=ч
ӨТ
E
EPD-9829-O
iii

FOREWORD
CLAIM
FOR
DAMAGE
IN
SHIPMENT
If
any
damage
to
the
shipping
container
is
ap-
parent
upon
receipt,
the
delivering
driver
should
be
requested
to
note
such
damage
on
all
copies
of
thefreight
bill.
This
is
for
your
protection
should
the
material
have
received
damage.
The
equipment
should
be
unpacked
immedi-
ately,
examined
for
damage
and
tested.
ЊЕ.
GUE
fails
to
operate
properly,
or
is
damaged
in
any
way,
а
claim
should
be
filed
with
the
carrier.
The
claim
should
be
filed
within
48
hours
after
receipt,
if
possible,
or
during
a
period
not
to
exceed
15
days.
A
full
report
of
such
damage
should
be
ob-
tained
from
the
claim
investigator,
who
will
call
upon
you.
For
the
purpose
of
this
report,
the
shipping
container
and
all
packing
materials
should
be
retained
for
the
investigator
to
examine.
Тһе
investigator's
report
should
then
be
for-
warded
to:
Motorola
Communications
&
Electronics,
Inc.
Parts
and
Service
Department
1301
E.
Algonquin
Road
Schaumburg,
Illinois
60172
Include
model
number
and
serial
number
when
referring
to
the
instrument
for
any
reason.
iv
Arrangements
for
repair
or
replacement
will
be
made
and
you
will
be
advised
of
the
disposition
of
the
instrument.
REPAIR
AND/OR
RECALIBRATION
Because
of
its
complexity
it
is
recommended
that
the
instrument
be
returned
to
the
factory
for
repair
and/or
calibration.
Return
to:
Motorola
Communications
&
Electronics,
Inc.
Parts
and
Service
Department
1301
E.
Algonquin
Road
Schaumburg,
Illinois
60172
Before
shipping
the
instrument
notify
the
De-
partment
at
the
above
address
of
the
service
re-
quired.
Refer
to
the
instrument
by
model
number
and
serial
number.
On
receipt
of
the
information,
you
will
be
informed
of
shipping
instructions.
If
requested,
an
estimate
of
the
charges
will
be
made
before
work
begins,
provided
the
instrument
is
not
covered
by
the
warranty.
SHIPPING
The
unit
employs
а
meter
movement
which,
though
electrically
rugged,
should
be
protected
from
mechanical
shock.
Therefore,
the
instru-
ment
should
be
surrounded
by
three
inches
of
excelsior
or
similar
absorbing
material
and
then
packed
іп
а
strong
exterior
container.
It
should
be
shipped
via
truck,
railway
express,
air
freight,
or
air
express.
Тһе
instrument
should
not
be
handled
roughly
during
packing.

WARRANTY
This
Motorola
instrument
is
guaranteed
by
Motorola
for
a
period
of
one
year
after
delivery
tothe
original
purchaser
against
defects
in
design,
material,
and
workmanship.
Our
liability
under
this
warranty
is
limited
to
servicing
or
adjusting
anyinstrument
returned
tothe
factory
Service
De-
partment
for
that
purpose
and
to
replace
any
de-
fective
parts
thereof.
This
warranty
is
effective
for
one
year
after
delivery
to
the
original
purchaser
when
the
in-
strument
is
returned,
transportation
charges
pre-
paid
by
the
original
purchaser,
and
when
upon
our
examination
it
is
disclosed
to
our
satisfaction
to
be
defective.
If
the
fault
has
been
caused
Бу
misuse
or
abnormal
conditions
of
operation,
re-
pairs
will
be
billed
at
the
net
price
of
necessary
parts
and
а
service
charge
at
Motorola's
then
pre-
vailing
labor
rate.
Іп
this
case,
an
estimate
will
be
submitted
before
the
work
is
started.
This
warranty
i
in
lieu
of
all
other
warran-
ties,
expressed
or
іпірПей
and
all
other
obliga-
tions
or
liabilities
on
Motorola
part.
If
any
fault
develops,
the
following
steps
should
be
taken:
1.
|
Notify
us
at
the
following
address:
Motorola
Communications
&
Electronics,
Inc.
Parts
and
Service
Department
1301
E.
Algonquin
Road
Schaumburg,
Illinois
60172
Give
full
details
of
the
difficulty,
and
include
Upon
receipt
of
this
information,
we
will
give
you
service
data
or
shipping
instructions.
model
number
and
serial
number.
2.
Троп
receipt
of
shipping
instructions,
for-
ward
the
instrument
prepaid
to
the
above
address,
or
to
the
authorized
repair
station
indicated
on
the
instructions.
If
requested,
an
estimate
of
the
charges
will
be
made
before
the
work
be-
gins,
if
the
instrument
is
not
covered
by
the
warranty.

SECTION
Guaranteed
Performance
Specifications
NiodelChbsrte
2
22%
INTRODUCTION
.
.
.
DESCRIPTION
. . . .
Functions
,
,
а.
b.
С»
а.
Instrument
Characteristics
Construction
o
о
AC
Power
Supply
METER
SCALES,
. . ,
CONTROLS
AND
INPUT
TERMINATIONS
a.
AC
Voltage
Scales
bi
Ce
а.
b.
с.
d.
e.
[2
ge
Decibel
Scale,
Battery
Condition
Scale
Range
Selector
Switch
,
OFF-B+
CHK,
-METER-OUTPUT
OFF-B+
CHK,
METER-OUTPUT
Input
Terminations.
Output
Termination,
Test
Lead
Accessory
,
230/117
Volt
Adapter
Cable
CIRCUIT
DESCRIPTION
Input
attenuation.
Pre-Amplifier
Amplifier.
.
Output
Stage
.
а.
or
с.
d.
e
f
Meter
Circuit
Power
Supply
(S1053C
Only)
OPERATION
.
.
.
.
Mechanical
Meter
Zero
Operation
from
an
AC
Source
Operation
from
Internal
Battery
а.
b.
Co
d.
e.
"e
p
h.
AC
Voltage
Measurement
о
Power
Measurements
.
Examples
of
AC
Voltage
and
Power
Amplifier
Operation
Battery
Conservation
TEMPERATURE
EFFECTS
APPLICATIONS
.
.
CALIBRATION
AND
MAINTENANCE
SCHEMATIC
DIAGRAMS
AND
PARTS
LIST
а.
b.
с.
а.
Dis
с.
а.
b.
General
а
Voltmeter.
Amplifier
.
General
=
Calibration
.
Troubleshooting
.
Model
$1051C
Model
51053С
.
.
ө
о
Functions
CONTENTS
° ° .
. .
. .
.
.
.
.
o .
. °
.
e
о
.
.
.
. o .
.
. .
. о .
.
.
e
.
.
.
е
о
.
е
.
°
° ° °
.
.
.
. .
.
.
° ° °
°
° . . .
О
.
о .
.
.
. o
Functions
e
x.
ҒЫС
5:
Ne
Ure)
tems
Јас
вес.
e
SUN Іт.
Дл
"SE
dM
se
Prec
ET
52%»
o
аат
б
ste
Ae
eh
255%
FATE
T
мые:
Qo
dr
Ys
A.
OO oO
STILO
MON
6
КИ
|
ORC
Me
hy
те,
Ж
ыс
TER
E
ET,
Measurements
Jd:
FRc
47/6
ы
dB
А»
е
е
S
o
G
&
о
Өй
Т
oh
Oia
Sh
O
0226
а
teal
кеј
ys
"BOO
AOT
Жаа
Bo
68
а
eee
of
6
ас
S
-
“ж
“хи
S.
c
ch
ко
.
Se
Ame
e
Switch
(Model
S1051C),
Switch
(Model
51053С),
PAGE
ii
EPD-9829-O
1
оын
н
һә ка
ра
һа
ма
Ф
о
C9
09
WW
WwW
WNNNNN
DN
N
су
л
щл
Ut
qu»
dg»
PHB
15
16

1.
INTRODUCTION
The
Motorola
Transistorized
AC
Voltmeters
offer
many
advantages
not
found
in
a-c
vacuum
tube
voltmeters.
Small
physical
size,
light
weight
and
full
transistorization
permit
com-
plete
portability
for
field
use.
Тһе
absence
of
heat
producing
elements,
such
as
tubes
and
transformers,
lessens
the
need
for
frequent
re-
calibration
and
increases
component
life,
The
.Model
S1051C.is
battery
operated.
The
Model
„
51053С,
in
addition
to
being
battery
operated,
con-
tains
an
a-c
power
supply
which
operates
froma
117уа-с,
50-400
срв
source.
A
detachable
power
cord
is
supplied
with
the
Model
51053С.
Тһе
SKN6009A
230/117
Volt
Adpater
Cable
Kit
(an
op-
tional
item
not
furnished
with
the
standard
Model
$1053C)
permits
operation
from
а
230
volt,
50-
400
cps
power
source.
2.
DESCRIPTION
а.
Functions
These
transistorized
a-c
voltmeters
are
ca-
pable
of
accurately
performing
the
following
func-
tions:
(1)
AC
voltage
measurement
from
0.1
milli-
volt
to
300
volts
in
а
frequency
range
of20
cycles
per
second
to
1
megacycle.
(2)
Power
measurements
from
-72
to
+52
dbm
when
measured
across
600
ohm
impedance
(0
dbm
-
1
milliwatt
into
600
ohms).
(3)
Comparative
power
measurements
from
-72
to
+52
db
(when
measured
at
the
same
imped-
ance
level).
(4)
High
gain
isolation
amplifier
with
high
input
resistance
and
low
impedance
output
for
amp-
lification
of
low
level
audio
or
r-f
signals.
b.
Instrument
Characteristics
This
instrument
is
similar
to
many
other
a-c
voltmeters
in
that
the
meter
movement
responds
to
average
values
of
applied
voltages.
The
meter
Scale
is
calibrated
to
read
the
rms
value
of
a
sinusoidal
waveform.
When
the
input
waveform
departs
from
a
pure
sine
wave,
the
meter
indica-
tion
will
be
in
error
by
the
ratio
of
the
average
value
to
the
rms
value
of
the
incoming
waveform.
(See
figures
1
and
2
in
paragraph
8.)
c.
Construction
Although
primarily
designed
for
laboratory
use,
these
instruments,
being
self-powered,
are
quite
suitable
for
portable
use
without
sacrificing
the
accuracy
or
versatility
ofalaboratory
instru-
ment.
A
detachable
metal
cover
protects
the
front
panel
from
damage
that
might
occur
in
portable
use.
Clips
for
storing
the
meter
cable
or
other
accessories
are
mounted
on
the
inside
of
the
cov-
er;
d.
AC
Power
Supply
The
power
supply
of
the
Model
51053С
con-
tains
a
conventional
half-wave
diode
rectifier
cir-
cuit
with
а
capacitor
input
filter
connected
to
the
output.
А
Zener
diode
is
connected
across
the
output
for
voltage
regulation.
The
input
step-down
transformer
is
installed
in
the
line
cord
circuit
and
isolates
the
instrument
case
from
the
a-c
source,
Тре
ground
pin
of
the
line
cord
is
not
connected
to
the
instrument
case.
Тһе
line
cord
is
detachable
when
portable
operation
with
an
in-
ternal
battery
is
desired.
3.
METER
SCALES
The
meter
is
calibrated
in
two
linear
a-c
voltage
scales,
a
decibel
scale
anda
battery
con-
dition
scale,
It
uses
а
0-50
microampere
taut-
band
movement
with
non-linearity
less
than
19
of
full-scale
deflection.
Damping
is
adjusted
to
eliminate
'overshoot''
for
convenience
in
reading
the
pointer
indication.
The
meter
scales
and
their
applications
are
as
follows:
a.
AC
Voltage
Scales
The
two
linear
scales
(black)
are
used
to
mea-
sure
rms
values
of
a-c
voltages,
The
upper
scale
is
graduated
to
a
full-scale
value
of
1.0
and
the
lower
scale
is
graduated
to
a
full-scale
reading
of
3.2.
АП
a-c
voltages
from
0.
1
millivoltto
300
volts
rms
are
read
directly
from
these
scales
using
the
full
scale
factors
appearing
onthe
range
selector
switch
positions.
b.
Decibel
Scale
The
DECIBEL
scale
(red)
is
used
for
dbm
measurement
when
measuring
power
level
into
а
600
ohm
impedance
or
comparative
db
levels
when
measured
at
the
same
impedance
level.
The
scale

VOLTS
¢
MILLIVOLTS
۾
A
INPUT
ATTENUATOR
PRE-
AMPLIFIER
SECOND
ATTENUATOR
А
OUTPUT
O—]RECTIFIER
OUTPUT
STAGE
OUTPUT
AMPLIFIER
BLOCK
DIAGRAM
is
calibrated
from
-12
to
42
and
readings
are
ob-
tained
by
using
the
algebraic
sumofthe
range
se-
lector
switch
position
and
the
meter
pointer
indi-
cation.
c.
Battery
Condition
Scale
Тһе
LINE
OR
BATTERY
O.K.
scale
(red)
is
the
small
scale
above
and
to
the
rightofthe
upper
a-c
voltage
scale.
The
meter
pointer
indication
within
the
scale
limits
is
а
relative
indication
of
battery
condition
(under
load)
or
of
the
a-c
power
supply
output.
4.
CONTROLS
AND
INPUT
TERMINATIONS
All
controls
and
input
terminations
used
for
measurement
are
located
on
the
front
panel
ofthe
instrument,
a.
Range
Selector
Switch
This
is
а
12-position
switch
used
to
selectthe
proper
voltage
or
decibel
range.
Тһе
correct
Switch
position
is
determined
by
the
level
applied
to
the
input.
b.
OFF-B+
CHK,
-METER-OUTPUT
Function
Switch
(Model
S1051C)
This
switch
permits
a
check
of
the
internal
battery
condition
under
load
in
addition
to
turn-
ing
the
instrument
on
or
off,
The
meter
is
con-
nected
to
the
battery
under
a
simulated
load
when
the
switchis
placedinthe
B+
CHK,
position.
Volt-
age
measurements
may
be
made
in
the
METER
position.
Amplifier
output
is
connected
to
the
front
panel
BNC
connector
in
the
OUTPUT
posi-
tion.
с.
OFF-B+CHK,-METER-OUTPUT
Function
Switch
(Model
S1053C)
This
is
an
8-position
(continuous
rotation)
switch
which
performs
four
functions:
OFF,
Bt
CHK.,
METER
and
OUTPUT
(see
photograph
on
frontispiece
of
this
manual).
The
markings
on
the
knob
(pointer
marks
labeled
LINE
and
BATT)
automatically
indicate
whether
the
internal
bat-
tery
or
the
a-c
line
is
in
use
as
a
power
source.
METER
and
OUTPUT
functions
are
the
same
as
those
described
in
the
preceding
paragraph.
d.
Input
Terminations
The
units
are
equipped
with
two
binding
posts
that
are
mounted
on
a
molded
polystyrene
base
se-
lected
for
its
low
loss
characteristics
at
high
fre-
quencies.
These
'six-way''binding
posts
are
used
to
make
electrical
connections
with
single
and
double
pin
banana
type
plugs,
tipped
plugs,
spade
lugs,
alligator
clips
and
bare
wire.
e.
Output
Termination
The
units
are
equipped
with
a
BNC
coaxialre-
ceptacle
which
is
mounted
on
the
front
panel.
This
receptacle
furnishes
amplifier
output
for
external
applications
when
the
function
selector
switch
is
in
the
OUTPUT
position.
WARNING
The
voltmeters
have
the
GND
terminal
connected
to
the
instrument
case.
Ex-
treme
caution
should
be
exercised
when
connecting
this
terminal
to
off
ground
potentials
(referenced
to
ground
of
the
circuit
being
measured)
to
minimize
shock
hazard
to
operating
personnel.
When
high
d-c
potentials
are
present,
connect
а
large
coupling
capacitor
in
series
with
this
terminal
and
a
l-meg-
ohm
resistor
between
this
terminal
and
referenced
ground
of
the
circuit
being
measured.
f.
Test
Lead
Accessory
(Optional
Accessory)
The
SKN6001A
Meter
Cable
Kit
is
available
as
an
optional
test
lead
accessory.
It
is
а
30"
shielded
cable
terminated
at
one
end
in
a
standard
two-pin
banana
plug.
The
probe
end
of
the
cable
is
terminated
in
two
insulated
alligator
clips.
BEPD-9635-O

gə
230/117
Volt
Adapter
Cable
(Optional
Accessory)
The
Model
SKN6009A
230/117
Volt
Adapter
Cable
is
an
optional
accessory,
and
will
provide
а
117
у
a-c
source
for
the
51053C
Transistorized
AC
Voltmeter
when
it
(the
adapter)is
plugged
in-
to
а
230
v
a-c
line.
Тһе
adapter
cable
consists
of
approximately
six
feetof
3-conductor
cable,
a
small
cylindrical
housing
containing
a
potted
step-
down
transformer
and
a
3-ріп
connector
which
mates
with
the
plug
on
the
a-c
voltmeter
power
cable.
An
a-c
line
plug
is
not
supplied
with
the
cable
due
to
the
lack
of
standardization
of
the
types
used,
When
connecting
an
a-c
line
plug,
connect
the
BLK
and
WHT
leads
to
the
230
volt
line
and
connect
the
GRN
lead
to
ground.
h.
Battery
Installation
and
Aging
The
battery
(60B82292H01
or
Mallory
TR136)
must
be
installed
with
the
positive
end
(+)firstas
indicated
on
the
battery
plug
button.
Uponinstalling
a
new
battery
there
is
approxi-
mately
а
5
hour
period
for
the
battery
to
age
to
its
long
term
voltage
value.
During
this
period
|
of
time
the
voltmeter
error
may
be
increased
by
approximately
+1/2%
of
full
scale.
If
this
error
is
not
tolerable
it
is
suggested
that
the
battery
be
pre-aged.
This
can
be
accomplished
after
instal-
lation
of
à
new
battery
by
placing
the
voltmeter
function
switch
in
the
B+
check
position
for
5
hours.
Т»
Needle
Kick
Kicking
of
the
needle
immediately
after
the
instrument
is
turned
on
is
due
to
charging
and/or
discharging
of
the
electrolytic
capacitors.
The
needle
kick
can
also
be
noticed
especially
when
changing
the
range
switch
between
300
MV
and
1
V
ranges,
and
1
V
and
3
V
ranges.
It
is
suggested
that
the
instrument
be
turned
on
for
at
least
two
minutes
before
using
to
re-
form
the
charge
on
the
electrodes
of
the
electro-
lytic
capacitors.
5.
CIRCUIT
DESCRIPTION
.
Refer
to
the
block
diagram
for
general
infor-
mation
and
to
the
schematic
diagram
for
detailed
wiring
information.
a.
Input
Attenuation
Two
precision
resistor
attenuators
are
used
to
reduce
the
input
level.
The
input
attenuator
(used
only
on
ranges
above
1
volt)
reduces
the
input
level
by
60
db.
A
second
attenuator
at
the
output
of
the
pre-amplifieris
used
to
accomplish
additional
attenuation
in
10
db
steps.
А
three
Section
potentiometer
permits
adjustment
for
minor
loading
variations
or
resistance
changes
of
the
second
attenuator.
b.
Pre-amplifier
The
pre-amplifier
presents
a
high
inputim-
pedance
necessary
to
prevent
circuitloading
and
résultant
erroneous
readings
in
many
applications,
Transistor
Ol
is
connected
in
а
"bootstrap"
con-
figuration.
The
northallylow
input
impedance
of
transistor
amplifiers
is
increased
through
the
use
of
feedback
to
the
high
levelrequired
for
ac-
curate
measurement.
Two
protection
diodes
(СВ1
and
CR2)
are
connected
in
the
base
circuit
of
the
input
transistor
(Ol)
to
protect
the
instru-
ment
from
excessive
input
voltages.
А
maximum
of
550
volts
peak
(sum
of
the
a-c
and
d-c
voltages)
may
be
applied
on
any
VOLT
range
without
da-
mage
to
the
instrument,
Amaximum
of
110
volts
rms
continuous
or
220
volts
rms
for
10
seconds
or
less
can
be
applied
on
any
MILLIVOLT
range
without
damage.
C
Amplifier
The
main
amplifier
consists
of
3
pairs
of
direct-coupled
common
emitter
stages
followed
by
an
emitter
follower
output
stage.
Тһе
nega-
tive
voltage
is
fed
back
from
the
collector
of
the
Second
stage
to
the
emitter
of
the
first
stage
in
each
direct
coupled
pair.
The
input
impedance
of
the
first
pair
(Q3
and
Q4)
presents
a
fixed
load
for
the
second
at-
tenuator.
Theinputimpedance
is
essentially
the
parallel
combination
of
R22
and
R23
because
the
input
impedance
of
Q3
is
raised
to
а
very
high
value
by
the
use
of
negative
feedback.
A
variable
gain
control
(R36)
in
the
emitter
circuit
of
Q5
controls
the
net
gain
of
Q5
and
Q6
for
calibration
purposes.
C28
and
R48
areused
for
high
frequency
compensation,
In
the
METER.
position
of
the
function
selec-
tor
switch,
the
meter
and
the
rectifier
circuit
areconnectedinthe
negative
feedback
loop
(from
the
collector
of
Q8
to
the
emitter
of
Q7).
Also
(with
the
switchinthe
METER
position),
the
rear
section
of
switch
52В
disconnects
d-c
bias
from
the
base
of
Q9
and
the
collector
of
Q8.
When
the
function
selector
switch
is
in
the
OUTPUT
posi-
tion,
R51
and
C29
are
substituted
for
the
meter

rectifier
circuit
in
the
collector
circuit
of
Q8,
and
switch
S2B
applies
bias
to
the
base
of
Q9
by
connecting
it
to
the
collector
of
Q8.
Since
the
function
selector
switch
іп
the
OUT-
PUT
position
disconnects
the
rectifier
meter
circuit,
distortion
due
to
the
rectifier
diodes
is
eliminated.
Thus,
the
amplifier
output
contains
very
little
distortion,
а.
Output
Stage
When
the
collector
of
Q8
is
connected
to
the
base
of
Q9
through
section
S2B
of
the
function
se-
lector
switch,
ап
output
signal
appears
at
the
emitter
of
the
N-P-N
transistor
09.
This
signal
is
coupled
to
the
output
connector
on
the
front
panel
through
C31,
a
100
uuf
capacitor
and
a
shielded
cable.
The
output
impedance
of
the
amp-
lifier
is
approximately
50
ohms,
e.
Meter
Circuit
The
output
of
Q8
is
applied
to
a
full
wave
bridge
rectifier
consisting
of
two
high
frequency
diodes
(СКЗ
and
Ска).
A
0-50
microampere
taut-band
meter
movement
(М1)
is
connected
a-
cross
the
output
of
the
rectifierto
measure
the
re-
sultant
d-c
current.
Signal
current
from
the
meter
circuit
is
fed
back
to
the
amplifier
to
ob-
tain
gain
stability
and
meter
linearity
over
the
entire
bandwidth.
fe
Power
Supply
(S1053C
Only)
The
Model
S1053C
AC
Voltmeter
may
be
powered
from
either
an
internal
battery
or
from
the
rectifier
circuit
which
operates
from
the
a-c
line.
The
rectifier
power
supply
consists
of
transformer
ТІ
and
diode
rectifier
CR5.
Filtering
is
accomplished
by
means
of
the
filter
network
circuit
C32,C33
and
R55.
Zener
diode
CR6
pro-
vides
voltage
regulation.
Transformer
Tl
is
built
into
the
large
cylindrical
plug
РІ
which
is
plugged
into
the
a~c
line;
a
cable
from
РІ
carries
low
voltage
secondary
current
and
is
terminated
at
the
other
end
by
P2
which
plugs
into
J1
on
the
case
of
the
instrument.
6.
OPERATION
a.
Mechanical
Meter
Zero
A
screwdriver
adjustment
is
used
to
mech-
anically
zero
the
meter.
It
is
located
on
the
meter
cover.
If
the
meter
pointer
does
not
rest
directly
in
line
withthe
Oline
of
the
voltage
scales
when
the
power
switch
is
in
the
OFF
position
(instrument
uprighton
feet),
turn
this
adjustment
left
or
right
until
the
pointer
is
directly
in
line
with
the
0
line.
b.
Operation
from
an
AC
Source
(Model
S1053C)
(1)
Connect
the
female
plug
end
of
the
power
cable
to
the
receptacle
at
the
rear
of
the
instru-
ment
case.
(2)
Connect
the
male
plug
end
of
the
power
cable
to
a
117
v
a-c
(50-400
cps)
receptacle.
A
230
v
a-c
power
source
may
be
reduced
to
the
required
117
v
a-c
with
the
Model
SKN60094A
230/
117
VAC
Adapter
Cable
Kit.
(3)
Placethe
LINE
side
ofthe
function
switch
in
the
B+
CHK.
position
and
check
the
power
sup-
ply
output
by
observing
the
reading
on
the
LINE
OR
BATTERY
O.K.
scale.
(4).
Rotate
the
LINE
side
of
the
function
switch
to
the
METER
position
for
voltage
mea-
surements
or
to
the
OUTPUT
position
for
amp-
lifier
applications.
|
МОТЕ
Should
sensitive
measurements
require
complete
isolation
from
r-f
energy
which
may
be
present
on
the
a-c
line,
switch
the
Model
S1053C
to
battery
operation
and
remove
the
power
cable
from
the
instrument
housing.
с.
Operation
From
Internal
Battery
Place
the
function
switch
in
the
B+
СНК,
po-
sition,
A
new
battery
will
give
ameter
indication
near
the
upper
limits
of
the
LINE
OR
BATTERY
О.К,
scale.
After
a
few
hours
of
operation,
the
meter
indication
will
be
approximately
mid-scale.
If
the
meter
indication
just
reaches
or
falls
below
the
lower
limits
of
the
scale,
the
accuracy
of
the
instrument
will
be
affected
and
the
battery
must
be
replaced,
Refer
to
the
MAINTENANCE
para-
graph
of
this
manual
for
detailed
replacement
in-
formation.
d.
AC
Voltage
Measurement
(1)
Place
the
function
switch
in
the
ON
po-
sition.
(2)
A
rapid
check
of
the
condition
of
the
in-
strument
may
be
performed
by
placing
the
range
selector
switch
in
the
1
MILLIVOLT
position.
The
meter
indication
should
be
anywhere
from
0.1
to
fullor
off-scale
deflection
depending
on
the
proximity
of
stray
electric
fields
from
a-c
power
lines.

(3)
Place
the
range
selector
switch
ina
VOLTS
or
MILLIVOLTS
position
corresponding
to
an
expected
meter
indication
in
the
upper
2/3
of
the
meter
scale.
Readings
in
this
portion
of
the
scale
are
most
nearly
accurate
and
ranges
should
be
selected
to
accomplish
this
whenever
possible.
NOTE
When
in
doubt
as
to
expected
voltage
levels,
good
practice
is
to
place
the
range
selector
switchinthe
least
sen-
sitive
(highest
voltage)
range
and
pre-
gressively
increase
the
sensitivity
(switch
to
lower
voltage
ranges)
until
а
reading
in
the
upper
2/3
of
the
scale
is
obtained.
Note
alsothatinthe
METER
position,
the
amplifier
output
is
dis-
abled.
(4)
Connect
the
input
terminals
across
the
voltage
source
to
be
measured.
WARNING
These
voltmeters
have
the
GND
ter-
minal
connected
to
the
instrument
case,
Extreme
caution
should
be
ex-
ercised
when
connecting
this
terminal
to
off
ground
potentials
(referenced
to
ground
of
the
circuit
being
measured)
to
minimize
shock
hazardto
operating
personnel.
When
high
d-c
potentials
are
present,
connect
a
1
megohm
re-
sistor
between
this
terminal
and
re-
ferenced
ground
to
the
circuit
being
measured,
and
bypass
this
resistor
witha
high
voltage
capacitor
ofavalue
of
.22
ufd
or
larger.
e.
Power
Measurements
Power
measurements
in
terms
of
db
or
dbm
are
made
inthe
same
manner
as
a-c
voltage
mea-
TABLE
1
Range
Selector
Meter
Switch
Position
Scale
Indication
Level
300
VOLTS
10
VOLTS
3
MILLIVOLTS
0-3.2
0-1.0
0-3.2
0-1.0
DECIBEL
DECIBEL
DECIBEL
DECIBEL
1
MILLIVOLTS
+50
DECIBELS
+20
DECIBELS
-60
DECIBELS
-40
DECIBELS
surements
exceptthatthe
meter
indication
is
read
fromthe
DECIBEL
scale,
When
making
measure-
ments
in
terms
of
dbm,
the
measurements
must
be
made
across
a
600
ohm
impedance
(0
dbm
-
1
milliwatt
into
600
ohms).
Comparative
power
level
measurements
in
terms
of
db
may
be
made
by
noting
the
difference
in
db
readings
obtained
when
each
measurement
is
made
across
the
same
value
of
impedance.
Тһе
correct
level
іп
db
or
dbm
is
the
algebraic
sum
of
the
meter
indication
on
the
DECIBEL
scale
and
the
range
selector
switch
DECIBEL
position.
f.
Examplesof
AC
Voltage
and
Power
Measure-
ments
Hd
o
The
following
tablelists
a
number
of
meter
indications
andtheir
respective
voltage
and
power
levels.
210
volts
a-c
rms
6.4
volts
a-c
rms
0.0026
volts
a-c
rms
0.00072
volts
a-c
rms
+51
decibels
+15
decibels
-68
decibels
-38
decibels
р.
Amplifier
Operation
(1)
Place
the
function
switch
in
the
METER
position.
(In
the
Model
S1053C
voltmeter,
there
аге
two
markings--LINE
and
ВАТТ--оце
of
which
should
be
turned
to
the
METER
position,
depend-
ing
upon
whether
the
meter
is
powered
from
the
a-c
line
or
from
the
internal
battery.)
(2)
Place
the
range
selector
switch
in
a
VOLTS
or
MILLIVOLTS
position
such
thatthe
ex-
pected
meter
indication
will
register
inthe
upper
2/3
of
the
meter
scale.
The
output
voltage
ofthe
amplifier
will
depend
on
this
setting,
and
will
be
approximately
0.5
volt
(rms)
for
a
full
scale
me-
ter
reading
and
0.25
volt
(rms)
at
half
scale
de-
flection,
Be
sure
to
make
this
voltage
measure-
ment
if
the
input
voltage
is
not
known,
Ап
ехсе5-
sive
overload
input
signal
can
damage
the
instru-
ment.
See
the
overload
protection
limits
in
Table
of
Guaranteed
Performance
Specifications.

(3)
Place
the
function
switchinthe
OUTPUT
position;
this
will
disconnect
the
meter
circuitry
and
provide
an
amplified
output
signal.
Whenthe
function
switch
is
in
the
OUTPUT
position,
bat-
tery
drain
is
increased
by
approximately
40%
(or
1.2
ma).
(Although
the
OUTPUT
position
of
the
function
switch
disconnects
the
rectifier
circuit
to
eliminate
distortion
which
would
be
caused
by
the
rectifier
diodes,
the
meter
may
show
some
deflection
at
higher
frequencies
due
to
capacitive
coupling
of
the
switches,
Тһе
meter
may
deflect
either
above
or
below
zero
if
the
amplifier
is
connected
to
a
noisy
source
or
is
overdriven.)
NOTE
Minimum
loading
to
be
used
with
the
amplifier
must
be
not
less
than
600
ohms
resistive
and/or
not
morethan
200
uuf
capacitive
load.
The
output
cable
may
be
RG-58A/U,
RG-59/U,
or
other
r-f
cable
fitted
with
a
female
RG-59/U
cable
have
a
capacity
of
approximately
24
uuf
per
foot;
avoid
using
long
cable
at
the
out-
put.
(4)
Output
voltage
can
Бе
attenuated
in
10
db
steps
by
turning
the
range
selector
switch
to
the
next
higher
range.
Example:
If
the
input
is
1
mv
and
the
range
selector
switch
is
in
the
1
MILLI-
VOLT
position,
output
will
be
„5
volts
rms,
an
approximate
voltage
gain
of
54
db.
То
attenuate
the
output
10
db,
turn
the
range
selector
switch
to
the
3
MILLIVOLT
setting;
the
output
will
then
be
0.157
volts
rms.
ТЕ
another
10
db
attenuation
is
required,
turnthe
range
selector
switch
to
the
10
MILLIVOLT
position.
The
corresponding
out-
put
voltage
will
be
0.05
volts
rms.
Voltage
gain
for
any
range
switch
posi-
tion
up
to
300
MILLIVOLTS
is
given
by
the
rela-
tion:
Voltage
gain
-
0.5
volts
rms
Full
scale
value
of
range
setting
or:
Voltage
gain
(db)=
BO
log
0.5
volts
rms
Full
scale
value
of
range
setting
The
amplifier
consists
of
3common
col-
lector
(emitter
follower)
stages
and
6
common
emitter
stages..
The
common
collector
(emitter
follower)
stages
will
not
reverse
phase.
The
6
common
emitter
stages
will
each
provide
а
180°
phase
shift
which
results
in
6
x
180?
or
3
x
360?
phase
shift;
hence,
input
and
output
voltages
are
"1
in
the
same
phase,
Theoretically
at
mid
frequen-
cies
there
will
be
no
phase
shift
due
to
reactive
characteristics
of
the
circuit
and
components,
although
such
phase
shift
may
be
present
at
very
high
or
very
low
frequencies.
Тһе
exact
amount
of
such
phase
shift
cannot
be
guaranteed.
h.
Battery
Conservation
Whenthe
instrumentis
operated
by
the
inter-
nal
battery,
it
should
be
turned
off
when
not
in
use
to
prolong
battery
life.
Accuracy
willnot
be
affected
by
using
the
instrument
immediately
after
turning
it
on
asthere
is
essentially
no
''warm-up"
period
required,
If
the
instrument
has
not
been
used
for
extended
periods
(6
weeks
or
longer)
а
five
minute
stabilization
period
is
recommended
before
use.
7.
TEMPERATURE
EFFECTS
As
with
most
precision
measuring
equipment
this
instrument
has
certaintemperature
limitations,
Accurate
readings
are
obtained
in
normal
temper-
atures.
Avoid
operation
and
storage
іп
tempera-
tures
above
50°С
(122?
Е).
Storage
in
tempera-
tures
less
than
-40°C
or
-
409
F
should
also
be
avoid-
ed.
Тһе
following
table
will
provide
an
idea
ofthe
accuracy
of
the
instrument
(except
for
the
300
volt
range)
as
influenced
by
temperature.
TABLE
II
Full
Scale
Temperature
|
Accuracy
Frequency
20°C
to
30°С].
23%
300
kc
to
1
mc
30*C
to
40
20°C
to
-0°
C|
44h,
-54|
20
ера
to
300
kc
|
40°C
to
50°C
|
159,
-6%
300
kc
to
1
mc
8.
APPLICATIONS
Qo
tor
2057
(ue
a.
General
A
complete
understanding
of
instrument
ca-
pabilites
and
effects
on
various
circuits
is
nec-
essary
to
obtain
optimum
accuracy
in
difficult
measurements,
This
instrument
measures
aver-
age
voltage
levels
of
sinusoidal
waveforms
and
the
meter
scale
is
calibrated
in
rms
levels.
The
meter
reading
may
be
in
error
when
the
instru-
ment
is
used
to
measure
other
than
sinusoidal
voltage
waveforms.
Тһе
instrument
will
accept
voltage
peaks
up
totwice
the
rms
value
of
the
in-
put
at
full
scale
deflection
without
waveform
clip-
ping.

BEPD-4997-A
BEPD-4998-A
AC
VOLTMETER
RESPONSE
TO
2ND
HARMONIC
110
ЕЕГ
0
5
0—1
415.
20
25
PERCENTAGE
ОҒ
2ND
HARMONIC
CONTENT
METER
READINGS
MAY
VARY
BETWEEN
UPPER
AND
LOWER
LIMITS
DEPENDING
ON
PHASE
RELATIONSHIP
OF
FUNDAMENTAL
AND
HARMONIC.
NOTE:
RESPONSE
PERCENTAGE
AS
COMPARED
TO
FUNDAMENTAL
FIGURE
1.
The
curves
of
figures
1
and2illustrate
some
of
the
effects
of
the
harmonic
content
of
non-
sinusoidal
waveforms
on
meter
readings.
It
can
be
noted
from
these
curves
that
the
meter
willal-
ways
read
lower
than
the
true
rms
value
when
measuring
waveforms
having
a
second
harmonic
content,
The
meter
may
read
higher
or
lower
than
the
true
rms
value
when
measuring
waveforms
having
а
third
harmonic
content.
b.
Voltmeter
А
brief
outline
of
typical
applications
for the
a-c
voltmeter
is
included
to
show
the
versatility
of
an
instrument
of
this
type.
Unique
uses
for
this
instrument
will
be
found
as
capabilities
become
more
evident.
D
ric
requency
Measurements
Low
level
audio
voltages
generated
in
piezo-electric
and
magnetostrictive
electromech-
anical
devices
(phonograph
cartridges,
tape
re-
cording
and
playback
heads,
and
microphones)
may
be
accurately
measured
on
the
lower
rangesof
the
meter.
Voltage
levels
in
audio
and
ultra-sonic
amplifiers
using
either
electron
tubes
or
tran-
sistors
may
also
be
measured
without
disrupting
the
circuit
under
test.
Output
voltages
from
power
amplifiers,
such
as
P,
A,
loudspeaker
systems,
may
be
mea-
sured
across
low
impedance
speakers
and
high
impedance
distribution
lines
without
any
loss
of
accuracy
of
the
measuring
instrument.
However,
ШЕ
ЕЕЕ
”
UPPER
LIMIT
LAT
5
35
AC
VOLTMETER
RESPONSE
TO
3RD
HARMONIC
ШИТ,
115
110
105
95
RESPONSE
PERCENTAGE
AS
COMPARED
TO
FUNDAMENTAL
0
5
40
15
20
25
ЗО
35
PERCENTAGE
ОҒ
3RD
HARMONIC
CONTENT
NOTE:
METER
READINGS
MAY
VARY
BETWEEN
UPPER
AND
LOWER
LIMITS
DEPENDING
ON
PHASE
RELATIONSHIP
OF
FUNDAMENTAL
AND
HARMONIC.
FIGURE
2.
do
not
exceed
the
maximum
overload
voltages
as
specified
in
the
GUARANT
EED
PERFORMANCE
SPECIFICATIONS
chart
included
in
this
manual.
Hum
levels
of
power
supplies
may
also
be
measured.
When
d-c
voltages
in
excess
of
the
instrument
rating
(550
volts-sum
ofthe
a-c
peak
and
d-c)
are
present,
a
0.1
microfaradcapaci-
tor
should
be
connected
in
series
withthe
INPUT
terminal
and
а
10
megohm
resistor
connected
be-
tween
the
INPUT
and
GND
terminals.
Use
a
ca-
pacitor
with
a
higher
d-c
voltage
ratingthanthat
of
the
power
supply
being
measured.
The
а-с
voltmeter
will
accurately
mea-
sure
voltagelevelsini-fand
r-f
amplifiers,
mix-
ers,
detectors,
oscillators
and
modulators
using
either
electron
tubes
or
transistors.
Measure-
ments
at
these
higher
frequencies
should
be
per-
formed
using
very
short
direct
leads
betweenthe
voltmeter
and
the
circuit
under
test.
This
will
avoid
the
capacitive
shunting
effects
which
are
inherent
in
shielded
cables
and
long
test
leads.

The
input
resistance
and
shunt
capacity
of
the
instrument
must
be
considered
when
mea-
suring
voltages
at
radio
frequencies.
Тре
loading
effect
is
most
predominant
on
high
impedance
tube
circuits
(especially
on
tuned
circuits).
The
influence
is
considerably
less
on
low
impedance
transistor
circuits,
where
the
shunt
capacity
of
the
instrument
is
normally
а
small
part
of
the
tuning
circuit
being
measured.
With
battery
operation,
the
instruments
are
very
useful
as
null
indicators,
sincethey
are
isolated
from
the
a-c
line.
NOTE
To
completely
isolate
the
S1053C
Volt-
meter
from
the
a-c
line
and
eliminate
a-c
pickup,
remove
the
power
cable
plug
from
the
rear
of
the
unit.
WARNING
Place
the
voltmeter
as
far
as
possible
from
high
power
r-f
transmitters
to
avoid
possible
r-f
pick-up
through
the
voltmeter
aluminum
housing.
The
high
sensitivity
and
low
internal
noise
allows
an
accurate
balance
of
the
bridge
circuit
to
be
made.
Due
to
the
wide
frequency
response
of
the
instrument,
it
is
important
that
the
oscillator
supplying
the
bridge
be
completely
free
from
harmonics.
c.
Amplifier
Included
in
applications
of
the
51051С
or
51053С
equipmentas
an
audio
or
radio
frequency
amplifiers
are
the
following:
The
instruments
may
be
used
as
high
gain
pre-amplifiers
for
the
amplification
of
low
level
audio
voltages
generated
in
piezo-electric
and
magnetostrictive
electromechanical
devices
(pho-
,nograph
cartridges,
tape
equipment
heads,
and
microphones).
They
may
be
used
to
amplify
low
signal
level
voltages
generated
by
audio
or
r-f
oscillators
in
order
to
drive
frequency
counters,
They
may
be
used
as
isolation
amplifiers
with
high
input
resistance
and
low
impedance
outputs.
Тһе
input
resistance
is
greater
than
1
megohm
in
the
MILLIVOLT
position
and
greater
than
10
megohms
in
the
VOLTS
position.
9.
CALIBRATION
AND
MAINTENANCE
a.
General
Accuracy
of
the
S1051C
and
51053С
Ттап-
sistorized
AC
Voltmeters
can
be
maintained
by
periodic
calibration
of
the
instruments.
Calibra-
tion
should
be
accomplished
only
by
qualified
per-
sonnel
having
adequate
test
facilities.
If
desir-
ed,
the
Model
51051С
or
S1053C
may
be
returned
to
the
factory
for
calibration;
refer
to
the
Fore-
word
for
detailed
information
on
shipment
of
the
instruments.
The
calibration
procedure
outlined
herein
may
be
used
for
recalibration
of
the
instrument.
However,
if
there
have
been
any
electrical
com-
ponent
changes
made
such
as
replacement
of
diodes,
transistors
ог
range
switch
assembly,
it
is
suggested
that
the
instrument
be
returned
to
the
factory
for
calibration,
Table
III
lists
the
testinstruments
required
for
calibration
and
maintenance
of
transistorized
a-c
voltmeters.
The
voltmeter
chassis
may
be
removed
from
the
case
by
loosening
four
screws
at
the
back
of
the
unit,
In
the
a-c
powered
unit
(Model
S1053C),
first
unplug
the
power
cord
from
the
unit.
b.
Calibration
(1)
Neise
Test
Cover
the
voltmeter
input
terminals
with
а.
shielded
double
banana
plug
across
whichis
con-
nected
à
100K
ohm
resistor.
Set
the
voltmeter
range
selector
switch
tol
MILLIVOLT.
Theme-
ter
indication
should
be
less
than
0.1
on
the
top
(0-1)
meter
scale.
(2)
Needle
Kick
(a)
After
the
voltmeter
has
been
"оп!
for
at
least
two
minutes,
turnthe
range
selector
switch
from
the
1
VOLT
positiononto
the
3
VOLT
position.
Note
the
needle
kick.
It
should
be
less
than
2596
of
full
scale
deflection.
(b)
Return
the
range
selector
switch
to
the
1
VOLT
position
and
note
the
needle
kick.
It
should
be
less
than
25%
of
full
scale
deflection,

TABLE
III
Sensitivity
deflection
Voltmeter
Calibrator
Test
Oscillator
Output
voltage:
nal
oscillator
General
Purpose
Oscillator
(low
output
impedance):
(3)
Input
Resistance
(a)
Connectthe
voltage
calibrator
to
the
input
of
the
voltmeter.
(b)
Set
the
voltage
calibrator
to
100
mv
at
400
cps
and
adjust
the
calibrator
gain
control
for
a
full
scale
reading
on
the
voltmeter
100
MILLIVOLT
range.
(c)
Insert
a
parallel
combination
of
a
1
megohm
(film)
resistor
and
a
30
uuf
capacitor
in
series
withthe
voltmeter
input.
The
new
volt-
meter
reading
should
be
1/2
full
scale
or
more
for
normal
input
resistance
(1
megohm
or
great-
er).
Кеану
Test
(a)
Turn
the
voltmeter
OFF
and
place
it
upright
on
its
feet.
Set
the
meter
indicator
to
zero
with
a
screwdriver.
Turn
the
voltmeter
Hon".
(b)
Connect
the
voltage
calibrator
out-
put
to
the
voltmeter
input
terminals.
Set
the
calibrator
for
1
volt
at
400
cps.
`
Recommended
Instrument
Type
Minimum
Required
Specifications
Instrument
|
DC
Multimeter
Sensitivity:
0.1
volt
minimum
for
full
scale
de-
flection
Accuracy:
+3%
of
full
scale
or
better
1
millivolt
minimum
for
full
scale
AC
Voltmeter
nsitivity:
illi
ini
Impedance:
1
megohm
or
higher
Accuracy:
+3%
of
full
scale
or
better
Accuracy:
+0,
259
or
better
Voltage
Range:
1
mv,3
mv,
10
mv;
100
volts,
300
volts,
rms
li
mv,
3.
тау,
10
тау;
---
3
volte;
into
50
ohms
Monitor
Meter
сс
+0.5%
from
10
cps
to
1
mc
Other
Features:
Provision
for
use
with
exter-
Frequency
Range:
5
cps
to
600
kc
Output:
3
volts
min,
into
50
ohms
Distortion:
0.5%
max,
below
500
kc
..
..
Motorola
DC
Multimeter
or
equivalent
Motorola
Transistorized
AC
Voltmeter
Hewlett-
Packard
Model
738AR
Voltmeter-
Calibrator
or
equivalent
Hewlett-
Packard
Model
739AR
Frequency
Response
Test
Set
or
equivalent
Hewlett-
Packard
Model
200SR
Oscillator
or
equivalent
(c)
Loosenthelocknut
on
the
GAIN
con-
trol
and
adjust
the
control
for
full
scale
indication
(1.0
volt)
with
the
range
selector
switch
in
the
l
VOLT
position.
Ifthis
adjustment
cannot
be
made,
a
malfunction
exists
in
the
voltmeter
circuits,
Do
not
continue
with
the
test
procedure
until
the
trouble
has
beencorrected.
Refertothe
Trouble-
shooting
paragraphinthis
manual
for
instructions.
(d)
Adjust
the
calibrator
and
check
the
voltmeter
readings
for
inputs
of
1.0
v,
0.8
v,
0.6
у,
0:4
у
and
0.2.
v.
(e)
Place
the
voltmeter
range
selector
Switch
in
the
3
VOLT
position.
Adjust
the
cal-
ibrator
and
check
the
readings
for
inputs
of
3.0
v,
Воо
Юте
0v,
апа
0.5
у.
(5)
400
CPS
Calibration
(а)
Place
the
voltmeter
in
the
normal
position
and
reset
the
zero,
ifnecessary,
while
the
voltmeter
is
OFF.
(b)
Place
the
range'
‘selector
switch
in
the
1
MILLIVOLT
position.
338
3/AH
232ИАНО
-30A8
ZIHT
ИО
T3iH?
30221
33e

10
CHANGES
HAVE
BEEN
MADE
CAUTION
ON
THIS
PAGE.
SEE
ISSUE
SHEFTX
2
N
Chassis
Adjustments
Detail
Chassis
Adjustments
Detail
AEPD-9815-0(CE2286-W21)
AEPD-9819-O(CE2286-
X21)
BE.
"ини

(c)
Connect
the
voltage
calibrator
out-
put
to
the
voltmeter
input
with
low-loss,
shield-
ed
cable
(RG-58/U,
RG-59/U
or
equivalent)
less
than
three
feet
in
length.
(d)
.
Set
the
calibrator
output
of
0.001
volt
at
400
cps.
(e)
Adjust
the
voltmeter
GAIN
control
for
a
meter
reading
of
1.0
on
the
top
scale.
(f)
Secure
thelocknut
on
the
GAIN
con-
trols
(g)
Check
the
meter
reading
to
be
sure
it
still
indicates
1.0
on
the
top
scale.
If
not,
loosen
the
locknut
and
repeat
steps
(d),
(e)
and
(f).
NOTE
This
is
à
basic
adjustment
upon
which
all
others
depend.
It
must
be
correct.
(h)
Set
the
voltage
calibrator
and
volt-
meter
range
selector
switch
accordingto
Table
IV.
Adjust
the
corresponding
control
for
full-
scale
indication.
These
steps
must
be
followed
in
order,
namely,
100
mv
first,
then
10
mv,
then
3
mv.
TABLE
IV
Voltmeter
Voltage
Calibrator
Setting
Adjust
for
Range
Full-Scale
Position
Indication
100
MILLIVOLTS
|100
MV
Control
B
|
0.01
Volt
10
MILLIVOLTS
10
MV
Control
0.003
Volt
3
MILLIVOLTS
3
MV
Control
(i)
Repeat
step
(h)
once
or
twice
until
no
further
adjustments
are
necessary.
0.1
Volt
(j
Turn
the
voltmeter
range
selector
switch
to
1
VOLT,
(к)
Set
the
voltage
calibrator
to
1.0
volt.
(1)
Adjust
the
1
V,
400cps
control
(R3)
for
full
scale
indication.
This
completes
the
400
cps
calibration.
(m)
The
accuracy
of
all
other
voltage
ranges
may
be
checked
in
à
similar
manner
by
using
the
voltage
calibrator.
(n)
Disconnect
the
voltage
calibrator
from
the
voltmeter.
(6)
1.0
MC
Adjustment
(а)
Set
the
controls
on
the
frequency
response
generator
(FRG)
and
the
associated
signal
generator
for
an
output
of
approximately
0.001
volt
at
400
cps.
(b)
Turn
the
voltmeter
range
selector
to
1
MILLIVOLT.
(c)
Connect
the
special
output
cable
of
the
FRG
to
the
voltmeter
input
terminals.
(d)
Adjust
the
AMPLITUDE
control
of
the
signal
generator
until
the
voltmeter
indicates
0.9
on
the
top
scale.
(e)
Use
the
FRG
METER
SET
control
to
adjust
the
FRG
meter
indicator
to
one
of
the
calibrating
marks.
(f)
Setthe
FRG
to
1
mc
(this
will
cause
the
FRG
meter
indicator
to
shift).
Reset
the
me-
ter
indicator,
with
the
amplitude
control,
to
the
same
calibrating
mark
used
in
step
(e).
(е)
Turn
the
voltmeter
Н.
F,
TRIMMER
(C28)
for
а
meter
indication
of
0.9
on
the
top
scale.
(h)
Set
the
signal
generator
to
300
kc
and
adjust
the
signal
generator
AMPLITUDE
control
for
the
same
calibrating
mark
used
in
step
(е).
Note
the
voltmeter
reading.
(i)
If
the
voltmeter
reading
of
step
(h)
is
higherthanthe
reading
taken
at
1
mc
(by
more
than
1/2
9),
turn
the
trimmer
potentiometer
(R48)
counterclockwise
about
20?,
(j
Repeat
steps
(f)
and
(g).
(k)
Repeat
Step
(h).
If
the
voltmeter
reading
is
still
higher
than
the
1
mc
reading
(by
more
than
1/296),
repeat
step
(i)
and
then
steps
(f)
and
(g)
until
the
300
kc
reading
is
within
1/296
of
the
1
mc
reading.
NOTE
If
the
voltmeter
reading
is
low
at
300
kc
in
step
(1),
turnthetrimmer
poten-
tiometer
clockwise,
thén
proceed
to
steps
(f),
(g)
(h),
and
(k).
11

SIA
R16
R15
JU1
-63
C2
C1
RANGE
SWITCH
ASSEMBLY
(FRONT)
CR6
C32
C33
R55
CR5
73
J4
C26
СІЗ
POWER
SUPPLY
BOARD
12
C9
+
SIB
RANGE
SWITCH
ASSEMBLY
(REAR)
C19.
CIS
C20
RIO
OG
ӨБ
Cl
(040
соз
MAIN
CIRCUIT
BOARD
Component
Location
Details
CRI
C6
CR2
C4
AEPD-9818-O(CE2286-
Z21)
А
Та
ТТ
сон
ич
pu
ma30
/.
ASSA
AEPD-9816-O(CE2286-
Y21)
This manual suits for next models
1
Table of contents
Other Motorola Measuring Instrument manuals

Motorola
Motorola R-20010 User manual
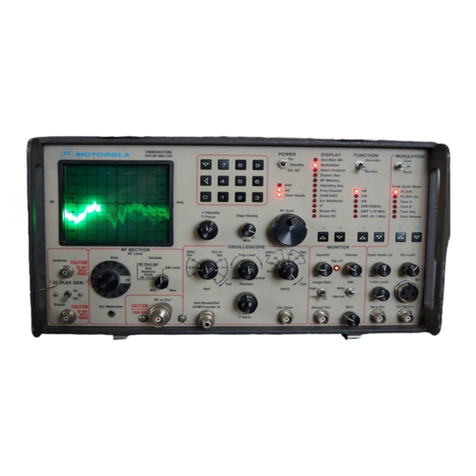
Motorola
Motorola R2008C User manual

Motorola
Motorola R-2550 Owner's manual

Motorola
Motorola R-2001A User manual

Motorola
Motorola R2010D User manual

Motorola
Motorola R-20018 User manual

Motorola
Motorola SCOUT2300/2 User manual

Motorola
Motorola R-2001D User manual

Motorola
Motorola R-2002A User manual
Motorola
Motorola R-2200 User manual