Mpio FY 500 User manual
FY500
User’s Manual

목 차
목 차
23
Thank you for purchasing MPIO FY500. FY500 is a digital audio player that enables users
to play back music conveniently and utilize it for various purposes. To use this product
properly, make sure to read through this manually before using it.
http://www.mpio.co.kr
For more information on the MPIO products, visit our web site on the Internet. You can find
many answers to the customer’s various enquiries, or upgrade the product performance
through firmware upgrade (system software) that operates this product.
Copyright
- MPIO holds patent, trademark, and other intellectual property right about this User’s Manual.
Imitating all or part of software of this product, and duplication, reproduction, or interpretation
without a prior consent with MPIO is prohibited. Making the electronic media version and the
mechanical abridgement of the contents are also prohibited.
Trademark
- Microsoft, Windows, Windows Explorer, and Windows logo are the trademark or registered
trademark of Microsoft Corporation.
- Intel and Pentium are the registered trademark of Intel Corporation.
- Macintosh and Macintosh are the registered trademark of Apple Computer, Inc.
- Products and products described in this manual are the trademark or registered trademark
of the corresponding company or organization, and ™ or
R
mark not always displayed
explicitly.
Disclaimer
- Manufacturer and sales office do not bear any responsibility over the accidental damage
that accompanies the injury to the user, which is caused by improper usage of this product.
The contents of this manual are based on the product status at the time of sales and can
be changed without a prior notice for continuous performance improvement and additional
function supplementation in the future.

45
Table of Contents
Table of Contents
Table of Contents
1. Introduction
1.
Usage Precautions
①
Usage environment and product safety
②
User’s safety
③
Safe data storage
2.
Product features
3.
Product composition
4.
Name of components and button usage
①
Name of components
②
How to use a stick
5.
Composition of the LCD information
6
7
7
8
9
10
11
11
2. Before You Use
1. Installing the operating software
2. Connecting FY500 to the computer
3. Installing an USB driver manually
4. Saving music and data file
5. Unplugging FY500 from the PC
12
15
16
18
20
3. Learning Basic Usage
1. Inserting a battery
2. Turning the player on/off
3. Listening to music
①
Music playback
②
Navigation
4. Recording a voice
5. Switching a mode
(Playback mode ↔FM Radio mode)
22
22
23
24
25
26
6. Listening to FM Radio
①
Changing the channel
②
Saving the channel
③
Selecting the saved channel
7. FM recording
8. Using the menu
①
Using the menu
②
Example
27
27
28
29
30
31
4. Using Advanced Functions
1. Playback mode
①
Summary of button usage
②
Changing the EQ setting value
③
Setting User EQ menu
④
Setting Live 3D Effect menu
⑤
Setting Repeat menu
⑥
Sector repeat (A↔B)
⑦
Adjusting the sound quality of voice
recording
⑦-1 Setting Quality menu
⑦-2 Setting Record Gain menu
⑦-3 Setting VOR menu
⑦-4 Setting AGC menu
⑧ Setting Speed Control menu
⑨ Deleting a File(s)
2. FM Radio Mode
① Summary of button usage
② Setting FM Band menu
③ Setting Seek Step menu
33
34
35
37
38
39
40
41
41
41
43
44
45
46
47
48
④
Setting Auto Preset menu
⑤
Setting FM Sound menu
3. Menu
①
Menu structure
②
Setting Display menu
②-1 Setting Visualization menu
②-2 Setting Menu Language menu
②-3 Setting File Info menu
②-4 Setting Playing Time menu
②-5 Setting Scroll Speed menu
②-6 Setting Backlight Time menu
②-7 Setting Contrast menu
②-8 Setting Lyrics menu
③
Setting System menu
③-1 Setting Resume menu
③-2 Setting Fade in menu
③-3 Checking Information
③-4 Setting Sleep menu
③-5 Setting Auto Power Off menu
③-6 Setting Initial Setting menu
48
49
50
51
52
52
53
54
55
55
56
57
58
59
59
60
61
5. Formatting FY500 & Firmware Upgrade
1. Windows PC
①
Formatting
②
Saving the initial setting value
③
Upgrading the firmware
2. Upgrading the firmware in Macintosh PC
63
66
67
69
6. Miscellaneous
1. Product specification
2. Minimum PC specification requirement
3. FAQ
70
71
72
67
1. Introduction
1. Introduction
1. Introduction
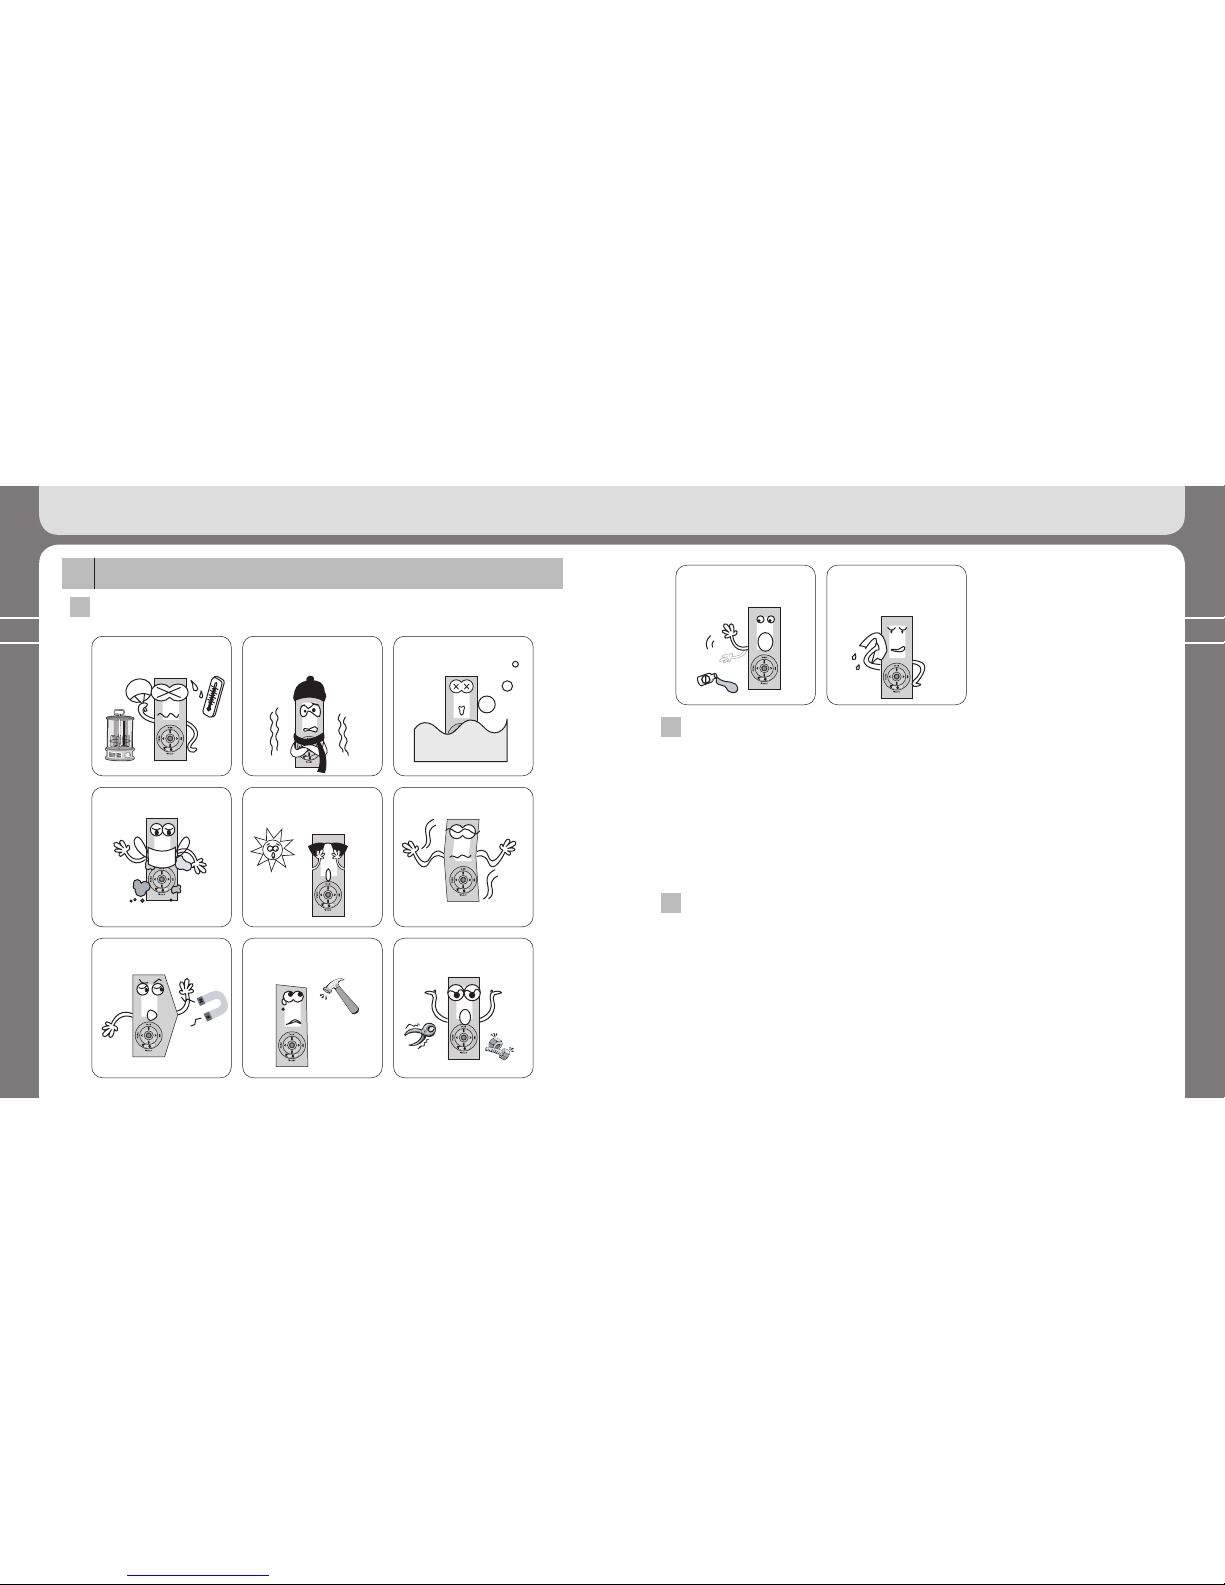
Usage Precautions1
1
Usage environment and product safety
Refrain from using or storing the product at the places listed below.
Place with high temperature
like a heater or heat
generator.
Outdoor in the winter time or place
with low temperature below zero
(Product operational temperature:
0℃ ~40℃)
Place with humidity or
possibility of flooding.
Dusty area Inside a car or under the
direct sunlight
Place with much vibration
Close to the strong magnetic
materials
Be careful not to apply
strong shock.
Do not disassemble, repair,
or modify at your own
discretion.
Be careful not to insert the foreign
object inside the product. (e.g.,
clip, paper, water, beverage, and
so on.)
If the product surface is covered
with the foreign object, clean it
with soft cloth or towel. Do not
use the chemical solution.
2
User’s safety
① Traffic safety
- Please refrain from using this product in wearing a headset or earphone while riding on the bicycle,
motorcycle, or car. There is a risk of a car accident. Additionally, it may violate the regional laws and
regulations.
- Reduce the headset or earphone volume when listening to music or FM while you’re walking.
There is a risk of an accident.
② Protecting your hearing capability
- Please refrain from listening to music for a long time. Medical care expertise point out the risk of
impairing your hearing capability if you use the portable audio device for a long time.
3
Safe data storage
① MPIO bears no responsibility over data loss or damage that occurs during data transmission between
the product and the computer.
② Make sure to back the important data saved in the product. Data stored in the product can
be lost due to product breakdown, malfunction, or other reasons. (External shock or power
failure). In this case, MPIO bears no responsibility. Please keep in mind this.
③ Hold the plug tightly when inserting/disconnecting the USB socket terminal to/from the PC.
④ Do not apply shock or shake the product while the product is connected to the PC.
⑤ You should back up the data saved in the product before requesting the after service. MPIO will
consider that the customers have backed up their data before sending it to MPIO for after service.
MPIO will not back up your data upon receiving the after service request. Additionally, MPIO will bear
no responsibility over data loss during the service.

89
Product features
2
※ Digital audio player with a simple design that everybody can use with ease.
① Supports USB 2.0 high-speed data transmission.
Data can be transferred and used faster and more conveniently using USB 2.0 interface.
② Supports USB mass storage
MP3 player can be used as a moveable disc. You can save and use the data conveniently at any time and
place.
③ Supports playback of multiple formats and DRM-applied file
Supports playback of MP3, WMA, and ASF format music file, as well as the WMA file purchased online that is
applied with DRM (Digital Rights Management).
④ FM radio function
Besides simple listening to the FM radio, channel saving and automatic preset functions are also provided.
⑤ Supports voice recording and FM recording
Voice and FM can be recorded.
⑥ Supports 7 EQ types and Live 3D Effect
Supported equalizer types include Normal, Pop, Rock, Jazz, Classic, Vocal, and user-defined EQ mode that
allows for your preferred equalizer setting. Additionally, Live 3D Effect provides various sound effects such as
Pure Studio, Concert, Groove, and Dynamic Bass.
⑦ 16 hour-long continuous playback time
Low power consumption design technology ensures 16 hour long continuous playback with a single alkaline
battery (AAA).
⑧ Provides Real Player
License Real Player program is bundled with this product, which enables to author MP3 file and use the music
library.
Product composition 3
차 차 차
Main unit Earphone USB cable Utility CD
Product warranty
Neck string
Arm band Case
(AAA) Battery
!
Actual production composition can be different from the images
shown below, and can be changed without a prior notice.
Please make enquiry about purchasing accessories to MPIO
Service Center.
1. Introduction
1. Introduction
Quick guide
Basic components
Additional components
(Additional components can differ depending on the sales area.)
Other manuals for FY 500
1
Table of contents
Other Mpio MP3 Player manuals


