Mpio FY 500 User manual
FY500
User’s Manual

Introduction of
2 3
Thank you for purchasing MPIO FY500. FY500 is a digital audio player that enables users
to play back music conveniently and utilize it for various purposes. To use this product
properly, make sure to read through this manually before using it.
http://www.mpio.com
For more information on the MPIO products, visit our web site on the Internet. You can find
many answers to the customer’s various enquiries, or upgrade the product performance
through firmware upgrade (system software) that operates this product.
Copyright
- MPIO holds patent, trademark, and other intellectual property right about this User’s Manual.
Imitating all or part of software of this product, and duplication, reproduction, or interpretation
without a prior consent with MPIO is prohibited. Making the electronic media version and the
mechanical abridgement of the contents are also prohibited.
Trademark
- Microsoft, Windows, Windows Explorer, and Windows logo are the trademark or registered
trademark of Microsoft Corporation.
- Intel and Pentium are the registered trademark of Intel Corporation.
- Macintosh and Macintosh are the registered trademark of Apple Computer, Inc.
- Products and products described in this manual are the trademark or registered trademark
of the corresponding company or organization, and ™ or
R
mark not always displayed
explicitly.
Disclaimer
- Manufacturer and sales office do not bear any responsibility over the accidental damage
that accompanies the injury to the user, which is caused by improper usage of this product.
The contents of this manual are based on the product status at the time of sales and can
be changed without a prior notice for continuous performance improvement and additional
function supplementation in the future.
Getting Started
The following information is for protecting the user’s safety and any property damages.
Please read the following information and use the product accordingly.
Safety Precautions
4 5
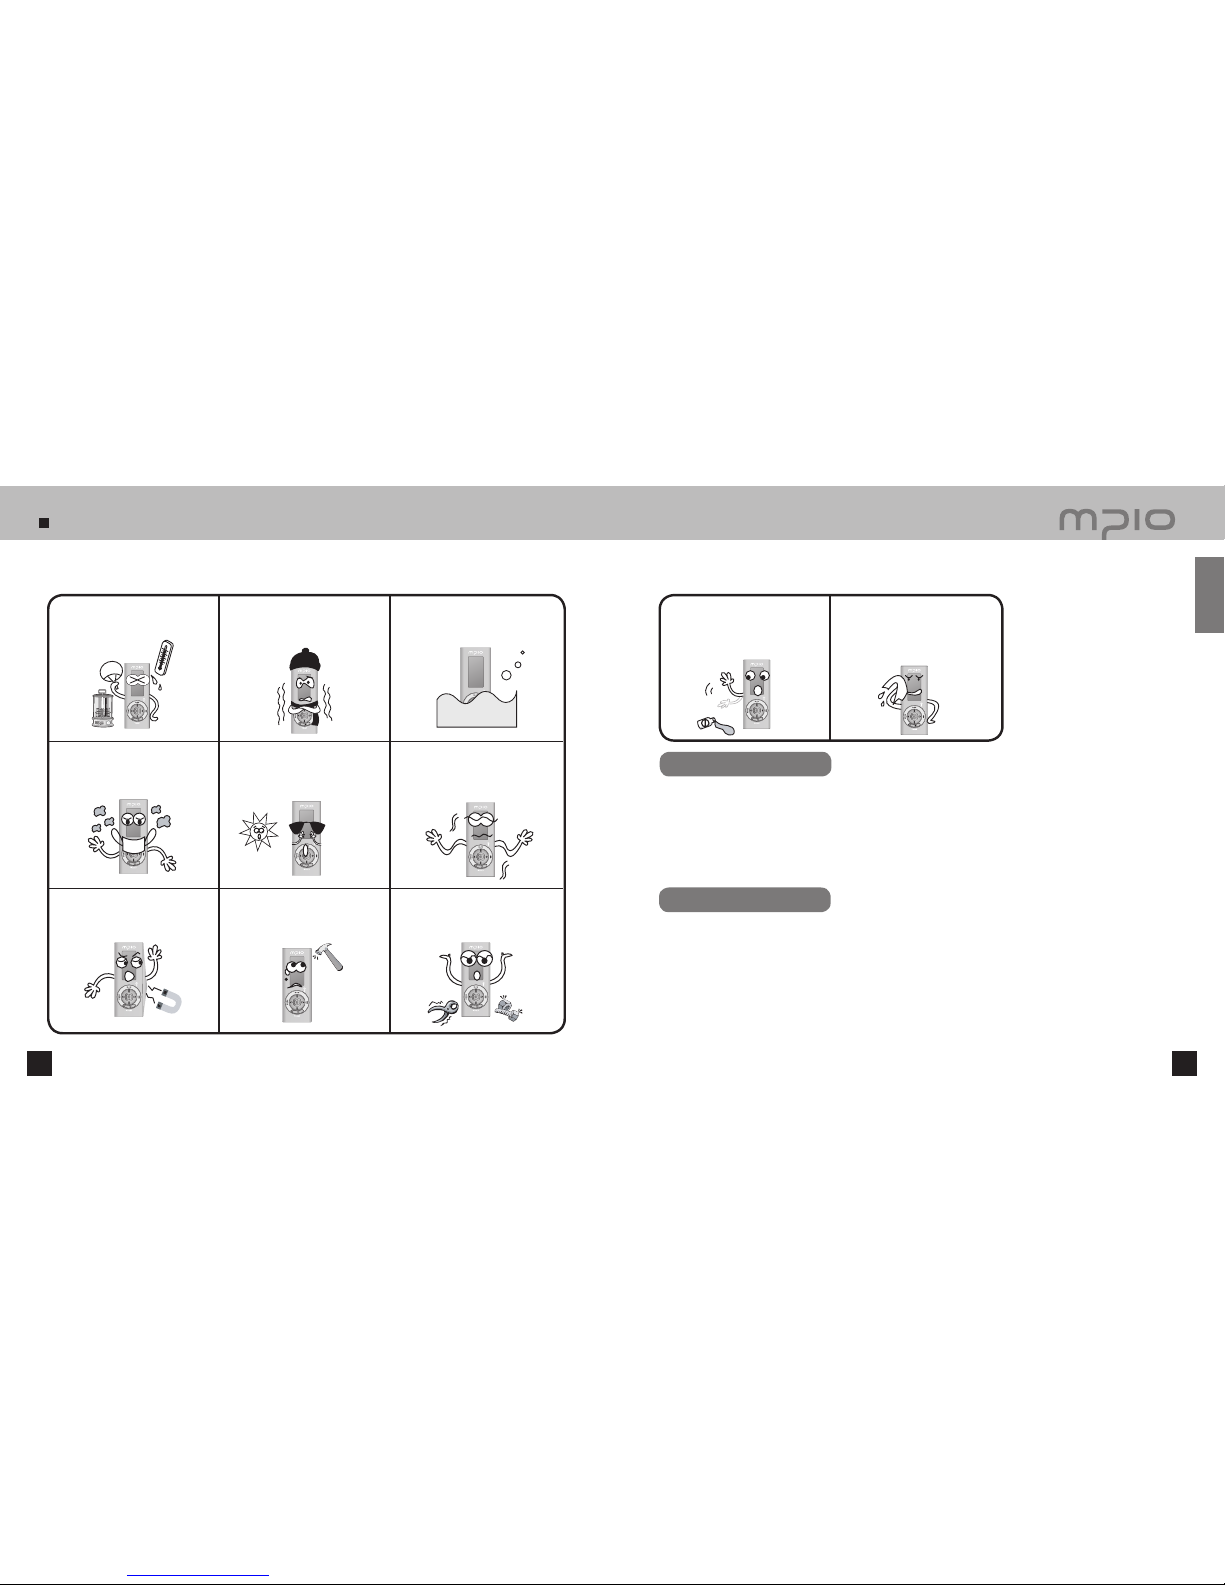
Do not use in high temperature
(near heating device or heat
generators).
Do not use in minus zero temperatures
or outdoors during winter (operating
temperature 0˚C~40˚C).
Do not use in high humidity or places
of dropping in water.
Do not use in places with high
amount of dust.
Do not use in direct sunlight or
inside a car.
Do not use in places with high
vibration.
Do not use near highly magnetic
devices.
Be Careful of strong impact. Do not dismantle, repair, or modify
the product.
Be careful of foreign substances
entering the product interior.
E.g.) Paper clips, paper, water,
drinks, etc.
When removing foreign substances
from the product surface, always
use a soft cloth or a towel. Do not
use chemical solvents.
User Safety
① Traffic safety
- Do not listen to music using headphones or earphones when riding a bicycle, motorcycle, or driving a
vehicle. It is dangerous and it may be against the law in some regions.
- Reduce the headset or earphone volume when listening to music or FM while you’re walking.
There is a risk of an accident.
② Hearing Protection
- Do not use headphones or earphones for a long period of time. Professionals suggest that long use of
all portable audio devices may have a possibility of causing hearing loss.
①MPIO Co., Ltd. will not be responsible for data loss or damages occurred while transferring data between the
product and a PC.
②When storing important data, please make a back-up copy. The data may be damaged due to
malfunction or other elements such as outer impact or lack of battery. Please note that in case of data
loss, MPIO Co., Ltd. will not be responsible for the lost data.
③When inserting/removing the USB plug into a computer, please do so by holding the plug.
④When the product is connected to a computer, please do not cause impact or shake the connector.
⑤You should back up the data saved in the product before requesting the after service. MPIO will consider that
the customers have backed up their data before sending it to MPIO for after service. MPIO will not back up
your data upon receiving the after service request. Additionally, MPIO will bear no responsibility over data loss
during the service.
Data Storage
Getting Started

Table of Contents
6 7
Getting Started
■ Safety Precautions ...................................................4
■ Product Features ......................................................8
■ Components .............................................................9
■ Name of the Parts ....................................................10
Connection
■ Connecting to a PC .................................................12
System Requirement ................................................12
Installing the Software ..............................................13
Connecting to a PC with a USB Cable .....................16
■ Installing USB Driver Manually .................................17
■ Using Removable Disk Function ..............................19
Using Removable Disk .............................................20
Basic Usage
■ Listening to Music ...................................................21
■ Adjusting Volume / Using Hold Switch .....................22
■ Switching Mode ........................................................23
■ Voice Recording .......................................................24
■ Using Navigation Mode ...........................................25
■ Setting My List ..........................................................26
■ Deleting File .............................................................27
■ Finding Music / Voice Recording Files .....................28
Additional Usage
■ Setting Repeat .........................................................32
■ Setting Menu ............................................................33
■ Setting Audio ............................................................34
Changing the EQ Setting .........................................34
Setting User EQ .......................................................35
Setting 3D Sound Effect ...........................................36
Changing Play Order ................................................37
■ Setting FM Radio .....................................................38
Saving Channel in Menu ..........................................38
Setting FM Frequency Bandwidth ............................39
Setting FM Sound ....................................................40
Setting Auto Channel Save ......................................41
Setting Seek Steps ...................................................42
■ Setting Recording .....................................................43
Setting the Quality of Voice Recording .....................43
Setting the Quality of FM Recording ........................44
Customer Support
■ Menu Structure ........................................................61
■ Formatting ................................................................62
■ Storing Default Saving .............................................65
■ Upgrading Firmware .................................................66
Upgrading Firmware in Macintosh ...........................68
■ Troubleshooting ........................................................69
■ Product Specifications ..............................................71
■ Setting Screen Display .............................................45
Select Visualization ..................................................45
Setting Language .....................................................46
Setting Track Information Indicator ..........................47
Setting Playing Time Indicator ..................................48
Setting Scroll Speed .................................................49
Setting Lighting Time ................................................50
Setting Contrast .......................................................51
Setting Lyrics ............................................................52
■ Setting System .........................................................53
Setting Auto Playback ..............................................53
Setting Memorized Playback ....................................54
Setting Fade In .........................................................55
Confirming Device Information .................................56
Setting Sleep Timer ..................................................57
Setting Auto Power Off Time ....................................58
Initializing to Default .................................................59
Setting Playback Speed ...........................................60
■ Listening to FM Radio ..............................................29
Searching Radio Frequency Manually (Scan Mode)
....29
Searching Radio Frequency Automatically (Scan Mode)
...29
Setting Save Channel ..............................................29
Changing Radio Frequency Saved ..........................30
Listening to Saved Channels (Channel Mode) .........30
■ Recording FM Radio ................................................31
Getting Started

Product Features
8 9
Components
Player Earphones USB Cable
Installation Driver CD
Quick guide
Arm Band
차 차 차
차 차 차
차 차 차
Neck String
차 차 차
Product Warranty
차 차 차
Case
차 차 차
차 차 차
Supports USB 2.0 high-speed data transmission.
Data can be transferred and used faster and more conveniently using USB 2.0 interface.
Supports USB mass storage
MP3 player can be used as a removable disc. You can save and use the data conveniently at any time
and place.
Supports playback of multiple formats and DRM-applied file
Supports playback of MP3, WMA and ASF format music file, as well as the WMA file purchased online
that is applied with DRM (Digital Rights Management).
FM radio function
Besides simple listening to the FM radio, channel saving and automatic preset functions are also
provided.
Supports voice recording and FM recording
Voice and FM can be recorded.
Supports 7 EQ types and Live 3D Effect
Supported equalizer types include Normal, Pop, Rock, Jazz, Classic, Vocal, and user-defined EQ mode
that allows for your preferred equalizer setting. Additionally, Live 3D Effect provides various sound effects
such as Pure Studio, Concert, Groove, and Dynamic Bass.
14 hour-long continuous playback time
Low power consumption design technology ensures 14 hour long continuous playback with a single
alkaline battery (AAA).
Provides Real Player
License Real Player program is bundled with this product, which enables to author MP3 file and use the
music library.
※ Digital audio player with a simple design that everybody can use with ease.
Basic components
Additional components
(Additional components can differ depending on the sales area.)
(AAA) Battery
차 차 차
Note
●
Actual player may vary slightly from images shown, and subject to change without notice.
●
Broken accessories may be purchased separately at MPIO Service Center.
Getting Started

MY SONG
WESTLIFE - MY LOVE
00:00:30
Name of the Parts
10 11
Battery Indicator
USB Connector
Earphone Jack
LCD Screen
Record Button
Function Button
Hold Switch
Power / Play / Pause Button
Menu, Navigation Setting / Changing Track /
Rewind & Fast Forward / Volume Control Lever
Battery Cover
Neck String Hole
Inserting a Battery
1. Push the battery cover to the arrow direction to open it.
2. Insert the battery with proper polarity +, –
and close the battery cover. (1 AAA battery)
Display of music
information
Playback timer
Sleep Indicator
Hold
Current Track /
Total Tracks
EQ Indicator
3D Sound Indicator Repeat Indicator
Folder Name
Visualization
Note
●
Do not apply excessive force to the cover.
It can break down.
Using the Lever
Pressing the Lever: Press the lever down or press and hold it.
Pushing Up : Push the lever or push and hold it up.
Pushing Down: Push the lever or push and hold it down.
Pushing to Left: Push the lever or push and hold it to left.
Pushing to Right: Push the lever or push and hold it to right.
Functioning by pushing the lever up, down, left, right direction and pressing it.
LCD Screen
Getting Started

Connecting to a PC
12 13
Click
IBM PC
System: USB Interface 2.0, Standard device and a CD-ROM Drive equipped
CPU: Pentium 133MHz or faster
Memory: 64MB or more
Hard disk space: 20MB or more
Supported Operating Systems: Windows 98 / 98SE / ME / 2000 / XP
Macintosh
System: USB Interface 2.0, Standard device and a CD-ROM Drive equipped
EX) Power Mac G3 (Blue & White) / G4 / G4 Cube, iMac / iBook, PowerBook, PowerBook G4
Memory: 64MB or more
Hard disk space: 20MB or more
Supported Operating Systems: Mac OS version 9.2 or later
System Requirement
Caution
●
Connection using USB Hubs or extension cables is not guaranteed.
Note
●
In Windows 98 / 98SE, the program must be installed to use FY500 as a removable disk. Please install
the USB drivers before use.
●
In Windows ME, 2000, XP, FY500 may be used as a Removable Disk without any separate programs.
FY500 is accessible though the Windows Explorer.
●
To format, or upgrade the firmware of FY500 in Windows 98, 98SE, ME, 2000 or XP, please install the
MPIO Utility.
Installing the Software
How to install windows 98 device driver, MPIO utility and other utility.
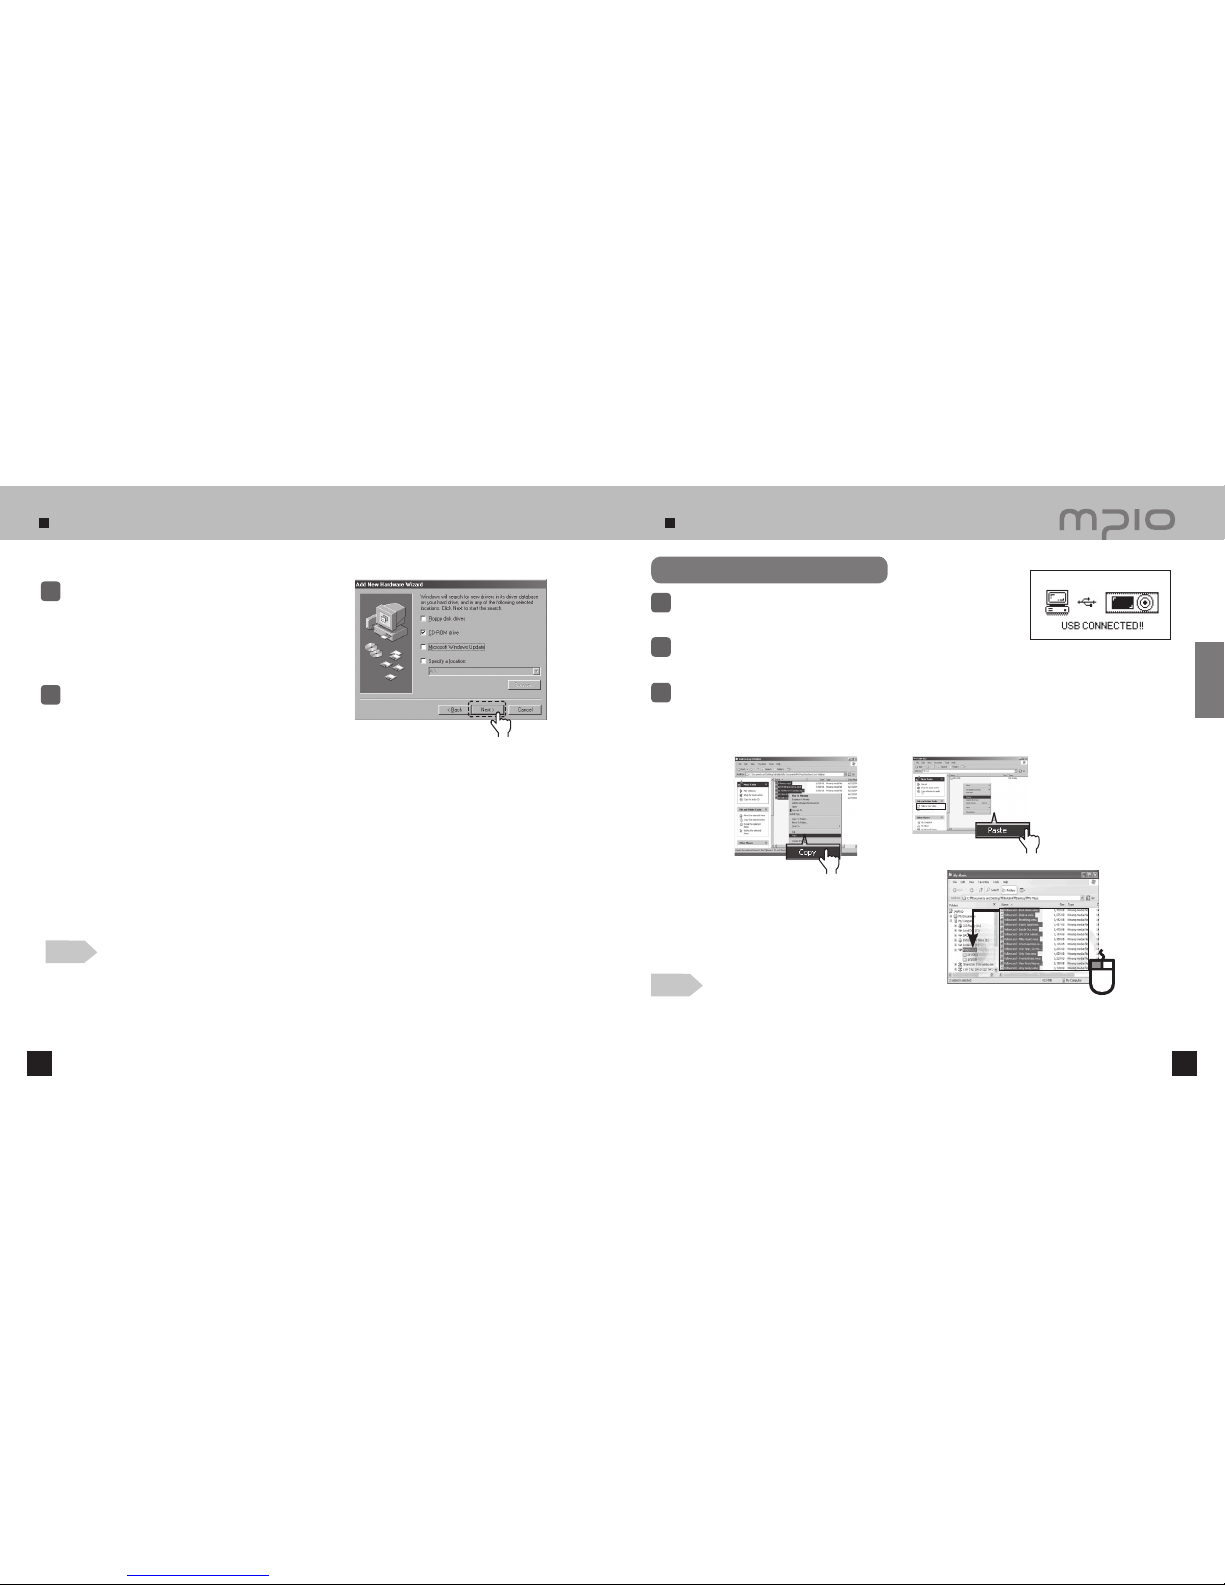
Insert the Installation CD into the CD-ROM Drive.
The installation will auto-start and the installation will
begin as shown in right. If the installation doesn’t
auto-start, double-click the CD-ROM icon in Windows
Explorer.
1
Click the [Next] button.
2
Connection

Connecting to a PC
14 15
Click
Click
Click
Click
After selecting [FY500], click the [Next] button.
3
Click the [Next] button.
All the utility programs will be installed.
The user can select the programs needed to install.
But, the following items must be installed.
- Windows 98 Device Driver
(For Windows 98/98SE user’s only)
- MPIO Utility
- Windows Media Player Plug-in
4
Click the [Install] button to install the selected
utilities in order.
5
Click the [Finish] button to finish the installation.
Check the MPIO Utility icon on the desktop to
confirm installation.
6
Connection

Connecting to a PC
16 17
Installing USB Driver Manually
Please refer to the below only if the device is not plugged with Windows 98/98E.
Click
Connecting to a PC with a USB Cable
Connect with a USB Cable
Connect FY500 to the PC with the USB cable as shown image.
●
If the USB cable is disconnected from the PC during the initial USB driver installation or in middle of a command,
it may malfunction.
1
The USB Driver will be installed with a message indicting “Looking for a New Device” The installation screen
may not appear. Check the Device Manager to confirm the installation.
2
Note
●
If the system operating under Windows 98/98SE don’t connect with FY500 automatically, install the USB
Driver manually by referring to “Installing USB Driver Manually”.
●
Windows 98/ME:
[Control Panel] → [Systems] → [Device Manager] →
[Hard Disk Controllers]→ MPIO FY500 USB Device
●
Windows 2000/XP:
[Control Panel] → [Systems] →[Hardware]→[Device Manager]
→[Disk Drives]→ MPIO FY500 USB Device
Confirming USB Installation
Connect FY500 with a computer with the USB
cable. When “Add New Hardware Wizard” window
appears on the screen as shown in right, click the
[Next] button.
1
Check “Search for the driver for your device”,
click the [Next] button.
2
Click
Connection
Installing USB Driver Manually
18 19
Using Removable Disk Function
● If the USB cable is disconnected while a file is being uploaded or downloaded, the device may malfunction.
● The music file display order in Windows Explorer when you select a removable disc can be different from the
actual playback order.
● If you rename music files like 001***, 002***… in Windows Explorer, you can play them back by the order
of number in the file name.
The USB connection screen when
the power is ON/OFF.
Copy & Paste: Select the data to store, click on right mouse button. Select “Copy” and then “Paste” in the
Removable Disk drive.
Click
Click
Insert the CD included in the package into the
CD-ROM, check “CD-ROM DRIVE” and click the
[Next] button.
3
When the driver installation is completed, an
“Installation complete” window will appear on the
screen. Then, click the [Finish] button.
4
Note
●
In Windows 98 / 98SE, the program must be installed to use FY500 as a removable disk. Please install the
USB drivers before use.
Go to the following destination to confirm that the
installation was completed successfully.
●
Windows 98/ME:
[ Control Panel ] → [ Systems ] → [ Device Manager ] →
[ Hard Disk Controllers ]→ MPIO FY500 USB Device
Uploading / Downloading File
Connect FY500 with a USB cable with the power turned OFF.
●
If connected, a connection icon will appear in the LCD screen.
1
Run Windows Explorer on the PC
●
A Removable Disk Drive Icon will be created in Windows Explorer.
2
The user can store, delete data and create a folder in the same way as a hard drive. Copy & Paste,
Drag & Drop commands can be used in the same way to store data.
3
Drag & Drop: Select the data store, click and hold down
the left mouse button to drag the files into the Removable
Disk drive, and then release the left mouse button.
Caution
Click
Connection
Using Removable Disk
20 21
Listening to Music
●
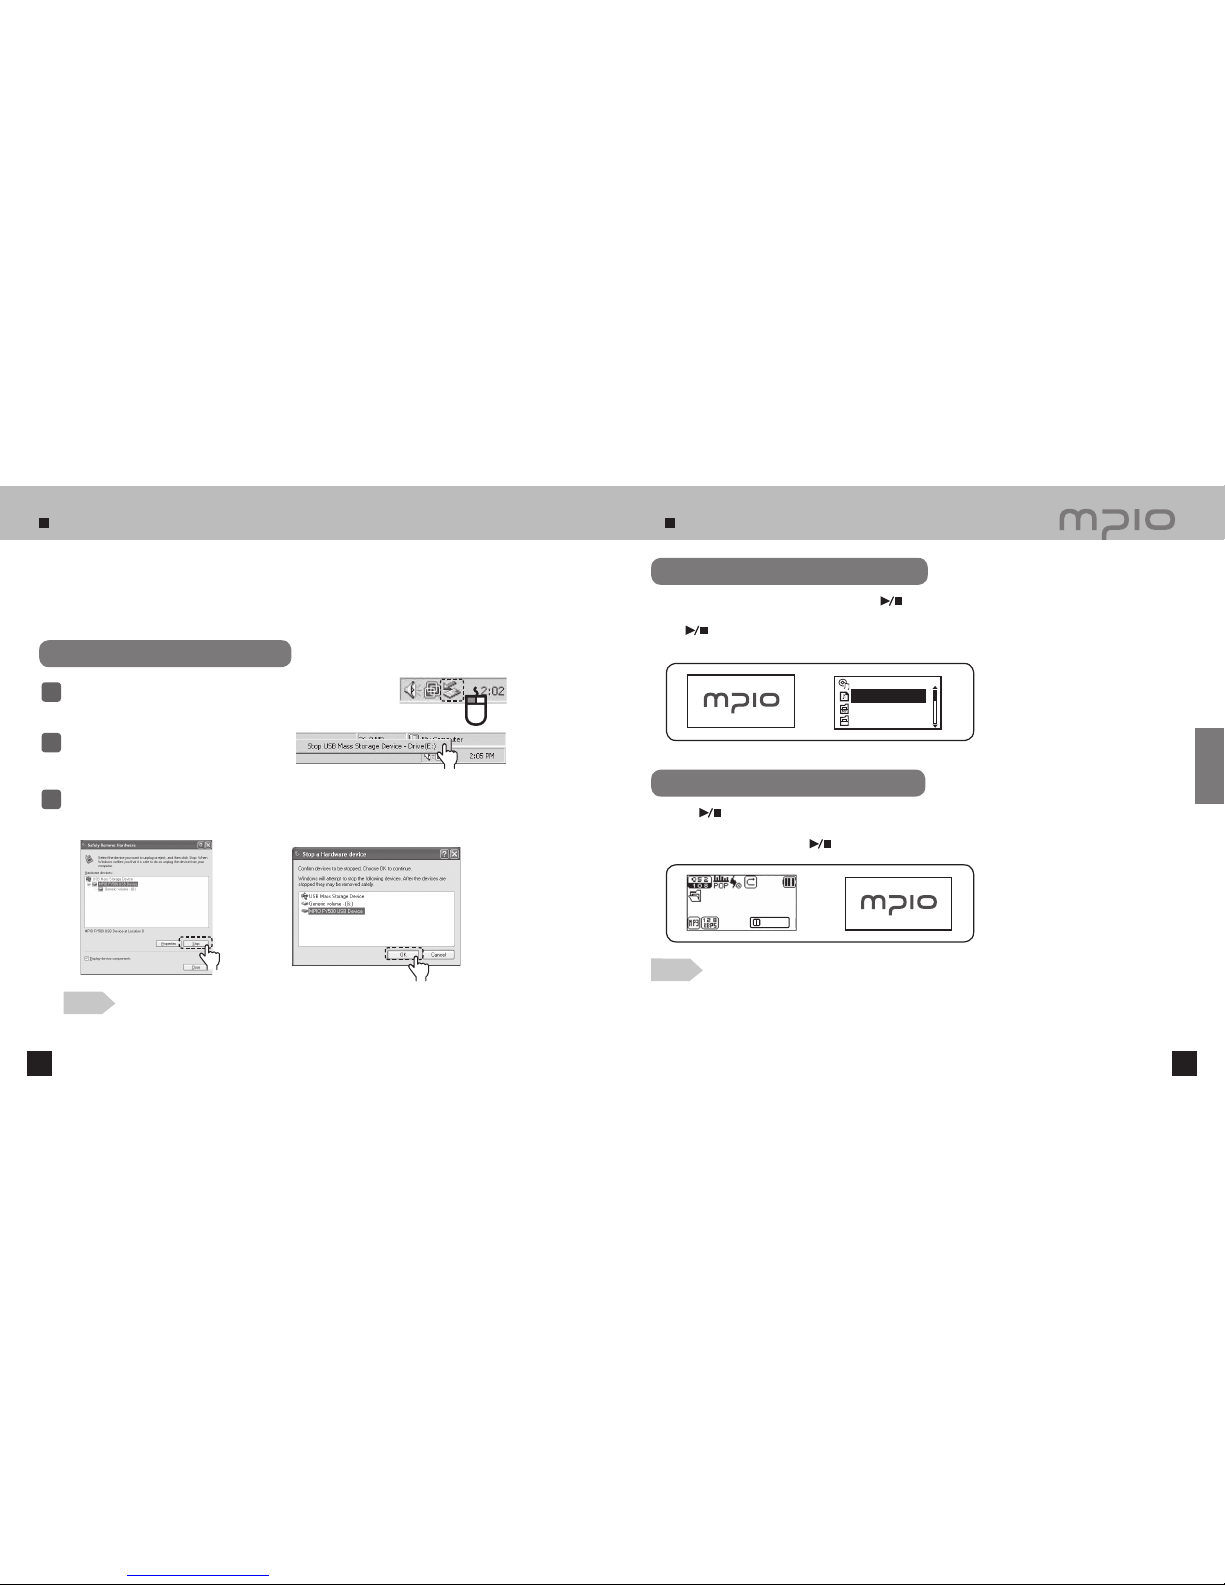
In Windows 2000, disconnect the USB cable by clicking the [OK] button after the “Safely Remove Hardware”
message appears.
In Windows XP, disconnect the USB cable after the “Safely Remove Hardware” message appears.
It is recommended that you follow these directions for separating the device from the PC safely. If these instructions
are not followed, it may result in data damage or product malfunction.
● Windows 98/98SE Users
- There is no Safely Remove Hardware command in Windows 98/98SE.
The user must wait until the file/data transfer is complete, and then disconnect the USB Cable.
Click
Click
To Play Music(Turning Power ON)
Navigation screen will appear by pressing longer button after turning the player on
with a logo screen. Select file you wish to playback.
Press button to play music.
For more details of ‘how to move folders or files, see ‘Using Navigation Mode’ in page 25.
To Stop (Turning Power OFF)
Pressing button pauses during playback and it is automatically turned-off if there is no
any further operation for 3 minutes.(In case default setting)
It is automatically turned off if the button is pressed longer during playback as well.
ROOT
MY SONG
WESTLIFE-MY LOVE
PAUSE
WESTLIFE
MY LIST
RECORD
POWER OFF
Disconnecting the USB Cable
Place mouse cursor on “Stop a Hardware Device” icon in
the system tray, and click right mouse button.
1
Select “Stop USB Mass Storage Device”.
Select USB Mass Storage Device from the list of hardware, and click the [Stop] button.
When the “Stop a Hardware Device” window appears, select MPIO FY500 USB Device.
Then, click the [OK] button and disconnect the USB Cable.
2
3
Note
Note
●
Auto power off time can be changed by setting.(See page 58). You can set in Menu.
Click
Usage
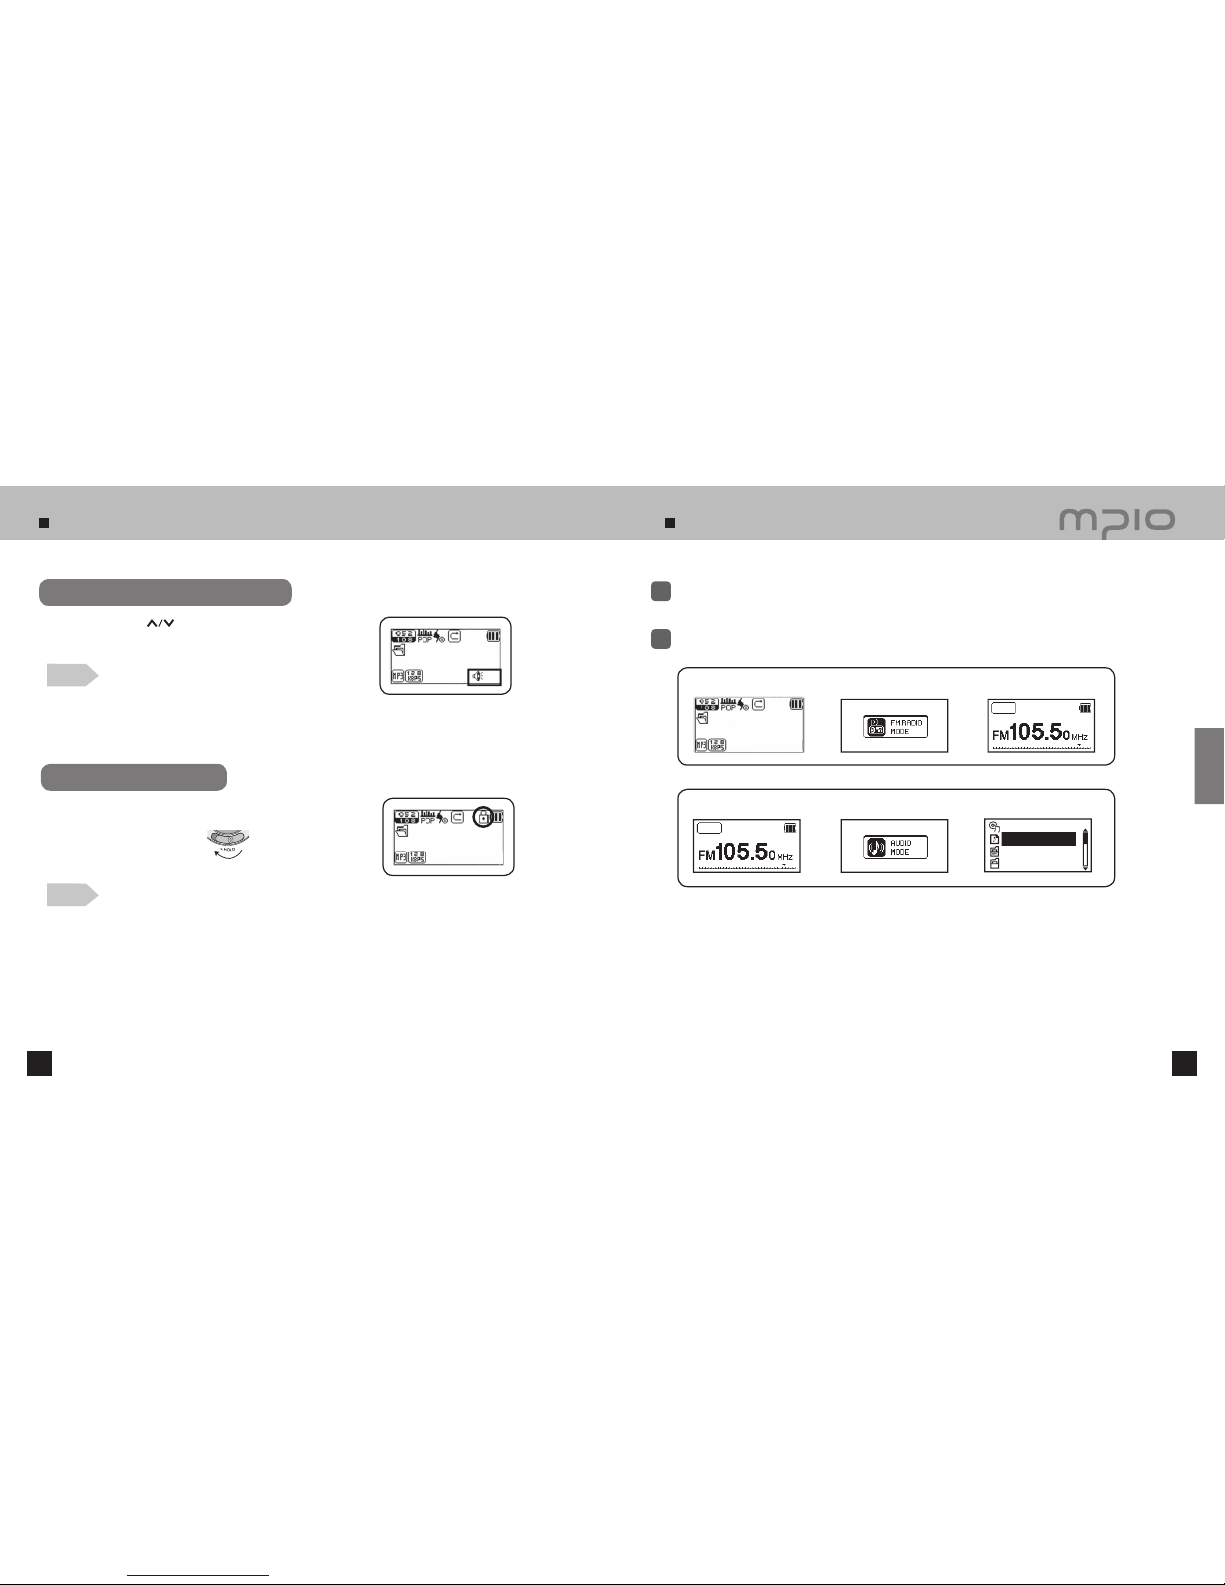
Use the Hold function so that other buttons do not work during
playback.
To use the Hold function, push the switch in the direction of
the arrow.
Adjusting Volume / Using Hold Switch
22 23
Switching Mode
Press and hold the FUNC button during playback or in pause.
1
Pushing FUNC button can change either music playback or FM radio mode.
2
MY SONG
WESTLIFE-MY LOVE
00:00:30
MY SONG
WESTLIFE-MY LOVE
15
MY SONG
WESTLIFE-MY LOVE
00:00:30
Scan STEREO
Scan STEREO
The screen changed from playback mode to FM radio mode.
The screen changed from FM radio mode to playback mode.
To Adjust the Volume
Push the lever toward direction during playback or
pause to adjust the volume.
Note
●
The volume can be adjusted from 00 to 40.
●
To adjust the volume gradually, push the lever and to adjust
the volume fast, push and hold the lever.
Hold Function
Note
●
If the Hold function is activated, other buttons will not work. And an icon shown in right will
appear on the LCD screen.
●
To deactivated the Hold function, push the switch in opposite the direction of the arrow.
Usage
ROOT
WESTLIFE
MY LIST
RECORD

Voice Recording
24 25
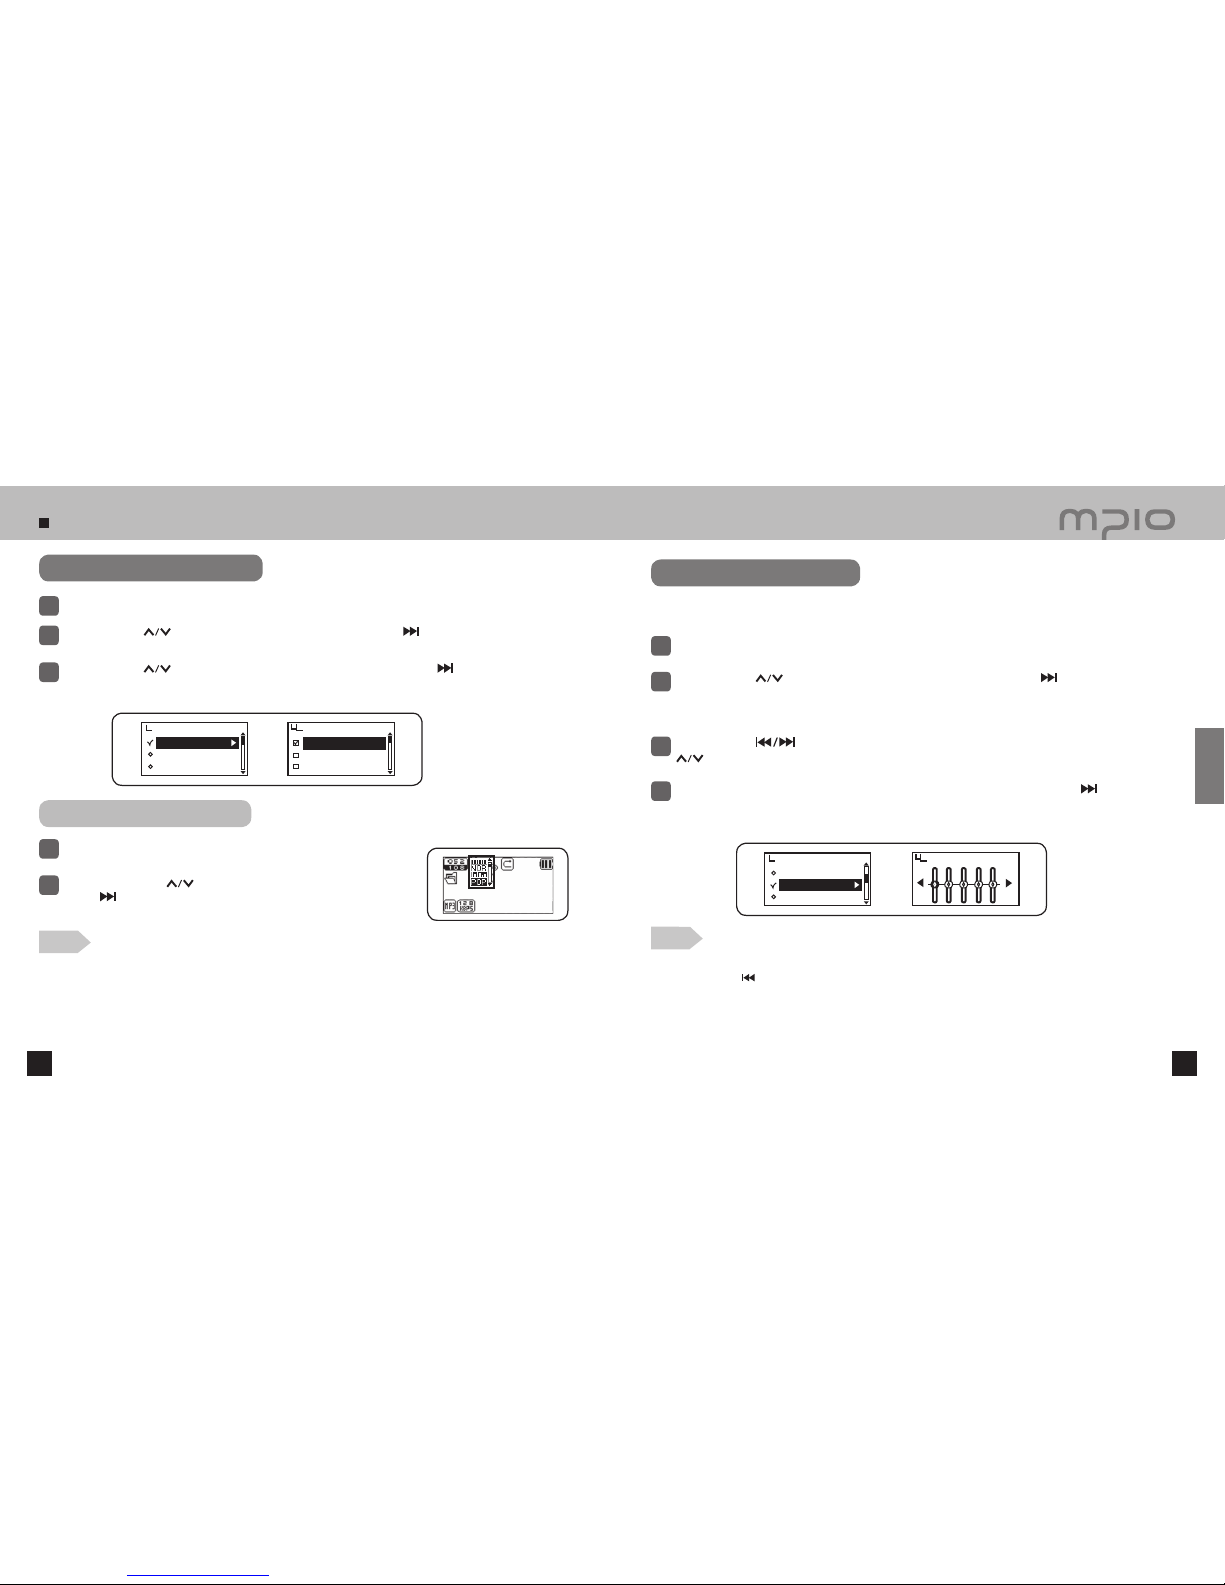
Using Navigation Mode
Voice recording starts if REC button is pressed during pause.
●
Voice Recording does not work while music is playing.
1
Press the button to pause the recording. Press the button again to
resume the recording.
2
Press the REC button to stop voice recording after saving the recorded file.
3
●
Push the lever toward direction to exit the Navigation Mode.
Press the FUNC button and move the lever toward direction to select Play Now and playback file
by moving the lever toward direction or pressing it down. Press button to playback as well.
●
Pressing the button or lever down without selecting pop-up menu or push the lever toward
direction can playback the file you selected.
3
RECORD
VOICE001. WAV
00:05:40
00:58:00
RECORD
VOICE001. WAV
00:05:45
00:54:00
RECORD
VOICE001. WAV
MY SONG
WESTLIFE-MY LOVE
00:00:30
WESTLIFE-MY LO
MUSIC002.mp3
MUSIC003.mp3
MY SONG
Play Now
Add to List
Delete
Note
●
The files will be stored in order of VOICE001, VOICE002, etc. And it will be stored in the RECORD folder
as a WAV file.
●
When storing the voice recording files, recording wills stop automatically if there aren’t sufficient memory
space.
●
Pressing the REC button in FM Mode will record the radio. Be sure to use voice recording in MP3 Mode.
●
The voice recording memory is limited to 64MB for each. In case the volume of any voice recording is more
than 64MB, the file being recorded is automatically saved and it continues recording by creating a new file.
To operate this, it needs around 2 seconds and during that period(2seconds), voice recording stops.
Uses navigation function for more convenient to search folders or files you wish.
Press the lever during playback or in pause to enter Navigation Mode.
●
A file list will appear on the LCD screen.
1
Select the file or folder to play.
●
Entering a folder: After selecting the folder, press or push the lever in direction.
●
Leaving a folder: Push the lever in direction.
2
Note
Usage

Push the lever in directions to select Add to List, and press the lever to add the selected items to My List.
●
The icon of the selected file will be changed to ( → ).
● Check the file set in MY LIST folder in navigation mode.
Setting My List
26 27
Press the FUNC button after moving to the file you want in navigation mode.
●
A pop up menu will appear.
1
2
Press FUNC button after moving to the file you want to delete in navigation mode.
●
A pop up menu will appear.
1
Push the lever toward direction to select Delete and then, push the lever toward direction or
press the lever down toward vertical direction.
2
● Release navigation mode to cancel delete.
● If there is a music file in MY LIST, it is deleted as well in case the music file is deleted in navigation mode.
●
If a music file in MY LIST is deleted, the music file is not deleted in navigation mode.
The file selected is deleted.
4
WESTLIFE-MY LO
MUSIC002.mp3
MUSIC003.mp3
MY SONG
Play Now
Add to List
Delete
WESTLIFE-MY LO
MUSIC002.mp3
MUSIC003.mp3
MY SONG
Play Now
Add to List
Delete
WESTLIFE-MY LO
MUSIC002.mp3
MUSIC003.mp3
MY SONG
Play Now
Add to List
Delete
Deleting
WESTLIFE-MY LO
MY LIST
WESTLIFE-MY LO
MY LIST
Play Now
Off the List
Delete
The display released in MY LIST.
WESTLIFE-MY LO
MUSIC002.mp3
MUSIC003.mp3
MY SONG
Play Now
Off the List
Delete
The display released in
navigation mode.
WESTLIFE-MY LO
MY LIST
Play Now
Off the List
Delete
The delete screen in MY LIST mode
The delete screen in navigation mode
Deleting File
WESTLIFE-MY LO
MUSIC002.mp3
MUSIC003.mp3
MY SONG
Play Now
Add to List
Delete
DELETE THE FILE
ARE YOU SURE?
NO
YES
Push the lever toward direction to select YES in DELETE THE FILE ARE YOU SURE? window
and then, push the lever toward direction or press down toward vertical direction to execute deleting.
●
Select NO to cancel delete.
3
Setting My List
To deselect the files from My List, use the Navigation Mode to select the file to remove.
Then, press the FUNC button and select Off the List.
4
Enter My List in Navigation Mode and play the selected files.
3
Note
Usage

Finding Music / Voice Recording Files
28 29
Listening to FM Radio
Press and hold the FUNC button to switch to FM Mode. (Refer to “Switching Mode” on page 23)
Searching Radio Frequency Manually (Scan Mode)
● Push the lever toward direction to move to the
frequency being received.
Setting Save Channel
When the lever is pressed while listening to FM Radio, Save Channel screen will appear.
● Frequency seek steps can be changed in [FM Radio]/[Seek Step] Menu settings.
1
2
Push the lever in direction to select channel number. Push the lever in direction
or press it to save the frequency.
● FM radio mode is not entered with low battery.
● Up to 20 channels are savable.
● The channels saved are verified in [FM Radio] → [Save Channel] in menu.
●
Save Channel is also available in FM radio menu.(see page 38)
● FM channel can not be deleted but the new frequency can be saved in the channel that had been
saved previous frequency.
A function for saving the selected frequency
Searching Radio Frequency Automatically (Scan Mode)
● Push and hold the lever toward direction
automatically to search for the frequency being
received.
Scan STEREO
Scan STEREO
CH01 : 105.50
CH02 :
CH03 :
Fast Forward / Rewinding During Playback
● Push the lever in directions during playback to Fast forward / rewind the music.
Release the lever to resume playback.
Finding Files During Playback
● Push the lever in direction during playback to play the next track.
● After starting playing back, push the lever in
direction to go back to the last track in the first 10 seconds
and push the lever in
direction after 10 seconds to restart the current track from the beginning.
Finding Files When Playback is Stopped
●
Push the lever in directions to move to next / previous track when playback is stopped.
Note
●
The MP2 or MP1 format files with extensions changed to MP3 may not played by FY500.
●
When playing VBR files, pushing the lever in direction within the first 10 seconds may
not play the previous track.
Note
Note
Usage

Listening to FM Radio
30 31
Recording FM Radio
Records the selected FM Radio broadcast
Press the REC button to start FM radio recording while listening to FM radio.
1
Changing Radio Frequency Saved
Press the lever to select the number of saved channel after the save channel screen appears and
then, push the lever toward direction.
1
Push the lever toward direction in OVERWRITE? window to select
‘YES’ and then, push the lever toward direction or press down toward
vertical direction to execute overwrite function.
2
Scan STEREO
CH01 : 105.50
CH02 :
CH03 :
OVERWRITE?
NO
YES
Channel 02/15
CH02
STEREO
Scan 02/15
NO
CHANNEL!!
RECORD
FM001. WAV
00:05:40
00:58:00
RECORD
FM001. WAV
00:05:45
00:54:00
RECORD
FM001. WAV
Listening to Saved Channels (Channel Mode)
Press the FUNC button to select CHANNEL MODE.
1
2
Push the lever in directions to move between the saved
frequencies (channels).
Press the FUNC button to change the reception mode (SCAN↔ CHANNEL).
3
The saved channel is selected.
Note
●
If there aren’t any saved frequencies (channels), NO CHANNEL!!
message will appear on the screen and the device will remain in
SCAN mode.
●
For more detailed information about the FM Menu, refer to pages
38~42.
Press the button to pause the recording. Press the button again to
resume the recording.
2
Press the REC button to stop FM recording after saving the recorded file.
3
Note
●
The files will be stored in order of FM001, FM002, etc. And it will be stored in the RECORD folder as a WAV
file.
●
When storing the voice recording files, recording wills stop automatically if there aren’t sufficient memory space.
●
The voice recording memory is limited to 64MB for each. In case the volume of any voice recording is more than
64MB, the file being recorded is automatically saved and it continues recording by creating a new file. To operate
this, it needs around 2 seconds and during that period(2seconds), voice recording stops.
Usage

Setting Repeat
32 33
Setting Menu
Press the REC button in the start position of the music/voice file to repeat during playback.
appears on LCD window and
icon is blinking.
●
Press the REC button again to release repeat.
●
Pause is usable during Sector Repeat.
WESTLIFE-MY LOVE
00:00:30
WESTLIFE-MY LOVE
00:01:30
Main Menu
Audio
FM Radio
Recording
EQ
User EQ
Live 3D Effect
EQ
Normal
Pop
Rock
Audio
Repeat Section Start Position
Repeat Section End Position
Press the REC button again at the desired end position.
mark will appear in the LCD screen.
The selected section will be repeated.
Note
How to Use the Menu
Press and hold the lever to enter the menu.
Selecting Menu: Push the lever in directions to move the highlight.
Entering Menu: Push the lever in direction or press the lever to enter the menu.
Changing Settings: Push the lever in directions to change the setting.
Saving Changed Settings: Push the lever in direction or press the lever to save the setting.
Going Back in Menu Tree: Push the lever in direction.
Canceling Menu Changes: Push the lever toward direction to release from Menu without saving the
value selected.
Audio: How to set the effect of music file.
FM Radio: Setting the options of FM Radio Mode
Recording: Setting the options for voice recording mode
Display: Setting the options for the screen
System: Adjusting system settings
Usage
EQ
User EQ
Live 3D Effect
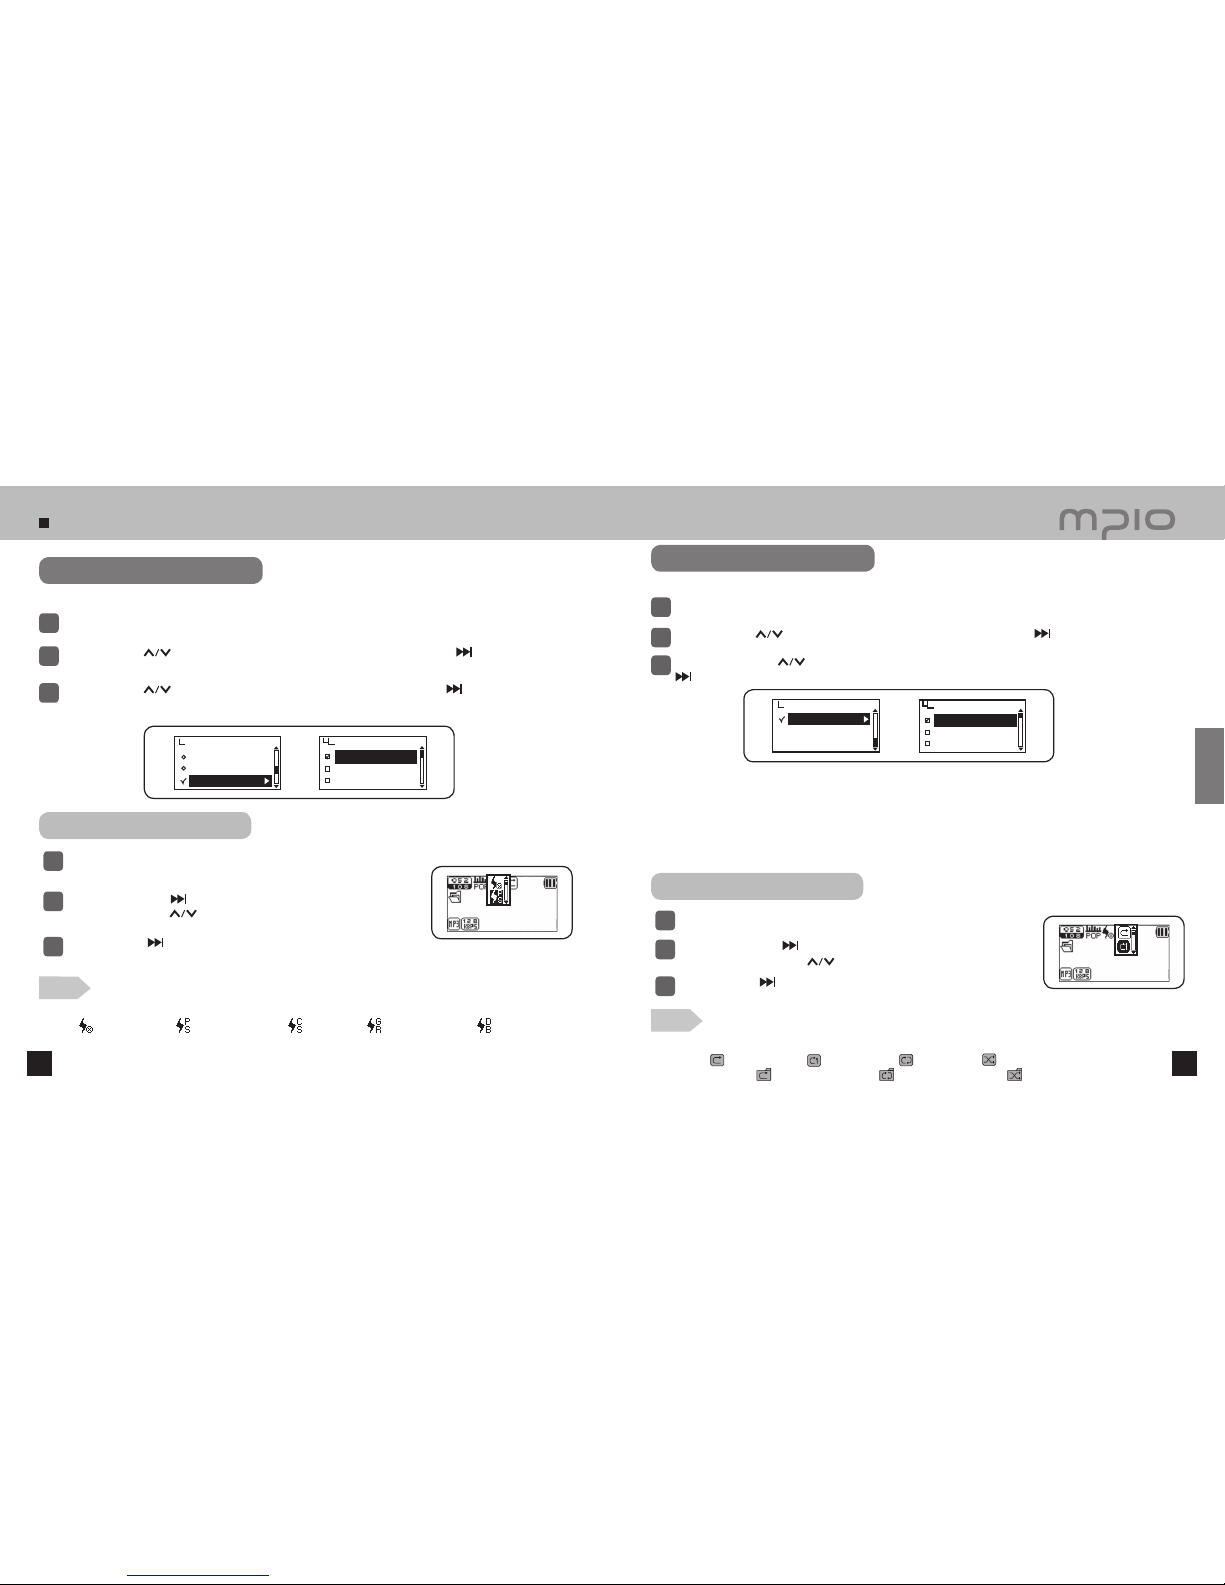
Setting Audio
34 35
Select Audio in the menu.
1
Using FUNC Button
Press the FUNC button during playback.
1
You can define your own EQ effect by adjusting the setting values in each frequency range,
instead of the pre-defined EQ setting values.
Select Audio in the menu.
1
Push the lever in directions to select User EQ and then, push the lever in direction or press
it to enter.
●
User EQ setting will appear in the LCD screen.
2
Push the lever in directions to change the frequency band and then, push the lever in
directions to adjust the frequency band settings.
3
It moves to the previous menu after saving the setting value if the lever is pushed toward direction
or press the lever down toward vertical direction to move to OK after completing setting the bandwidth
of each frequency.
4
Push the lever toward direction to select the EQ and then, push the
lever in direction or press it to save the setting.
2
● EQ Icon order
The EQ icons will be changed in the following order:
Normal (NOR) → Pop (POP) → Rock (ROC) → Jazz (JAZ) → Classic (CLA) → Vocal (VOC)
● It playbacks with the EQ saved in the EQ(USR), if you set the EQ with the EQ(USR).
EQ
Normal
Pop
Rock
Audio
User EQ
EXIT OK
MY SONG
WESTLIFE-MY LOVE
00:00:30
EQ
User EQ
Live 3D Effect
Audio
Changing the EQ Setting
Push the lever in directions to select EQ and then, push the lever in direction or press it to enter.
2
Push the lever in directions to elect the EQ item and then, push the lever in direction or press it to
save the setting. After saving, device will automatically return to the previous menu.
3
Note
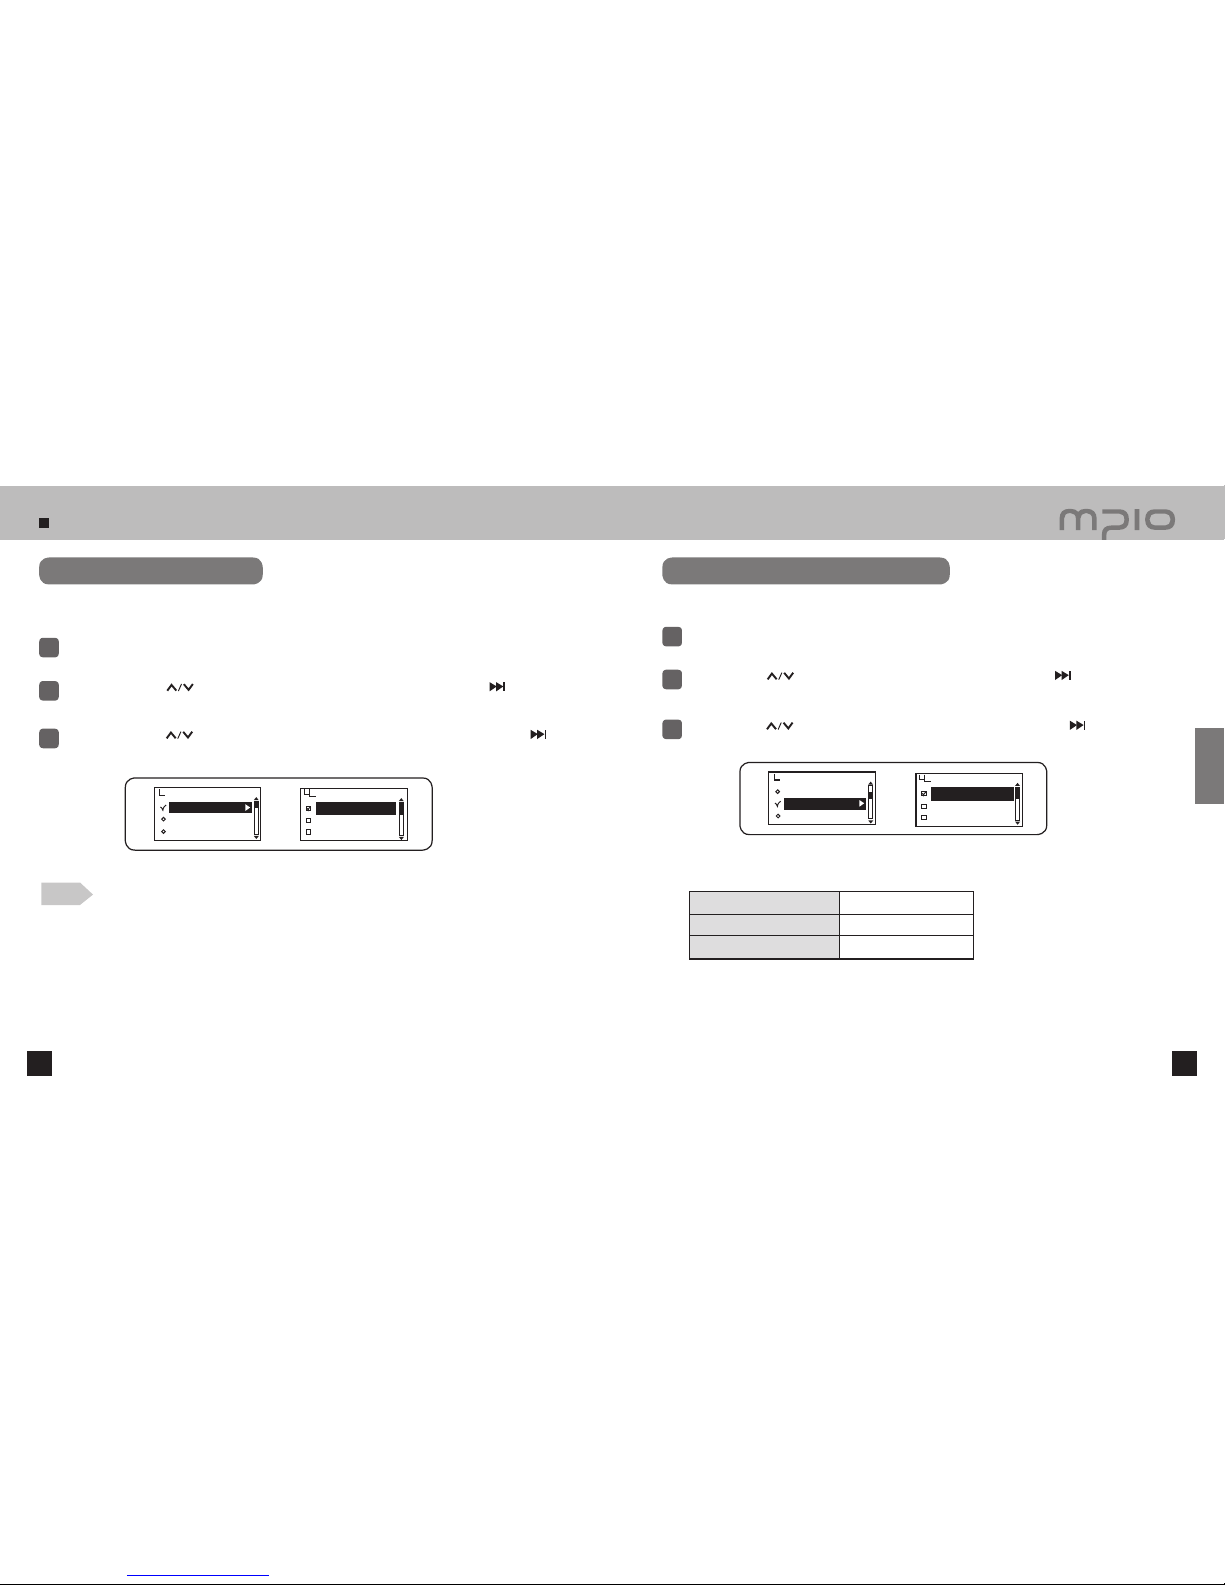
Setting User EQ
Note
●
Canceling User EQ Settings
Push the lever in direction and move to the EXIT to cancel User EQ setting.
Usage
Setting Audio
36 37
Select Audio in the menu.
1
Push the lever in directions to select Live 3D Effect and then, push the lever in direction or
press it to enter.
2
Push the lever in directions to select the 3D effect and then, push the lever in direction or press it
to save. After saving, the device will return to its previous menu.
3
3D sound effect will enhance your music experience.
Changing Play Order
Select Audio in the menu.
1
Push the lever in directions to select Repeat and then, push the lever in direction or press it to enter.
2
3
Push the lever toward direction to select the order of playback wanted and then, push the lever toward
direction or press it to save. After saving, the device will return to its previous menu.
● The icon of playback changing order:
Normal ( ) → Repeat One ( ) → Repeat All ( ) → Random ( ) →
Directory Normal ( ) → Directory Repeat ( ) → Directory Random ( )
Normal : Plays the music file(s) once including folder
Repeat One : Repeats only one music file
Repeat All : Repeats all the music file(s)
Random : Plays randomly all the music file(s)
Directory Normal : : Plays the music file(s) once in the folder selected.
Directory Repeat : Repeats all the music file(s) in folder.
Directory Random : Plays randomly all the music file(s) in folder.
Live 3D Effect
Off
Pure Studio
Concert Sound
Repeat
Audio Repeat
Normal
Repeat One
Repeat All
Using FUNC Button
Press the FUNC button during playback.
1
Push the lever toward direction to select 3D sound effect icon and then,
push the lever toward direction.
2
MY SONG
WESTLIFE-MY LOVE
00:00:30
Push the lever in direction or press it to save the setting.
3
Using FUNC Button
Press the FUNC button during playback.
1
Push the lever toward direction to select the icon of playback order and
then, push the lever toward direction to select.
2
MY SONG
WESTLIFE-MY LOVE
00:00:30
Push the lever in direction or press it to save the setting.
3
EQ
User EQ
Live 3D Effect
Audio
Select ‘How to playback’ of the music files saved.
Setting 3D Sound Effect
Note
Usage
●
The changing order of 3D sound effect
Off ( ) → Pure Studio( ) → Concert Sound( ) → Groove( ) → Dynamic Bass( )
Note
Setting FM Radio
38 39
Saving Channel in Menu
Select FM Radio in menu.
●
Set the frequency you want to save.
1
Push the lever toward direction to select save channel and then, push the lever toward
direction or press down toward vertical direction to enter.
2
3
Push the lever toward direction to select the number of channel and then, push the lever toward
direction or press down toward vertical direction to save the setting value.
Setting FM Frequency Bandwidth
Select the FM frequency band to receive.
Select FM Radio in menu.
1
Push the lever in directions to select FM Band and then, push the lever in direction
or press it to enter.
2
3
Push the lever in directions to select the FM Band and then, push the lever in direction or pushing
it to save. After saving the FM Band setting, the device will return to its previous menu.
Korea/USA/China/Europe 87.5MHz ~108MHZ
Worldwide 76MHz ~108MHZ
Japan 76MHz ~92MHZ
FM Frequencies for each region
Set by pressing and hold the FUNC button after change to FM radio mode.
Saving channel in menu can not be set in music mode.
● FM radio mode can not be entered with low battery.
● Up to 20 channels are savable.
Save Channel
FM Band
FM Sound
FM Radio Save Channel
CH01 : 99.90
CH02 :
CH03 :
FM Band
US/EU/KR/CN
Worldwide
Japan
Save Channel
FM Band
FM Sound
FM Radio
Note
Usage
Other manuals for FY 500
1
Table of contents
Other Mpio MP3 Player manuals


