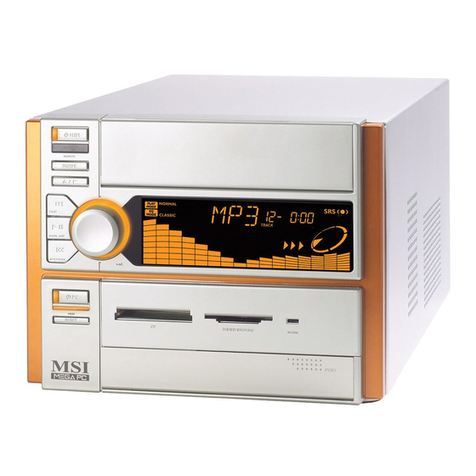
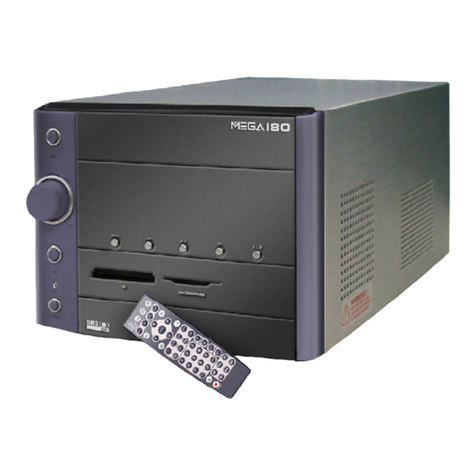
MSI MPC 400 User manual

○○○○○○○○○○○○○○○○○○○○○○○○○○○
1
Version 1.0
Multilingual
G52-B6253X2
QuicQuic
QuicQuic
Quick Insk Ins
k Insk Ins
k Instt
tt
tallall
allall
allaa
aa
ation Guidetion Guide
tion Guidetion Guide
tion Guide

○○○○○○○○○○○○○○○○○○○○○○○○○○
2
Copyright Notice
The material in this document is the intellectual property of MICRO-STAR
INTERNATIONAL. We take every care in the preparation of this document, but
no guarantee is given as to the correctness of its contents. Our products are
under continual improvement and we reserve the right to make changes without
notice.
Trademarks
All trademarks used in this manual are the property of their respective owners.
About this Manual
This manual is designed to provide the user a quick reference for barebone setup.
As MEGA400 is shipped out in a barebone, we assume you need the information
regarding how to assembly the system, such as CPU, RAM, HDD..., etc. Based
on this assumption, we make this manual of quick installation guide. Please
follow the description step by step to assembly the components. If you have any
question in assembling the system, you can contact your dealer or our technical
support.
Revision History
Revision Revision History Date
V 1.0 First Release Dec. 2003

○○○○○○○○○○○○○○○○○○○○○○○○○○○
3
CONTENTS
English ......................................................................................................... 5
French (FRANÇAIS).............................................................................................. 15
German (DEUTSCH) ............................................................................................. 25
Spanish (ESPAÑOL) .............................................................................................. 35
Italy (ITALIANO).................................................................................................... 45
Russian ( ) ................................................................... 55
Polish (POLSKI)..................................................................................................... 65
Chinese (繁體中文) ..................................................................................................... 75
Simplified Chinese (簡体中文) ................................................................................. 85
Japanese (日本語) ........................................................................................ 95
NOTE: This manual is written just for system assembly. For complete
information about the system, please refer to the user’s manual in CD.
РУССКИЙ

○○○○○○○○○○○○○○○○○○○○○○○○○○
4
Technical Support
If a problem arises with your system and no solution can be
obtained from the user’s manual, please contact your place
of purchase or local distributor. Alternatively, please try the
following help resources for further guidance.
Visit the MSI website for FAQ, technical guide, BIOS
updates, driver updates, and other information: http://
www.msi.com.tw/

○○○○○○○○○○○○○○○○○○○○○○○○○○○
5
overview
The MEGA400 is shipped out as a bare bone. Some components are
equipped while some are optional. See the following for the standard and op-
tional items:
This manual provides you with the information of system setup. Before
assembling your system, please be prepared for the installation tools and appro-
priate items. If you are not clear about the items, contact your dealer for the
information.
Installation Tools
Screws
You will find two types of screws in the package.
Fastening HDD
Screw Driver Gloves
Type 1 Type 2
Standard Mainboard, Power Supply, Case, Cables, Cooler,
Radio Antenna, Remote Controller, Card Reader,
CD, Manual
Optional TV-Tuner Card MS-8606
Fastening CD-ROM

○○○○○○○○○○○○○○○○○○○○○○○○○○
6
Installation Flowchart
Install HDD Install CPU&
Cooler Install Optical
Drives
Checking the Items
Before starting the assembling, check the items you need.
HDD Module CPU
CPU Cooler
CD-ROM Module DDR DIMM
Radio Antenna
NOTICE!!!
To provide you with the complete steps
from mechanical view, we STRONGLY
suggest you to follow the installation
procedures from p. 7~ p. 13.
Start Remove Cover
Install RAM Replace Cover

○○○○○○○○○○○○○○○○○○○○○○○○○○○
7
Removing Cover
Check the bare bone inside. The Card Reader
is already equipped in.
Use your hand to free and remove the three
thumb screws on the back panel.
Use your two hands to remove the cover.
Follow the direction indicated to remove the
cover.
Card Reader

○○○○○○○○○○○○○○○○○○○○○○○○○○
8
Installing hdd
Locate the bracket. Remove the screws to
take out the bracket.
Insert the HDD module into the bracket. Use
Type 2 screws to secure the module from the
right side.
Follow the direction indicated to take out
the bracket.

○○○○○○○○○○○○○○○○○○○○○○○○○○○
9
Connect the power cord.
Connect the specific HDD cable which is
marked “HDD Master”.
Insert the HDD bracket into the case. Use
Type 2 screws to secure the HDD bracket
from the left side.
Use Type 2 screws to secure the module from
the left side.

○○○○○○○○○○○○○○○○○○○○○○○○○○
10
Installing CPU
Put the CPU onto the socket. Make sure the
pins are completely embedded into the
socket. The CPU can only fit in the correct
direction.
Pull the lever away from the socket and raise
it up to a 90-degree angle.
Close the lever to complete the installation.
Locate the CPU socket.

○○○○○○○○○○○○○○○○○○○○○○○○○○○
11
Installing CPU cooler
Insert the cooler into the bare bone and put it
onto the CPU.
Use the screw driver to secure the built-in
screws. Follow the sequence indicated to
secure the screws.
Use the screw driver to secure the 4th screw.
Connect the power cord.
NOTE: Please follow the description of stick on
the cover to install CPU cooler.

○○○○○○○○○○○○○○○○○○○○○○○○○○
12
Installing CD-ROM
Use your two hands to insert the CD-ROM
module into the place indicated. Follow the
orientation as indicated.
Connect the CD-ROM cable, audio cable and
specific power cord which is marked “CD-
ROM”. Make sure the jumper is inserted in
master mode.
Use 2 Type 1 screws to secure the CD-ROM
module from the right side.
Use 3 Type 1 screws to secure the CD-ROM
module from the left side.

○○○○○○○○○○○○○○○○○○○○○○○○○○○
13
Installing DIMM
Use your two hands to insert the DDR DIMM
vertically into the slot. NOTE: The DIMM has
only one notch on the center of module. It will
only fit in the right direction.
The plastic clip at each side of the DIMM
slot will automatically close.
Replacing the cover and use three thumb
screws to secure it.
Connect the radio antenna and power cord.

○○○○○○○○○○○○○○○○○○○○○○○○○○
14

○○○○○○○○○○○○○○○○○○○○○○○○○○○
15
Introduction
Le MEGA400 est livré en tant que système minimum (barebone).
Certains composants sont standards tandis que d’autres sont optionnels. Voir
dans la liste ci-dessous les composants standards et optionnels :
Ce manuel vous fournira des informations pour l’installation du
système. Avant d’assembler votre système, préparez les outils et
composants nécessaires à l’installation. Si vous avez des doutes concernant
ces composants, contactez votre revendeur pour un supplément
d’informations.
Outils d’installation
Vis
Standard
Pour fixer les
disques durs
Tournevis Gants
Type 1 Type 2
Carte mère, Alimentation, Boîtier, Câbles,
Radiateur, Antenne radio, Télécommande, CD,
Manuel, Lecteur de cartes
Optionnel Carte tuner TV 8606
Pour fixer les lecteurs de
CD-ROM et de disquettes

○○○○○○○○○○○○○○○○○○○○○○○○○○
16
Diagramme d’installation
Vérifiez les composants
Avant de commencer l’assemblage, vérifiez les composants dans
vous aurez besoin.
Module disque dur Processeur
Radiateur du processeur
Module lecteur de
CD-ROM
Module DIMM DDR
Antenne radio
Installez le
disque dur Installez le
processeur et le
radiateur
Installez les
lecteurs
optiques
AVERTISSEMENT!!!
Pour la partie mécanique de
l’installation, nous vous recommandons
fortement de suivre la procédure décrite
dans les pages 15 à 23.
Démarrage Retirez le
couvercle
Installez la
mémoire Remettez le
couvercle

○○○○○○○○○○○○○○○○○○○○○○○○○○○
17
Retirer le couvercle
Vérifiez l’intérieur du système minimum.
Le lecteur de cartes est déjà à l’intérieur.
Dévissez à la main les trois vis à tête
moletée sur le panneau arrière et retirez-
les.
Retirez le couvercle avec vos deux
mains. Suivez la direction indiquée pour
retirer le couvercle.
Lecteur de cartes

○○○○○○○○○○○○○○○○○○○○○○○○○○
18
Installer le disque dur
Cherchez le support. Retirez les vis pour
enlever le support.
Suivez la direction indiquée à sortent la
parenthèse.
Insérez le module disque dur dans le
support. Utilisez des vis de type 2 pour
fixer le module sur le côté droit.

○○○○○○○○○○○○○○○○○○○○○○○○○○○
19
Branchez le cordon d’alimentation.
Reliez le câble spécifique de HDD qui
est “maître marqué de HDD”.
Insérez le support de disque dur dans le
boîtier. Utilisez des vis de type 2 pour
fixer le support de disque dur sur le côté
gauche.
Utilisez des vis de type 2 pour fixer le
module sur le côté gauche.

○○○○○○○○○○○○○○○○○○○○○○○○○○
20
Installer le processeur
Mettez le processeur dans le support.
Vérifiez que les broches sont
complètement enfoncées dans le support.
Le processeur ne peut rentrer que dans la
bonne direction.
Levez le levier en l’éloignant du support
et levez-le à un angle de 90 degrés.
Abaissez le levier pour terminer
l’installation.
Cherchez le support du processeur.
Other manuals for MPC 400
1
This manual suits for next models
1
Table of contents
Languages:
Other MSI Desktop manuals