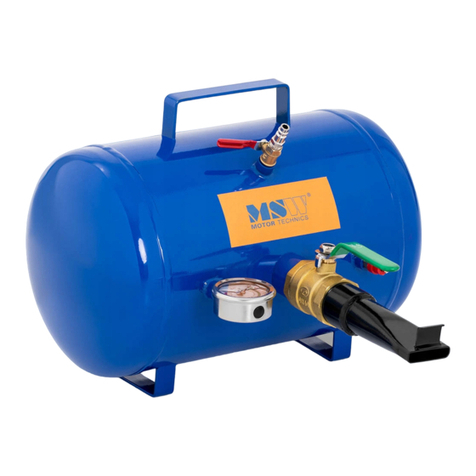
MSW Motor Technics MSW-MS40A User manual

EXPONDO.DE
PORTABLE SANDBLASTER
MSW-MS40A
BEDIENUNGSANLEITUNG
User manual | Instrukcja obsługi | Návod k použití | Manuel d´utilisation | Istruzioni per l‘uso | Manual de instrucciones

Deutsch
English
Polski
Česky
Français
Italiano
Español
Magyar
3
8
13
18
23
28
33
38
INHALT | CONTENT | TREŚĆ | OBSAH | CONTENU | CONTENUTO | CONTENIDO TECHNISCHE DATEN
Die Begrie "Gerät" oder "Produkt" in den Warnungen und
Beschreibung des Handbuchs beziehen sich auf MOBILES
SANDSTRAHLGERÄT.
2.1. SICHERHEIT AM ARBEITSPLATZ
a) Halten Sie Ihren Arbeitsplatz sauber und gut
beleuchtet. Unordnung oder schlechte Beleuchtung
kann zu Unfällen führen. Handeln Sie vorausschauend,
beobachten Sie, was getan wird, und nutzen Sie Ihren
gesunden Menschenverstand bei der Verwendung
des Gerätes.
b) Im Falle eines Schadens oder einer Störung sollte das
Gerät sofort ausgeschaltet und dies einer autorisierten
Person gemeldet werden.
c) Wenn Sie nicht sicher sind, ob das Gerät
ordnungsgemäß funktioniert, wenden Sie sich an den
Service des Herstellers.
d) Reparaturen dürfen nur vom Service des Herstellers
durchgeführt werden. Führen Sie keine Reparaturen
auf eigene Faust durch!
e) Halten Sie Kinder und Unbefugte fern; Unachtsamkeit
kann zum Verlust der Kontrolle über das Gerät führen.
f) In für Beschädigungen besonders gefährdeten
Bereichen sollten verstärkte Schläuche verwendet
werden.
g) Anschließen und Trennen der Druckleitung sollten bei
geschlossenem Luftventil erfolgen.
h) Richten Sie die Druckleitung nicht auf sich selbst, auf
andere Personen oder Tiere.
i) Unterbrechen Sie die Druckluftversorgung nicht durch
Quetschen oder Biegen der Leitungen.
j) Erhöhen Sie allmählich die Luftzufuhr zum Gerät, um
sicherzustellen, dass es ordnungsgemäß funktioniert.
Funktioniert das Gerät nicht ordnungsgemäß, trennen
Sie es sofort von der Druckluft und wenden Sie sich an
die Serviceabteilung des Herstellers.
k) Im Laufe der Nutzung dieses Werkzeugs einschlieβlich
anderer Werkzeuge soll man sich nach übrigen
Betriebsanweisungen richten.
Parameter Werte
Produktname MOBILES
SANDSTRAHLGERÄT
Modell MSW-MS40A
Tankabmessungen (ØxH)
[mm] 310x450
Gewicht [kg] 13,75
Speicherinhalt [l] 31
Arbeitsdruck [bar] 4-8,6
Schlauchlänge [m] 2,4
Luftverbrauch [l/min] 170-708
2.2. PERSÖNLICHE SICHERHEIT
a) Es ist nicht gestattet, das Gerät im Zustand der
Ermüdung, Krankheit, unter Einuss von Alkohol,
Drogen oder Medikamenten zu betreiben, wenn das
die Fähigkeit das Gerät zu bedienen, einschränkt.
b) Seien Sie aufmerksam und verwenden Sie Ihren
gesunden Menschenverstand beim Betreiben
des Gerätes. Ein Moment der Unaufmerksamkeit
während der Arbeit kann zu schweren Verletzungen
führen.
c) Benutzen Sie eine persönliche Schutzausrüstung,
die den in Punkt 1 der Symbolerläuterungen
vorgegebenen Maßgaben entspricht. Die
Verwendung einer geeigneten und zertizierten
Schutzausrüstung verringert das Verletzungsrisiko.
d) Vergewissern Sie sich vor dem Anschließen des
Geräts an eine Stromquelle, dass der Schalter
ausgeschaltet ist.
1. ALLGEMEINE BESCHREIBUNG
Diese Anleitung ist als Hilfe bei der sicheren und
zuverlässigen Nutzung gedacht. Das Produkt wurde strikt
nach den technischen Vorgaben und unter Verwendung
modernster Technologien und Komponenten sowie unter
Wahrung der höchsten Qualitätsstandards entworfen und
angefertigt.
VOR INBETRIEBNAHME MUSS DIE ANLEITUNG
GENAU DURCHGELESEN UND VERSTANDEN
WERDEN.
Für einen langen und zuverlässigen Betrieb des Geräts muss
auf die richtige Handhabung und Wartung entsprechend
den in dieser Anleitung angeführten Vorgaben geachtet
werden. Die in dieser Anleitung angegebenen technischen
Daten und die Spezikation sind aktuell. Der Hersteller
behält sich das Recht vor, im Rahmen der Verbesserung der
Qualität Änderungen vorzunehmen. Unter Berücksichtigung
des technischen Fortschritts und der Geräuschreduzierung
wurde das Gerät so entworfen und produziert, dass das
infolge der Geräuschemission entstehende Risiko auf dem
niedrigsten Niveau gehalten wird.
ERLÄUTERUNG DER SYMBOLE
Das Produkt erfüllt die geltenden
Sicherheitsnormen.
Gebrauchsanweisung beachten.
Recycling-Produkt.
Gehörschutz benutzen!
Augenschutz benutzen!
Staubschutz benutzen (Schutz der Atemwege)!
Handschutz benutzen!
Fußschutz benutzen.
HINWEIS! In der vorliegenden Anleitung sind
Beispielbilder vorhanden, die von dem tatsächlichen
Aussehen der Maschine abweichen können.
Die originale Anweisung ist die deutschsprachige Fassung.
Sonstige Sprachfassungen sind Übersetzungen aus der
deutschen Sprache.
2. NUTZUNGSSICHERHEIT
ACHTUNG! Lesen Sie alle Sicherheitshinweise und
alle Anweisungen durch. Die Nichtbeachtung der
Warnungen und Anweisungen kann zu elektrischen
Schlägen, Feuer und / oder schweren Verletzungen
oder Tod führen.
HINWEIS! Kinder und Unbeteiligte müssen bei der
Arbeit mit diesem Gerät gesichert werden.
32 Rev. 15.06.2020
DE
BEDIENUNGSANLEITUNG
PRODUKTNAME MOBILES SANDSTRAHLGERÄT
PRODUCT NAME PORTABLE SANDBLASTER
NAZWA PRODUKTU MOBILNA PIASKARKA SYFON
NÁZEV VÝROBKU MOBILNÍ PÍSKOVAČKA
NOM DU PRODUIT SABLEUSE MOBILE
NOME DEL PRODOTTO SABBIATRICE PORTATILE
NOMBRE DEL PRODUCTO ARENADORA PORTATIL
TERMÉK NÉV MOBIL HOMOKSZÓRÓ GÉP
MODELL
MSW-MS40A
PRODUCT MODEL
MODEL PRODUKTU
MODEL VÝROBKU
MODÈLE
MODELLO
MODELO
TÍPUS
IMPORTEUR
EXPONDO POLSKA SP. Z O.O. SP. K.
IMPORTER
IMPORTER
DOVOZCE
IMPORTATEUR
IMPORTATORE
IMPORTADOR
IMPORTŐR
ADRESSE VON IMPORTEUR
UL. NOWY KISIELIN – INNOWACYJNA 7, 66-002 ZIELONA GÓRA | POLAND, EU
IMPORTER ADDRESS
ADRES IMPORTERA
ADRESA DOVOZCE
ADRESSE DE L'IMPORTATEUR
INDIRIZZO DELL'IMPORTATORE
DIRECCIÓN DEL IMPORTADOR
AZ IMPORTŐR CÍME

e) Überschätzen Sie Ihre Fähigkeiten nicht. Sorgen Sie
für einen sicheren Stand während der Arbeit. Dies
gibt Ihnen eine bessere Kontrolle über das Gerät im
Falle unerwarteter Situationen.
f) Tragen Sie keine weite Kleidung oder Schmuck.
Halten Sie Haare, Kleidung und Handschuhe von
beweglichen Teilen fern. Lose Kleidung, Schmuck
oder lange Haare können durch sich bewegende
Teile erfasst werden.
g) Entfernen Sie alle Einstellwerkzeuge oder Schlüssel,
bevor Sie das Gerät einschalten. Gegenstände, die
in rotierenden Teilen verbleiben, können zu Schäden
und Verletzungen führen.
h) Die Werkstücke – insbesondere kleinere Teile –
gegen unbeabsichtigtes Verschieben absichern, z.B.
durch Blockieren mit einer Schraubzwinge.
i) Beim Arbeiten mit dem Gerät entsteht Staub, der
gesundheitsschädliche Stoe enthalten kann. Das
Gerät in einem sehr gut belüfteten Raum verwenden;
es wird empfohlen einen Gesichtsschutz mit Filter zu
tragen.
2.3. SICHERE ANWENDUNG DES GERÄTS
a) Überhitzen Sie das Gerät nicht. Verwenden Sie
geeignete Werkzeuge für die entsprechende
Anwendung. Richtig ausgewählte Geräte führen die
Arbeit, für die sie vorgesehen sind, besser aus.
b) Die Druckleitung abtrennen, bevor Einstellungen
vorgenommen werden. Anbaugeräte wechseln
oder Werkzeuge weglegen. Eine solche
vorbeugende Maßnahme verringert das Risiko eines
versehentlichen Starts des Geräts.
c) Nicht verwendete Werkzeuge sind außerhalb
der Reichweite von Kindern sowie von Personen
aufzubewahren, welche weder das Gerät selbst, noch
die entsprechende Anleitung kennen. In den Händen
unerfahrener Personen können derlei Geräte eine
Gefahr darstellen.
d) Halten Sie das Gerät im einwandfreien Zustand.
Überprüfen Sie vor jeder Arbeit, ob allgemeine
Schäden vorliegen oder Schäden an beweglichen
Teilen (Bruch von Teilen und Komponenten oder
andere Bedingungen, die den sicheren Betrieb der
Maschine beeinträchtigen könnten). Im Falle eines
Schadens muss das Gerät vor Gebrauch in Reparatur
gegeben werden.
e) Halten Sie das Gerät außerhalb der Reichweite von
Kindern.
f) Reparatur und Wartung von Geräten dürfen nur
von qualiziertem Fachpersonal und mit Original-
Ersatzteilen durchgeführt werden. Dadurch wird die
Sicherheit bei der Nutzung gewährleistet.
g) Um die vorgesehene Betriebsintegrität des Gerätes
zu gewährleisten, dürfen die werksmäßig montierten
Abdeckungen oder Schrauben nicht entfernt werden.
h) Beim Transport und beim Verlegen des Gerätes
vom Aufbewahrungsort zum Einsatzort sind
die Sicherheits – und Hygienevorschriften für
die manuelle Handhabung für das Land zu
berücksichtigen, in dem das Gerät verwendet wird.
i) Vermeiden Sie Situationen, in denen das Gerät bei
laufendem Betrieb unter schwerer Last stoppt. Dies
kann zu einer Überhitzung der Antriebskomponenten
und damit zu einer Beschädigung des Gerätes
führen.
j) Berühren Sie keine beweglichen Teile oder
Zubehörteile, es sei denn, das Gerät wurde vom Netz
getrennt.
k) Das Gerät nicht an der Druckleitung transportieren
oder aufhängen.
l) Wartung und Austausch von Schläuchen, Düsen usw.
sollten nur mit abgeschalteter Druckluftversorgung
und leerem Tank durchgeführt werden.
m) Zur Versorgung des Gerätes soll nur Druckluft
verwendet werden. Es ist verboten andere Gase zu
verwenden.
n) Transportieren Sie das Gerät nur in vertikaler Position.
o) Für das Gerät darf ausschließlich spezieller für
Sandstrahler vorgesehener Sand verwendet werden.
Es ist dringend untersagt, gewöhnlichen Sand zu
benutzen!
p) Wenn das Gerät transportiert oder nicht benutzt
wird, sollte der Druck im Sandbehälter reduziert
werden. Das Manometer sollte einen Wert von 0
anzeigen.
1. Behälter
2. Räder
3. Verschluss
4. Stütze
5. Radachse
6. Tragegri
7. Handgri
8. Schraube
9. Mutter
10. Unterlegscheibe
11. Sicherheitsventil
12. Dichtung
13. Sandeinfüllstutzen – Verschluss
14. Rohr
15. Dreiwegestück
16. Manometer
17. Zweiseitiger Nippel
18. Lufttrockner
19. Hauptluftventil 3/8''
19A. 3/8" Drosselklappe
19B. Schleifschlauchventil
20. Stecker-Buchse
21. Zweiseitiger Nippel
22. Luftschlauch
23. Sandablaufrohr
24. Kabelbinder
25. Sandstrahlleitung
26. Nippel
27. Dichtung
28. Keramikdüse
29. Vordere Mutter
30. Unterlegscheibe
31. Trichter
32. Haube
33. Totmannschaltung
34. Auslöser
35. Totmannschaltungsadapter
36. Dichtungsblock
ACHTUNG! Die Haube (32) ist kein Atemschutz und ersetzt
keine Staubmaske.
3.2. VORBEREITUNG ZUR VERWENDUNG
AUFBAU DES GERÄTES
1. Einbau des Ansaugkrümmers (15): Ein Manometer
(16) muss oben am Einlass des T-Stücks angebracht
werden. Das Messgerät muss so gedreht werden, dass
es an der Oberseite des Tanks sichtbar ist. Bringen
Sie dann das Drosselventil (19A) am unteren Teil des
Kollektors an. Den Nippel (21) an das Drosselventil
anschließen. Befestigen Sie ein Verbindungsrohr am
T-Stück.
2. Installation des Lufttrockners (18): Den Nippel (17) auf
beiden Seiten des Filters anschrauben. Bringen Sie
das Luftventil (19) auf einer Seite am Verbindungstück
und dann das Verbindungstück (20) an. Vor dem
Betrieb muss die Luftzufuhrleitung vom Kompressor
an das Verbindungstück (20) angeschlossen werden.
3. Den Tank positionieren und den Trocknerlter
(18) und seine Teile seitlich am Ansaugkrümmer
einschrauben. Schrauben Sie dann das oene Ende
des Verbindungsrohrs (14) mit dem T-Stück (15) und
dem Manometer (16) in die Gewindebohrung an der
Seite des Einlassrohrs oben auf dem Tank. Stellen Sie
sicher, dass das Messgerät vertikal positioniert ist.
4. Montage des Auslassventils für Schleifmittel an der
Bohrung am Boden des Tanks: Befestigen Sie die
vier Teile in der richtigen Reihenfolge gemäß der
Zeichnung.
14
16
15
19A
21
17 18
17 19 20
1
2
17
19B
17
23
2
3
34
33
27 28 36
29
24 25 24
5
6
3. NUTZUNGSBEDINGUNGEN
Das mobile Sandstrahlgerät ist ein Gerät zur Reinigung
verschiedener Arten von Oberächen von Rost,
Verunreinigungen usw. durch einen Druckluftstrom mit
Schleifpartikeln.
Für alle Schäden bei nicht sachgemäßer Verwendung
haftet allein der Betreiber.
3.1. GERÄTEBESCHREIBUNG
ACHTUNG! Obwohl das Gerät in Hinblick auf Sicherheit
entworfen wurde und über Schutzmechanismen
sowie zusätzlicher Sicherheitselemente verfügt,
besteht bei der Bedienung eine geringe Unfall-
oder Verletzungsgefahr. Es wird empfohlen, bei der
Nutzung Vorsicht und Vernunft walten zu lassen.
ACHTUNG! Die Zeichnung von diesem
Produkt bendet sich auf der letzte Seite der
Bedienungsanleitung S. 43.
54 Rev. 15.06.2020
Rev. 15.06.2020
DE DE

5. Montage des Auslösers (34): Wählen Sie eine
der verfügbaren Düsen (28) (die Düsen können
ausgetauscht werden) und montieren Sie sie
entsprechend der Zeichnung.
6. Anschließen der Elemente aus Schritt 4 und 5 mit
dem Tank: Setzen Sie zwei Schlauchschellen (24) auf
die Enden des Schlauchs (25). Ziehen Sie ein Ende am
Rohrausgang (23) und das andere Ende am Ende des
Nippels (26) an. Schieben Sie die Schellen so weit wie
möglich bis zum Ende des Nippels und ziehen Sie sie
fest an.
7. Stellen Sie den Tank horizontal auf, befestigen Sie
zwei Tragegrie mit 4 Schrauben, Unterlegscheiben
und Muttern am Tank. Hinweis: Stellen Sie sicher, dass
die gebogenen Grielemente in die richtige Richtung
zeigen (zur Oberseite des Tanks, nach außen). Setzen
Sie die Radachse (5) in die Bohrungen der Grie (6).
Platzieren Sie die Räder an den Enden der Achse und
befestigen Sie sie mit Splinten und Unterlegscheiben.
Platzieren Sie das feste Bein (4) am Boden des Tanks
nahe am Rand. Verwenden Sie den Splint (3), um es zu
halten.
Achtung! Überprüfen Sie vor Arbeitsbeginn, ob alle
Verbindungen korrekt sind und die Elemente richtig
sitzen.
3.3. ARBEIT MIT DEM GERÄT
3.3.1. VORBEREITUNG ZUM BETRIEB
Vor dem Anschließen der Druckluftleitung sicherstellen,
dass sich das Hauptluftventil in der geschlossenen Position
bendet. Verbinden Sie den Druckluftschlauch mit der
Stecker-/Buchsenverbindung (20). Sicherstellen, dass
alles korrekt installiert ist und nicht unter dem Druck
der Druckluft bricht. Um Feuchtigkeit zu entfernen, die
Probleme beim Betrieb der Vorrichtung verursachen kann,
wird die Luft über einen Entfeuchter getrocknet.
3.3.2. AUSWAHL DER RICHTIGEN DÜSE
Sandstrahlen erfordert ein großes Luftvolumen unter
hohem Druck. Ein zu kurzer Schlauch, unzureichender
Luftdruck oder eine zu große Düse verringern den Durchsatz
des Geräts. Durch die Wahl des Schlauchdurchmessers
entsprechend seiner Länge wird ein großer Druckabfall im
Gerät vermieden.
Schlauch-
durchmes-
ser [‘’]
Schlauch-
länge [m] Düsen-
durch-
messer
[‘’]
Schleifmittel-
verbrauch pro
Stunde [kg]
3/8 15,2 3/32 27,2
3/8 7,6 7/64 45,4
1/2 15,2 1/8 68
1/2 7,6 9/64 90,7
Es wird empfohlen, einen Druck von 4 - 8,6 bar zu
verwenden, um die besten Ergebnisse zu erzielen.
3.3.3. ABLASSEN DES WASSERS AUS DEM ENTFEUCHTER
1. Das Hauptluftventil schließen. Es wird auch empfohlen,
den Behälter vom Druck zu befreien.
2. Die rote Verriegelung des Trockners drücken und
halten, dabei den unteren Teil des Trockners nach
rechts drehen.
3. Den Behälter entfernen und entleeren.
4. Den Trocknerbehälter auf die analoge Weise
montieren wie die Demontage verläuft.
Um einen optimalen und korrekten Betrieb des Geräts zu
gewährleisten, sollte der Wirkungsgrad des Kompressors
in Bezug auf den Luftverbrauch der Empfangsgeräte
angemessen gewählt werden. Das Gerät sollte in einem
sicheren Abstand vom Kompressor verwendet werden, um
zu verhindern, dass Staub von abrasiven Materialien in den
Kompressor gelangt.
3.3.4. EINSCHALTEN DES GERÄTS
Hinweis: Das Gerät nur in aufrechter Position verwenden!
• Die Druckluftversorgungsleitung anschließen,
am Kompressor den bevorzugten Betriebsdruck
einstellen, der jedoch den maximalen Wert für das
Gerät nicht überschreiten darf.
• Den Sand in den Speicher einfüllen.
• Halten Sie die Sandstrahlleitung fest, richten Sie
die Düse auf die zu bearbeitende Oberäche und
drücken Sie die Totmannschaltung.
• Das Hauptventil 3/8 "(19) in die oene Position
einstellen, um den Luftstrom vom Kompressor zum
Gerät egulieren zu können.
• Önen Sie vorsichtig die 3/8 "Drosselklappe (19a).
So kann der Luftstrom, der Sand in Richtung des
Auslassrohrs itzieht, reguliert werden. Hinweis: Das
Gerät nur in aufrechter Position verwenden.
• Vorsichtig das Speicherventil (19b) önen. Dieses
Ventil reguliert die Sandmenge, die vom Speicher
zum Sandauslassrohr gelangt.
• Das Strahlrohrventil (19c) in die oene Position
einstellen. Mit diesem Ventil wird der Luftstrom mit
Sand durch die Düse reguliert.
• Die Drosselklappe (19a) önen, bis Sand aus der
Luftdüse austritt.
• Die bevorzugten Einstellungen festlegen.
• Es wird empfohlen, den Betrieb des Geräts auf einer
kleinen Fläche zu überprüfen, um die Reaktion des
Materials auf den Sandstrahl zu überprüfen.
3.3.5. SENKEN DES LUFTDRUCKS IM SPEICHER
Persönliche Schutzausrüstung tragen, d.h. Schutz der
oberen Atemwege, Schutzbrille und Handschuhe.
• Sicherstellen, dass sich das Hauptluftventil in der
geschlossenen Position bendet.
• Das Strahlrohrventil in die oene Position stellen;
warten, bis auf dem Manometer der Wert "0"
erscheint.
3.3.6. EINFÜLLEN VON SAND IN DEN SPEICHER
• Sicherstellen, dass der Schleifsand nicht feucht
ist und das Tankventil, das Sandauslassrohr, den
Schleifdraht, das Strahlrohrventil, die Düse und
andere Gerätekomponenten nicht blockiert.
• Persönliche Schutzausrüstung anlegen, z.B. oberen
Atemschutz, Schutzbrille und Handschuhe.
• Den Luftdruck im Tank vermindern.
• Den Verschluss des Sandeinlasses abschrauben.
Den Trichter mit dem Sieb in die Önung einsetzen
und dann die entsprechende Menge Sand einfüllen.
Hinweis: Den Trichter nicht ohne Sieb verwenden! Es
können größere Klumpen im Sand vorkommen, die
zu Fehlfunktionen des Geräts führen. ACHTUNG: Die
Füllmenge nicht über ¾ der gesamten Tankkapazität
ansetzen. Bei hoher Umgebungsfeuchtigkeit ist es
nicht empfehlenswert, den Tank maximal zu befüllen;
es empehlt sich, kleinere Sandmengen in den Tank
zu gießen und den Tank nach und nach aufzufüllen.
• Den Trichter wieder entfernen. Den Verschluss
wieder schließen.
• Das Ventil der Sandstrahlleitung schließen,
das Luftventil önen. Sicherstellen, dass das
Sandabsperrventil ordnungsgemäß geschlossen
ist und keine Luftlecks vorhanden sind.
Sandstrahlmaterialien haben die Eigenschaft,
Wasser anzuziehen. Deshalb kann das Zurücklassen
von unbenutztem Sand im Tank dazu führen,
dass Feuchtigkeit eindringt und somit die
Auslassönungen des Geräts, die Düsen usw.
blockiert werden.
Im Gerät ist Material mit folgender Körnigkeit zu
verwenden: 0,2 ÷ 0,7 mm. Folgende abrasive Materialien
sind zulässig:
• Quarzschleifmittel / Sand
• Aloxit
• Gusseisernes Schrot
• Gussstahlschrot
• Glasmikrokugeln
• Siliciumcarbid
3.4. REINIGUNG UND WARTUNG
• Bevor das Gerät gereinigt wird, muss es von der
Druckluftversorgung getrennt werden. Den Druck
im Sandspeicher durch Ablassen der Luft reduzieren.
• Nach jeder Arbeit das Gerät gründlich reinigen.
• Überprüfen Sie systematisch den Zustand von
Düsen, Ventilen und Schläuchen. Das abrasive
Material bewirkt die Abnutzung der Schlauchwände.
Dies ist besonders wichtig für das ordnungsgemäße
Funktionieren der Totmannschaltung.
• Aus dem Entfeuchter systematisch das aus der Luft
gelterte Wasser ablassen.
• Verwenden Sie zum Reinigen der Oberäche
ausschließlich Mittel ohne ätzende Inhaltsstoe.
• Lassen Sie nach jeder Reinigung alle Teile gut
trocknen, bevor das Gerät erneut verwendet wird.
• Bewahren Sie das Gerät an einem trockenen, kühlen,
vor Feuchtigkeit und direkter Sonneneinstrahlung
geschütztem Ort auf.
ENTSORGUNG GEBRAUCHTER GERÄTE
Dieses Produkt darf nicht über den normalen Hausmüll
entsorgt werden. Geben Sie das Gerät bei entsprechenden
Sammel- und Recyclinghöfen für Elektro- und
Elektronikgeräte ab. Überprüfen Sie das Symbol auf dem
Produkt, der Bedienungsanleitung und der Verpackung. Die
bei der Konstruktion des Gerätes verwendeten Kunststoe
können entsprechend ihrer Kennzeichnung recycelt werden.
Mit der Entscheidung für das Recycling leisten Sie einen
wesentlichen Beitrag zum Schutz unserer Umwelt. Wenden
Sie sich an die örtlichen Behörden, um Informationen über
Ihre lokale Recyclinganlagen zu erhalten.
03
02
30
08
07
06
10
09
01
04 03
7
76 Rev. 15.06.2020
Rev. 15.06.2020
DE DE

TECHNICAL DATA
The terms "device" or "product" are used in the warnings
and instructions to refer to PORTABLE SANDBLASTER.
2.1. SAFETY IN THE WORKPLACE
a) Make sure the workplace is clean and well lit. A messy
or poorly lit workplace may lead to accidents. Try
to think ahead, observe what is going on and use
common sense when working with the device.
b) If you discover damage or irregular operation,
immediately switch the device o and report it to a
supervisor without delay.
c) If there are any doubts as to the correct operation
of the device, contact the manufacturer's support
service.
d) Only the manufacturer's service point may repair the
device. Do not attempt any repairs independently!
e) Children or unauthorised persons are forbidden to
enter a work station. (A distraction may result in loss
of control over the device).
f) Reinforced hoses must be used in places particularly
threatening with damage.
g) Only connect and disconnect the pressure line when
the air valve is closed.
h) Do not point the pressure line towards yourself or
toward other people or animals.
i) Do not cut o the supply of compressed air by
crushing or bending pressure hoses.
j) When starting the device, increase the air supply
to the device gradually in order to ensure that it is
functioning properly. If you notice any abnormal
operation of the device, disconnect it immediately
from the compressed air and contact the
manufacturer's service point.
k) If this device is used together with another equipment,
the remaining instructions for use shall also be
followed.
Parameter description Parameter value
Product name PORTABLE
SANDBLASTER
Model MSW-MS40A
Tank dimensions (ØxH)
[mm] 310x450
Weight [kg] 13,75
Tank volume [l] 31
Operating pressure [bar] 4-8,6
Hos Length [m] 2,4
Air consumption [l/min] 170-708
2.2. PERSONAL SAFETY
a) Do not use the device when tired, ill or under the
inuence of alcohol, narcotics or medication which
can signicantly impair the ability to operate the
device.
b) When working with the device, use common sense
and stay alert. Temporary loss of concentration while
using the device may lead to serious injuries.
c) Use personal protective equipment as required
for working with the device, specied in section 1
(Legend). The use of correct and approved personal
protective equipment reduces the risk of injury.
d) To prevent the device from accidentally switching on,
make sure the switch is on the OFF position before
connecting to a power source.
e) Do not overestimate your abilities. When using the
device, keep your balance and remain stable at all
times. This will ensure better control over the device
in unexpected situations.
f) Do not wear loose clothing or jewellery. Keep hair,
clothes and gloves away from moving parts. Loose
clothing, jewellery or long hair may get caught in
moving parts.
8
g) Remove all adjusting tools or spanners before
turning the device on. A tool or spanner left in the
revolving part of the device may cause injury.
h) It is necessary to secure the workpiece, especially of
small size, against accidental displacement e.g. by
blocking it by means of a vice.
i) In the course of working with the device, dust is
generated that may contain harmful substances.
It is therefore necessary to use the device in a very
wellventilated room and to use a protective mask
with a lter.
2.3. SAFE DEVICE USE
a) Do not overload the device. Use the appropriate
tools for the given task. A correctly-selected device
will perform the task for which it was designed better
and in a safer manner.
b) Make sure the plug is disconnected from the socket
before attempting any adjustments, accessory
replacements or before putting the device aside.
Such precautions will reduce the risk of accidentally
activating the device.
c) When not in use, store in a safe place, away from
children and people not familiar with the device who
have not read the user manual. The device may pose
a hazard in the hands of inexperienced users.
d) Keep the device in perfect technical condition. Before
each use check for general damage and especially
check for cracked parts or elements and for any other
conditions which may impact the safe operation of
the device. If damage is discovered, hand over the
device for repair before use.
e) Keep the device out of the reach of children.
f) Device repair or maintenance should be carried out
by qualied persons, only using original spare parts.
This will ensure safe use.
g) To ensure the operational integrity of the device, do
not remove factory-tted guards and do not loosen
any screws.
h) When transporting and handling the device between
the warehouse and the destination, observe the
occupational health and safety principles for manual
transport operations which apply in the country
where the device will be used.
i) Avoid situations where the device stops working
during use due to excessive loading. This may result
in overheating of the drive elements and damage to
the device.
j) Do not touch articulated parts or accessories unless
the device has been disconnected from the power
source.
k) Do not carry or hang the device by the pressure line.
l) Maintenance activities and replacement of hoses,
nozzles, etc. must be carried out only and exclusively
when the compressed air supply is switched o and
the tank is emptied from pressure.
m) Only air should be used to supply the unit, it is
forbidden to use other gases.
n) It is necessary to transport the device in a vertical
position.
o) Only sandblasting materials specially designed
for sandblasters may be used with this device. It is
forbidden to use ordinary sand!
p) Whenever the device is transported or not in use, it
is necessary to reduce the pressure in the sand tank.
The pressure gauge should indicate the value of 0
9
1. Tank
2. Wheel
3. Fastener
4. Support
5. Axle of wheels
6. Transport grip
7. Handle of grip
8. Screw
9. Nut
10. Washer
11. Safety valve
12. Gasket
13. Closure for sand pouring
14. Tube
15. Three-way-adapter
16. Manometer
17. Two-sided nipple
18. Air dehumidier
19. Main air valve 3/8 ''
19A. 3/8 "throttle valve
19B. Sandblasting line valve
20. Male-female connector
21. Two-sided nipple
22. Air hose
23. Sand outlet pipe
24. Clamping band
25. Sandblasting line
26. Nipple
27. Gasket
28. Ceramic nozzle
29. Front nut
30. Washer
31. Funnel
32. Cowl
33. Dead man’s trigger
34. Release
35. The adapter of a dead man’s trigger
36. Sealing block
The cowl (32) is not a respiratory protection and does not
replace a dust mask.
1. GENERAL DESCRIPTION
The user manual is designed to assist in the safe and
trouble-free use of the device. The product is designed
and manufactured in accordance with strict technical
guidelines, using state-of-the-art technologies and
components. Additionally, it is produced in compliance
with the most stringent quality standards.
DO NOT USE THE DEVICE UNLESS YOU HAVE
THOROUGHLY READ AND UNDERSTOOD THIS
USER MANUAL.
To increase the product life of the device and to ensure
trouble-free operation, use it in accordance with this user
manual and regularly perform maintenance tasks. The
technical data and specications in this user manual are
up to date. The manufacturer reserves the right to make
changes associated with quality improvement. The device
is designed to reduce noise emission risks to a minimum,
taking into account technological progress and noise
reduction opportunities.
LEGEND
The product satises the relevant safety
standards.
Read the instructions before use.
The product must be recycled.
Use ear protection. Exposure to loud noise may
result in hearing loss.
Wear protective goggles.
Wear a dust mask (respiratory tract protection).
Wear protective gloves.
Wear foot protection.
PLEASE NOTE! The drawings in this manual are for
illustration purposes only and in some details may
dier from the actual machine.
The original operation manual is in German. Other
language versions are translations from German.
2. USAGE SAFETY
ATTENTION! Read all safety warnings and all
instructions. Failure to follow the warnings and
instructions may result in an electric shock, re and/
or serious injury or even death.
REMEMBER! When using the device, protect children
and other bystanders.
3. USE GUIDELINES
The portable sandblaster is a device designed to clean
various kinds of surfaces from rust, impurities, etc. by means
of a stream of compressed air with particles of abrasive
material intended for sandblasting.
The user is liable for any damage resulting from
unintended use of the device.
3.1. DEVICE DESCRIPTION
ATTENTION! Despite the safe design of the device
and its protective features, and despite the use of
additional elements protecting the operator, there is still
a slight risk of accident or injury when using the device.
Stay alert and use common sense when using the device.
ATTENTION! This product‘s view can be found on the
last pages of the operating instructions (pp. 43).
Rev. 15.06.2020
Rev. 15.06.2020
EN
USER MANUAL
EN


11
5. Installation of the release (34): select one of the
available nozzles (28) (the nozzles can be replaced)
and install as shown.
6. Connecting the elements from steps 4 and 5 to the
tank: Attach two hose clamps (24) to the ends of the
hose (25). Clamp one end at the outlet of the pipe (23)
and the other at the end of the nipple (26). The clamps
must be pushed all the way to the end of the nipples
and tightened securely.
7. Lay the tank horizontally, attach the two transport
handles to the tank with 4 screws, washers and nuts.
Note: Make sure that the skewed handle elements
point in the right direction (towards the top of the
tank, outwards). The wheel axle (5) should be placed
in the holes of the handles (6). Place the wheels at the
ends of the axles and fasten with cotter pins and pads.
Place the xed leg (4) at the bottom of the tank close
to the edge. Use the cotter pin (3) to hold it.
Caution: Before starting operation, make sure that all
connections are correct and the elements are properly
seated.
3.3. DEVICE USE
3.3.1. PREPARING FOR USE
Before connecting the compressed air line, it is always
necessary to make sure that the main air valve is in the
closed position. Connect the compressed air supply line to
the male-female coupler (20). Make sure that it is correctly
mounted and it will not unfasten under compressed air
pressure. In order to remove moisture, which can cause
problems in the operation of the device, the air is dried by
a dehumidier.
3.3.2. CHOOSING THE RIGHT NOZZLE
Sandblasting requires a large volume of air under high
pressure. Too short hose, insucient air pressure or a nozzle
that is too large reduce the device's throughput. Choosing
the diameter of the hose to its length avoids a large pressure
drop in the device.
Hose
diameter
[‘’]
Hose
lenght [m] Nozzle
diameter
[‘’]
Abrasive usage
per hour [kg]
3/8 15,2 3/32 27,2
3/8 7,6 7/64 45,4
1/2 15,2 1/8 68
1/2 7,6 9/64 90,7
It is recommended to use a pressure of 4 – 8,6 bar, this will
ensure the best results.
3.3.3. EMPTYING THE DEHUMIDIFIER FROM WATER
1. Close the main air valve, it is also recommended to
empty the tank from the pressure.
2. Press the red lock on the dehumidier and while
holding it, turn the lower part of the dehumidier to
the right.
3. Take out and empty the tank.
4. Mount the dehumidier tank proceeding in a similar
way to the disassembly process.
In order to ensure an optimum and correct device
operation, it is necessary to properly select the compressor's
eciency in relation to air consumption by the receiving
devices. The device should be used at a safe distance from
the compressor, in order to prevent dust with abrasive
materials from getting into it.
3.3.4. SWITCHING THE DEVICE ON
Note: Use the device only and exclusively in the upright
position!
03
02
30
08
07
06
10
09
01
04 03
7
10
1. Installing the intake manifold (15): Attach a pressure
gauge (16) to the top of the T-piece inlet. Turn the
meter so that it is visible in the upper part of the tank.
Then attach the throttle valve (19A) to the bottom of
the manifold. Connect the nipple (21) to the throttle
valve. Attach the connecting pipe to the tee.
2. Installation of the air dryer (18): Screw the nipple (17)
on both sides of the lter. Attach the air valve (19) to
the connector on one side, then the connector (20).
Before starting work, connect the compressor air
supply pipe to the tting (20).
3. Position the tank and screw in the dryer lter (18) and
its parts to the side of the intake manifold. Then screw
the open end of the connecting pipe (14) with the
T-piece (15) and pressure gauge (16) to the threaded
hole on the side of the ller pipe at the top of the tank.
Make sure the meter is vertical.
4. Installation of the abrasive outlet valve into the hole at
the bottom of the tank: attach four parts in the correct
order as shown.
14
16
15
19A
21
17 18
17 19 20
1
2
17
19B
17
23
2
3
34
33
27 28 36
29
24 25 24
5
6
3.2. PREPARING FOR USE
ASSEMBLING THE DEVICE
• Connect the compressed air supply line. Set the
preferred working pressure on the compressor which
will not exceed the maximum value for the device.
• Pour the sand into the tank.
• Holding the sanding hose, point the nozzle towards
the surface to be worked on and press the dead
man's trigger.
• Set the main 3/8 "air valve (19) in the open position
– used to regulate the air ow from the compressor
to the device.
• Gently open the 3/8 "throttle valve (19A) – used to
adjust the ow of the air that raws the sand from the
sand outlet pipe towards the nozzle.
• Set the sandblasting line valve (19B) in the open
position – a valve that regulates the ow of the air
with sand through the nozzle.
• Open the 3/8 "throttle valve (19A) until the sand
appears in the air getting out from the nozzle.
• Set the preferred settings
• It is recommended to check the operation of the
device on a small area in order to check the material
reaction to sandblasting.
3.3.5. LOWERING THE AIR PRESSURE IN THE TANK
Put on personal protective equipment i.e. upper respiratory
protection, safety glasses and gloves.
• Verify whether the main air valve is in the closed
position.
• Set the sandblasting line valve in the open position,
wait until the "0" value appears on the manometer
3.3.6. POURING SAND INTO THE TANK
• Make sure that the sandblasting sand is not moist
and will not block the tank valve, sand outlet pipe,
sandblasting line, sandblasting line valve and nozzle
and other device components.
• Put on personal protective equipment i.e. upper
respiratory protection, safety glasses and gloves.
• Lower the air pressure in the tank.
• Unscrew the closure of the sand pouring point. Put
the funnel with strainer in the hole, and then pour
in the appropriate quantity of sand. Note: Do not
use the funnel without a strainer. There may be
larger lumps in the sand that may cause failure of
the device. NOTE: Do not exceed the lling of ca. ¾
of the total tank capacity. In case of high ambient
humidity, it is not ecommended to ll the tank to the
maximum, it is necessary to pour smaller portions of
sand into the tank and to gradually ll up the tank.
• Remove the funnel. Tighten the closure.
• Close the sandblasting line valve, open the air valve
and verify whether the sand pouring point is properly
tightened and whether there are no air leaks.
Sandblasting materials often easily absorb water.
Therefore, leaving unused sand in the tank can cause
the sand to soak, and consequently block the outlets
of the device, nozzles, etc.
Abrasive materials with graininess must be used in the
machine: 0,2 ÷ 0,7 mm. The use of the following abrasive
materials is permitted:
• Quartz abradant / sand
• Aloxite
• Cast iron shot
• Cast steel shot
• Glass microspheres
• Silicon carbide
Rev. 15.06.2020
Rev. 15.06.2020
ENEN

DANE TECHNICZNE
1. OGÓLNY OPIS
Instrukcja przeznaczona jest do pomocy w bezpiecznym
i niezawodnym użytkowaniu. Produkt jest zaprojektowany
i wykonany ściśle według wskazań technicznych przy
użyciu najnowszych technologii i komponentów oraz przy
zachowaniu najwyższych standardów jakości.
PRZED PRZYSTĄPIENIEM DO PRACY NALEŻY
DOKŁADNIE PRZECZYTAĆ I ZROZUMIEĆ NINIEJSZĄ
INSTRUKCJĘ.
Dla zapewnienia długiej i niezawodnej pracy urządzenia
należy dbać o jego prawidłową obsługę oraz konserwację
zgodnie ze wskazówkami zawartymi w tej instrukcji. Dane
techniczne i specykacje zawarte w tej instrukcji obsługi są
aktualne. Producent zastrzega sobie prawo dokonywania
zmian związanych z podwyższeniem jakości. Uwzględniając
postęp techniczny i możliwość ograniczenia hałasu,
urządzenie zaprojektowano i zbudowano tak, aby ryzyko
jakie wynika z emisji hałasu ograniczyć do najniższego
poziomu.
OBJAŚNIENIE SYMBOLI
UWAGA! Ilustracje w niniejszej instrukcji obsługi
mają charakter poglądowy i w niektórych
szczegółach mogą różnić się od rzeczywistego
wyglądu produktu.
Instrukcją oryginalną jest niemiecka wersja instrukcji.
Pozostałe wersje językowe są tłumaczeniami z języka
niemieckiego.
2. BEZPIECZEŃSTWO UŻYTKOWANIA
UWAGA! Przeczytaj wszystkie ostrzeżenia
dotyczące bezpieczeństwa oraz wszystkie instrukcje.
Niezastosowanie się do ostrzeżeń i instrukcji może
spowodować porażenie prądem, pożar i/lub ciężkie
obrażenia ciała lub śmierć.
Termin „urządzenie” lub „produkt” w ostrzeżeniach i w
opisie instrukcji odnosi się do MOBILNA PIASKARKA
SYFONOWA.
2.1. BEZPIECZEŃSTWO W MIEJSCU PRACY
a) Utrzymywać porządek w miejscu pracy i dobre
oświetlenie. Nieporządek lub złe oświetlenie może
prowadzić do wypadków. Należy być przewidującym,
obserwować co się robi i zachowywać rozsądek
podczas używania urządzenia.
b) W razie stwierdzenia uszkodzenia lub nieprawidłowości
w pracy urządzenia należy je bezzwłocznie wyłączyć i
zgłosić to do osoby uprawnionej.
c) W razie wątpliwości czy urządzenia działa poprawnie,
należy skontaktować się z serwisem producenta.
d) Naprawy urządzenia może wykonać wyłącznie
serwis producenta. Nie wolno dokonywać napraw
samodzielnie!
e) Na stanowisku pracy nie mogą przebywać dzieci
ani osoby nieupoważnione. (Nieuwaga może
spowodować utratę kontroli nad urządzeniem.)
f) W miejscach szczególnie zagrażających uszkodzeniem
należy używać węży zbrojonych.
g) Podłączanie i odłączanie przewodu ciśnieniowego
powinno odbywać się przy zamkniętym zaworze
powietrza.
h) Nie wolno kierować przewodu ciśnieniowego w
kierunku swoim lub innych osób lub zwierząt.
Powietrze pod ciśnieniem może spowodować
poważne obrażenia.
i) Nie wolno odcinać dopływu sprężonego powietrza
przez zgniatanie lub zaginanie przewodów
ciśnieniowych.
j) W czasie rozpoczęcia pracy z urządzeniem należy
stopniowo zwiększać dopływ powietrza do urządzenia
w celu upewnienia się, że działa ono prawidłowo.
W przypadku zauważenia nieprawidłowej pracy
urządzenia należy natychmiast odłączyć je od
sprężonego powietrza i skontaktować się z serwisem
producenta
k) W trakcie użytkowania tego urządzenia wraz z innymi
urządzeniami należy zastosować się również do
pozostałych instrukcji użytkowania.
Opis parametru Wartość parametru
Nazwa produktu
MOBILNA
PIASKARKA
SYFONOWA
Model MSW-MS40A
Wymiary zbiornika (ØxH) [mm] 310x450
Ciężar [kg] 13,75
Pojemność zbiornika [l] 31
Ciśnienie robocze [bar] 4-8,6
Długość przewodu [m] 2,4
Zużycie powietrza [l/min] 170-708
PAMIĘTAJ! Należy chronić dzieci i inne osoby
postronne podczas pracy urządzeniem.
2.2. BEZPIECZEŃSTWO OSOBISTE
a) Niedozwolone jest obsługiwanie urządzenia w stanie
zmęczenia, choroby, pod wpływem alkoholu,
narkotyków lub leków, które ograniczają w istotnym
stopniu zdolności obsługi urządzenia.
b) Należy być uważnym, kierować się zdrowym
rozsądkiem podczas pracy urządzeniem. Chwila
nieuwagi podczas pracy, może doprowadzić do
poważnych obrażeń ciała.
c) Należy używać środków ochrony osobistej
wymaganych przy pracy urządzeniem
wyszczególnionych w punkcie 1 objaśnienia symboli
Stosowanie odpowiednich, atestowanych środków
ochrony osobistej zmniejsza ryzyko doznania urazu.
Produkt spełnia wymagania odpowiednich norm
bezpieczeństwa.
Przed użyciem należy zapoznać się z instrukcją.
Produkt podlegający recyklingowi.
Stosuj ochronę słuchu. Narażenie na hałas może
powodować utratę słuchu.
Załóż okulary ochronne.
Stosuj maskę przeciwpyłową (ochrona dróg
oddechowych).
Stosuj rękawice ochronne.
Stosować ochronę stóp.
3.4. CLEANING AND MAINTENANCE
• Before starting to clean the device it is necessary to
disconnect it from the source of the compressed air
supply and then to reduce the pressure in the sand
tank by releasing the air from it.
• After each use of the device, it is necessary to clean
it thoroughly.
• Systematically check the condition of nozzles, valves
and hoses. The abrasive material causes attrition of
the hose walls. This is especially important for the
proper functioning of the dead man's trigger.
• Systematically empty the dehumidier from the
water ltered out from the air.
• Use cleaners without corrosive substances to clean
each surface.
• Dry all parts well after cleaning before the device is
used again.
• Store the unit in a dry, cool place, free from moisture
and direct exposure to sunlight.
DISPOSING OF USED DEVICES
Do not dispose of this device in municipal waste systems.
Hand it over to an electric and electrical device recycling
and collection point. Check the symbol on the product,
instruction manual and packaging. The plastics used to
construct the device can be recycled in accordance with
their markings. By choosing to recycle you are making
a signicant contribution to the protection of our
environment. Contact local authorities for information on
your local recycling facility.
1312 Rev. 15.06.2020
Rev. 15.06.2020
EN PL
INSTRUKCJA OBSŁUGI

26. Nypel
27. Uszczelka
28. Ceramiczna dysza
29. Przednia nakrętka
30. Podkładka
31. Lejek
32. Kaptur
33. Czuwak
34. Wyzwalacz
35. Adapter czuwaka
36. Blok uszczelniający
Uwaga: Kaptur (32) nie stanowi ochrony dróg oddechowych
i nie zastępuje maski przeciwpyłowej.
3.2. PRZYGOTOWANIE DO PRACY
MONTAŻ URZĄDZENIA
1. Montaż kolektora dolotowego (15): Do górnej części
wlotu trójnika należy przymocować manometr (16).
Miernik należy obrócić tak żeby był widoczny w górnej
części zbiornika. Następnie należy przymocować
zawór dławiący (19A) do dolnej części kolektora.
Podłączyć nypel (21) do zaworu dławiącego. Do
trójnika przymocować rurkę łączącą.
2. Montaż osuszacza powietrza (18): Z obu stron ltra
przykręcić nypel (17). Z jednej strony do złącza
przymocować zawór powietrza (19) a następnie złącze
(20). Przed rozpoczęciem pracy do złączki (20) należy
przymocować przewód doprowadzający powietrze ze
sprężarki.
3. Ustawić zbiornik i wkręcić ltr osuszacza (18) i jego
części z boku kolektora dolotowego. Następnie
należy przykręcić otwarty koniec rury łączącej (14) z
trójnikiem (15) i manometrem (16) do gwintowanego
otworu z boku rury wlewowej na szczycie zbiornika.
Upewnić się, że miernik jest ustawiony pionowo.
4. Montaż zaworu wylotowego materiału ściernego do
otworu na dnie zbiornika: dołączyć cztery części w
odpowiedniej kolejności zgodnie z rysunkiem.
14
16
15
19A
21
17 18
17 19 20
1
2
17
19B
17
23
2
3
34
33
27 28 36
29
24 25 24
5
6
d) Aby zapobiegać przypadkowemu uruchomieniu
upewnij się, że zawór jest w pozycji zamkniętej
przed podłączeniem do źródła zasilania sprężonym
powietrzem.
e) Nie należy przeceniać swoich możliwości.
Utrzymywać balans i równowagę ciała przez cały czas
pracy. Umożliwia to lepszą kontrolę nad urządzeniem
w nieoczekiwanych sytuacjach.
f) Nie należy nosić luźnej odzieży ani biżuterii. Włosy,
odzież i rękawice utrzymywać z dala od części
ruchomych. Luźna odzież, biżuteria lub długie włosy
mogą zostać chwycone przez ruchome części.
g) Należy usunąć wszelkie narzędzia regulujące lub
klucze przed włączeniem urządzenia. Narzędzie
lub klucz pozostawiony w obracającej się części
urządzenia może spowodować obrażenia ciała.
h) Należy zabezpieczyć obrabiany element, szczególnie
niewielkiej wielkości przed przypadkowym
przesunięciem np. blokując go za pomocą imadła.
i) Podczas pracy z urządzeniem wytwarza się
pył mogący zawierać szkodliwe substancje,
należy użytkować urządzenie w bardzo dobrze
wentylowanym pomieszczeniu oraz używać maski
ochronnej z ltrem.
2.3. BEZPIECZNE STOSOWANIE URZĄDZENIA
a) Nie należy przeciążać urządzenia. Używać narzędzi
odpowiednich do danego zastosowania. Prawidłowo
dobrane urządzenie wykona lepiej i bezpieczniej pracę
dla którego zostało zaprojektowane.
b) Przed przystąpieniem do regulacji, wymiany osprzętu
lub odłożeniem narzędzia należy wyciągnąć wtyczkę z
gniazda. Taki środek zapobiegawczy zmniejsza ryzyko
przypadkowego uruchomienia.
c) Nieużywane urządzenia należy przechowywać
w miejscu niedostępnym dla dzieci oraz osób
nieznających urządzenia lub tej instrukcji
obsługi. Urządzenia są niebezpieczne w rękach
niedoświadczonych użytkowników.
d) Utrzymywać urządzenie w dobrym stanie technicznym.
Sprawdzać przed każdą pracą czy nie posiada
uszkodzeń ogólnych lub związanych z elementami
ruchomymi (pęknięcia części i elementów lub wszelkie
inne warunki, które mogą mieć wpływ na bezpieczne
działanie urządzenia). W przypadku uszkodzenia,
oddać urządzenie do naprawy przed użyciem.
e) Urządzenie należy chronić przed dziećmi.
f) Naprawa oraz konserwacja urządzeń powinna być
wykonywana przez wykwalikowane osoby przy
użyciu wyłącznie oryginalnych części zamiennych.
Zapewni to bezpieczeństwo użytkowania.
g) Aby zapewnić zaprojektowaną integralność operacyjną
urządzenia, nie należy usuwać zainstalowanych
fabrycznie osłon lub odkręcać śrub.
h) Przy transportowaniu i przenoszeniu urządzenia z
miejsca magazynowania do miejsca użytkowania
należy uwzględnić zasady bezpieczeństwa i higieny
pracy przy ręcznych pracach transportowych
obowiązujących w kraju, w którym urządzenia są
użytkowane.
i) Należy unikać sytuacji, gdy urządzenie podczas pracy,
zatrzymuje się pod wpływem dużego obciążenia.
Może spowodować to przegrzanie się elementów
napędowych i w konsekwencji uszkodzenie
urządzenia.
j) Nie wolno dotykać części lub akcesoriów ruchomych,
chyba że urządzenie zostało odłączone od zasilania.
k) Nie wolno przenosić lub wieszać urządzenie za
przewód ciśnieniowy.
l) Czynności konserwacyjne oraz wymianę przewodów,
dysz itp. należy wykonywać tylko i wyłącznie przy
odłączonym dopływie sprężonego powietrza oraz
opróżnionym z ciśnienia zbiorniku.
m) Do zasilania urządzenia używać powietrza, zabrania
się używania innych gazów.
n) Urządzenie transportować w pozycji pionowej.
o) W urządzeniu można stosować tylko i wyłącznie
specjalnie przeznaczony do piaskarek materiał do
piaskowania. Zabrania się używania zwykłego piasku!
p) Zawsze gdy urządzenie jest transportowane lub
nieużywane należy zmniejszyć ciśnienie w zbiorniku z
piaskiem. Manometr powinien wskazywać wartość 0.
UWAGA! Pomimo iż urządzenie zostało
zaprojektowane tak aby było bezpieczne, posiadało
odpowiednie środki ochrony oraz pomimo użycia
dodatkowych elementów zabezpieczających
użytkownika, nadal istnieje niewielkie ryzyko wypadku
lub odniesienia obrażeń w trakcie pracy z urządzeniem.
Zaleca się zachowanie ostrożności i rozsądku podczas
jego użytkowania.
3. ZASADY UŻYTKOWANIA
Mobilna piaskarka jest urządzeniem przeznaczonym
do oczyszczania różnego rodzaju powierzchni z rdzy,
zanieczyszczeń itp. za pomocą strumienia sprężonego
powietrza z drobinami materiału ściernego przeznaczonego
do piaskowania.
Odpowiedzialność za wszelkie szkody powstałe
w wyniku użytkowania niezgodnego z przeznaczeniem
ponosi użytkownik.
3.1. OPIS URZĄDZENIA
1. Zbiornik
2. Koło
3. Spinka
4. Stopa
5. Oś kół
6. Uchwyt do przewożenia
7. Rękojeść uchwytu
8. Śruba
9. Nakrętka
10. Podkładka
11. Zawór bezpieczeństwa
12. Uszczelka
13. Zamknięcie wsypu piasku
14. Rurka
15. Trójnik
16. Manometr
17. Nypel dwustronny
18. Osuszacz powietrza
19. Główny zawór powietrza 3/8’’
19A. Zawór dławiący 3/8’’
19B. Zawór przewodu do piaskowania
20. Złączka męska- damska
21. Nypel dwustronny
22. Wąż do powietrza
23. Rurka wylotowa piasku
24. Opaska zaciskowa
25. Przewód do piaskowania
UWAGA: Rysunek produktu znajduje się na końcu
instrukcji na stronie: 43.
1514 Rev. 15.06.2020
Rev. 15.06.2020
PLPL

3.3.6. NASYPYWANIE PIASKU DO ZBIORNIKA
Upewnić się, że piasek do piaskowania nie jest wilgotny i
nie spowoduje zapchania zaworu zbiornika, rury wylotowej
piasku, przewodu do piaskowania, zaworu przewodu do
piaskowania oraz dyszy i innych komponentów urządzenia.
• Założyć środki ochrony osobistej tj. ochronę górnych
dróg oddechowych, okulary ochronne oraz rękawice.
• Obniżyć ciśnienie powietrza w zbiorniku.
• Odkręcić zamknięcie wsypu piasku. Wsadzić lejek z
sitkiem w otwór, a następnie wsypać odpowiednią
ilość piasku. Uwaga: Nie należy używać lejku bez
sita. W piasku mogą znajdować się większe grudki
mogące spowodować awarię urządzenia.
UWAGA: Nie należy przekraczać wypełnienia
powyżej ok. ¾ pojemności całkowitej zbiornika. W
przypadku wysokiej wilgotności otoczenia nie zaleca
się maksymalnego zapełnienia zbiornika, należy
wsypywać mniejsze porcje piasku do zbiornika i
sukcesywnie uzupełniać zbiornik.
• Usunąć lejek. Zakręcić zamknięcie.
• Zamknąć zawór przewodu do piaskowania, otworzyć
zawór powietrza i zwerykować, czy zamknięcie
wsypu piasku jest poprawnie zakręcone i nie ma
wycieków powietrza. Materiały do piaskowania
często są wysoce absorbujące wodę, dlatego też
pozostawienie niezużytego piasku w zbiorniku może
spowodować jego namoknięcie, a co za tym idzie
zapchanie się wylotów urządzenia, dysz itp.
W urządzeniu należy używać materiał ścierny o ziarnistości:
0,2 ÷ 0,7 mm. Dozwolone jest stosowanie następujących
materiałów
ściernych:
• Ścierniwo kwarcowe / piasek
• Elektrokorund
• Śrut żeliwny
• Śrut staliwny
• Mikrokulki szklane
• Węglik krzemu
3.4. CZYSZCZENIE I KONSERWACJA
• Przed rozpoczęciem czyszczenia urządzenia
należy odłączyć je od źródła zasilania sprężonym
powietrzem, a następnie zmniejszyć ciśnienie w
zbiorniku z piaskiem wypuszczając z niego powietrze.
• Po zakończeniu każdej pracy z urządzeniem należy je
starannie wyczyścić.
• Systematycznie kontrolować stan dysz, zaworów oraz
węży. Materiał ścierny powoduje wycieranie się ścian
węża. Jest to szczególnie ważne dla prawidłowego
działania czuwaka.
• Systematycznie opróżniać osuszacz z odltrowanej z
powietrza wody.
• Do czyszczenia powierzchni należy stosować
wyłącznie środki niezawierające substancji żrących.
• Po każdym czyszczeniu wszystkie elementy należy
dobrze wysuszyć, zanim urządzenie zostanie
ponownie użyte.
• Urządzenie należy przechowywać w suchym i
chłodnym miejscu chronionym przed wilgocią i
bezpośrednim promieniowaniem słonecznym.
USUWANIE ZUŻYTYCH URZĄDZEŃ.
Po zakończeniu okresu użytkowania nie wolno usuwać
niniejszego produktu poprzez normalne odpady komunalne,
lecz należy go oddać do punktu zbiórki i recyklingu
urządzeń elektrycznych i elektronicznych. Informuje o tym
symbol, umieszczony na produkcie, instrukcji obsługi lub
opakowaniu. Zastosowane w urządzeniu tworzywa nadają
się do powtórnego użycia zgodnie z ich oznaczeniem.
Dzięki powtórnemu użyciu, wykorzystaniu materiałów lub
innym formom wykorzystania zużytych urządzeń wnoszą
Państwo istotny wkład w ochronę naszego środowiska.
Informacji o właściwym punkcie usuwania zużytych
urządzeń udzieli Państwu lokalna administracja.
5. Montaż wyzwalacza (34): należy wybrać jedną z
dostępnych dysz (28) (dysze można wymieniać ) i
zamontować ją zgodnie z rysunkiem.
6. Podłączenie elementów z kroku 4 i 5 do zbiornika: Na
końce węża (25) nałożyć dwie opaski zaciskowe (24).
Jeden koniec zacisnąć na wylocie rury (23) a drugi na
końcu nypla (26). Zaciski należy dosunąć maksymalnie
do końca nypli i mocno dokręcić.
7. Położyć zbiornik poziomo, przymocować dwa
uchwyty do przewożenia do zbiornika za pomocą 4
śrub, podkładek i nakrętek. Uwaga: należy zwrócić
uwagę by przekrzywione elementy uchwytów
były skierowane w odpowiednią stronę (ku górze
zbiornika, na zewnątrz). Oś kół (5) należy umieścić w
otworach uchwytów (6). Umieścić koła na końcach osi
i przymocować za pomocą zawleczek i podkładek.
Stałą nogę (4) umieścić na dnie zbiornika blisko
krawędzi. Użyć zawleczki (3) do jej przytrzymania.
Uwaga: Przed rozpoczęciem pracy należy sprawdzić
czy wszystkie połączenia są prawidłowe a elementy
dobrze osadzone.
3.3. PRACA Z URZĄDZENIEM
3.3.1. PRZYGOTOWANIE DO PRACY
Przed podłączeniem przewodu sprężonego powietrza
zawsze należy upewnić się, że główny zawór powietrza jest
w pozycji zamkniętej. Podłączyć przewód doprowadzający
sprężone powietrze do złączki damsko-męskiej (20).
Upewnić się, że jest prawidłowo zamontowany i nie wypnie
się pod wpływem naporu powietrza pod ciśnieniem. W celu
pozbycia się wilgoci mogącej spowodować problemy w
pracy urządzenia, powietrze jest osuszane przez osuszacz.
3.3.2. WYBÓR ODPOWIEDNIEJ DYSZY
Piaskowanie wymaga dużej objętości powietrza pod
wysokim ciśnieniem. Zbyt krótki wąż, niedostateczne
ciśnienie powietrza lub zbyt duża dysza zmniejszają
przepustowość urządzenia. Dobór średnicy przewodu
do jego długości pozwala na uniknięcie dużego spadku
ciśnienia w urządzeniu.
Średnica
węża [‘’] Długość
węża [m] Średnica
dyszy [‘’] Zużycie materiału
ściernego na
godzinę [kg]
3/8 15,2 3/32 27,2
3/8 7,6 7/64 45,4
1/2 15,2 1/8 68
1/2 7,6 9/64 90,7
Zaleca się użycie ciśnienia w zakresie 4 - 8,6 bar, zapewni to
najlepsze rezultaty.
3.3.3. OPRÓŻNIANIE OSUSZACZA Z WODY
1. Zamknąć główny zawór powietrza, zaleca się również
opróżnić zbiornik z ciśnienia.
2. Przycisnąć czerwoną blokadę na osuszaczu i
przytrzymując ją przekręcić dolną część osuszacza w
prawo.
3. Wyjąć i opróżnić zbiornik.
4. Zamontować zbiornik osuszacza postępując
analogicznie do procesu demontażu.
W celu zapewnienia optymalnej i poprawnej pracy
urządzenia należy odpowiednio dobrać wydajność
kompresora w stosunku do zużycia powietrza przez
urządzenia odbiorcze. Urządzenie użytkować w bezpiecznej
odległości od kompresora, tak aby uniemożliwić dostanie
się do niego pyłu z materiałami ściernymi.
3.3.4. WŁĄCZANIE URZĄDZENIA
Uwaga: Urządzenie używać tylko i wyłącznie w pozycji
pionowej!
• Podłączyć przewód doprowadzający sprężone
powietrze. Na sprężarce ustawić preferowane
ciśnienie robocze nie przekraczające maksymalnej
wartości dla urządzenia.
• Nasypać piasek do zbiornika.
• Trzymając przewód do piaskowania skierować dyszę
w kierunku opracowywanej powierzchni i wcisnąć
czuwak.
• Ustawić w pozycji otwartej główny zawór powietrza
3/8’’ (19) – służący do regulacji przepływu powietrza
od sprężarki do urządzenia.
• Delikatnie otworzyć zawór dławiący 3/8’’ (19A)
– służący do regulacji przepływu powietrza
pobierającego w kierunku dyszy piasek z rury
wylotowej piasku.
• Ustawić w pozycji otwartej zawór przewodu do
piaskowania (19B) – zawór regulujący przepływ
powietrza z piaskiem przez dyszę.
• Otwierać zawór dławiący 3/8’’ (19A), aż w powietrzu
wydostającym się z dyszy pojawi się piasek.
• Ustawić preferowane ustawienia
• Zaleca się sprawdzić działanie urządzenia na
niewielkiej powierzchni w celu sprawdzenia reakcji
materiału na piaskowanie.
3.3.5. OBNIŻANIE CIŚNIENIA POWIETRZA W ZBIORNIKU
Założyć środki ochrony osobistej tj. ochronę górnych dróg
oddechowych, okulary ochronne oraz rękawice.
• Zwerykować, czy główny zawór powietrza jest w
pozycji zamkniętej.
• Zawór przewodu do piaskowania ustawić w pozycji
otwartej, odczekać, aż na manometrze pojawi się
wartość „0”
03
02
30
08
07
06
10
09
01
04 03
7
1716 Rev. 15.06.2020
Rev. 15.06.2020
PLPL

TECHNICKÉ ÚDAJE Pojem „zařízení“ nebo „výrobek“ v bezpečnostních
pokynech a návodu se vztahuje na MOBILNÍ PÍSKOVAČKA.
2.1. BEZPEČNOST NA PRACOVIŠTI
a) Na pracovišti udržujte pořádek a mějte dobré
osvětlení. Nepořádek nebo špatné osvětlení mohou
vést k úrazům. Buďte předvídaví a sledujte, co se
během práce kolem vás děje. Při práci se zařízením
vždy zachovávejte zdravý rozum.
b) Pokud zjistíte, že zařízení nepracuje správně, nebo
je poškozeno, ihned jej vypněte a poruchu nahlaste
autorizované osobě.
c) Pokud máte pochybnosti o tom, zda zařízení funguje
správně, kontaktujte servis výrobce.
d) Opravy zařízení může provádět pouze servis výrobce.
Opravy neprovádějte sami!
e) Na pracovišti se nesmí zdržovat děti a nepovolané
osoby. (Nepozornost může způsobit ztrátu kontroly
nad zařízením.)
f) Na místech, kde hrozí poškození, používejte zesílené
hadice.
g) Tlakovou hadici připojujte a odpojujte pouze pokud je
vzduchový ventil uzavřen.
h) Tlakovou hadici nesměrujte na sebe, jiné osoby nebo
zvířata.
i) Přívod stlačeného vzduchu nezavírejte mačkáním
nebo zalomením tlakových hadic.
j) Po zahájení práce postupně otevírejte přívod vzduchu
do zařízení, abyste se ujistili o jeho správném
fungování. Pokud si všimnete nesprávného provozu
zařízení, ihned jej odpojte od stlačeného vzduchu a
kontaktujte servis výrobce.
k) Pokud společně s tímto nástrojem používáte nějaké
další nářadí, pak musíte dodržovat také jeho návod k
použití.
Popis parametru Hodnota parametru
Název výrobku MOBILNÍ PÍSKOVAČKA
Model MSW-MS40A
Rozměry nádoby (ØxH)
[mm] 310x450
Hmotnost [kg] 13,75
Objem nádrže [l] 31
Pracovní tlak [bar] 4-8,6
Délka pískovací hadice [m] 2,4
Spotřeba vzduchu [l/min] 170-708
2.2. OSOBNÍ BEZPEČNOST
a) Zařízení nepoužívejte, jste-li unaveni nebo pod
vlivem drog, alkoholu nebo léků, které významně
snižují schopnost zařízení ovládat.
b) Při práci se zařízením buďte pozorní, řiďte se
zdravým rozumem. Chvilka nepozornosti při práci
může vést k vážnému úrazu.
c) Používejte osobní ochranné pomůcky vyžadované
pro práci se zařízením, specikované v bodě
1 vysvětlením symbolů. Používání vhodných,
atestovaných osobních ochranných prostředků
snižuje nebezpečí úrazu.
d) Zabraňte náhodnému spuštění. Ujistěte se, že je
spínač ve vypnuté poloze před připojením zařízení k
napájecímu zdroji.
e) Nepřeceňujte své schopnosti. Udržujte stabilní
postoj a rovnováhu po celou dobu práce. To vám
umožní lépe ovládat zařízení v neočekávaných
situacích.
f) Nenoste volné oblečení nebo šperky. Vlasy, oděv
a rukavice udržujte v bezpečné vzdálenosti od
rotujících dílů. Volný oděv, šperky nebo dlouhé vlasy
mohou zachytit rotující díly.
g) Odstraňte veškeré seřizovací nástroje nebo klíče před
zapnutím zařízení. Nástroje nebo klíče ponechané v
rotujících dílech zařízení mohou způsobit vážný úraz.
h) Zabezpečte obrobek, zvláště malé části, proti
náhodnému přesunutí např. blokací svěrákem.
18
i) Při práci se zařízením vzniká škodlivý prach, zařízení
používejte v prostorách s dobrou ventilací a
používejte ochrannou masku s ltrem.
2.3. BEZPEČNÉ POUŽÍVÁNÍ ZAŘÍZENÍ
a) Zařízení nepřetěžujte. Pro daný úkol používejte vždy
správný typ nářadí. Správně zvolené nářadí lépe a
bezpečněji provede práci, pro kterou bylo navrženo.
b) Vytáhněte zástrčku ze zásuvky před jakýmkoliv
seřízením, výměnou příslušenství nebo odložením
zařízení. Toto opatření snižuje riziko náhodného
zapnutí.
c) Nepoužívaná zařízení uchovávejte mimo dosah dětí
a osob, které nejsou seznámeny se zařízením nebo
návodem k obsluze. Zařízení jsou nebezpečná v
rukou nezkušených uživatelů.
d) Zařízení udržujte v dobrém technickém stavu.
Kontrolujte před každou prací jeho celkový stav i
jednotlivé díly a ujistěte se, že je vše v dobrém stavu,
a uživateli tak při práci se zařízením nehrozí žádné
nebezpečí. V případě, že zjistíte poškození, nechte
zařízení opravit.
e) Udržujte zařízení mimo dosah dětí.
f) Opravu a údržbu zařízení by měly provádět
pouze kvalikované osoby za výhradního použití
originálních náhradních dílů. Zajistí to bezpečné
používání zařízení.
g) Pro zachování navržené mechanické integrity
zařízení neodstraňujte předem namontované kryty
nebo neuvolňujte šrouby.
h) Při přemisťování zařízení z místa skladování na místo
používání berte v úvahu pracovní zásady bezpečnosti
a ochrany zdraví v rámci přenášení břemena platné v
zemi, ve které se zařízení používá.
i) Zabraňte situaci, kdy se zapnuté zařízení zastaví
vlivem velkého zatížení. Může to způsobit přehřátí
hnacích součástí a v následku poškození zařízení.
j) Pokud zařízení nebylo odpojeno od napájení,
nedotýkejte se rotujících dílů ani součástí.
k) Zařízení nepřenášejte nebo nezavěšujte za tlakovou
hadici.
l) Údržbu nebo výměnu hadic, trysek apod. provádějte
pouze a při uzavřeném přívodu stlačeného vzduchu
a s nádrži bez tlaku.
m) K napájení zařízení používejte vzduch, je zakázáno
používat jiné plyny.
n) Zařízení přepravujte ve svislé poloze.
o) Do zařízení používejte pouze a výlučně pískovací
materiál speciálně určený pro pískováčky.
Nepoužívejte obyčejný písek!
p) Při přepravě zařízení nebo jeho nepoužívání vždy
snižte tlak v nádrži s pískem. Manometr musi
ukazovat hodnotu 0.
19
1. Nádrž
2. Kolečka
3. Kolečka
4. Vzpěra
5. Náprava kol
6. Úchyt pro přepravu
7. Rukojeť
8. Šroub
9. Matice
10. Podložka
11. Pojistný ventil
12. Těsnění
13. Uzávěr násypky písku
14. Trubka
15. T-kus
16. Manometr
17. Oboustranný nipl
18. Odvlhčovač vzduchu
19. Hlavní vzduchový ventil 3/8’’
19A. Škrticí klapka 3/8’’
19B. Ventil pískovací hadice
20. Spojka samec-samice
21. Oboustranný nipl
22. Vzduchová hadice
23. Výstupní trubka písku
24. Upínací spona
25. Pískovací hadice
26. Nipl
27. Těsnění
28. Keramická tryska
29. Pření matice
30. Podložka
31. Trychtýř
32. Ochranná kapuce
33. Bezpečnostní pojistka
34. Spoušť
35. Adaptér pojistky
36. Těsnění
UPOZORNĚNÍ: Ochranná kapuce (32) neslouží k ochraně
dýchacích cest a nenahrazuje respirátor.
3.2. PŘÍPRAVA K PRÁCI
MONTÁŽ ZAŘÍZENÍ
3.1. POPIS ZAŘÍZENÍ
1. VŠEOBECNÝ POPIS
Návod slouží jako nápověda pro bezpečné a spolehlivé
používání výrobku. Výrobek je navržen a vyroben přesně
podle technických údajů za použití nejnovějších technologií
a komponentů a za dodržení nejvyšších jakostních norem.
PŘED ZAHÁJENÍM PRÁCE SI DŮKLADNĚ PŘEČTĚTE
TENTO NÁVOD A SNAŽTE SE JEJ POCHOPIT.
Pro zajištění dlouhého a spolehlivého fungování zařízení
provádějte pravidelný servis a údržbu v souladu s pokyny
uvedenými v tomto návodu. Technické údaje a specikace
uvedené v návodu k obsluze jsou aktuální. Výrobce si
vyhrazuje právo provádět změny pro zvýšení kvality.
Vzhledem k technickému pokroku a možnosti omezení
hluku bylo zařízení navrženo a vyrobeno tak, aby nebezpečí
vyplývající z emise hluku bylo omezeno na nejnižší úroveň.
VYSVĚTLENÍ SYMBOLŮ
Výrobek splňuje příslušné bezpečnostní normy.
Před použitím se seznamte s návodem.
Recyklovatelný výrobek.
Používejte ochranu sluchu.
Nasaďte si ochranné brýle.
Používejte protiprachovou masku (ochrana
dýchacích cest).
Používejte ochranné rukavice.
Používejte ochranou obuv.
POZOR! Ilustrace v tomto návodu mají náhledovou
povahu, a v některých detailech se od skutečného
vzhledu stroje mohou lišit.
Originálním návodem je německá verze návodu. Ostatní
jazykové verze jsou překladem z německého jazyka.
2. BEZPEČNOST POUŽÍVÁNÍ
POZNÁMKA! Přečtěte si tento návod včetně všech
bezpečnostních pokynů. Nedodržování návodu
a pokynů může vést k úrazu elektrickým proudem,
požáru a/nebo těžkému úrazu nebo smrti.
PAMATUJTE! Při práci se zařízením chraňte děti
a jiné nepovolané osoby.
3. ZÁSADY POUŽÍVÁNÍ
Mobilní pískováčka je zařízení určené pro čištění povrchů
různého druhu od rzi, nečistot atp. pomocí proudu
stlačeného vzduchu s částicemi tryskacího materiálu
určeného pro pískování.
Odpovědnost za veškeré škody vzniklé v důsledku
použití zařízení v rozporu s určením nese uživatel.
POZNÁMKA! I když zařízení bylo navrženo tak, aby
bylo bezpečné, tedy má vhodné bezpečnostní prvky,
tak i přes použití dodatečné ochrany uživatelem při
práci se zařízením nadále existuje malé riziko úrazu
nebo poranění. Doporučuje se zachovat opatrnost
a zdravý rozum při jeho používání.
POZNÁMKA! Nákres tohoto produktu naleznete na
konci návodu na str. 43.
14
16
15
19A
21
1
Rev. 15.06.2020
Rev. 15.06.2020
CZ CZ
NÁVOD K OBSLUZE

21
5. Montáž spouště (34): vyberte jednu z dostupných
trysek (28) (trysky lze měnit) a namontujte ji dle
obrázku.
6. Připojení částí z bodů 4 a 5 k nádrži: Na koncích hadice
(25) umístěte dvě upínací svorky (24). Jeden konec
upněte na výstupu potrubí (23) a druhý na konci
vsuvky (26). Svorky je třeba zasunout až na konec
vsuvek a pevně dotáhnout.
7. Položte nádobu vodorovně, k nádobě přimontujte
dvě transportní rukojeti pomocí 4 šroubů, podložek
a matic. Upozornění: Je třeba se ujistit, že zahnuté
části rukojetí směřují správným směrem (k horní
straně nádoby, směrem ven). Osu kol (5) umístěte v
otvorech rukojetí (6). Na koncích osy umístěte kola a
připevněte pomocí závlaček a podložek. Pevnou nohu
(4) umístěte na spodní stranu nádoby blízko okraje.
Použijte závlačku (3) pro její přidržení.
Upozornění: Před zahájením práce je třeba se ujistit,
že všechny připojení jsou správné a části a součásti
jsou správně namontované.
Průměr
hadice [‘’] Délka
hadice
[fm
Průměr
trysky [‘’] Spotřeba
abrazivního
materiálu za
hodinu [kg]
15,2 3/32 27,2
3/8 7,6 7/64 45,4
1/2 15,2 1/8 68
1/2 7,6 9/64 90,7
Doporučuje se použít tlak v rozsahu 4 - 8,6 bar, což zajistí
dosažení těch nejlepších výsledků.
3.3.3. VYPOUŠTĚNÍ VODY Z OSUŠOVAČE
1. Uzavřete hlavní vzduchový ventil, doporučuje se také
vypustit z nádrže tlak.
2. Stiskněte červené blokovací tlačítko na osušovači
a jeho přidržováním otočte spodní část osušovače
vpravo.
3. Vyjměte a vyprázdněte nádrž.
4. Namontujte nádrž osušovače stejným způsobem jako
při demontáži.
Abyste zajistili optimální a správnou práci zařízení, vyberte
vhodný výkon kompresoru podle spotřeby vzduchu
spotřebičů. Zařízení používejte v bezpečné vzdálenosti
od kompresoru, tak aby se znemožnilo proniknutí do něj
prachu s tryskacím materiálem.
3.3.4. ZAPNUTÍ ZAŘÍZENÍ
Upozornění: Zařízení používejte pouze a výlučně ve svislé
poloze!
• Připojte hadici přivádějící stlačený vzduch. Na
kompresoru nastavte požadovaný provozní tlak
nepřekračující maximální hodnotu zařízení.
• Do nádrže nasypejte písek.
• Držte hadici pískováčky a nasměrujte trysku na
obráběný povrch a stiskněte spoušť.
• Nastavte do polohy otevřeno hlavní vzduchový ventil
3/8’’ (19) – který slouží pro regulaci průtoku vzduchu
z kompresoru do zařízení.
• Opatrně otevřete škrticí klapku 3/8’’ (19A) – který
slouží pro regulaci průtoku vzduchu odebírajícího
směrem k trysce písek z výstupní trubky písku.
• Nastavte do polohy otevřeno ventil pískovací hadice
(19B) – ventil upravující průtok vzduchu s pískem
přes trysku.
03
02
30
08
07
06
10
09
01
04 03
7
20
1. Instalace sacího potrubí (15): Na horní část vstupu
T-kusu namontujte manometr (16). Měřič by měl být
otočen tak, aby byl vidět v horní části nádoby. Potom
připojte škrtící ventil (19A) ke spodní části sacího
potrubí. Napojte vsuvku (21) na škrtící ventil. K T-kusu
připojte spojovací trubku.
2. Instalace sušiče vzduchu (18): Na obě strany ltru
našroubujte vsuvky (17). Ke spojce na jedné straně
připojte vzduchový ventil (19) a poté spojku (20).
Před zahájením práce namontujte na na spojku (20)
potrubí přívodu vzduchu z kompresoru.
3. Umístěte nádobu a našroubujte ltr sušiče (18) a jeho
části z boční strany sacího potrubí. Potom našroubujte
otevřený konec spojovací trubky (14) s T-kusem (15)
a manometrem (16) do závitového otvoru na straně
plnící trubky v horní části nádoby. Ujistěte se, že měřič
je ve svislé poloze.
4. Instalace vypouštěcího ventilu abrazivního materiálu
ve spodní části nádoby: namontujte čtyři části ve
správném pořadí, jak je uvedeno na obrázku.
17 18
17 19 20
2
17
19B
17
23
2
3
34
33
27 28 36
29
24 25 24
5
6
• Otevřete škrticí klapku 3/8’’ (19A), až se ve vzduchu
vystupujícím z trysky objeví písek.
• Nastavte požadovaná nastavení.
• Fungování zařízení zkontrolujte na malém povrchu,
abyste zjistili reakci materiálu na pískování.
3.3.5. SNÍŽENÍ TLAKU VZDUCHU V NÁDRŽI
Nasaďte si osobní ochranné prostředky, tj. ochranu horních
cest dýchacích, ochranné brýle a rukavice.
• Ujistěte se, že hlavní vzduchový ventil je v poloze
zavřeno.
• Ventil pískovací hadice otevřete a počkejte, až
manometr ukáže hodnotu „0“.
3.3.6. NASYPÁVÁNÍ PÍSKU DO NÁDRŽE
• Ujistěte se, že písek pro pískování není vlhký a neucpe
ventil nádrže, výstupní trubku písku, pískovací hadici,
ventil pískovací hadice a trysky a jiné komponent
zařízení.
• Nasaďte si osobní ochranné prostředky, tj. ochranu
horních cest dýchacích, ochranné brýle a rukavice.
• Snižte tlak vzduchu v nádrži..
• Vyšroubujte uzávěr násypky písku. Vložte trychtýř se
sítkem do otvoru a pak nasypejte vhodné množství
písku. Upozornění: Nepoužívejte trychtýř bez sítka.
V písku se mohou nacházet větší hrudky, které
mohou způsobit poruchu zařízení. UPOZORNĚNÍ:
Nepřekračujte naplnění nad zhruba ¾ celkového
objemu nádrže. V případě vysoké okolní vlhkosti
se nedoporučuje naplňovat nádrž po maximum,
nasypávejte menší dávky písku do nádrže a postupně
doplňujte písek.
• Vyjměte trychtýř. Zašroubujte uzávěr.
• Zavřete ventil pískovací hadice, otevřete vzduchový
ventil a ověřte, zda uzávěr násypky písku je náležitě
zašroubován a zda nejsou žádné úniky vzduchu.
Materiály pro pískování jsou často vysoce absorbující, proto
také ponechání nespotřebovaného písku v nádrži může
způsobit jeho navlhnutí, a potažmo ucpání výstupních
otvorů zařízení, trysek atp.
V zařízení používejte tryskací materiál se zrnitostí: 0,2 ÷ 0,7
mm. Můžete používat následující tryskací materiály:
• Křemíkový tryskací materiál / písek
• Elektrokorund
• Litinové broky
• Ocelové broky
• Skleněné mikrokuličky
• Karbid křemíku
3.4. ČIŠTĚNÍ A ÚDRŽBA
• Dříve než začnete zařízení čistit, odpojte jej od zdroje
přívodu stlačeného vzduchu a pak snižte tlak v nádrži
s pískem tak, že z ní vypustíte vzduch.
• Zařízení po každém ukončení práce pečlivě vyčistěte.
• Pravidelně kontrolujte stav trysek, ventilů a hadic.
Tryskací materiál způsobuje ošoupání stěn hadice. Je
to velmi důležité pro správnou funkci bezpečnostní
pojistky.
• Z vysoušeče pravidelně vypouštějte vodu
odltrovanou ze vzduchu.
• K čištění povrchu používejte výhradně prostředky
neobsahující žíravé látky.
• Po každém čištění je nutno všechny prvky dobře
osušit, než bude zařízení opět použito.
3.3. PRÁCE SE ZAŘÍZENÍM
3.3.1. PŘÍPRAVA K PRÁCI
Před připojením hadice stlačeného vzduchu se vždy ujistěte,
že hlavní vzduchový ventil je v poloze zavřeno. Připojte
hadici přivádějící stlačený vzduch do spojky samec-samice
(20). Ujistěte se, že je správně namontovaná a neodpojí se
vlivem náporu stlačeného vzduchu. Aby se zabránilo
vlhkosti, která může způsobit problémy při práci zařízení, je
vzduch zbavován vlhosti pomocí odvlhčovače.
3.3.2. VÝBĚR SPRÁVNÉ TRYSKY
K pískování je potřeba použít velké množství vzduchu pod
vysokým tlakem. Příliš krátká hadice, nedostatečný tlak
vzduchu nebo příliš velká tryska snižují výkon zařízení. Volba
průměru hadice a jeho délky pomáhá zabránit velkému
poklesu snížení tlaku v zařízení.
Rev. 15.06.2020
Rev. 15.06.2020
CZ CZ

• Zařízení skladujte na suchém a chladném místě,
chráněném proti vlhkosti a přímému slunečnímu
záření.
LIKVIDACE OPOTŘEBENÝCH ZAŘÍZENÍ
Po ukončení doby používání nevyhazujte tento výrobek
společně s komunálním odpadem, ale odevzdejte jej k
recyklaci do sběrny elektrických a elektronických zařízení.
O tom informuje symbol umístěný na zařízení, v návodě
k obsluze nebo na obalu. Komponenty použité v zařízení
jsou vhodné pro zužitkování v souladu s jejich označením.
Díky zužitkování, recyklaci nebo jiným způsobům využití
opotřebených zařízení významně přispíváte k ochraně
životního prostředí. Informace o příslušné sběrně
opotřebených zařízení poskytne místní obecný nebo
městský úřad.
DÉTAILS TECHNIQUES
Les notions d'« appareil », de « machine » et de « produit
» gurant dans les descriptions et les consignes du manuel
se rapportent à/au SABLEUSE MOBILE.
2.1. SÉCURITÉ AU POSTE DE TRAVAIL
a) Veillez à ce que votre poste de travail soit toujours
propre et bien éclairé. Le désordre ou un éclairage
insusant peuvent entraîner des accidents. Soyez
prévoyant, observez les opérations et faites preuve de
bon sens lorsque vous utilisez l’appareil.
b) En cas de dommages ou de mauvais fonctionnement,
l’appareil doit être mis hors tension immédiatement
et la situation doit être rapportée à une personne
compétente.
c) En cas d’incertitude quant au fonctionnement correct
de l’appareil, contactez le service client du fabricant.
d) Seul le service du fabricant peut eectuer des
réparations. Ne tentez aucune réparation par vous-
même !
e) Aucun enfant ni personne non autorisée ne doit se
trouver sur les lieux de travail. (Le non-respect de
cette consigne peut entraîner la perte de contrôle sur
l'appareil).
f) Dans les zones à risque élevé de dommages, des
tuyaux renforcés doivent être utilisés.
g) La soupape doit être fermée lors du branchement et
du débranchement de la conduite d’air comprimé.
h) Ne dirigez pas la conduite d’air comprimé vers vous,
vers d'autres personnes ou vers des animaux
i) N’interrompez pas l’alimentation en air en comprimant
ou en pliant les exibles.
j) Lors du travail avec l’appareil, augmentez
graduellement l’alimentation en air pour vous
assurer qu’il fonctionne correctement. En cas de
fonctionnement anormal de l'appareil, débranchez-
le immédiatement de la source d’air comprimé et
contactez le service après-vente du fabricant.
k) Lors de l’utilisation combinée de cet appareil avec
d’autres outils, respectez également les consignes se
rapportant à ces outils.
Description des paramètres Valeur des
paramètres
Nom du produit SABLEUSE MOBILE
Modèle MSW-MS40A
Dimensions du réservoir (ØxH)
[mm] 310x450
Poids [kg] 13,75
Contenu du réservoir [l] 31
Pression de travail [bar] 4-8,6
Longueur du tuyau
de sablage [m] 2,4
Consommation d’air [l/min] 170-708
2.2. SÉCURITÉ DES PERSONNES
a) N'utilisez pas l'appareil lorsque vous êtes fatigué,
malade, sous l'eet de drogues ou de médicaments
et que cela pourrait altérer votre capacité à utiliser
l'appareil.
b) Soyez attentif et faites preuve de bon sens lors que
vous utilisez l’appareil. Un moment d'inattention
pendant le travail peut entraîner des blessures graves.
c) Utilisez l'équipement de protection individuel
approprié pour l'utilisation de l'appareil,
conformément aux indications faites dans le tableau
des symboles, au point 1. L'utilisation de l'équipement
de protection individuel adéquat certié réduit le
risque de blessures.
d) An de prévenir la mise en marche accidentelle de
l'appareil, assurez-vous que celui-ci est éteint et que
1. DESCRIPTION GÉNÉRALE
L'objectif du présent manuel est de favoriser une utilisation
sécuritaire et able de l'appareil. Le produit a été conçu
et fabriqué en respectant étroitement les directives
techniques applicables et en utilisant les technologies et
composants les plus modernes. Il est conforme aux normes
de qualité les plus élevées.
LISEZ ATTENTIVEMENT LE PRÉSENT MANUEL ET
ASSUREZ-VOUS DE BIEN LE COMPRENDRE AVANT
LA PREMIÈRE UTILISATION.
An de garantir le fonctionnement able et durable de
l'appareil, il est nécessaire d'utiliser et d'entretenir ce
dernier conformément aux consignes gurant dans le
présent manuel. Les caractéristiques et les spécications
contenues dans ce document sont à jour. Le fabricant se
réserve le droit de procéder à des modications à des ns
d’amélioration du produit. L'appareil a été mis au point et
fabriqué en tenant compte des progrès techniques et de la
réduction de bruit an de réduire au maximum les risques
liés aux émissions sonores.
EXPLICATION DES SYMBOLES
Le produit est conforme aux normes de sécurité
en vigueur.
Veuillez lire attentivement ces instructions
d'emploi.
Produit recyclable.
Serre-tête anti-bruit obligatoire!
Lunettes de protection obligatoires.
Masque obligatoire.
Gants de protection obligatoires.
Portez des protections pour les pieds.
ATTENTION! Certaines illustrations, présentes
dans cette notice, peuvent diérer de la véritable
apparence de l‘appareil.
La version originale de ce manuel a été rédigée en
allemand. Les autres versions sont des traductions de
l‘allemand.
2. CONSIGNES DE SÉCURITÉ
ATTENTION! Lisez attentivement toutes les
consignes de sécurité et toutes les instructions. Le
non-respect des avertissements et instructions peut
entraîner des chocs électriques, des incendies et/
ou des blessures graves ou la mort.
REMARQUE! Veillez à ce que les enfants et les
personnes qui n'utilisent pas l'appareil soient en
sécurité durant le travail.
2322 Rev. 15.06.2020
Rev. 15.06.2020
CZ FR
MANUEL D‘UTILISATION

30. Rondelle
31. Entonnoir
32. Capuchon
33. dispositif de l'homme mort
34. Déclencheur
35. Adaptateur du dispositif de l'homme mort
36. Bloc d'étanchéité
ATTENTION: Le capuchon (32) n'est pas une protection
respiratoire et ne remplace pas un masque anti-poussière.
3.2. PRÉPARATION À L'UTILISATION
MONTAGE DE L’APPAREIL
1. Installation du collecteur d'admission (15): Un
manomètre (16) doit être xé en haut de l'entrée de la
pièce en T. Le compteur doit être tourné de manière
à être visible dans la partie supérieure du réservoir.
Fixez ensuite la vanne d'étranglement (19A) au bas
du collecteur. Connectez le mamelon (21) à la vanne
d'étranglement. Fixez le tuyau de raccordement à la
pièce en T.
2. Installation du sécheur d'air (18): Vissez le raccord
(17) des deux côtés du ltre. Fixez la vanne d'air (19)
au connecteur d'un côté, puis au connecteur (20).
Avant de commencer les travaux, raccordez le tuyau
d'alimentation en air du compresseur au raccord (20).
3. Positionnez le réservoir et vissez le ltre du sécheur
(18) et ses pièces sur le côté du collecteur d'admission.
Vissez ensuite l'extrémité du tuyau de raccordement
ouverte (14) avec la pièce en T (15) et le manomètre
(16) au trou leté sur le côté du tuyau de remplissage
en haut du réservoir. Assurez-vous que le compteur
est en vertical.
4. Assemblage de la vanne de sortie du matériau abrasif
sur le trou au fond du réservoir : attachez quatre
éléments dans le bon ordre, comme indiqué.
14
16
15
19A
21
17 18
17 19 20
1
2
2
17
19B
17
23
3
34
33
27 28 36
29
24 25 24
5
6
l'interrupteur se trouve sur arrêt avant de procéder au
branchement.
e) Ne surestimez pas vos capacités. Adoptez toujours
une position de travail stable vous permettant de
garder l'équilibre. Vous aurez ainsi un meilleur
contrôle en cas de situations inattendues.
f) Ne portez ni vêtements amples ni bijoux. Tenez vos
cheveux, vos vêtements et vos gants à l'écart des
pièces mobiles. Les vêtements amples, les bijoux et
les cheveux longs peuvent être happés par les pièces
mobiles.
g) Avant de démarrer l'appareil, enlevez tous les outils
de réglage et toutes les clés utilisées. La présence
d'objet au niveau des pièces en rotation peut causer
des dommages et des blessures.
h) Protégez les pièces – en particulier les plus petites
pièces – contre les décalages involontaires, par ex. en
les bloquant avec un serre-joint..
i) L'appareil génère de la poussière pendant le
fonctionnement, laquelle peut contenir des
substances nocives. Utilisez l'appareil dans une pièce
bien ventilée. Il est recommandé de porter un masque
de protection avec ltre.
2.3. UTILISATION SÉCURITAIRE DE L'APPAREIL
a) Ne faites pas surchauer l'appareil. Utilisez les outils
appropriés pour l'usage que vous en faites. Le choix
d'appareils appropriés et l'utilisation soigneuse de
ceux-ci produisent de meilleurs résultats.
b) Débranchez l'appareil avant de procéder à tout
réglage, changement d'accessoire, ou mise de côté
d'outils. Cette mesure préventive réduit le risque de
mise en marche accidentelle.
c) Les outils qui ne sont pas en cours d'utilisation
doivent être mis hors de portée des enfants et des
personnes qui ne connaissent ni l'appareil, ni le
manuel d'utilisation s'y rapportant. Entre les mains de
personnes inexpérimentées, ce genre d'appareils peut
représenter un danger.
d) Maintenez l'appareil en parfait état de marche. Avant
chaque utilisation, vériez l’absence de dommages en
général et au niveau des pièces mobiles (assurez-vous
qu’aucune pièce ni composant n’est cassé et vériez
que rien ne compromet le fonctionnement sécuritaire
de l’appareil). En cas de dommages, l’appareil doit
impérativement être envoyé en réparation avant
d’être utilisé de nouveau.
e) Tenez l'appareil hors de portée des enfants.
f) La réparation et l'entretien des appareils doivent être
eectués uniquement par un personnel qualié, à
l'aide de pièces de rechange d'origine. Cela garantit la
sécurité d’utilisation.
g) Pour garantir l'intégrité opérationnelle de l'appareil,
les couvercles et les vis posés à l'usine ne doivent pas
être retirés.
h) Lors du transport, de l’installation et de l’utilisation de
l’appareil, respectez les dispositions d'hygiène et de
sécurité en vigueur dans le pays d'utilisation.
i) Évitez de soumettre l'appareil à une charge excessive
entraînant son arrêt. Cela peut causer une surchaue
des composants d'entraînement et endommager
l'appareil.
j) Ne touchez ni les pièces mobiles, ni les accessoires
à moins que l’appareil n'ait été préalablement
débranché.
k) N'utilisez pas la conduite d'air comprimé pour
suspendre l'appareil.
l) Les travaux d’entretien et le remplacement des tuyaux,
des buses, etc. ne doivent être eectués que lorsque
'alimentation en air comprimé est déconnectée et le
réservoir vide.
m) N'utilisez que de l'air comprimé pour alimenter
l'appareil. Il est interdit d'utiliser d'autres gaz.
n) Transportez l'appareil uniquement en position
verticale.
o) N’utilisez pour la sableuse que du sable destiné au
sablage. Il est strictement interdit d'utiliser du sable
ordinaire!
p) Si l’appareil doit être transporté ou stocké, la
pression dans le réservoir à sable doit être réduite. Le
manomètre doit acher la valeur 0.
3. CONDITIONS D’UTILISATION
La sableuse mobile est un appareil conçu pour nettoyer de la
rouille et des impuretés, etc. divers types de surfaces, à l’aide
d’un courant d'air comprimé chargé de particules abrasives.
L’utilisateur porte l’entière responsabilité pour l’ensemble
des dommages attribuables à un usage inapproprié.
3.1. DESCRIPTION DE L'APPAREIL
1. Réservoir
2. Roues
3. Fermoir
4. Support
5. Axe de roue
6. Poignée de transport
7. Poignée
8. Vis
9. Écrou
10. Rondelle plate
11. Soupape de sécurité
12. Joint
13. Orice de remplissage de sable – fermoir
14. Tube
15. Pièce à trois voies
16. Manomètre
17. Raccord double sortie
18. Séchoir d’air
19. Vanne d'air principale 3/8 ''
19A. 3/8" vanne papillon
19B. Vanne du tube à jet
20. Connecteur mâle / femelle
21. Raccord double sortie
22. Tuyau d'air
23. Tube de sortie du sable
24. Attache-tuyau
25. Conduite de Sablage
26. Raccord
27. Joint
28. Buse en céramique
29. Écrou avant
ATTENTION! Bien que l'appareil ait été conçu en
accordant une attention spéciale à la sécurité et qu'il
comporte des dispositifs de protection, ainsi que des
caractéristiques de sécurité supplémentaires, il n’est
pas possible d’exclure entièrement tout risque de
blessure lors de son utilisation. Nous recommandons
de faire preuve de prudence et de bon sens lorsque
vous utilisez l’appareil.
ATTENTION! Le plan de ce produit se trouve à la
dernière page du manuel d‘utilisation, p. 43.
5. Installation de la gâchette (34): sélectionnez l'une
des buses disponibles (28) (les buses peuvent être
remplacées) et installez comme indiqué.
6. Connexion des éléments des étapes 4 et 5 au
réservoir : Placez les deux colliers de serrage (24) sur
les extrémités du tuyau (25). Serrez une extrémité à la
sortie du tuyau (23) et l'autre à l'extrémité du raccord
(26). Les pinces doivent être poussées jusqu'en n de
mamelons et bien serrées.
2524 Rev. 15.06.2020
Rev. 15.06.2020
FRFR

• Réduisez la pression d'air dans le réservoir.
• Ouvrez le bouchon de l'entrée de sable. Insérez
l' entonnoir avec le tamis dans l'ouverture, puis
remplissez la quantité appropriée de sable. Attention:
N'utilisez pas l'entonnoir sans tamis! Il peut y avoir
des gros grains dans le sable qui provoquent un
dysfonctionnement de l'appareil. ATTENTION:
Ne pas remplir plus de ¾ de la capacité totale du
réservoir. En cas de forte humidité ambiante, il
n'est pas recommandé de remplir le réservoir au
maximum; il est conseillé de verser du sable en
petites quantités dans le réservoir et de remplir le
réservoir petit à petit.
• Retirez à nouveau l'entonnoir. Fermez l’ouverture à
nouveau.
• Fermez la vanne de la conduite de sablage, ouvrez
la vanne d'air. Assurez-vous que la vanne d'arrêt du
sable est correctement fermée et qu'il n'y a pas de
fuites d'air.
L'appareil doit être utilisé avec la granularité suivante: 0,2
÷ 0,7 mm. Les matériaux abrasifs suivants sont autorisés:
• Sable de quartz abrasif / sable
• Aloxite
• Grenaille de fonte
• Grenaille en acier coulé
• Microsphères en verre
• Carbure de silicium
3.4. NETTOYAGE ET ENTRETIEN
• Avant de nettoyer l'appareil, il doit être déconnecté
de l'alimentation en air comprimé. Réduisez la
pression dans le réservoir de sable en libérant l'air.
• Nettoyez soigneusement l'appareil après chaque
utilisation.
• Vériez systématiquement l'état des buses, des
vannes et des tuyaux. Le matériau abrasif provoque
l'usure des parois du tuyau. Ceci est particulièrement
important pour le bon fonctionnement du contrôle
de dispositif de l'homme mort.
• Videz systématiquement le déshumidicateur de
l'eau absorbée à partir de l'air.
• Utilisez uniquement des produits de nettoyage sans
substances corrosives pour nettoyer la surface.
• Après chaque nettoyage, tous les composants
doivent être soigneusement séchés et les plaques de
cuisson protégées par le graissage.
• Gardez l'appareil dans un endroit sec et frais, à l'abri
de l'humidité et de la lumière directe du soleil.
MISE AU REBUT DES APPAREILS USAGÉS
À la n de sa vie, ce produit ne doit pas être jeté dans
les ordures ménagères ; il doit impérativement être remis
dans un point de collecte et de recyclage pour appareils
électroniques et électroménagers. Un symbole à cet
eet gure sur le produit, l'emballage ou dans le manuel
d'utilisation. Les matériaux utilisés lors de la fabrication
de l'appareil sont recyclables conformément à leur
désignation. En recyclant ces matériaux, en les réutilisant ou
en utilisant les appareils usagés d’une autre manière, vous
contribuez grandement à protéger notre environnement.
Pour obtenir de plus amples informations sur les points de
collecte appropriés, adressez-vous à vos autorités locales.
7. Posez le réservoir horizontalement, xez les deux
poignées de transport au réservoir avec 4 vis,
rondelles et écrous. Remarque: Assurez-vous que
les éléments de la poignée inclinés pointent dans
la bonne direction (vers le haut du réservoir, vers
l'extérieur). L'axe de roue (5) doit être placé dans les
trous des poignées (6). Placer les roues aux extrémités
des axes et les xer avec des goupilles fendues et des
rondelles. Placez le pied xe (4) au fond du réservoir
près du bord. Utilisez la goupille fendue (3) pour la
maintenir.
Attention : Avant de commencer l'usage, vériez
que toutes les connexions sont correctes et que les
éléments sont correctement installés.
3.3. UTILISATION DE L'APPAREIL
3.3.1. PRÉPARATION AU FONCTIONNEMENT
Assurez-vous que la vanne d'air principale est en position
fermée avant de raccorder la conduite d'air comprimé.
Raccordez le tuyau d'air comprimé au connecteur mâle /
femelle (20). Assurez-vous que tout est correctement installé
et que rien ne se casse sous la pression de l'air comprimé.
An d'éliminer l'humidité qui peut causer des problèmes
au fonctionnement de l'appareil, l'air est séché avec un
déshumidicateur.
3.3.2. CHOIX DE LA BUSE APPROPRIÉE
Le sablage nécessite un grand volume d'air sous haute
pression. Un tuyau trop court, une pression d'air insusante
ou une buse trop grande réduisent le débit de l'appareil. Le
choix approprié du diamètre du tuyau à sa longueur évite
une chute de pression importante dans l'appareil.
Diamètre
du tuyau
[‘’]
Longueur
du tuyau
[m]
Diamètre
de la
buse [‘’]
Consommation de
matériau abrasif
par heure [kg]
3/8 15,2 3/32 27,2
3/8 7,6 7/64 45,4
1/2 15,2 1/8 68
1/2 7,6 9/64 90,7
Il est recommandé d'utiliser une pression de 4 – 8,6 bar,
cela garantira les meilleurs résultats.
3.3.3. ÉVACUATION DE L'EAU DU DÉSHUMIDIFICATEUR
1. Fermez la vanne d'air principale. Il est également
recommandé de libérer le réservoir de la pression.
2. Appuyez et maintenez le loquet rouge du séchoir,
tout en tournant la partie inférieure du séchoir vers la
droite.
3. Retirez et videz le réservoir.
4. Montez le réservoir de séchage de la même façon qu’il
est démonté.
An de garantir un fonctionnement optimal et correct de
l'appareil, le niveau de pression du compresseur doit
être sélectionné de façon appropriée en fonction de la
consommation en air des appareils récepteurs. L'appareil
doit être positionné à une distance de sécurité par rapport
au compresseur, an que la poussière des atériaux abrasifs
ne pénètre pas dans le compresseur.
3.3.4. MISE EN MARCHE DE L'APPAREIL
Note: Utilisez l'appareil uniquement en position verticale!
• Connectez la conduite d'alimentation en air
comprimé, réglez la pression de fonctionnement
souhaitée sur le compresseur, sans toutefois
dépasser la valeur maximale de l'appareil.
• Versez le sable dans le réservoir.
• En tenant le tuyau de ponçage, pointez la buse
vers la surface à traiter et appuyez sur le levier du
dispositif de l'homme mort.
• Tournez la vanne principale 3/8 "(19) en position
ouverte pour réguler le débit d'air provenant du
compresseur vers l'appareil.
• Ouvrez avec précaution la vanne papillon 3/8 "(19A)
pour réguler le ux d'air qui entraîne le sable vers le
tube de sortie.
• Tournez la vanne du tube à jet (19B) en position
ouverte. Cette vanne régule le ux d'air à travers la
buse avec du sable.
• Ouvrez la vanne papillon (19A) jusqu'à ce que le
sable sorte de la buse d'air.
• Dénissez les paramètres que vous préférez.
• Il est recommandé de vérier le fonctionnement
de l'appareil sur une petite surface, an de vérier
comment le matériau réagit au sablage.
3.3.5. DIMINUTION DE LA PRESSION DE L'AIR DANS LE
RÉSERVOIR
Portez des équipements de protection individuelle tels
que la protection des voies respiratoires, les lunettes et les
gants de protection.
• Assurez-vous que la vanne d'air principale est en
position fermée.
• Tournez la vanne du tube à jet en position ouverte;
attendez jusqu'à ce que la valeur "0" s’ache sur le
manomètre.
3.3.6. REMPLISSAGE DU SABLE DANS LE RÉSERVOIR
• Assurez-vous que le sable abrasif n'est pas mouillé et
ne bloque pas la vanne du réservoir, le tube de sortie
du sable, le l abrasif, la vanne du tuyau à jet, la buse
et d’autres composants de l'appareil.
• Portez des équipements de protection individuelle
tels que la protection des voies respiratoires, les
lunettes et les gants de protection.
03
02
30
08
07
06
10
09
01
04 03
7
2726 Rev. 15.06.2020
Rev. 15.06.2020
FRFR

DATI TECNICI
Il termine "apparecchio" o "prodotto" nelle avvertenze
e descrizioni contenute nel manuale si riferisce alla/al
SABBIATRICE PORTATILE.
2.1. SICUREZZA SUL LAVORO
a) Mantenere il posto di lavoro pulito e ben illuminato. Il
disordine o una scarsa illuminazione possono portare
a incidenti. Essere sempre prudenti, osservare che
cosa si sta facendo e utilizzare il buon senso quando
si adopera il dispositivo.
b) In presenza di un danno o un difetto, il dispositivo
deve subito essere spento e bisogna avvisare una
persona autorizzata.
c) Se non si è sicuri del corretto funzionamento del
dispositivo, rivolgersi al servizio assistenza del
fornitore.
d) Le riparazioni devono essere eseguite esclusivamente
dal servizio assistenza del produttore. Non eseguire le
riparazioni da soli!
e) I bambini e le persone non autorizzate non devono
essere presenti sul posto di lavoro. (La disattenzione
può causare la perdita del controllo sul dispositivo).
f) In situazioni particolarmente a rischio utilizzare tubi
rinforzati.
g) Il collegamento e scollegamento del condotto della
pressione deve avvenire con le ventole di areazione
chiuse.
h) Non rivolgere il tubo di pressione contro sé stessi,
altre persone o animali.
i) Non interrompere l'alimentazione dell'aria piegando
o schiacciando i tubi di pressione.
j) Quando si lavora con il dispositivo, aumentare
gradualmente l'apporto d'aria per assicurarsi che
funzioni correttamente. Se si nota un funzionamento
anomalo del dispositivo, scollegarlo immediatamente
dall'aria compressa e rivolgersi al servizio clienti del
fornitore.
k) Durante l’impiego del dispositivo in contemporanea
con altri dispositivi, è consigliabile rispettare le altre
istruzioni d’uso.
Parametri - Descrizione Parametri - Valore
Nome del prodotto SABBIATRICE
PORTATILE
Modello MSW-MS40A
Dimensioni del serbatoio (ØxH)
[mm] 310x450
Peso [kg] 13,75
Capacità del serbatoio [l] 31
Pressione lavorativa [bar] 4-8,6
Lunghezza tubo [m] 2,4
Consumo d'aria [l/min] 170-708
2.2. SICUREZZA PERSONALE
a) Non è consentito l'uso del dispositivo in uno stato
di aaticamento, malattia, sotto l'inuenza di alcol,
droghe o farmaci, se questi limitano la capacità di
utilizzare il dispositivo.
b) Prestare attenzione e usare il buon senso quando si
utilizza il dispositivo. Un momento di disattenzione
durante il lavoro può causare gravi lesioni.
c) Utilizzare dispositivi di protezione individuale adeguati
quando si utilizza il dispositivo, conformemente alle
speciche indicate nella spiegazione dei simboli al
punto 1. L'uso di dispositivi di protezione individuale
adeguati e certicati riduce il rischio di lesioni.
d) Per evitare avviamenti accidentali, prima di collegare
il dispositivo a una fonte di alimentazione assicurarsi
che questo sia spento.
28
e) Non sopravvalutare le proprie capacità. Mantenere
l'equilibrio durante il lavoro, in questo modo è
possibile controllare meglio il dispositivo in caso di
situazioni impreviste.
f) Non indossare indumenti larghi o gioielli. Tenere
capelli, indumenti e guanti lontano da parti in
movimento. Vestiti sciolti, gioielli o capelli lunghi
possono impigliarsi nelle parti in movimento.
g) Rimuovere tutti gli strumenti di regolazione o chiavi
prima di accendere il dispositivo. Gli oggetti che
rimangono nelle parti rotanti possono condurre a
danni e lesioni.
h) Proteggere i componenti – in particolare le parti più
piccole – da movimenti involontari e improvvisi, ad
esempio bloccandoli con un morsetto.
i) Il dispositivo può produrre polveri contenenti
sostanze tossiche dannose per la salute. Utilizzare il
dispositivo in un ambiente ben ventilato. Si consiglia
di indossare una maschera dotata di ltri.
2.3. USO SICURO DEL DISPOSITIVO
a) Non far surriscaldare il dispositivo. Utilizzare strumenti
appropriati. Dispositivi scelti correttamente e un
attento utilizzo degli stessi portano a risultati migliori.
b) Prima della regolazione, della sostituzione degli
accessori o dello stoccaggio, estrarre la spina dalla
presa. Tali misure preventive riducono il rischio di
avviamento accidentale.
c) Gli strumenti inutilizzati devono essere tenuti fuori
dalla portata dei bambini e delle persone che non
hanno familiarità con il dispositivo e le istruzioni d’uso.
Nelle mani di persone inesperte, questo dispositivo
può rappresentare un pericolo.
d) Mantenere il dispositivo in perfette condizioni. Prima di
ogni utilizzo, vericare che non vi siano danni generali
o danni alle parti mobili (frattura di parti e componenti
o altre condizioni che potrebbero compromettere il
funzionamento sicuro del prodotto). In caso di danni,
l'unità deve essere riparata prima dell'uso.
e) Tenere il dispositivo fuori dalla portata dei bambini.
f) La riparazione e la manutenzione dell'attrezzatura
devono essere eseguite esclusivamente da personale
specializzato qualicato e con pezzi di ricambio
originali. Ciò garantisce la sicurezza durante l'uso.
g) Per garantire l'integrità di funzionamento
dell'apparecchio, i coperchi o le viti installati in
fabbrica non devono essere rimossi.
h) Quando si trasporta e si sposta l'apparecchiatura
dal luogo di deposito al luogo di utilizzo, i requisiti
di sicurezza e di igiene per la movimentazione
manuale devono essere rispettati per il paese in cui
l'apparecchiatura viene utilizzata.
i) Evitare situazioni in cui l'unità si arresta a causa di un
carico eccessivo durante il funzionamento. Ciò può
causare il surriscaldamento dei componenti e quindi
danni al dispositivo.
j) Non toccare parti mobili o accessori senza aver
scollegato il dispositivo dall'alimentazione.
k) Non appendere il dispositivo per il cavo di pressione.
l) Prima di compiere operazioni di manutenzione o
sostituire i tubi o ad esempio gli ugelli, interrompere il
usso di aria compressa e svuotare il serbatoio.
m) Per l´utilizzo del dispositivo impiegare solo aria
compressa. Attenzione! Non utilizzare altri gas.
n) Durante il trasporto mantenere il dispositivo in
posizione verticale.
29
o) Utilizzare solo sabbia adatta per sabbiatrici. È
severamente vietato impiegare sabbia comune!
p) Durante il trasporto o quando non si utilizza il
dispositivo ridurre la pressione nel serbatoio. Il
manometro dovrebbe mostrare il valore 0.
1. Serbatoio
2. Ruote
3. Tappo di chiusura
4. Perni
5. Asse ruota
6. Maniglia per il trasporto
7. Maniglia
8. Vite
9. Dado madre
10. Rondella
11. Valvola di sicurezza
12. Guarnizione
13. Bocchettone di riempimento – Tappo di chiusura
14. Tubo
15. Raccordo a tre vie
16. Manometro
17. Raccordo a due vie
18. Essicatore aria
19. Valvola principale 3/8''
19A. Valvola a farfalla 3/8"
19B. Valvola tubo
20. Boccola
21. Raccordo a due vie
22. Tubo di collegamento per il passaggio dell'aria
23. Tubo di scarico (sabbia)
24. Fascetta serracavi
25. Tubo (per la sabbia)
26. Raccordo
27. Guarnizione
28. Ugello di ceramica
29. Dado anteriore
30. Rondella
31. Imbuto
32. Cappuccio
33. Dispositivo vigilante
34. Trigger
35. Adattatore del dispositivo vigilante
36. Blocco di tenuta
Nota: Il cappuccio (32) non è una protezione respiratoria e
non sostituisce la maschera antipolvere.
1. DESCRIZIONE GENERALE
Queste istruzioni sono intese come ausilio per un uso sicuro
e adabile. Il prodotto è stato rigorosamente progettato
e realizzato secondo le direttive tecniche e l'utilizzo delle
tecnologie e componenti più moderne e seguendo gli
standard di qualità più elevati.
PRIMA DELLA MESSA IN FUNZIONE È NECESSARIO
AVER LETTO E COMPRESO LE ISTRUZIONI D'USO.
Per un funzionamento duraturo e adabile del dispositivo
assicurarsi di maneggiarlo e curarne la manutenzione
secondo le disposizioni presentate in questo manuale.
I dati e le speciche tecniche indicati in questo manuale
sono attuali. Il fornitore si riserva il diritto di apportare
delle migliorie nel contesto del miglioramento dei
propri prodotti. L'apparecchiatura è stata progettata e
realizzata tenendo in considerazione il progresso tecnico
e la riduzione di rumore, in maniera tale da mantenere al
minimo i possibili rischi derivanti dalle emissioni di rumore.
SPIEGAZIONE DEI SIMBOLI
Questo prodotto è conforme alle normative
vigenti in materia di sicurezza.
Leggere attentamente le seguenti avvertenze.
Prodotto riciclabile.
Indossare una protezione per l´udito!
Indossare occhiali protettivi!
Indossare una mascherina antipolvere
(protezione delle vie respiratorie)!
Indossare guanti protettivi!
Utilizzare una protezione per i piedi.
AVVERTENZA! Le immagini contenute in questo
manuale sono puramente indicative e potrebbero
dierire dal prodotto.
Il manuale originale è stato scritto in tedesco. Le versioni in
altre lingue sono traduzioni dalla lingua tedesca.
2. SICUREZZA NELL'IMPIEGO
ATTENZIONE! Leggere le istruzioni d'uso e di
sicurezza. Non prestare attenzione alle avvertenze
e alle istruzioni può condurre a shock elettrici,
incendi, gravi lesioni o addirittura al decesso.
AVVERTENZA! Quando si lavora con questo
dispositivo, i bambini e le persone non coinvolte
devono essere protetti.
3. CONDIZIONI D'USO
La sabbiatrice portatile è un dispositivo concepito per
rimuovere ruggine o impurità da diversi tipi di supercie
grazie all´azione esercitata dall´aria compressa.
L'operatore è responsabile di tutti i danni derivanti da
un uso improprio.
3.1. DESCRIZIONE DEL DISPOSITIVO
ATTENZIONE! Anche se l'apparecchiatura è
stata progettata per essere sicura, sono presenti
degli ulteriori meccanismi di sicurezza. Malgrado
l'applicazione di queste misure supplementari di
sicurezza sussiste comunque il rischio di ferirsi. Si
raccomanda inoltre di usare cautela e buon senso.
ATTENZIONE: L´esploso di questo prodotto si trova
nell´ultima pagina del manuale d´uso, p. 43.
Rev. 15.06.2020
Rev. 15.06.2020
IT
ISTRUZIONI PER L’USO
IT

30
1. Montaggio del collettore di aspirazione (15): E'
necessario ssare un manometro (16) nella parte
superiore dell'ingresso del raccordo a T. Il contatore
deve essere girato in modo che sia ben visibile
nella parte superiore del serbatoio. Quindi collegare
la valvola a farfalla (19A) alla parte inferiore del
collettore. Collegare il nipplo (21) alla valvola a
farfalla. Fissare un tubo di collegamento al raccordo
a T.
2. Montaggio dell'essiccatore d'aria (18): Avvitare
il nipplo (17) su entrambi i lati del ltro. Fissare
la valvola dell'aria (19) al connettore da un lato
e successivamente il connettore (20). Prima della
messa in funzione, è necessario collegare la linea di
alimentazione dell'aria del compressore al connettore
(20).
3. Posizionare il serbatoio e avvitare il ltro dell'
essiccatore (18) e le sue parti sul lato del collettore
di aspirazione. Avvitare quindi l'estremità aperta del
tubo di collegamento (14) con il raccordo a T (15) e
il manometro (16) nel foro lettato sul lato del tubo
di ingresso in cima al serbatoio. Assicurarsi che il
misuratore sia posizionato verticalmente.
4. Montaggio della valvola di scarico del materiale
abrasivo nel foro sul fondo del serbatoio: ssare le
quattro parti nell'ordine corretto in base al disegno.
14
16
15
19A
21
17 18
17 19 20
1
2
17
19B
17
23
3
34
33
27 28 36
29
24 25 24
5
6
31
5. Montaggio del trigger (34): selezionare uno fra
gli ugelli disponibili (28) (gli ugelli possono essere
sostituiti) e montarlo come indicato nel disegno.
6. Collegamento dei componenti dei passi 4 e 5 al
serbatoio: Posizionare due fascette stringitubo (24)
alle estremità del tubo (25). Serrare un'estremità
all'uscita del tubo (23) e l'altra all'estremità del
nipplo (26). Spingere i morsetti il più possibile no
all'estremità del nipplo e stringere saldamente.
7. Posizionare il serbatoio in orizzontale, quindi ssare
al serbatoio due maniglie per il trasporto utilizzando
4 bulloni, rondelle e dadi. Nota: assicurarsi che gli
elementi curvi delle maniglie siano rivolti nella giusta
direzione (verso l'alto del serbatoio, verso l'esterno).
Posizionare l'asse della ruota (5) nei fori delle maniglie
(6). Posizionare le ruote alle estremità dell'asse e
ssarle con perni e rondelle. Posizionare il piedino
sso (4) sul fondo del serbatoio vicino al bordo.
Utilizzare il perno a clip (3) per tenerlo premuto.
Nota: Prima di iniziare i lavori, vericare che tutti i
collegamenti siano corretti e che i componenti siano
posizionati in modo adeguato.
3.3. LAVORARE CON IL DISPOSITIVO
3.3.1. PREPARAZIONE ALL'USO
Prima di raccordare il tubo dell´aria compressa, assicurarsi
che la valvola principale sia chiusa. Collegare il tubo di
aria compressa alla boccola (20). Assicurarsi che tutto sia
stato correttamente installato e che non vi siano danni
dovuti alla pressione. Per eliminare l´umidità, l´aria viene
asciugata attraverso un apposito deumidicatore. ´umidità
potrebbe infatti compromettere il corretto funzionamento
del dispositivo.
3.3.2. SELEZIONE DELL’UGELLO ADEGUATO
La sabbiatura richiede un grande volume d'aria ad alta
pressione. Un tubo troppo corto, una pressione dell'aria
insuciente o un ugello troppo grande riducono la portata
dell’apparecchio. Selezionando il diametro del tubo essibile
alla sua lunghezza si evita una grande perdita di pressione
nel’apparecchio.
Diame-
tro del
tubo [‘’]
Lunghez-
za del
dubo [m]
Diametro
dell’u-
gello [‘’]
Consumo del
materiale abrasivo
all’ora [kg]
3/8 15,2 3/32 27,2
3/8 7,6 7/64 45,4
1/2 15,2 1/8 68
1/2 7,6 9/64 90,7
Si raccomanda di utilizzare un campo di pressione di 4 – 8,6
bar, in modo da garantire i migliori risultati.
03
02
30
08
07
06
10
09
01
04 03
7
3.2. PREPARAZIONE AL FUNZIONAMENTO
MONTAGGIO DEL DISPOSITIVO
2
3.3.3. Come scaricare l´acqua dal deumidicatore:
1. Chiudere la valvola principale. Si consiglia anche di
eliminare la pressione nel serbatoio.
2. Pressare e mantenere premuta il tappo di chiusura
rosso del deumidicatore, quindi ruotare la parte
inferiore del deumidicatore verso destra.
3. Rimuovere e svuotare il serbatoio.
4. Allo stesso modo montare il serbatoio del
deumidicatore.
Per garantire il corretto e ottimale funzionamento del
dispositivo scegliere il grado di ecienza del compressore
in relazione all´impiego d´aria del dispositivo ricevente.
Mantenere il dispositivo a un´adeguata distanza di
sicurezza dal compressore. Le polveri dei materiali abrasivi
potrebbero nire dentro al serbatoio.
3.3.4. ACCENSIONE DELL'APPARECCHIO
Avvertenze: Utilizzare il dispositivo soltanto in posizione
verticale.
• Attivare l´aria compressa, regolare quindi la pressione
del compressore, assicurandosi di non superare il
valore massimo previsto per questo dispositivo.
• Riempire il serbatoio di sabbia.
• Tenendo fermo il tubo per sabbiatura, puntare
l'ugello verso la supercie da trattare e attivare il
dispositivo vigilante.
• Aprire la valvola principale 3/8 "(19) in modo da
regolare l´aria del compressore.
• Aprire con cautela la valvola a farfalla 3/8 "(19A). In
questo modo è possibile regolare il usso d´aria che
consente di dirigere la sabbia verso il tubo di scarico.
• Aprire la valvola (19B). Questa valvola consente
di regolare il usso d´aria con sabbia che passa
dall´ugello.
• Aprire la valvola a farfalla (19a) per consentire alla
sabbia di fuoriuscire dall´ugello.
• Impostare i parametri prescelti.
• Si consiglia di vericare il funzionamento del
dispositivo su una piccola supercie per in modo da
testare la reazione del materiale al getto di sabbia.
3.3.5. DIMINUIZIONE DELLA PRESSIONE DELL´ARIA NEL
SERBATOIO
Indossare indumenti protettivi: una protezione per le vie
respiratorie, occhiali di protezione e guanti di protezione.
• Assicurarsi che la valvola principale sia chiusa.
• Aprire la valvola a diramazione; attendere no a
quando sul manometro non viene segnato il valore
"0".
3.3.6. COME RIEMPIRE IL SERBATOIO DI SABBIA
• Assicurarsi che la sabbia non sia umida e che non
blocchi la valvola del serbatoio, il tubo di fuoriuscita
del getto di sabbia, il lo abrasivo, la valvola
a diramazione, l´ugello e altri componenti del
dispositivo.
• Indossare indumenti protettivi: una protezione per
le vie respiratorie, occhiali di protezione e guanti di
protezione.
• Come ridurre la pressione dell aria nel serbatoio.
• Svitare la vite di chiusura nel punto d´ingresso della
sabbia. Inserire l´imbuto con il colino nell´apertura
e successivamente immettere la quantità di sabbia
adeguata. Importante: Non utilizzare l´imbuto
senza il colino! La sabbia può contenere grossi
Rev. 15.06.2020
Rev. 15.06.2020
ITIT

grumi che potrebbero compromettere il corretto
funzionamento del dispositivo. ATTENZIONE: Non
immettere una quantità di sabbia superiore ai ¾
della capacità totale del serbatoio. Se l´umidità
dell´ambiente è elevata si consiglia di non riempire
al massimo il serbatoio. Si consiglia invece di
immettere piccole quantità di sabbia e di riempire a
poco a poco il serbatoio.
• Rimuovere nuovamente l´imbuto. Inserire
nuovamente il tappo.
• Chiudere la valvola da cui proviene il getto di sabbia;
quindi aprire la valvola dell´aria. Assicurarsi che la
valvola da cui proviene il getto di sabbia sia ben
chiusa e che non ci sia nessuna dispersione d´aria.
Utilizzare per questo dispositivo materiali con le seguenti
granulosità: 0,2 ÷ 0,7 mm.
Sono ammessi i seguenti materiali abrasivi:
• Abrasivi come il quarzo / la sabbia
• Aloxit
• Pallini di ghisa
• Pallini di acciaio fuso
• Microsfere di vetro
• Carburo di silicio
3.4. PULIZIA E MANUTENZIONE
• Prima di pulire il dispositivo staccarlo dalla fonte di
erogazione di aria compressa. Ridurre la pressione
del serbatoio attraverso lo sfogo dell´aria.
• Dopo ogni utilizzo pulire a fondo il dispositivo.
• Vericare regolarmente lo stato degli ugelli, delle
valvole e dei tubi. Il materiale abrasivo può usurare
le pareti del tubo. Questo è particolarmente
importante per il corretto funzionamento del
dispositivo vigilante.
• Scaricare sistematicamente l´acqua ltrata dal
deumidicatore. Per la pulizia delle superci
impiegare solo detersivi non corrosivi.
• Dopo aver compiuto le operazioni di pulizia lasciare
asciugare tutti i componenti prima di utilizzare
nuovamente il dispositivo.
• Conservare il dispositivo in un luogo fresco e asciutto
e lontano dall'esposizione diretta ai raggi solari.
SMALTIMENTO DELLE ATTREZZATURE USATE
Questo prodotto, se non più funzionante, non deve
essere smaltito insieme ai normali riuti, ma deve essere
consegnato ad un’organizzazione competente per lo
smaltimento dei dispositivi elettrici e elettronici. Maggiori
informazioni sono reperibili sull'etichetta sul prodotto, sul
manuale di istruzioni o sull'imballaggio. I materiali utilizzati
nel dispositivo possono essere riciclati secondo indicazioni.
Riutilizzando i materiali o i dispositivi, si contribuisce
a tutelare l'ambiente circostante. Le informazioni sui
rispettivi punti di smaltimento sono reperibili presso le
autorità locali.
DATOS TÉCNICOS
Conceptos como "aparato" o "producto" en las advertencias
y descripciones de este manual se reeren a ARENADORA
PORTATIL.
2.1. SEGURIDAD EN EL PUESTO DE TRABAJO
a) Mantenga el lugar de trabajo limpio y bien iluminado.
El desorden o la mala iluminación pueden provocar
accidentes. Tenga cuidado, preste atención al trabajo
que está realizando y use el sentido común cuando
utilice el dispositivo.
b) En caso de avería o mal funcionamiento, apague el
aparato y contacte con el servicio técnico autorizado.
c) Si no está seguro de que la unidad funcione
correctamente, póngase en contacto con el servicio
técnico del fabricante.
d) Las reparaciones solo pueden ser realizadas por
el servicio técnico del fabricante. ¡No realice
reparaciones por su cuenta!
e) Se prohíbe la presencia de niños y personas no
autorizadas en el lugar de trabajo (la falta de atención
puede llevar a la pérdida de control del equipo).
f) En zonas con mayor peligro deben utilizarse
mangueras reforzadas.
g) El conducto de presión debe conectarse y
desconectarse solamente cuando la válvula de aire
esté cerrada.
h) No apunte la salida de presión hacia usted ni hacia
otras personas o animales.
i) No interrumpa el suministro de aire comprimido
apretando o doblando las tuberías de presión.
j) Cuando empiece a trabajar con el equipo, aumente
gradualmente el suministro de aire para asegurarse
de que el funcionamiento es el correcto. Si el aparato
funcionara de forma deciente, desconéctelo
inmediatamente del aire comprimido y póngase en
contacto con el departamento de servicio técnico del
fabricante.
k) Al utilizar este equipo junto con otros, también deben
observarse otras instrucciones de uso.
Parámetro - Descripción Parámetro - Valor
Nombre del producto ARENADORA
PORTATIL
Modelo MSW-MS40A
Dimensiones del tanque (ØxH)
[mm] 310x450
Peso [kg] 13,75
Capacidad del tanque [l] 31
Presión de trabajo [bar] 4-8,6
Longitud del conducto
para el chorro de arena [m] 2,4
Consumo de aire [l/min] 170-708
2.2. SEGURIDAD PERSONAL
a) No está permitido utilizar el aparato en estado de
fatiga, enfermedad, bajo la inuencia del alcohol,
drogas o medicamentos, ya que estos limitan la
capacidad de manejo del aparato.
b) Actúe con precaución y use el sentido común cuando
maneje este producto. La más breve falta de atención
durante el trabajo puede causar lesiones graves.
c) Utilice el equipo de protección personal necesario
para el empleo de este dispositivo, de acuerdo con
las especicaciones del punto 1 de las explicaciones
de los símbolos. El uso de un equipo de protección
personal apropiado y certicado reduce el riesgo de
lesiones.
d) Para evitar una puesta en marcha accidental,
asegúrese de que el interruptor esté apagado antes
de conectar la clavija a una fuente de alimentación.
1. DESCRIPCIÓN GENERAL
Este manual ha sido elaborado para favorecer un empleo
seguro y able. El producto ha sido estrictamente diseñado
y fabricado conforme a las especicaciones técnicas y para
ello se han utilizado las últimas tecnologías y componentes,
manteniendo los más altos estándares de calidad.
ANTES DE LA PUESTA EN FUNCIONAMIENTO,
LEA LAS INSTRUCCIONES MINUCIOSAMENTE Y
ASEGÚRESE DE COMPRENDERLAS.
Para garantizar un funcionamiento duradero y able del
aparato, el manejo y mantenimiento deben llevarse a cabo
de acuerdo con las instrucciones de este manual. Los
datos técnicos y las especicaciones de este manual están
actualizados. El fabricante se reserva el derecho de realizar
modicaciones para mejorar la calidad. Teniendo en cuenta
los avances técnicos en materia de reducción del ruido,
el equipo ha sido diseñado y fabricado para mantener el
riesgo de emisiones sonoras al nivel más bajo posible.
EXPLICACIÓN DE LOS SÍMBOLOS
El producto cumple con las normas de
seguridad vigentes.
Respetar las instrucciones de uso.
Producto reciclable.
¡Utilizar protección para los oídos!
¡Utilizar protección para los ojos!
¡Utilizar protección contra el polvo (para las vías
respiratorias)!
¡Utilizar guantes de protección!
Utilizar calzado de seguridad.
¡ADVERTENCIA! En este manual se incluyen fotos
ilustrativas, que podrían no coincidir exactamente
con la apariencia real del dispositivo.
El texto en alemán corresponde a la versión original. Los
textos en otras lenguas son traducciones del original en
alemán.
2. SEGURIDAD
¡ATENCIÓN! Lea todas las instrucciones
e indicaciones de seguridad. La inobservancia de
las advertencias e instrucciones al respecto puede
provocar descargas eléctricas, incendios, lesiones
graves o incluso la muerte.
¡ADVERTENCIA! Los niños y las personas no
autorizadas deben estar asegurados cuando trabajen
con esta unidad.
3332 Rev. 15.06.2020
Rev. 15.06.2020
IT ES
MANUAL DE INSTRUCCIONES

30. Arandela
31. Embudo
32. Capucha
33. Botón de vigilancia
34. Gatillo
35. Adaptador del botón de vigilancia
36. Bloque de sellado
Atención: La capucha (32) no es una protección respiratoria
ni reemplaza una máscara antipolvo.
3.2. PREPARACIÓN PARA LA PUESTA EN MARCHA
MONTAJE DE LA MÁQUINA
1. Montaje del colector de admisión (15): conecte un
manómetro (16) a la parte superior de la entrada de
la pieza en T. Gire el medidor para que sea visible en
la parte superior del tanque. Conecte la válvula de
estrangulamiento (19A) a la parte inferior del colector.
Conecte el niple (21) a la válvula de estrangulamiento.
Conecte el tubo de conexión a la pieza en T.
2. Montaje del secador de aire (18): atornille el niple (17)
a ambos lados del ltro. Conecte la válvula de aire
(19) al conector en un lado, y después, el conector
(20). Antes de iniciar el trabajo, conecte el conducto
de suministro de aire del compresor al conector 20).
3. Coloque el tanque y atornille el ltro del secador (18)
y sus partes al costado del colector de admisión. A
continuación, atornille el extremo abierto del tubo de
conexión (14) con la pieza en T (15) y el manómetro
(16) en el oricio roscado, en el lado del tubo de
llenado en la parte superior del tanque. Asegúrese de
que el medidor esté en posición vertical.
4. Instalación de la válvula de salida de abrasivo en el
oricio en la parte inferior del tanque: conecte cuatro
partes en el orden correcto según se muestra en la
gura.
14
16
15
19A
21
17 18
17 19 20
1
2
2
17
19B
17
23
3
34
33
27 28 36
29
24 25 24
5
6
5. Instalación del gatillo (34): seleccione una de las
boquillas disponibles (28) (las boquillas se pueden
reemplazar) e instálelas como se muestra en la gura.
6. Conexión de los elementos de los pasos 4 y 5 al
tanque: Fije dos abrazaderas de manguera (24) a los
extremos de la manguera (25). Sujete un extremo en
la salida del tubo (23) y el otro en el extremo del niple
(26). Las abrazaderas deben moverse hasta el nal de
los niples y apretarse rmemente.
e) No sobrestime sus habilidades. Mantenga el equilibrio
durante el trabajo. Esto le da un mejor control sobre el
dispositivo en caso de situaciones inesperadas.
f) No utilice ropa holgada o adornos tales como joyas.
Mantenga el cabello, la ropa y los guantes alejados
de las piezas móviles. La ropa holgada, las joyas o el
cabello largo pueden quedar atrapados en las piezas
móviles.
g) Antes de encender el equipo, aleje todas las
herramientas o destornilladores utilizados para su
ajuste. Los objetos que permanezcan sobre piezas
rotatorias podrían ocasionar desperfectos y lesiones.
h) Asegurar las piezas de trabajo, especialmente las más
pequeñas, para evitar desplazamientos involuntarios,
p. ej., jándolas con una abrazadera de tornillo.
i) El trabajo con el aparato genera polvo que puede
contener sustancias nocivas. Utilice el aparato
solamente en habitaciones con muy buena ventilación;
se recomienda usar una protección facial con ltro.
2.3. MANEJO SEGURO DEL APARATO
a) No permita que el aparato se sobrecaliente. Utilice
las herramientas apropiadas para cada trabajo.
Debe seleccionarse el aparato adecuado para cada
aplicación y utilizarse conforme al n para el que
ha sido diseñado, para conseguir así los mejores
resultados.
b) Antes de ajustar o cambiar accesorios o desmontar
herramientas, desconecte el enchufe de la toma de
corriente. Estas medidas preventivas reducen el riesgo
de una puesta en marcha accidental.
c) Mantenga las herramientas fuera del alcance de los
niños y de las personas que no estén familiarizadas
con el equipo en sí o no hayan recibido las
instrucciones pertinentes al respecto. En manos de
personas inexpertas este equipo puede representar
un peligro.
d) Mantenga el aparato en perfecto estado de
funcionamiento. Antes de cada trabajo, compruébelo
en busca de daños generales o de piezas móviles
(fractura de piezas y componentes u otras
condiciones que puedan perjudicar el funcionamiento
seguro de la máquina). En caso de daños, el aparato
debe ser reparado antes de volver a ponerse en
funcionamiento.
e) Mantenga la unidad fuera del alcance de los niños.
f) La reparación y el mantenimiento de los equipos
solo pueden ser realizados por personal cualicado
y siempre empleando piezas de repuesto originales.
Esto garantiza la seguridad durante el uso.
g) A n de asegurar la integridad operativa del
dispositivo, no se deben retirar las cubiertas o los
tornillos instalados de fábrica.
h) Al transportar o trasladar el equipo desde su lugar
de almacenamiento hasta su lugar de utilización, se
observarán los requisitos de seguridad e higiene para
la manipulación manual en el país en que se utilice el
equipo.
i) Evite situaciones en las que el aparato haya
de trabajar en exceso. Esto podría ocasionar el
sobrecalentamiento de sus componentes y, con ello,
daños en el equipo.
j) No toque ninguna pieza o accesorio móvil a menos
que el aparato haya sido desconectado de la corriente
eléctrica.
k) No mover el aparato tirando del conducto de presión
ni colgarlo de este.
l) El mantenimiento y la sustitución de mangueras,
inyectores, etc., solo deben realizarse con el suministro
de aire comprimido desconectado y el depósito vacío.
m) Solamente debe utilizarse aire comprimido para
alimentar la unidad. La utilización de otros gases está
prohibida.
n) Transporte el equipo solamente en vertical.
o) Solo se puede utilizar arena especial para pistolas de
chorro de arena. ¡Queda totalmente prohibido utilizar
arena común!
p) Cuando vaya a transportar el equipo o no vaya a
utilizarlo, reduzca la presión del contenedor de arena.
El manómetro debe indicar un valor de 0.
1. Depósito
2. Ruedas
3. Pasador
4. Soporte
5. Eje de rueda
6. Mango de transporte
7. Empuñadura
8. Tornillo
9. Tuerca
10. Arandela
11. Válvula de seguridad
12. Junta
13. Cierre de la boca de llenado
14. Conducto
15. Distribuidor de tres conductos
16. Manómetro
17. Conexión macho macho
18. Secador de aire
19. Válvula de aire 3/8 ''
19A. 3/8" Válvula de palanca
19B. Válvula del conducto de arena
20. Conexión hembra
21. Conexión macho
22. Manguera de aire
23. Conducto de salida de arena
24. Abrazadera
25. Conducto para chorro de arena
26. Conector macho
27. Junta
28. Boquilla de cerámica
29. Tuerca delantera
3. INSTRUCCIONES DE USO
La pistola de arena es un dispositivo diseñado para la
limpieza de óxido y otras impurezas en distintos tipos
de supercie mediante un chorro a presión de partículas
abrasivas.
El usuario es responsable de los daños derivados de un
uso inadecuado del aparato.
3.1. DESCRIPCIÓN DEL APARATO
¡ATENCIÓN! Aunque en la fabricación de este aparato
se ha prestado gran importancia a la seguridad,
dispone de ciertos mecanismos de protección
extras. A pesar del uso de elementos de seguridad
adicionales, existe el riesgo de lesiones durante el
funcionamiento, por lo que se recomienda proceder
con precaución y sentido común.
¡ATENCIÓN! La ilustración de este producto se
encuentra en la última página de las instrucciones p.
43.
3534 Rev. 15.06.2020
Rev. 15.06.2020
ES ES

alta humedad no se recomienda llenar el tanque
al máximo; se aconseja llenar el tanque con una
pequeña cantidad de arena e ir añadiendo conforme
sea necesario.
• Retirar el embudo. Volver a cerrar.
• Cerrar la válvula del conducto para el chorro arena y
abrir la válvula de aire. Comprobar que la válvula de
cierre de la arena está convenientemente cerrada y
que no existen fugas de aire.
• La arena tiene la propiedad de retener agua. Por
esta razón dejar arena sin utilizar en el tanque
podría hacer que esta se humedeciera, provocando
el bloqueo de los conductos de salida e inyectores,
entre otros.
Con este aparato se puede utilizar material del siguiente
grano: 0,2 ÷ 0,7 mm. Están permitidos los siguientes
materiales abrasivos:
• Cuarzo abrasivo / arena
• Aloxita
• Granalla de hierro
• Granalla de acero
• Microesferas de vidrio
• Carburo de silicio
3.4. LIMPIEZA Y MANTENIMIENTO
• Antes de proceder a limpiar el aparato, desconectar
el suministro de entrada de aire. Reducir la presión
del tanque de arena dejando salir el aire.
• Limpiar el aparato a fondo después de cada trabajo.
• Examinar regularmente el estado de inyectores,
válvulas y conductos. El material abrasivo provoca
el desgaste de las paredes de las mangueras.
Esto es especialmente importante para el buen
funcionamiento del botón de vigilancia.
• Drenar regularmente el agua del deshumidicador.
• Limpie la supercie exclusivamente con agentes no
corrosivos.
• Después de cada limpieza, deje secar bien todas las
piezas antes de volver a utilizar el aparato.
• Guarde el aparato en un lugar seco, fresco y
protegido de la humedad y la radiación solar directa.
ELIMINACIÓN DE DISPOSITIVOS USADOS
Tras su vida útil, este producto no debe tirarse al contenedor
de basura doméstico, sino que ha de entregarse en el
punto limpio correspondiente para recolección y reciclaje
de aparatos eléctricos. Al respecto informa el símbolo
situado sobre el producto, las instrucciones de uso o el
embalaje. Los materiales utilizados en este aparato son
reciclables, conforme a su designación. Con la reutilización,
aprovechamiento de materiales u otras formas de uso de
los aparatos utilizados, contribuirás a proteger el medio
ambiente. Para obtener información sobre los puntos de
recogida y reciclaje contacte con las autoridades locales
competentes.
7. Coloque el tanque horizontalmente, je las dos asas
de transporte al tanque con 4 tornillos, arandelas y
tuercas. Atención: Asegúrese de que los elementos
del mango torcidos apunten en la dirección correcta
(hacia la parte superior del tanque, hacia afuera). El
eje de las ruedas (5) debe colocarse en los oricios
de las asas (6). Coloque las ruedas en los extremos de
los ejes y fíjelas con pasadores y arandelas. Coloque
la pata ja (4) en el fondo del tanque cerca del borde.
Use el pasador (3) para sostenerla.
Atención: Antes de iniciar el trabajo, asegúrese de que
todas las conexiones sean correctas y que todos los
elementos estén asentados correctamente.
3.3. MANEJO DEL APARATO
3.3.1. PREPARACIÓN PARA EL FUNCIONAMIENTO
Antes de conectar el conducto de presión, asegúrese de
que la válvula principal esté cerrada. Conecte el conducto
de presión con un conector hembra (20). Compruebe que
está correctamente jado, de forma que no se desprenda
bajo la presión del aire. Para eliminar la humedad, lo que
podría ocasionar problemas de funcionamiento, utilizar un
deshumidicador.
3.3.2. ELEGIR LA BOQUILLA ADECUADA
El arenado requiere un gran volumen de aire a alta presión.
Una manguera demasiado corta, una presión de aire
insuciente o una boquilla demasiado grande reducen el
rendimiento del dispositivo. Seleccionar el diámetro de la
manguera a su longitud previene una gran caída de presión
en el dispositivo.
Diámetro
de la
manguera
[‘’]
Longitud
de la
manguera
[m]
El diámetro
de la
boquilla [‘’]
Consumo
abrasivo por
hora [kg]
3/8 15,2 3/32 27,2
3/8 7,6 7/64 45,4
1/2 15,2 1/8 68
1/2 7,6 9/64 90,7
Para los mejores resultados, se recomienda usar una
presión de 4 – 6,8 bar.
03
02
30
08
07
06
10
09
01
04 03
73.3.3. DRENAJE DEL AGUA DEL DESHUMIDIFICADOR
1. Cierre la válvula principal. Se recomienda aliviar la
presión del depósito.
2. Mantenga pulsado el bloqueo rojo del secador,
girando la parte inferior del secador de aire hacia la
derecha.
3. Retirar el depósito y vaciar.
4. Montar el depósito del secador de forma análoga al
desmontaje.
Para asegurar el funcionamiento óptimo y correcto del
equipo, la eciencia del compresor debe ser adecuada
en relación con el consumo de aire de los dispositivos
receptores. El aparato debe utilizarse a una distancia segura
del compresor, para evitar que este pueda deteriorarse por
acción del polvo de materiales abrasivos.
3.3.4. ENCENDIDO DEL APARATO
Nota: ¡Utilizar el equipo solamente en posición vertical!
• Conectar el conducto de suministro de aire, regular
la presión de trabajo deseada en el compresor,
teniendo en cuenta que esta no puede superar el
valor máximo tolerado por el equipo.
• Verter arena en el depósito.
• Sosteniendo la manguera de arenado, apunte la
boquilla hacia la supercie a trabajar y presione el
botón de vigilancia.
• Abrir la válvula principal 3/8 "(19), para poder regular
el ujo de aire del compresor al aparato.
• Abrir con precaución la válvula de palanca 3/8 "
(19A). De esta forma se puede regular el ujo de aire
que conduce la arena al inyector.
• Abrir la válvula del conducto de arena (19B). Con esta
válvula se regula el paso del ujo de aire con arena a
través del inyector.
• Abrir la válvula de palanca (19A) hasta que la arena
salga de del inyector.
• Seleccionar los ajustes deseados.
• Se recomienda examinar el funcionamiento del
aparato sobre una pequeña supercie, para
comprobar el efecto del chorro de arena sobre el
material.
3.3.5. DISMINUYA LA PRESIÓN DE AIRE EN EL DEPÓSITO
Utilizar siempre equipos de protección individuales:
guantes, protección de las vías respiratorias y para los ojos.
• Antes de conectar el conducto de presión, asegúrese
de que la válvula principal esté cerrada.
• Abrir la válvula del conducto de arena; esperar hasta
que el manómetro esté a "0".
3.3.6. LLENAR EL DEPÓSITO CON ARENA
• Compruebe que la arena no está húmeda y que la
válvula del tanque, el conducto de salida, la válvula
del conducto, los inyectores y otros componentes no
estén obstruidos.
• Utilizar equipo de protección individual como p. ej.
guantes, protección de las vías respiratorias y ocular.
• Disminuir la presión del tanque.
• Desenroscar el cierre de la entrada de arena.
Colocar el embudo con el colador en la abertura y
rellenar con la cantidad correspondiente de arena.
Advertencia: ¡No utilice el embudo sin colador!
Podría haber terrones de arena que provocarían
un mal funcionamiento del dispositivo. ATENCIÓN:
No superar ¾ de la capacidad del tanque. Con
3736 Rev. 15.06.2020
Rev. 15.06.2020
ES ES

MŰSZAKI ADATOK
Az útmutató leírásában és a gyelmeztetésekben található
„berendezés” vagy „termék” alatt a MOBIL HOMOKSZÓRÓ
GÉP értendő.
2.1. MUNKAHELYI BIZTONSÁG
a) Tartson rendet a munkavégzés helyén és ügyeljen
a megfelelő világításra. A rendetlenség és a rossz
világítás balesethez vezethet. A berendezés használata
során legyen előrelátó, ügyeljen a tevékenységre és
járjon el józan ésszel.
b) Amennyiben a berendezés működése során
megrongálódást vagy helytelenséget észlel, a
berendezést haladéktalanul kapcsolja ki és azt jelentse
jogosult személynek.
c) A berendezés javítását kizárólagosan a gyártó szervize
végezheti el. Tilos a javítást önállóan elvégezni!
d) Amennyiben kétségei vannak a termék megfelelő
működése vagy megrongálódás megállapítása felől,
forduljon a gyártó szervizéhez.
e) A munkahelyen gyerekek, vagy illetéktelen személyek
nem tartózkodhatnak. (A gyelmetlenség a
berendezés feletti utalom elveszítéséhez vezethet.)
f) Használjon a mechanikus sérülés nagy kockázatának
kitett helyeken becsatlakoztatott sűrített levegőhöz
használatos erősített tömlőt.
g) A nyomótömlő rácsatlakoztatását és lecsatlakoztatását
zárt légszelep mellett kell elvégezni.
h) Tilos a nyomás alatti tömlőt saját maga, vagy mások,
illetve állatok felé irányítani. A nyomás alatti levegő
komoly sérüléseket okozhat.
i) Tilos a sűrített levegő áramlását a nyomás alatti tömlő
összehajtásával, vagy összeszorításával megállítani.
j) A berendezés működtetésének elkezdésekor
fokozatosan növelje a levegő beáramlását a
berendezésbe és ellenőrizze, hogy a berendezés
megfelelően működik. Amennyiben a berendezés
helytelen működését észleli, azonnal csatlakoztassa le
a sűrített levegőt és forduljon a gyártó szervizhez.
k) A jelen berendezés egyéb berendezésekkel együtt
történő használatakor a többi kezelési útmutatót is
gyelembe kell venni.
Paraméter leírás Paraméter érték
Termék neve MOBIL
HOMOKSZÓRÓ GÉP
Modell MSW-MS40A
Tartály mérete (ØxH) [mm] 310x450
Súlya [kg] 13,75
Tartály űrtartalma (l) 31
Üzemi nyomás [bar] 4-8,6
Vezeték hossza [m] 2,4
Levegő felhasználás [l/m] 170-708
2.2. SZEMÉLYES BIZTONSÁG
a) Tilos a berendezés használata fáradtság, betegség,
szeszes ital, kábítószer vagy gyógyszer befolyása
alatt, melyek komoly mértékben korlátozzák a
berendezés kezelésének képességét.
b) A berendezés üzemeltetésekor legyen gyelmes és
járjon el józan ésszel. Egy pillanatnyi gyelmetlenség
a munka során komoly testi sérülésekhez vezethet.
c) A jelmagyarázat 1. pontjában részletezett
berendezés üzemeltetésekor megkövetelt egyéni
védőeszközöket kell használni. A megfelelő,
tanúsított egyéni védőeszközök használata csökkenti
a sérülések kockázatát.
d) A véletlen elindítás elkerülése érdekében ellenőrizze,
hogy a tápforrásra csatlakoztatáskor a kapcsoló
kikapcsolt helyzetben van.
A termék megfelel az megfelelő biztonsági
szabványok követelményeinek.
A használat előtt olvassa el az útmutatót.
A termék újrahasznosítható.
Használjon fülvédőt. A zajártalom a hallás
elvesztését okozhatja.
Viseljen védőszemüveget.
Használjon porvédő maszkot (légutakat védő
eszközt).
Használjon védőkesztyűt.
Használjon láb védelmet.
MEGJEGYZÉS! E eszközzel történő munka során
biztosítja, hogy illetéktelenek és gyerekek megfelelő
távolságban maradjanak a munka elvégzése során.
e) Ne értékelje túlzottan a lehetőségeit. A munkavégzés
egész időtartama alatt tartsa meg a testének
egyensúlyát. Lehetővé teszi a berendezés jobb
felügyeletét a váratlan helyzetekben.
f) Tilos laza öltözetet és ékszereket viselni. A hajat,
ruház és a kesztyűt a mozgó alkatrészektől távol
kell tartani. A laza ruházatot, ékszert és hosszú hajat
elkaphatják a mozgásban levő részek.
g) A berendezés bekapcsolása előtt távolítsa el a
szabályozó eszközöket és kulcsokat. A berendezés
forgó részében hagyott szerszám vagy kulcs testi
sérüléseket okozhat.
h) A munkadarabot, különösen a kis méretű tárgyakat
rögzíteni kell, megelőzve azok véletlen elmozdulását,
pl. satuba befogva.
i) A berendezés működtetése során por keletkezik,
mely káros anyagokat tartalmazhat, a berendezést
jól szellőzött helyiségben kell használni és szűrővel
felszerelt arcmaszkot kell alkalmazni.
2.3. A BERENDEZÉS BIZTONSÁGOS HASZNÁLATA
a) Tilos a berendezést túlterhelni. Az adott
alkalmazásnak megfelelő szerszámokat használjon.
A megfelelően kiválasztott berendezés jobban és
biztonságosabban elvégzi a munkát, amelyhez
megtervezésre került.
b) A szabályozás elkezdése előtt, a szerszámok cseréje,
valamint a szerszám leszerelése előtt, a csatlakozó
dugót az aljzatból ki kell húzni. Ez a megelőző
intézkedés csökkenti a véletlen bekapcsolás
kockázatát.
c) A használaton kívüli berendezést gyermekek,
valamint a berendezést, vagy a jelen használati
utasítást nem ismerő személyek által nem
hozzáférhető helyen kell tárolni. A berendezések a
tapasztalatlan személyek kezében veszélyesek.
d) Tartsa a berendezést jó műszaki állapotban. Minden
egyes használat előtt ellenőrizze, hogy nincsenek
rajta általános jellegű, vagy a mozgó alkatrészekkel
kapcsolatos sérülések (alkatrészek, vagy egységek
eltörése vagy egyéb körülmények, melyek
kihathatnak a berendezés biztonságos működésére).
Megsérülése esetén a berendezést a használata előtt
javíttassa meg.
e) Óvja a berendezést a gyermekektől.
f) A berendezés javítását és karbantartását szakképzett
személyekkel, kizárólag eredeti cserealkatrészek
felhasználásával kell elvégeztetni. Ez biztosítja a
biztonságos használatot.
g) A berendezés tervezett operatív integritásának
biztosítása érdekében nem szabad eltávolítani a
gyárilag felszerelt védőlemezeket, vagy kicsavarozni
a csavarokat.
h) A berendezés raktározási helyről a használatának
helyére szállítása, vagy hordozása során gyelembe
kell venni a berendezés használatának országában
érvényes, manuális szállításra vonatkozó
munkabiztonsági és munkaegészségügyi
szabályokat.
i) Kerülni kell az olyan helyzeteket, amikor a
berendezés a túl nagy megterhelés következtében
a működés közben megáll. Ez a hajtó egységek
túlmelegedéséhez és annak következményeként a
berendezés megrongálódásához vezethet.
j) Tilos a berendezés mozgó alkatrészeihez, vagy
tartozékaihoz érni, kivéve, ha a berendezés a
tápforrásról lecsatlakoztatásra került.
k) Nem szabad a berendezést a nyomótömlőnél fogva
hordozni, vagy fellógatni.
l) A karbantartási műveleteket és a tömlők, fúvókák
cseréjét csakis és kizárólagosan a sűrített levegő
betáplálásának lecsatlakoztatása és a tartály
nyomásának leengedése után lehet elvégezni.
m) A berendezés működtetéséhez használjon levegőt,
tilos egyéb gázt alkalmazni.
n) A berendezést függőleges helyzetben szállítsa.
o) A berendezésben csak és kizárólagosan a
homokszóróhoz rendeltetett anyagot szabad
használni. Tilos közönséges homokot alkalmazni!
p) A berendezés szállítáakor, vagy amikor az
használaton kívül van, a homoktartályban a nyomást
csökkenteni kell. A nyomásmérőnek 0 értéket kell
mutatnia.
1. Tartály
2. Kerék
3. Kapocs
4. Talp
5. Kerekek tengelye
6. Hordozó fül
7. Fogantyú markolat
8. Csavar
9. Anyacsavar
10. Alátét
11. Biztonsági szelep
12. Tömítés
13. Homok kiöntő lezárás
14. Cső
15. Háromágú elosztó
16. Nyomásmérő
17. Kétoldalú menetes csővég
18. Légszárító
19. 3/8” fő légszelep
19A. Fojtószelep 3/8''
19B. Homokszóró tömlő szelep
20. Fér női csatlakozó
21. Kétoldalú menetes csővég
22. Levegő tömlő
23. Homok kimenő cső
24. Rögzítő bilincs
25. Homokszóró tömlő
26. Közcsavar
27. Tömítés
28. Kerámia fúvóka
29. Első anyacsavar
30. Alátét
3. A HASZNÁLAT SZABÁLYAI
A mobil homokszóró gép a különböző felületek rozsdától,
szennyeződéstől, stb. való megtisztítását szolgálja sűrített
levegő és apró szemcséjű csiszolóanyag kihasználásával.
A nem rendeltetés szerinti használatból eredő
bárminemű kárért a felhasználó a felelős.
3.1. A BERENDEZÉS LEÍRÁSA
FIGYELEM! Annak ellenére, hogy a berendezés úgy
került megtervezésre, hogy az biztonságos legyen,
valamint a felhasználót védő további alkatrészekkel
került felszerelésre, továbbra is fennáll a berendezés
üzemeltetése közbeni baleset, vagy sérülés kis
mértékű kockázata. Ajánlott a berendezés használata
alatt óvatosan és a józan ész szerint eljárni.
FIGYELEM: A termék rajzai az útmutató végén, a 43
oldalon találhatók.
1. ÁLTALÁNOS LEÍRÁS
Az útmutató a biztonságos és zavarmentes használat
segítését szolgálja. A termék szigorú műszaki követelmények
alapján, a legújabb technológiák és komponensek
alkalmazásával, a legmagasabb minőségi standardok
betartásával került megtervezésre és elkészítésre.
A HAZSNÁLAT ELŐTT OLVASSA EL ÉS ÉRTELMEZZE
A HASZNÁLATI ÚTMUTATÓBAN
FELSOROLT PONTOKAT.
A berendezés hosszú és zavarmentes üzemeltetése
érdekében gondoskodni kell a megfelelő kezelésről és
karbantartásról, az útmutatóban található utasításoknak
megfelelően. A jelen használati utasításban található
műszaki adatok és specikációk aktuálisak. A gyártó
fenntartja magának a jogot a minőség növelésével
kapcsolatos módosítások megtételéhez. A műszaki
fejlődést és a zaj korlátozásának lehetőségét, a berendezés
úgy került megtervezésre és elkészítésre, hogy a
zajkibocsátásból eredő kockázat a legkisebb szintre
kerüljön lekorlátozásra.
JELMAGYARÁZAT
MEGJEGYZÉS! A használati útmutatóban található
képek csak illusztrációk, ezért eltérhetnek az adott
gép tényleges kinézetétől.
Az eredeti használati útmutató német nyelven készült.
A további nyelven készített leírások német nyelvről
fordítottak.
2. HASZNÁLATI FELTÉTELEK
FIGYELEM! Olvassa el a biztonsággal kapcsolatos
gyelmeztetéseket és az összes útmutatót. A
gyelmeztetések és utasítások gyelmen kívül
hagyása áramütéshez, tűzesethez és/vagy komoly
sérülésekhez vezethet.
HU HU
HASZNÁLATI ÚTMUTATÓ
3938 Rev. 15.06.2020
Rev. 15.06.2020
Table of contents
Languages:
Other MSW Motor Technics Power Tools manuals

MSW Motor Technics
MSW Motor Technics ACC-B2 User manual

MSW Motor Technics
MSW Motor Technics MSW-CDR10V2 User manual

MSW Motor Technics
MSW Motor Technics MSW-CA-120 User manual

MSW Motor Technics
MSW Motor Technics MSW-AN16GB User manual

MSW Motor Technics
MSW Motor Technics MSW-TPN-100 User manual

MSW Motor Technics
MSW Motor Technics MSW-CA-110 User manual

MSW Motor Technics
MSW Motor Technics MSW-HS-1500 MSW-HS-2000 User manual

MSW Motor Technics
MSW Motor Technics MSW-ETT-O-113 User manual

MSW Motor Technics
MSW Motor Technics MSW-TY-1 User manual

MSW Motor Technics
MSW Motor Technics MSW-SPS-19 User manual