EFX MkIII Audio Controller User Manual 8
*ThePCs channel is global (the same for all banks/presets). And you need not edit this for any other
banks/presets if you have already done so. In this case, omit procedures ~ .③⑤
Press the⑥PS-3 switch(NUM, number) to set a PC1 number. The display will show
the current PC1 number.
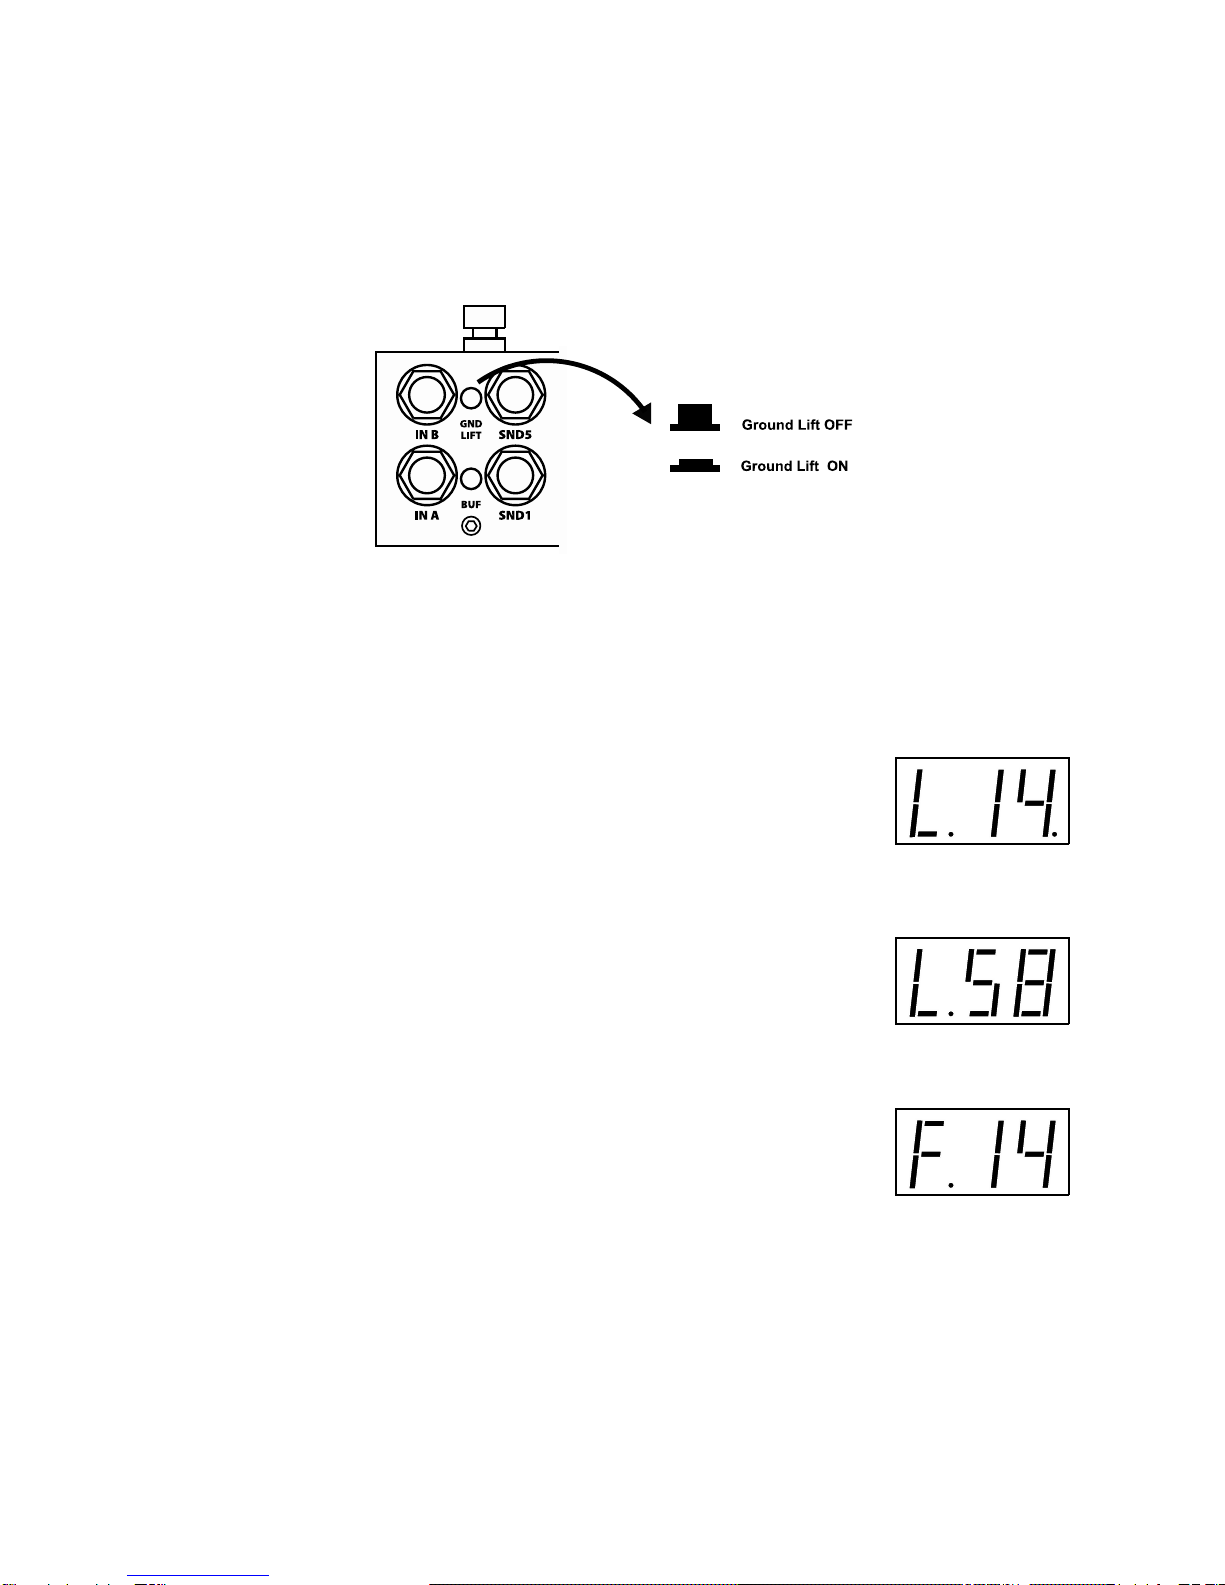
Press/hold the⑦BANK UP or BANK DOWN switches to select a PC1 number from
001. through 128. or not..
Press the⑧PS-3 switch to store a new PC1 number in memory. The display will show str(store) for a
moment.
Press the⑨PS-1 switch(FS, function select) to set other PCs and follow the same procedure ~ .③⑧
Note
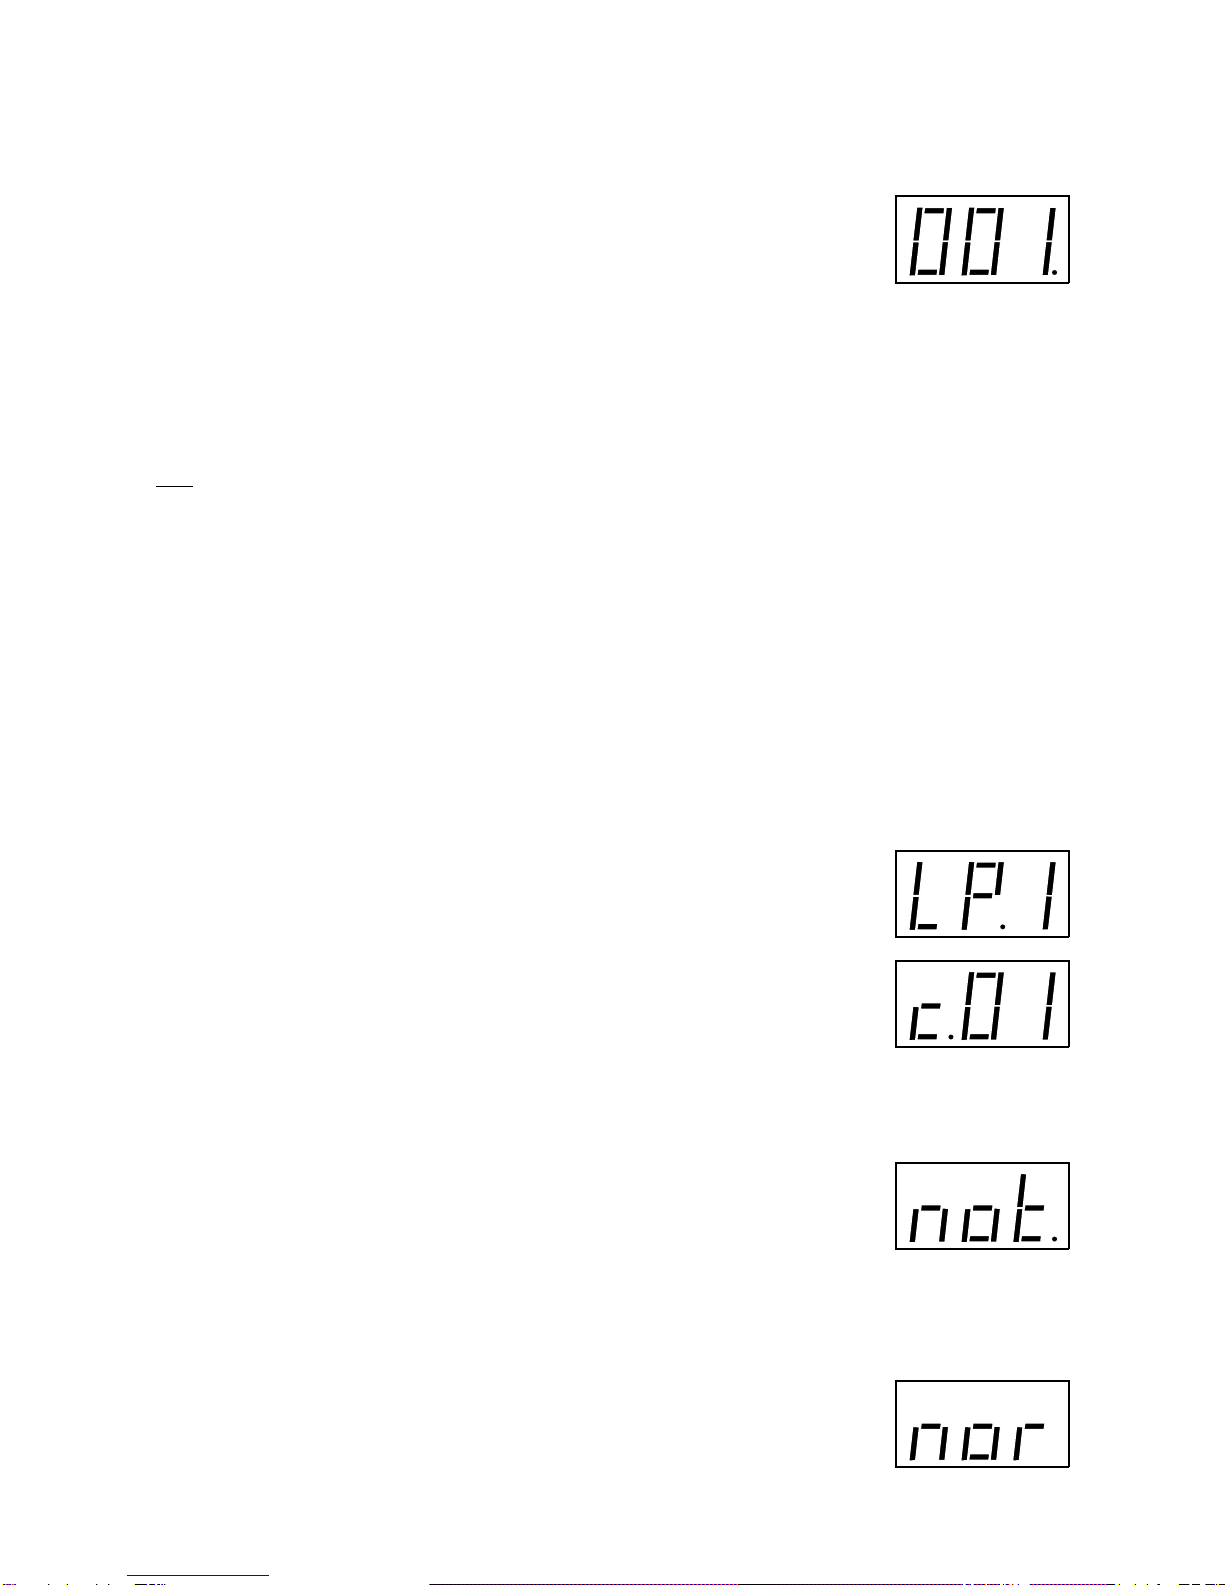
*Thenot. means no Program Change is transmitted.
* The last decimal point on the display means that the display shows a Program Change number or controller
number.
* For initial default Program Change channels and numbers setting are refer to page 12.
3.3.2 Editing MIDI Control Change
The MIDI Control Changes are transmitted via MIDI OUT jack when the assigned loops or function switches
turn on or off. The LP.1 is assigned the Loop1, ..... , and the FS.4 is assigned the Function Switch4.
* The Control Change channel and controller number are global (the same for all banks/presets). you need
not edit these for any other banks/presets if you have already done so.
Press/hold the①PS-1 switch(FS, function select) to edit the 1st Control Change
until the LP.1 is shown on the display if you are already in the Edit Mode.
Press the②PS-2 switch(CH, channel) to set a 1st Control Change channel. The
display will show the current 1st Control Change channel.
Press/hold the③BANK UP or BANK DOWN switches to select a channel from 1
through 16.
Press the④PS-2 switch to store a new 1st Control Change channel in memory.
The display will show str(store) for a moment.
Press the⑤PS-3 switch(NUM, number) to set 1st controller number. The display
will show the current 1st Controller number.
Press/hold the⑥BANK UP or BANK DOWN switches to select a 1st controller
number from 000. through 127. or not..
Press the⑦PS-3 switch to store a new 1st controller number in memory.
The display will show str(store) for a moment.
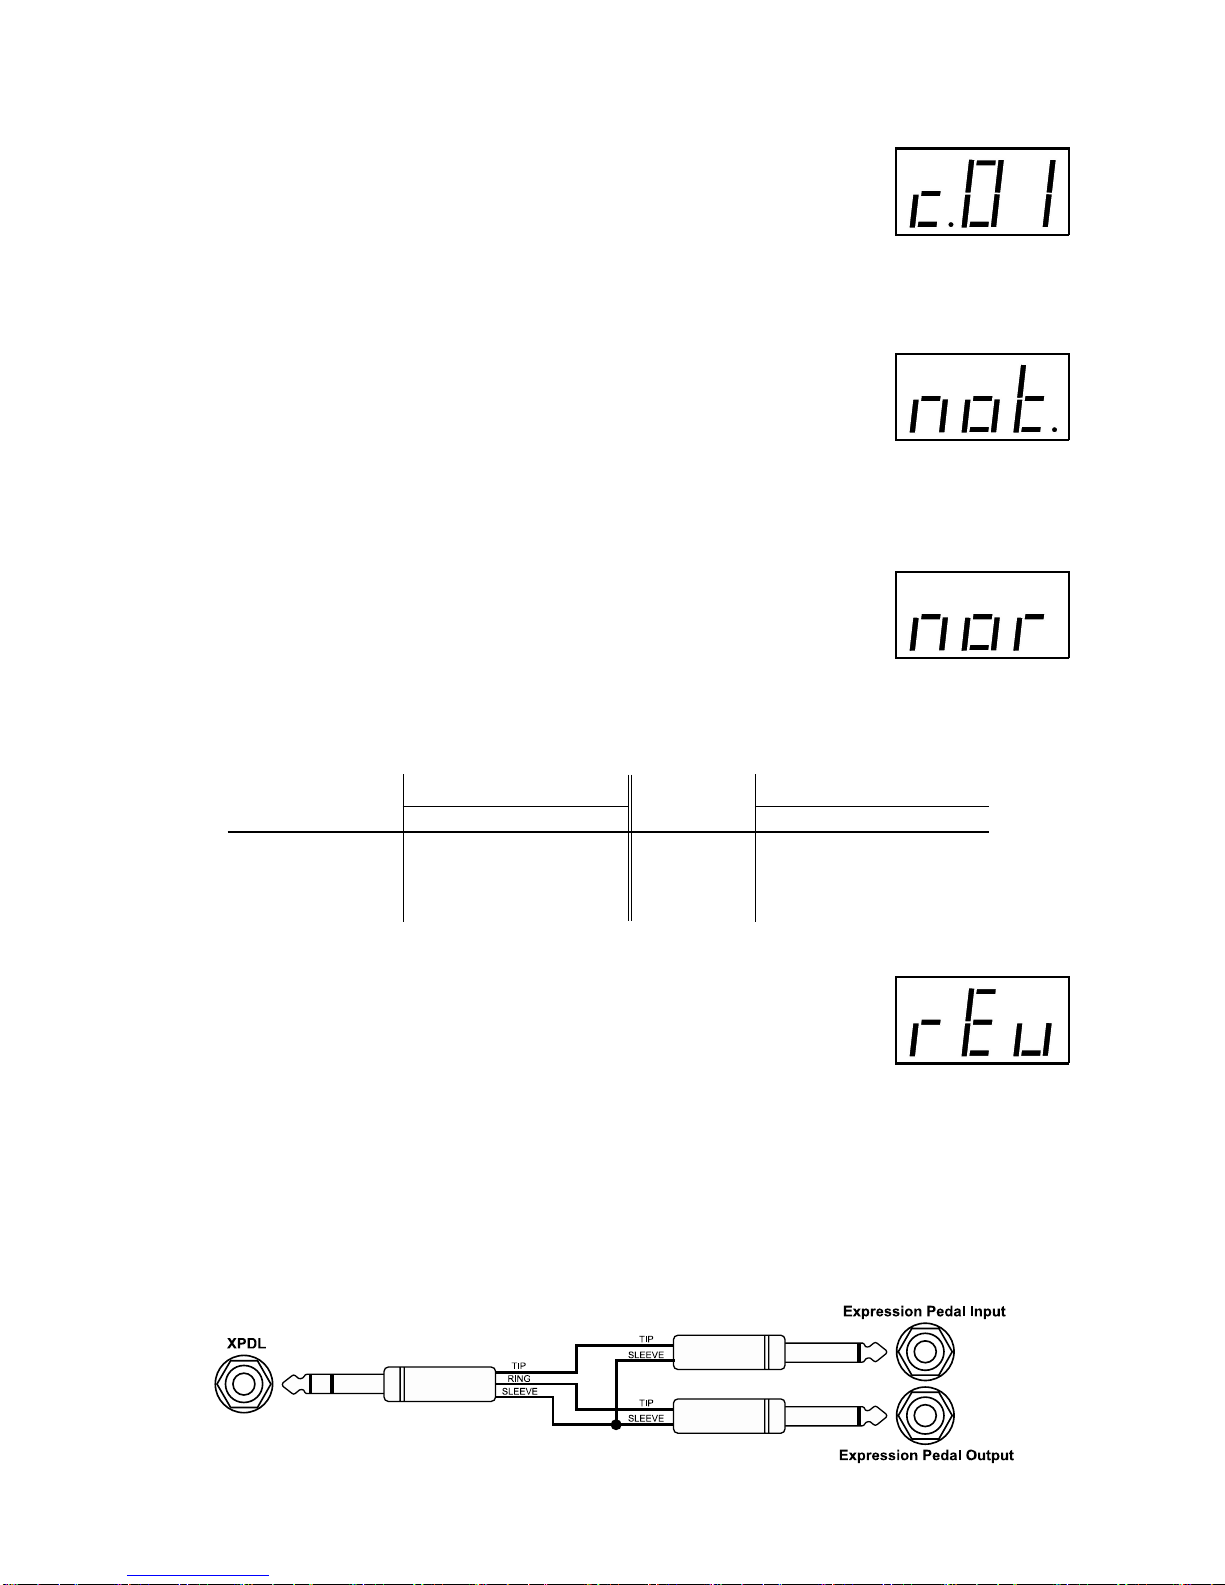
The EFX MkIII has an additional reverse function which reverse the control value.⑧
Press the PS-4 switch(TGL, toggle) to reverse 1st control value. The display will
show the current 1st control value mode.