manuals.online logo
Brands
  1. Home
  2. •
  3. Brands
  4. •
  5. NAPCO
  6. •
  7. Keypad
  8. •
  9. NAPCO RP2000LED User manual

NAPCO RP2000LED User manual

OPERATING GUIDE
RPIOOOLED KEYPAD
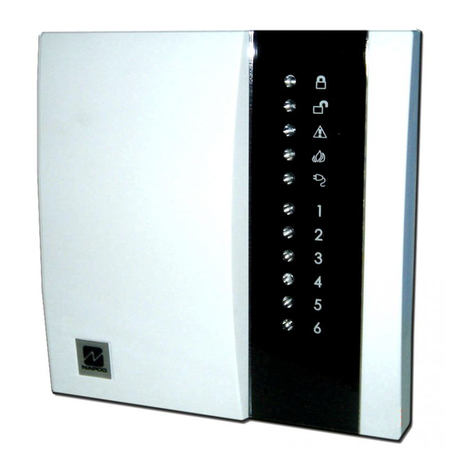
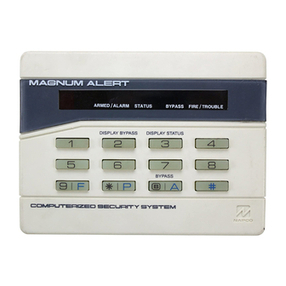
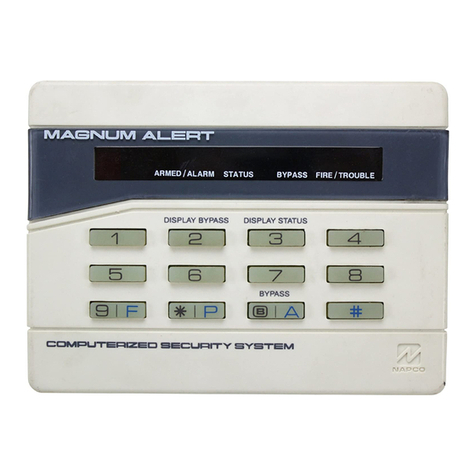
The RP2000LED is a remote arm/disarm station with bypassing
capability for use with Napco's MA26fi)-series control panels.
Featuring soft-touch keys and built-in backlighting, its modern,
attractive styling will complement any decor.
Napco Security Systems, Inc.,
333 Bayview Ave., Amityville, New York 11701
TABLEOFCONTENTS
Scclion Pagc
CENTRAL.STATIONMONTTORING.. ......3
GLOSSARY ......4
KEYPADCONTROIJ&INDICATORS .......6
sE-fTrNG THE Ar-ARM (ARMTNG) WHENLEAVING . . . . . . . . 7
TURMNGOFFTHEAI-ARM(DISARMING)WHENRETURMNG . 9
PROTECTING YOURSELF WHILEON THE PREMISFJ . . . . . . .10
FIREPROTECTION... .,..11
PREPARINGAFIREESCAPEPI.AN ........11
WARRANTY ... . .15
TO SHUT OFF AN AI-ARM WHILE ARMED:
ENTERYOUR CODE, THEN PRESS THE [ON/OFF] BUTTON.
FORSERVICE CALL:
CENTRAL STATION:
CENTR,AL.STATION MONITORING
Your alarm specialist may have programmed your s5ntem to be monitored by a
central station. The built-in digital communicator can transmit emergency
signals and status reports to the central station 24 houn a day.
COMMUNICATOR FEATURES
Abort Dclay. Ask your installer which of your zones have abort delay, a delay
that enables you to reset the system before it communicates to the central
station.
oRegular Burglary (Non-24-Hour) Zone reports are aborted by disarming
within the delayperiod.
az-Hour Zones and zones progammed to report restores must be restored
first, then the panel armed and disarmed, all within the delay period.
Openlng and/or Closlng Reporfing. Your system can notiry the central station
everytime it is disarmed orarmed.Anyorall of up to 15 different users can each
be identified. If your qntem reports on arming (Closing Report), the central
station will acknowledge arming by means of a "ringback" tone, a short verifica-
tion beep that will sound at the keypad.
3
o NAPCO 1990 DESIGN PATS. PENDING
GLOSSARY
Following are brief descriptions of terms and features used herein that may be
unfamiliar to you. Many of the features are programmable options that may or
may not apply to your system.
Abort Delay - A delay period that allows the control panel to be reset, thus
aborting a rcport to a central station.
Acccss Codc - A code (up to 6 digits) used to remotely unlock a door.
Ambush Codc - A 2digit code entered just prior to the Arm/Disarm C-ode
when forced to disarm. Sends a silent alarm to the central station.
Arrnlng/Dlsarmlng - Turning the system on/off by entering your code at the
keypad, then pressing the [ON/OFF] Button.
Arm/Disarm Codc - Your penonalized code for arming and disarming the
system. It may contain up to six digits.
Batr,ery - Backup power source in the contrcl-panel enclosure to provide
protection in the event of a power failure.
Bypass Butlon (kbelled [BYPASS] on keypad) - Enablcs you to manually
r€mo\re one or more protective zones from the system.
Central Stetlon - Monitors incoming reports and emergency messages from
a digital communicator and notifies the proper authorities.
Chlrnc - A keypad beep while disarmed alerting that the programmed zone
has been opened.
Communlcelor - Reports intrusions, emergencies, openings, closings, etc.
dircctly to the central station over telephone lines.
Conlrol Pancl - The brain of the q6tem, it controls all system functions.
ExtUEntry Dclays - Separate dela)6 that let you exit and enter your premises
without setting off an alarm when the system is armed.
Insl.onl Protecllon - Arming without entry delay while on the premises using
the [INSTANI'] Button.
Keypad - Puts control-panel functions at your fingertips. It can be mounted
anywhere in your premises.
Panlc Bultons - Blue buttons on the keypad (['] and [A], [B] or [C]). Pressing
[r] together with IAl, IBI or [C] will alert the ce ntral station of a fire, police or
other emergency.
4
Rcport - A transmission to a central station notiSing of a change in the status
of the q/stem (alarm, trouble, low battery, etc.).
Rlngback - A beep after arming verifying central-station receipt of report'
Scrvlcc Codc - An Arm/Disarm Code intended for temporary use.
Soundcr - A local warning device at each keypad to alert that (a) entry delay
has started; (b) an attempt was made to arm with a zone in trouble; or (c) central
station acknowledged arming (see Rlngback)'
Troublc - An open door, window, or other problem that may Prevent armlng'
Watch Modc - Turns all DayZnnes on or off simultaneously.
Z,oncs - Independent circuits that protect specific areas of the premises:
a Auto-Bypass Znne: A zone that will be automatically bypassed from the
protection system if it is in trouble (faulty) when the system is armed'
o Burglaty Tnne: Detects intrusion.
o DayZnne: A zone programmed to cause visual and audible indication at the
keypad when it is in trouble while disarmed.
o Exit/Entry Follower Zone: Provides exit and entry delay for interior devices'
Entry delay only occurs if re+ntry takes place through the normal exit/entry
door.
o InteriorZones: Circuitswithin theptemises, usuallyincludingspace'protec-
tion devices, interior doors, etc.; not exterior doors or c/indows. These can
all be bypassed simultaneously using the [INTERIOR] Button.
o Priority Zone: A zone that prevents arming if in trouble.
. PriorityZonewith Bypass: APriorityZone that maybebypassed if in trouble
by pressing the [RESE'I'] Button.
o Selective-Bypassed Zone: A zone that can be indMdually bypasse d using the
[BYPASS] Button.
o A-HourZnne: A zone tbat is armed and ready at all times to respond to an
emergency situation.
ARMEO STATUS BYPASSED
UGHT LIGHT UGHT
FIRE,/ SYSTEM
FIRE TROUBLE TROUBLE
LIGHT LIGHT
KEYPAD CONTROLS & INDICATORS SETTING THE AIARM (ARMING) WHEN LEAVING
Check the keypad; only the Feen STATUS light should be on. If the STATUS
light is flashing go to a keypad u/ith an English-t-anguage LCD display, note the
problem and secure it (by closing a window, door, etc.). Ifyou cannot locate or
repair the problemyourself, call for assistance.If you cannot get immediate help'
it may be possible to bypass that zone from the system (see Arnrlng wlfh Zoncs
Bypassrd, below) and arm temporarilywithpartial protection. Hocrever, be sure
to have the qDtem checked as soon as possible.
NOTE: If the ('SYS./TBL" light is on, go to the LCD keypad, display the qrtem
trouble and mrect it before attempting to arm. After the trouble is checked, it
will be possible to arm within 5 minutes if repairs cannot be made immediately.
Ifdesired, return to the RP2000LED keypad and enteryourArm/Disarm Codc,
then press the [ON/OFE Button to arm the s]stem: the green STATUS light
will go off, the red ARMED light will go on and the exit delaywill start. Irave
immediately through the regular exit/entry door.
NOTE: If your q6tem reports to a central station, your panel may have been
prcgrammed to start exit delay after the central-station ringback (verification)
sigral. Then, after arming, wait while your system communicates to the central
station. After the central station acknourledges rcceipt (ringback), exit delay
will start. If ringback is not heard within about 30 seconds, a cornmunication
problem mayexist.
Amtng VVlth Zones Bypasscd
Check that the green keypad STATUS light is on. To deactivate a zone
(programmable option), prcss the [BYPASS] Button, then the numerical key
rcprcsenting the zone number. (fhe zone number is properly entered as a
twodigit number, thus Zone 4 is entered as "04".) The BYPASSED light will
come on to indicate that at least one zone has been bypassed from the system.
Each zone must be bypassed separately. (Also s€e PROTECTING YOURSELF
WHILEON THE PREMISF^S: Bypassing Interior Zones") When the system is
subsequently disarmed, bypassed zones will revert to regular disarmed zones.
Prtorlty Arnlng
A steady tone at the keyxd when attempting to arm indicates a priority
condition; that is, a problem exists on at least one zone that has been desigrated
BYPASS
BUTTON
NUMERICAL
KEYS
INTERIOR
BUTTON
INSTANT
BUTTON
BUTTON
RESET
BUTTON
POLICE
AUXILIARY
FIRE
EMERGENCY BUTTONS
l'EiE-o-l
r..--t .5t @ ltE_
l----l
iat^l agBl asa ao-]l
LL--t--J---J
a Priority Zonc. Enter your Arm/Disarm Code, or simply press the [ON/OFF]
Button to silence the sounder. The trouble(s) must be cort€cted before the
panel can bc armed. To check which zone is in trouble, check status on the LCD
keypad. Similarty, if thc SYS./TBL light is on, a priority system trouble exists
which must be mrrected before the panel can be armed. To identify the q6tem
trouble, go to thc LCD kgpad and prcss the [FUNCTIONI Button 5 times
(Display S)6tem Trcublc), then the [ON/OFE Button to display the system
trouble(s).
A zone pr,ogrammed as a Priority Zonc with B5pass (ask your installer) may be
qrpassed when in trouble. Dtsplay status as abore; if the prcblem cannot be
corr€cted immediately, pr€ss the IRESEIj Button, then arm the panel. A
2-secondbeepwill sound at the panel to indicatc armingwith a PrioityTonein
trouble. Bc sure to have the trouble repaircd as soon as possible.
TURNING OFF THE AI,ARM (DISAR"}IING) WHEN RETURNING
Burglary Zonc
Upon entry through a designated exit/entry door, the red AI-ARM light should
be on. The kgpad sounder will come on as a rcminder to disarm the panel.
Immediately enter your Arm/Disarm Code, then press the [ON/OF!] Button
to disarm.
Alarm Indlcallon
NOTB If thc rcd ARMED light is flashing an alarm occurr€d - PROCEED
WITII CAI-EION!(If you susped that an intnrder is on the premises, call the
police from a neighbor's phone.). Go to the LCD keypad to recall the zones that
were in alarm. Corrrrt the zone condition that initiated the alarm to restore
"System Ready'status.
Dey?arc
A Day Tnne may be used to monitor a secured exit door, foil on doors or
windorn, ctc. A problem on this t'?e of burglary zone will cause aDay-7nne
trouble and a pulsing audible alert at the ke)?ad while disarmed. Arm and
disarm to silence the sounder. C.orrect the problem to reset the DayZane.
24-HotrZnre.
This zone is ahrap armed, even if the system is disarmed. Therc is no kqpad
indication showing the status of a Z-Hou rZnne, but an alarm on this zone will
be recorded in alarm history. If the detection device must be manually r,eset, it
must be reset to clear the zone. If the system is subsequently armed with a 24-
HourZone in trouble, the keypad sounderwill comeon momentarily to indicate
that there is a problem on the zone.
Ambush Zonc
If an intruder forces you to disarm your system, enter your two{igit Ambush
Code (programmed option) just prior to your Arm/Disarrn Code, then press
the ION/OFE Button. This will activate the Ambush Zone, sending a silent
alarm to a centnl monitoring station.
7
\
l
\
PROTECTING YOURSELF WHILE ON THE PR.EMISES
Bypesslng Infcdor Zoncs
Check that the keypad green STATUS light is on. To turn off all interior zones
simultaneously (programmable option), press the UNTERIORI Button. The
"BYPASSED" light indicates that at least one zone is beihg bypassed from the
qrtem.) Bc sure to secure all exterior doon and windows.
Armtng thc Syslcm YVhllc on thc Prcrrlses
After interior zones have been b5rpassed (see Bypasslng Interlor Zones, above)
you mayset the alarm with perimeterprctection only enteryourArmiDisarm
Code, then press the [ON/OFE Button. The ARMED lightwill go on. Entry
through any exterior door or window will cause an immediate alarm, except
through the r€gular entry door, which is still subject to the usual entry delay.
NOTB When the qntem is subsequentlydisarmed, bypassed interior zoneswill
revert to regular disarmed zones.
Armlng Wltb Inslani Protectlon
To cancel thc entry delaywhile on the premises, merely press the [INSTAI{I]
Button. Opening the entry door (after exit delay has expired) will cause an
instant alarm.
NOTE: When the q6tem is subsequently disarmed, entry delaywill bc rcstored.
Emcrgcncy Buttons (Opllonal)
Thc blue ['] Button must be pressed together with the blue [A], [B] or [Q
Button to activate the optional emergenryfeatures, each of which mayhave been
programmedbyyouralarm specialist tosignal a central station, sound anaudible
alarm, or both:
['] + [A] = Fire Emergency
['] + [B] = AuxiliaryEmergency
['l + [q = Police EmergencY
NOTB The emergency signal will only be activated when both of the respective
pair of buttons are pressed at the same time.
FIRE PROTECTION
This information is applicable only where local ordinance permits use of this
alarm control panel for Frre protection.
Flrc.ZoncAlerm-
If a fire alarm is detected, the FIRVTBL light will oome on and the sounder
will pulse. If a Frre is in progress, evacuate the premises immediately! If neces-
sary, call the Fire Department from an outside phone. If ther€ is no evidence of
a fire, disarm (if armed) to turn off the alarm (it may have been programmed
to shut off automatically after a preset time). Press the [RESEI] Button to
silence the sounder. After the alarm condition is restored, pressing the [RESE-IJ
Button again will reset the keypad within about 10 seconds.
Flrc.Zonc Troublc.
If a break in the wiring is detected, the FIRqTBL light will flash and the
sounderwill pulsc. Disarm (if armed), press the IRESEII Button to silence the
sounder and call for service,
Would You Lllc Morc Salety Informatlon?
For more information on home frre detection, burn safety, and home fire safety,
writc to the National Fire Protection Association, Public Affairs Dept. 05A,
Batteryrnarch Pla"a, Qu incy, MA 02269.
PREPARING A FIRE ESCAPE PI-AN
Even with the mo6t adrranced firc alarm s)atem, adequate protection requires
an cscape plan. To preparc your plan:
Draw floor plans of lour building. Shor two exits - a front or back door and a
windo'from each room. (Make surc the windowworks. You may need a special
fire+scape laddcr if the window is high up.) Write down lour outside meeting
place.
Famlly Rehcarsel
Rehearre each of the following activities:
1. Eveqone in his room with the doors closed.
2. One person sounds the alarm.
3. Each pcrson tests his door.
t0 1t
4. Pretend the door is hot and use the alternate escape exit.
5. Everyone meets outdoors at the assiged spot.
FLOORPI-AN
IMPORTANT! - Rcad CarefullY.
Discuss thesc escape prccedures with all those who use the building:
1. In a residence, sleep with the bedroom door closed. A closed doorwill hold
back deadly smoke while you escape.
2. When the fire alarm signals, escape quickly. Do not stop to pack'
3. Test the door. If it is hot, use your alternate route thrcugh the windos'. If the
door is cool, bnce your shoulder against it and open it cautiously. Be ready to
slam the door if smoke or heat nrshes in. Crawl through smoke, holding your
brcath. Close the doors again on leaving to help prcvent the frre from spreading.
4. Go topurspecificoutdoormeetingplace soyou can see that everyone is safe.
5. Assign someone to make sure nobody returns to the burning building.
6. Call the Fire Department from a neighbor's telephone.
12
THE FOLIOWING STATEMENT IS REQUIRED BYTHEFCC.
This equipment generates and uses radio-frequencyenergrand, ifnot installed
and used properly, that is, in strict acmrdance with the manufacturels instruc-
tions, may causc interference to radio and television rcception. It has been type
tested and found to comply with the limits for a Class-B computing device in
acmrdancc with the specifications in Subpart J of Part 15 of FCC Rules, which
are designed to provide reasonable protection against such interference in a
residential installa tion.
Hm,ever, therc is no guarantee that interfercnce will not ocrcur in a particular
installation. If this equipment does cause interference to radio or television
reception, wtrich can be determined by turning the equipment off and on, the
user is encouraged to try to correct the interference by one or more of the
follming measures: reorient the rcceiving antenna; relocate the computer with
rcspect to the receiver; move the computer away from the receiver; plug the
computer into a different outlet so that computer and receiver are on different
branch circuits.
If necessary, the user should consult the dealer or an experienced
radio/television technician for additional suggestions. The user may find the
folloring booklet prcparcd by the Federal C.ommunications Commission help-
ful: "Ho, to Identify and Resolve Radio-TV Interference Problems." This
booklet is available from the U.S. Government Printing Office,Washington, DC
20402; Stock No. 0044m403454.
Rlngcr Equlvatcncc Number.
The FCC Registration l-abel, found on top ofyour system and on the bottom
of your telephone sets, includes the ringer equivalence number (REN). This is
a representation of the electrical load thatwill be applied toyour telephone line.
This qctem has a ringer equivalence of zero. Therefore, it does not affect the
load of the telephone companycentral office equipment whenyour telephones
ring. The telephone line scrvicingyourpremises will not operate properly if the
total ringer load exceeds the capability of the central office equipment. That is,
if too many ringers are connected to the line, there may be insufficient enerry
to ring your tclephones. If the ringer load is excessivc, you may also have
difficulty dialing telephone numbers.
Ifyou want to kn(n'the total REN allowed foryour telephone line,you maycall
t3
your telephone company. Howerrer, as a nrlc of thumb, a total REN of Fwe (5)
should permit nomal operation of lour telephonc scts and cquipment. To
determine the total ringcr load, list the REN of each ofyour telePhone sets or
dcviccs connectcd tolour telephonc line. Add thesc numbcrs; the rcsult is the
total REN for )our linc. If this number cxcceds 5, ]rou maywant to consult your
telephone crmpany to determine whether or not prol)er oPeration of your
equipment is possiblc.
It e Dlgltal Communlcetor b Connccttd to a Tclcphonc Llnc:
Do not notify the telephone company. It is no longer necessary to call the
telephone company to notify it of the registration and ringer equivalence
numbers of any telephone instrumcnt bcing connected to the Public switched
telephonc netcorh Thc telephonc companywill call and request this informa'
tion if a need ariscs in the futurc.
Rlghls of thc Tclapbonc Company
If ),our digital communicator causes harm to the telePhonc networlq thc
tclephone clmpany may discontinuc your service temporarily. If possible, they
will noti$ you in advancc. But if adrrance notice is not practical, you will be
notified as soon as poesible, You will bc given the opportunity to corrcct the
situation and lou will be informed of your right to file a complaintwith the FCC.
Your telephonc mmpany may make changes in its facilities, equipment, opera-
tions orprocedurcs that could affect the proper function ofyour communicator.
If they do, you will be notiFred in advance to give you an opportunity to maintain
uninterrupted sc^rice.
NAPCO LIMITEDWARRANTY
NAPCO SECURITY SYSTEMS, INC. (NAPCO) warrants its products to be
free from manufacturing defects in materials and workmanship for fifteen
months following the date of manufacture. NAPCO will, within said period, at
its option, repair or replace any product failing to operate correctly without
charge to the original purchaser or user.
This warranty shall not apply to any equipment, or any part thereof, which has
been repaired byothers, improperlyinstalled, improperly used, abused, altered,
damaged, subjected to acts of God, or on which any serial numbers have been
altered, defaced or removed. Seller will not be responsible for any dismantling
or reinstallation charges.
In case of defect, contact the security ptofessional who installed and maintains
lour security qntem. NAPCO shall have no obligation under this warranty, or
otherwise, if the product has been repaired by others, impnrperly installed,
improperly used, abused, altered, damaged, subjected to accident, nuisance,
flood, Frrc or acts of God, or on which any serial numbers have been altered,
defaced or removed. NAPCO will not be responsible for any dismantling
reassembly or reinstallation charges.
In order to exercise the warranty, the product must be returned by the user or
purchaser, shipping costs prepaid and insured to NAPCO. After repair or
replacement, NAPCO assumes the cost of returning products under warranty.
Thcrterc nowerrentlcg cxprcss or lmplied,which cxlendbeyond lhc descrip-
ll,on on thc facc hcrcof. Thcrc ls no cxprcss or implied warranty of merchan-
tablllly or r waranty ol lltncss lor a psrticular purpos.. Additionally, thls
werranty ls ln llcu ol all olhcr obllgations or liabilities on thc part oINAPCO.
Any action for breach of warranty, including but not limited to any implied
warranty of merchantability, must be brought within the six months following
the end of the warrantyperiod. In no case shall NAPCO be liable to anyone for
anyconsequential orincidental damages forbreach ofthis oranyotherwarranty,
cxpress or implied, even if the loss or damage is caused by the seller's owrt
ncgligence or fault.
Thls werranty contelns lhc cntirc warranty. It ls lhc solc warrenly and ony
prlor aglccmcnts or reprtscntatlong whelhcr oral or wrltlen, arc clther
mcrged hcrcln or arc cxprcssly crncclled- NAPCO nelther assumes, nor
aulhorlzcs eny olhcr Frson purportlng tro act on lts bchalf to modlfy, to
changc, or io assumc for I any olher warranly or llabllity concernlng lls
producls
In no event shall NAPCO bc liable for an amoirnt in excess of NAPCO's original
1{ 15
goods furnished hereunder.
NAPCO RECOMMENDS THATTTIE ENTIRE SYSTEM BE COMPLETE-
LYTESTEDWEEKLY.
damage.
payment of the annual premium cost by user.
Some states do not allflr limitations on how long an implied warranty lasts or
do not allow the exclusion or limitation of incidental or consequential damages,
ordifferentiate in their treatment of limitations of liability forordinaryor grcs
negligence, so the above limitations or exclusions may not apply to y-"u ThP
Wirrintygivasyou specific legal rights andyou mayalso have other rightswhich
vary from state to state.
Printed in U.S.A. OI138 3/90

Other NAPCO Keypad manuals

NAPCO RP1016LCD User manual

NAPCO

NAPCO RP1016LCD User manual

NAPCO GEM-RP1CAE KEYPAD User manual

NAPCO

NAPCO GEM-RP1CAE KEYPAD User manual

NAPCO GEMINI C Series Installation manual

NAPCO

NAPCO GEMINI C Series Installation manual

NAPCO Gemini GEM-RP1CAe2 User manual

NAPCO

NAPCO Gemini GEM-RP1CAe2 User manual

NAPCO RP1000LCD User manual

NAPCO

NAPCO RP1000LCD User manual

NAPCO Gemini GEM-RP2ASe2 User manual

NAPCO

NAPCO Gemini GEM-RP2ASe2 User manual

NAPCO Gemini GEM-P816 User manual

NAPCO

NAPCO Gemini GEM-P816 User manual

NAPCO Gemini GEM-K1CA User manual

NAPCO

NAPCO Gemini GEM-K1CA User manual

NAPCO Magnum Alert RP1000ELCD User manual

NAPCO

NAPCO Magnum Alert RP1000ELCD User manual

NAPCO RP1054D KEYPAD User manual

NAPCO

NAPCO RP1054D KEYPAD User manual

NAPCO iSecure ISEC-WL-KEYPAD User manual

NAPCO

NAPCO iSecure ISEC-WL-KEYPAD User manual

NAPCO Gemini GEM-K4 User manual

NAPCO

NAPCO Gemini GEM-K4 User manual

NAPCO GEM-RP1Ca User manual

NAPCO

NAPCO GEM-RP1Ca User manual

NAPCO RP1054e User manual

NAPCO

NAPCO RP1054e User manual

NAPCO GEM-RP1Ca User manual

NAPCO

NAPCO GEM-RP1Ca User manual

NAPCO GEM-RP2AS User manual

NAPCO

NAPCO GEM-RP2AS User manual

NAPCO Gemini GEM-DXRP1 User manual

NAPCO

NAPCO Gemini GEM-DXRP1 User manual

NAPCO Gemini GEM-RP3DGTL User manual

NAPCO

NAPCO Gemini GEM-RP3DGTL User manual

NAPCO Magnum Alert RP2000LCD User manual

NAPCO

NAPCO Magnum Alert RP2000LCD User manual

NAPCO Gemini GEM-RP4C User manual

NAPCO

NAPCO Gemini GEM-RP4C User manual

NAPCO MAGNUM ALERT RP1000E LCD KEYPAD User manual

NAPCO

NAPCO MAGNUM ALERT RP1000E LCD KEYPAD User manual

NAPCO Gemini GEM-TOUCH K Series User manual

NAPCO

NAPCO Gemini GEM-TOUCH K Series User manual

NAPCO RPXP6GT User manual

NAPCO

NAPCO RPXP6GT User manual

NAPCO RP1016LCD User manual

NAPCO

NAPCO RP1016LCD User manual

Popular Keypad manuals by other brands

Samsung OfficeServ SMT-I5220 user guide

Samsung

Samsung OfficeServ SMT-I5220 user guide

DSC HS2LED Series installation instructions

DSC

DSC HS2LED Series installation instructions

Russound KP4 manual

Russound

Russound KP4 manual

CYP CDPW-K1 Operation manual

CYP

CYP CDPW-K1 Operation manual

Uplift Desk FRM072 quick start guide

Uplift Desk

Uplift Desk FRM072 quick start guide

Lightolier LyteMode user guide

Lightolier

Lightolier LyteMode user guide

Russound UNO-S2 user manual

Russound

Russound UNO-S2 user manual

Channel Vision AB-124 instructions

Channel Vision

Channel Vision AB-124 instructions

Arrowhead AV9000 Installation & programming manual

Arrowhead

Arrowhead AV9000 Installation & programming manual

Honeywell Lyric LKP500-EN Installation and setup guide

Honeywell

Honeywell Lyric LKP500-EN Installation and setup guide

Black Nova ARIA Operation and maintenance manual

Black Nova

Black Nova ARIA Operation and maintenance manual

Videx 4000 Series installation instructions

Videx

Videx 4000 Series installation instructions

Soyal AR-721KP Operation manual

Soyal

Soyal AR-721KP Operation manual

Genovation Micropad 630 Quick start quide

Genovation

Genovation Micropad 630 Quick start quide

Fermax MDS Series quick start guide

Fermax

Fermax MDS Series quick start guide

Digichain WP6K user manual

Digichain

Digichain WP6K user manual

Assa Abloy EMTEK LISCIO user manual

Assa Abloy

Assa Abloy EMTEK LISCIO user manual

Sentinel CodeAccess A manual

Sentinel

Sentinel CodeAccess A manual

manuals.online logo
manuals.online logoBrands
  • About & Mission
  • Contact us
  • Privacy Policy
  • Terms and Conditions

Copyright 2025 Manuals.Online. All Rights Reserved.