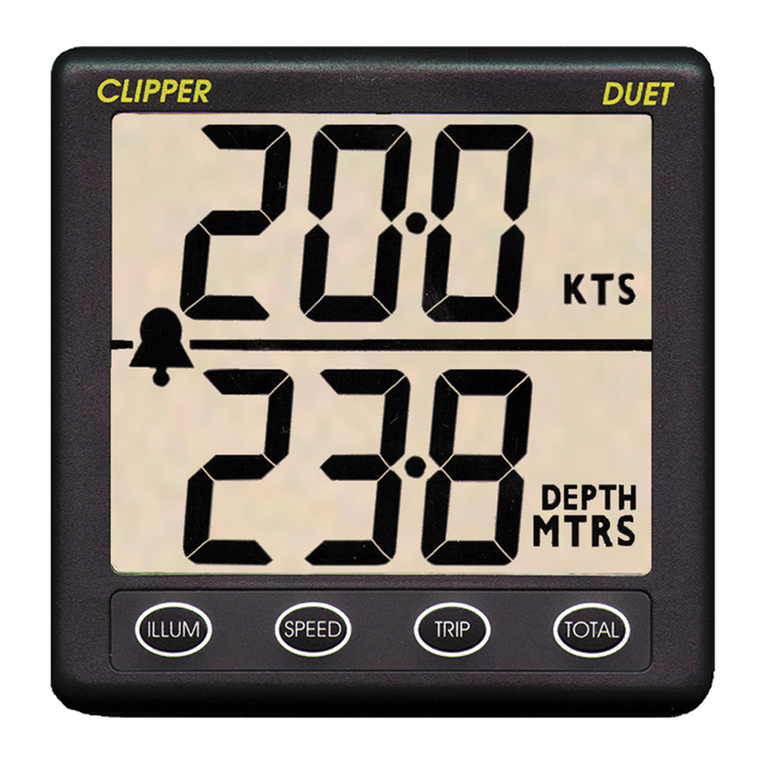
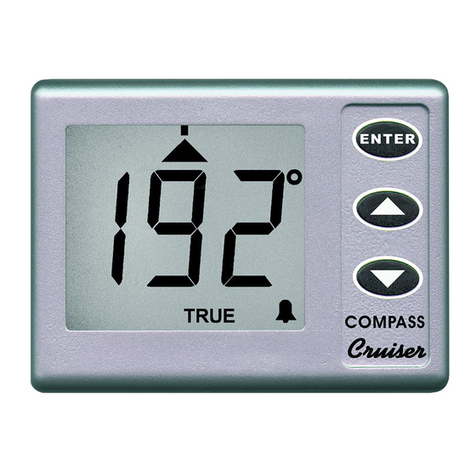
NASA Marine Cruiser Guide

INSTALLATION AND
USER INSTRUCTIONS
for
Cruiser
CONTEMPORARY STYLED INSTRUMENTS
FOR CABIN MOUNTING
LOG, DEPTH
WIND & COMPASS
NASA MARINE LTD
BOULTON ROAD
STEVENAGE
HERTS. SG1 4QG
(01438) 354033
MARINE INSTRUMENTS


1: INTRODUCTION
Cruiser instruments are designed to operate from a 12 volt battery supply and
are supplied complete with sensors, displays and display mounting kits.
Prior to unpacking this instrument read and fully understand the
installation instructions. Only proceed with the installation if you are
competent to do so. Nasa Marine Ltd. will not accept any responsibility for injury
or damage caused by, during or as a result of the installation of this product. Any
piece of equipment can fail due to a number of causes. Do not install this equip-
ment if it is the only source of information and its failure could result in injury or
death. Instead return the instrument to your retailer for full credit. Remember this
equipment is an aid to navigation and not a substitute for proper seamanship.
This instrument is used at your own risk, use it prudently and check its operation
from time to time against other data. Inspect the installation from time to time
and seek advice if any part thereof is not fully seaworthy.
The surface of Cruiser has an acrylic finish chemically bonded to a tough plastic.
To keep it looking good clean only with a damp cloth. Do not use abrasive clean-
ers or solvents.
2: INSTALLING THE DISPLAY
Although waterproof cruiser instruments are designed for cabin mounting.
Select a convenient position for the display on a panel or bulk head.
The site must be flat and the cavity behind the panel must remain dry at all times.
(The cable entry boss is not sealed to allow free passage of air to and from the
unit. This prevents misting of the display.)
The positions for the fixing holes can be marked on the panel using the drill tem-
plate which is an integral part of the packing carton. Before drilling check that
there is sufficient space behind the panel to route the cables and to allow access
to tighten up the wing fixing nuts.
Drill the five holes and check that the unit fits. It may be wise to connect the
cables before finally fixing the unit in position.
A sponge rubber seal is provided which should be fitted into the slot in the back
of the instrument.
Fit the instrument into the panel and tighten the four wing nuts finger tight only.
It is important that the sponge rubber seal makes good contact with the panel or
water may get behind the unit and enter the cavity behind the panel.
It is always good practice to take the cables vertically down from the unit.

3: ECHO SOUNDER
3:1 INSTALLING THE TRANSDUCER
The transducer can be mounted in one of three ways:
(a) The transducer face can be bonded directly to the inside of the hull.
(Some energy is lost to the hull but the loss in performance is, for
most G.R.P, hulls, hardly noticeable).
(b) A transom mount is available from your dealer.
(c) The transducer can be positioned inside a GRP hull by means of an In Hull
Transducer kit.
This method of installation has the dual advantage that no hole is made in the
vessels hull and that the echo sounder and transducer can easily be removed for
examination or installation elsewhere. It should be mentioned however, that
although the accuracy will in no way be affected by installing the transducer
inside the hull, the maximum range sensitivity may be reduced, depending on the
thickness and quality of the glass fibre. The In Hull Kit is available direct from
NASA Marine or your local chandler. Whichever is selected the best location still
has to be found.
Select a position below the water level where the transducer will point substan-
tially towards the sea bed and where the transducer and cable are kept well clear
of interference generating equipment. This position should be well clear of large
masses of bubbles or cavitation which would disrupt the signal.
To test the suitability of the location, press a little sticky chewing gum on the sur-
face of the transducer and stick it down to the inside of the hull (remove dirt and
oily residue first). The unit can then be tested. If the location is
satisfactory the chewing gum can be removed and the transducer mounted
using one of the methods described previously. (Note: Do NOT shorten the trans-
ducer cable).
It is important that the face of the transducer is thoroughly bonded down to the
hull. A single air bubble will cause a considerable loss in performance.
The transducer and the place of mounting must be kept entirely free of any
antifouling compound as this can also effect the performance of the unit.

3:2 NOTES ON ELECTRICAL INTERFACE
External electrical interference is characterised by persistent, random numbers
on the display which obscure the true depth reading on the depth sounder.
This is caused by large amplitude voltage "spikes" generally associated with the
engine's alternator and/or ignition system which has not been properly sup-
pressed. These "spikes" may find their way into the sensitive amplifier section of
the depth sounder in two ways:
(a) Through the craft's common power supply or
(b) Through direct radiation from the source of interference.
To reduce the possibility of induced interference from the engine's generator
and/or ignition system choose a position as far away from the engine as possible
and run the cable from the transducer as far as practicable from the engine.
Do NOT cut the transducer cable, but stow excess away from any possible
source of electrical interference.
3:3 CONNECTING THE DISPLAY
Connect the black wire to the negative supply and the red wire to the positive via
a 250 milli-amp fuse. The red wire of the alarm is also connected to the positive
supply whilst the black wire connects to the green wire from the display unit. The
alarm is not watertight and must be mounted in a protected position. Plug the
transducer into the socket on the display unit.
3:4 SOUNDER OPERATION
Various operational parameters need to be set into the memory prior to use to
get the best from your Cruiser depth sounder. Once set, these parameters are
permanent and are not likely to require adjustment.
Most depth sounders measure the depth below the transducer. It is often more
convenient to display the depth below the keel. A facility has been included
where the vertical distance between the transducer face and the bottom of the
keel (the keel offset) can be programmed into the unit. The unit then reads the
true depth below the keel. (On delivery the keel offset is zero so the unit will read
the depth below transducer).
BACK LIGHT:
A quick press of the ENTER key will turn on the back light. A further quick press of
the ENTER key will turn the back light off.

TO SET THE KEEL OFFSET
Put the unit into engineering mode. (This is achieved by turning off the power
supply to the unit and turning the power back on whilst the ENTER key is
depressed). The word ‘ENG’ will appear until the ENTER key is
released. Now use the up and down keys to enter the required keel offset.
A long press on the ENTER key will return to normal echo sounder operation.
SELECTING THE OPERATING UNITS (FEET or METRES)
Put the unit into engineering mode (see above). A short press on the ENTER key
will swap the units from feet to metres. A long press on the ENTER key will return
to normal echo sounder operation.
SETTING THE SENSITIVITY THRESHOLD
Echoes received from near objects will clearly be larger than from more distant
objects. Echoes from keels or turbulence under the boat may be substantially greater
than echoes from the sea-bed and may cause the sounder to alternate between the
sea-bed and something more local. To overcome this problem, the Cruiser sounder is
fitted with variable swept gain. This reduces the sensitivity for local objects, progres-
sively increasing the sensitivity as depth increases The point at which the gain starts to
rise is called the sensitivity threshold. The sensitivity of the unit at depths below the
sensitivity threshold will be considerably reduced whilst above the sensitivity threshold
the unit rapidly becomes more sensitive with increasing depth.
The sensitivity threshold is factory enter to 0.0 metres. To view the sensitivity
threshold press ENTER The value can be altered by using the up and down
keys. The value is then fixed in memory by pressing ENTER.
USING THE ALARMS
The alarm will sound if an echo is received which is shallower than the upper
alarm setting or deeper than the lower alarm setting. To view the setting of the
upper (Shallow) alarm, press the up key. Return to sounder by pressing
ENTER. To view the setting of the lower (Deep) alarm, press the down key.
The setting can be altered by using the up and down keys. The new value
is entered and the unit returned to the echo sounder by pressing the ENTER key.
To enable the alarm, press the up and down keys simultaneously. A ‘bell’
symbol will appear to show the alarm is activated. When an alarm condition is
apparent the bell symbol will flash and the audible alarm will sound. Pressing up
and down keys again will disable the alarm. All parameters set into the unit
are held in memory even when the power is removed.

4: LOG
4:1 INSTALLING THE PADDLEWHEEL UNIT
The paddle wheel should be installed at a point in the hull where:-
1) It is immersed at all attitudes under power or sail.
2) The blades of the paddle wheel are presented with a smooth flow of
water corresponding to the vessels speed through the water. On displacement
hulls this is usually about amidships , but on planing hulls it should be as far aft
as possible.
3) It should be easily accessible in the bilges for cleaning and laying up.
A blanking cap is provided to seal the skin fitting when the paddle wheel
is removed.
4) It is not vulnerable to damage from unforgiving surfaces such as trailers and
lifting slings.
Drill a hole of 42mm diameter to take the skin fitting and use conventional methods
for sealing. It is advisable to avoid the use of mastic materials - use a form of propri-
etary silicon sealant. The securing nut has a groove on its underside which should
also be filled with sealing compound. Finger tighten this nut only. After the sealing
compound has enter wipe off the excess and encapsulate the whole assembly in
G.R.P. as shown in the diagram. Take care to ensure that a minimum of 20mm of
thread is left uncovered. The paddle wheel unit can now be slid into the housing,
with the arrow pointing along the centre line of the vessel. It is recommended that a
little silicon grease be smeared over the rubber "O" ring to keep the unit free.

4:2 CONNECTING THE DISPLAY
Connect the black wire to the negative supply and the red wire to the positive via
a 250 milli-amp fuse. Plug the paddle wheel unit into the socket on the display
unit.
4:3 LOG OPERATION
When switched on the display will momentarily display the total distance and
then revert to reading speed. The speed is shown in nautical miles per hour and
is reliable up to 25.0 knots. (At higher speeds cavitation around the paddlewheel
may reduce accuracy.)
A short press of the SPEED key will turn the backlight on and off.
A short press of the TRIP key will display the Trip distance. To reset the trip to
zero first select trip by pressing the TRIP key. When the trip distance is shown
press and hold the TRIP key until the display shows ' F '. The trip is then reset to
zero. The trip distance is shown in tenths of nautical miles up to 99.9nm and in
single miles up to 999nm thereafter.
A short press of the TOTAL key will display the total distance. The unit will dis-
play the total distance travelled to 999 nautical miles. This counter cannot be
reset.
A long press of the SPEED key will return to the Speed display
CALIBRATION
The calibration is preset in the factory. The type of hull and the position of the
paddlewheel may affect the performance of the unit. If the log under or over
reads then the calibration factor can be adjusted to compensate.
Enter the Engineering mode by first turning off the power supply to the instru-
ment. Press and hold the SPEED key whilst the power supply is turned back on.
The word ENG will appear on the display. Press either the TRIP or TOTAL keys to
display the calibration setting. This is normally 100 (%) when it leaves the factory.
Press TRIP to increase or TOTAL to decrease the number. Each press will incre-
ment or decrement the number by 1%. When the desired calibration factor is
attained a long press of the SPEED key will return the unit to normal operation.
Both speed and distance are calibrated simultaneously. The calibration factor is
stored in a non-volatile memory and is retained when power is off.

5: COMPASS
5:1 INSTALLING THE SENSOR.
The sensor measures the direction of the Earth’s weak magnetic field, and so is
sensitive to other magnetic fields which can affect the unit’s accuracy. It should
therefore be positioned carefully. Select a position as far as possible away from
large ferrous objects such as engines, and items such as DC motors or loud-
speakers which have powerful permanent magnets in them. Check also for small
ferrous objects close to the mounting location such as screws, nails, hinges etc.
These can become magnetised and cause errors. When a likely location has
been found, a check for reasonable accuracy can be made with a hand bearing
compass to confirm its suitability.
The magnetic sensor itself is gimballed within the housing. To accommodate
pitch and roll motions most effectively, mount the sensor as near to horizontal as
possible. For best performance in rough weather conditions, it is also advisable
to mount the sensor in a position (usually amidships) that minimises lateral
accelerations due to pitch and roll. Avoid mounting the sensor high above the
water line because doing so also increases pitch and roll accelerations. The sen-
sor is waterproof to CFR-46 standard. Ensure the sensor does not become sub-
merged.
Position the sensor and mark and drill pilot holes for the mounting screws to
allow the sensor to be rotated to align it exactly with the vessel’s axis. Now
mount the sensor carefully in position using non-magnetic screws. The rotational
position of the sensor should be chosen to ensure that the arrow points as close
as possible fore-and-aft.
5:2 CONNECTING THE DISPLAY
Figure 1

5:3 COMPASS OPERATION
When power is applied to the Cruiser Compass, it executes a comprehensive
internal test routine. It then displays the heading. When first powered up, the dis-
played heading may not be correct until the Compass alignment is done. A typi-
cal display is shown on Figure 2.
SWITCHING THE BACKLIGHTING
Backlighting is provided to allow the unit to be seen at night. The backlighting is
switched on and off by a single press of ENTER.
Figure 2 - Normal operation display
CHANGING THE DAMPING
When the vessel is affected by rapid variations of heading in rough seas, a more
heavily damped display can be selected instead of the normal lightly damped
display. Press ENTER and up together to switch between heavily and lightly
damped modes. The display shows “L”(for Light damping), “A”(for Average
damping), or “H”(for Heavy damping) for two seconds after the keys are
released to indicate which mode has been selected. Successive presses of the
two keys switches between the three damping settings.
ASSISTED STEERING
Assisted steering means using the Cruiser Compass to show errors from a cho-
sen heading, and the direction to steer to bring the vessel back to the chosen
heading, which is marked by the lubber line at all times.
When the vessel’s heading is within the pre-set error limits, the dead-ahead indi-
cator is lit to show that all is well (see Figure 3), and no steering adjustment is
required. This is the display when assisted steering is started.

Figure 3 - Dead-ahead indication.
Steering chevrons light whenever the heading error is greater than 3°. As the
error builds up, more steering chevrons are lit to indicate the increasing strength
of steering needed to correct the heading error. Three are shown on Figure 4a. If
the error exceeds 21°, the central chevrons clear in sequence to indicate how far
“0ff the Scale”the steering correction is needed. 30°of error are shown on
Figure 4b.
Figure 4a & 4b - Three and ten-chevron Steering indications
If the error increases beyond 180°, the error display reverses to show that the
shortest route back to the desired heading is now using the opposite tiller.
SETTING THE DESIRED HEADING
Bring the Vessel to the desired heading, and press up and down together
to log that heading. The display changes as shown on Figure 3. The logged
heading is the heading shown when the up and down buttons are FIRST
pressed.
The dead-ahead symbol indicates that the vessel’s heading is within the error
setting.

SWITCHING ASSISTED STEERING OFF
At any time, while Assisted Steering is operating, pressing up and down
together switches it off.
HEADING ALARM
When Assisted Steering is in operation, an alarm can be set to sound whenever
the heading exceeds a pre-set amount from a chosen heading. The chosen
heading is the heading logged when assisted steering was selected. Alarm oper-
ation is inhibited when Assisted Steering is off. The alarm, when set, sounds
whenever the heading is at or outside the alarm setting to port or starboard.
FIGURE 5 - Alarm Boundaries set at +/- 9°
The alarm setting can altered at any time during normal operation by pressing up
to increase its value, or down to decrease it. The alarm boundaries are
shown by the steering chevrons, as shown on Figure 5, for two seconds when
the key is released, whereupon the display returns to the normal steering display.
SETTING OR STOPPING THE ALARM
During assisted steering, press up to switch the alarm on and down to
switch it off. The bell symbol shows when the alarm is on.
Whenever the alarm is on, and the heading during assisted steering is outside
the boundaries set at the desired heading, the alarm sounds, and the bell symbol
flashes.
ENGINEERING
Engineering settings means those adjustments which seldom need changing, but
which affect how the unit operates. The settings (as are all those which can be
selected in normal operation too) are stored even when the power is disconnect-
ed. There are three operating characteristics which can be set in Engineering:
Magnetic or True heading display; Magnetic Variation; and Compass error (devia-
tion) compensation settings.

Engineering mode is entered by holding down the ENTER button while turning on
the power. The Engineering mode displays “En”(for Engineering) for two sec-
onds when the button is released. When the two seconds is up, the Magnetic
variation is shown in degrees. The present set-up is shown as “MAG.”(for mag-
netic readings) or “TRUE”(for true readings). Note that the magnetic variation
affects only true readings, and need not be corrected as described below if mag-
netic bearing readings are required.
Any of the following settings can be done when in Engineering. If more than one
different setting is to be done, it is necessary only to return via the “En”display
between different adjustments or settings, as described below.
ADJUSTING MAGNETIC VARIATION
The Earth’s magnetic variation varies from year to year, and from place to place.
The appropriate variation value can be found by reference to Almanacs, maps, or
charts. The variation is the offset of magnetic North from true North. If the
Magnetic North (the variation) is West of true North, enter it as a positive number.
Conversely, if it is quoted as East of true North, enter a negative variation value.
If not already in Engineering (“En”displayed), hold down the ENTER button while
turning on the power to put the unit into the Engineering mode. The display
shows “En”(for Engineering) for two seconds. The display then changes as
shown in Figure 6 to show the stored magnetic variation and whether the unit is
operating in Magnetic or true modes (Figure 6 shows Magnetic operation, and an
Eastward variation of 6.3°).
FIGURE 6 - Magnetic Variation Display
Positive numbers represent Westward variations, and negative numbers (as
shown on Figure 6) represent Eastward variations. Each press of up or down
alters the stored variation in steps of 0.1°. If the total variation is greater than ±
9.9°, the fractional part of the angle is altered, but cannot be shown.

Press up or down to change the stored variation value to the correct value.
Note that changing the magnetic variation has no effect on the accuracy of the
compass’s compensation (see page 7).
If it is desired to end Engineering adjustments, press ENTER to return to normal
heading indication, using the revised magnetic variation value.
MAGNETIC OR TRUE READOUT
If not already in Engineering (“En”displayed), hold down the ENTER button while
turning on the power to put the unit into the Engineering mode.
Press ENTER and up together to switch between Magnetic and True display
of the compass readings. When True is selected “TRUE”is displayed, and the
variation shown is used to correct the readings made by the sensor. When
Magnetic is selected, “MAG.”is displayed as shown on Figure 6. In Magnetic
indication mode the variation value is ignored.
If it is desired to end Engineering adjustments, press ENTER to return to normal
heading indication.
COMPASS ERROR (DEVIATION) CORRECTIONS
In common with all magnetic compasses, the presence of magnetic objects in
the vessel distorts the earth’s magnetic field nearby, and can affect the accuracy
of readings by different amounts at various points of the compass.
Detecting and correcting these errors is known as “Compass Swinging”.
Compass swinging in the Cruiser Compass is achieved by sailing the vessel in a
circle at a constant turn rate in still water, so it is best to select calm conditions.
During the constant-rate turn, the errors are detected in the instrument and
logged. When a full set of values from a 360°turn are available, the corrections -
the compass deviations - are calculated and permanently stored. The factory
default deviation settings are all zero, so if it is found that there are significant
errors at some points of the compass, these errors should be compensated by
swinging the compass.
Compass swinging in the Cruiser Compass has two phases:
•establishing a constant turn rate
•continuing at the same rate to log the deviations
Compass swinging is an Engineering function. To enter Engineering, hold down
the ENTER button while turning on the power. The display shows “En”(for
Engineering) for two seconds, and then the stored magnetic variation. Now press
all three keys together to start Compass swinging.

The swing must be performed by sailing CLOCKWISE in a circle at a constant
rate. (If the turn is anticlockwise, the turn bars all point left, to indicate that cor-
rect results cannot be achieved.) The display shows the turn rate in degrees per
second. Any fixed value between 0.5˚and 2˚/second is acceptable, and the most
important thing to achieve is a CONSTANT rate within this range. It can usually
be achieved with a fixed throttle setting and a fixed rudder setting. If the rate of
turn is too fast, the steering bars flow to the left (to indicate “slow down”), where-
as they flow to the right (“speed up”) if the rate of turn is too slow. When a rate
between 0.5˚and 2˚/second is settled on, the turn bars return to their rest posi-
tion, without moving, to indicate that the turn rate is satisfactory. At 0.5˚/second,
a full 360˚degrees will, of course, take 12 minutes to execute, and at 2˚/second a
full 360˚will take only 3 minutes. The accuracy of the compensation is better at
lower turn rates.
When a steady turn rate has been established, press ENTER to enter the error
logging phase. The display changes to show a rotating symbol and a progress
count, starting at 9. All the previous compensation values are immediately
cleared. If it desired simply to clear the settings, simply press any key during the
swing to return to Engineering.
As the constant-rate turn proceeds, the progress indication counts down. It is
vital to maintain the previously-chosen constant turn rate during this phase.
When the progress indication falls to zero (after turning just over 360˚), the swing
is complete, and the compass deviation values are automatically calculated and
stored. The display returns to normal Compass mode to show that swinging is
finished and that it is no longer necessary to continue the constant-rate turn.
HEADING ADJUSTMENT
It may be necessary to make a minor adjustment to the sensor alignment to
ensure that the Compass correctly measures the vessel’s heading. If an adjust-
ment is found to be needed, accurately point the vessel to a known heading.
Either MAG. or TRUE is displayed to remind the user which physical alignment of
the vessel is to be used.
If the display does not show the known heading, the sensor unit must be rotated
slightly to bring the display into alignment. Slacken the sensor unit’s mounting
screws sufficiently to allow the unit to be turned, and rotate it until the display
shows the known heading. Then re-tighten the sensor unit’s mounting screws to
lock the compass calibration at that position.
6: WIND
6:1 PRE-TEST OF INSTRUMENT
Before mounting check that the instrument is complete and undamaged. Plug
the sensor into the display unit and apply 12 volts. Gently spin the wind cups
and the wind vane and check the operation of the display.

6:2 INSTALLING THE MASTHEAD UNIT
The masthead sensor unit is designed for mast mounting and is supplied with 20
metres of cable. Choose a position where the masthead unit can receive an
unobstructed flow of air from all directions. The masthead unit must be substan-
tially horizontal, however the orientation with respect to the boat is unimportant.
Four mounting blocks together with four stainless steel self tapping screws are
supplied to screw the masthead unit to a metal mast. If the masthead unit is to
be fitted to a wooden mast suitable screws should be used.
After the masthead unit is securely fitted run the cable to the display unit and
plug into the socket on the display. Do not reduce any excess length of the
cable by cutting off the plug, but stow the excess neatly. If the cable is not long
enough, 5 or 20 metre extension cables are available.
6:3 CONNECTING THE DISPLAY
Connect the black wire to the negative supply and the red to the positive via a
250 milli-amp fuse. Plug the masthead unit into the socket on the display unit.
6:4 WIND OPERATION
The Cruiser wind system can display wind speed measurements in miles per
hour (MPH), nautical miles per hour (knots, shown as KTS), and metres per sec-
ond (m/s). Press ENTER and up together to switch between knots, miles per
hour, and meters per second. The choice is always saved so the unit operates as
set whenever it is powered up again.
WINDVANE DEAD-AHEAD ALIGNMENT
It is always necessary to enter the dead-ahead position of the vane when it is
first installed on the vessel so the display shows the relative wind direction cor-
rectly. Setting the dead-ahead alignment is achieved by pressing all three but-
tons together when the vane is aligned with the stainless steel tip pointing for-
ward along the axis of the vessel. The reading is stored when the last button is
released, and so it is important that the vane is correctly aligned at that moment.
CHANGING THE POINTER STYLE
The pointer style can be either a block or “windex”style. Press up and down
together to switch between the styles. When the block pointer is displayed,
up increases its width and down decreases its width. The up and down
keys have no effect when the “windex”pointer style is displayed. As with the
speed setting, the final setting is stored so the unit operates as set when ever it
is powered up again.
Backlight
The backlight is switched by pressing ENTER alone.


LIMITED WARRANTY
Nasa Marine Ltd. warrants this instrument to be substantially free of defects in
both materials and workmanship for a period of one year from the date of pur-
chase. Nasa Marine Ltd. will, at its discretion, repair or replace any components
which fail in normal use within the warranty period. Such repairs or replacements
will be made at no charge to the customer for parts and labour. The customer is
however responsible for transport costs. This warranty excludes failures resulting
from abuse, misuse, accident, or unauthorised modifications or repairs. In no
event shall Nasa Marine Ltd. be liable for incidental, special, indirect or conse-
quential damages, whether resulting from the use, misuse, the inability to cor-
rectly use the instrument, or from defects in the instrument. If any of the above
terms are unacceptable to you then return the instrument unopened and unused
to your retailer for full credit.

Table of contents
Other NASA Marine Marine Equipment manuals
Popular Marine Equipment manuals by other brands

Garmin
Garmin GDL 30A owner's manual

NexSens
NexSens CB-250 Data Buoy user guide

Simrad
Simrad ER60 - REV B Operator's manual

MARLOW-HUNTER
MARLOW-HUNTER 45DS Wiring

Simrad
Simrad ES60 - REFERENCE MANUAL REV H Reference manual

Francis Searchlights
Francis Searchlights LX300 User instruction & installation manual