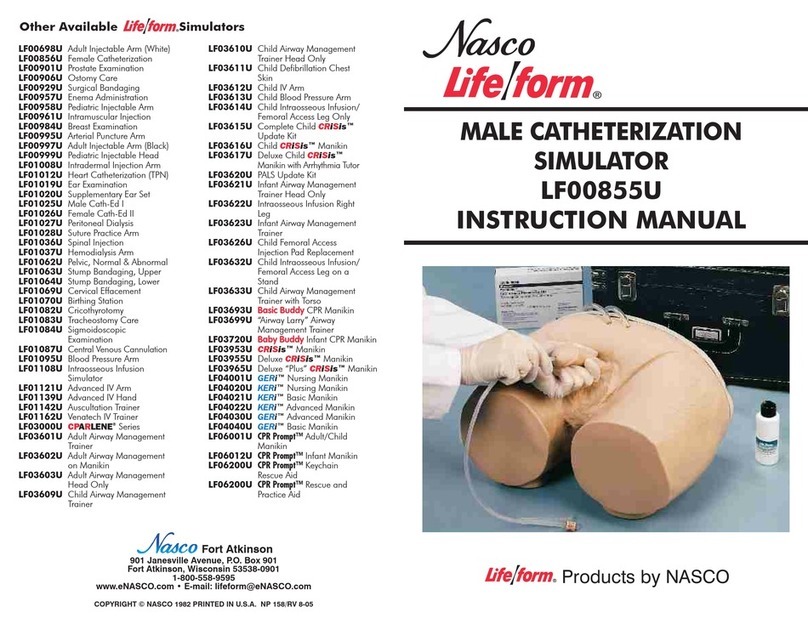
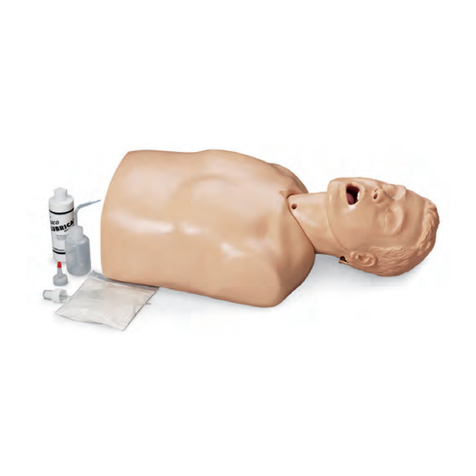
manuals.online logo
Brands
  1. Home
  2. •
  3. Brands
  4. •
  5. Nasco
  6. •
  7. Medical Equipment
  8. •
  9. Nasco Life/form KERi LF04024U User manual

Nasco Life/form KERi LF04024U User manual

Auscultation Manikin
Update Package
KERi™ — LF04024U
GERI™ — LF04004U
Instruction Manual
COPYRIGHT © NASCO 2001 PRINTED IN U.S.A. NP 98-01/RV 10-15
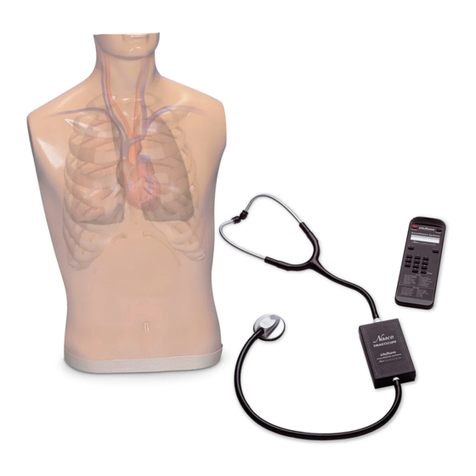
Remote Control
SmartScope™
Other Available Simulators
LF00698U Adult Injectable Arm (Light)
LF00855U MaleCatheterization
LF00856U FemaleCatheterization
LF00901U ProstateExamination
LF00906U OstomyCare
LF00929U SurgicalBandaging
LF00957U EnemaAdministration
LF00958U PediatricInjectableArm
LF00961U IntramuscularInjection
LF00984U BreastExamination
LF00995U ArterialPunctureArm
LF00999U PediatricInjectableHead
LF01005U First Aid Arm
LF01008U IntradermalInjectionArm
LF01012U HeartCatheterization(TPN)
LF01019U EarExamination
LF01027U PeritonealDialysis
LF01028U SuturePracticeArm
LF01034U SuturePracticeLeg
LF01036U SpinalInjection
LF01037U HemodialysisPracticeArm
LF01038U EpisiotomySuturingSet
LF01042U SutureKit
LF01062U Pelvic,Normal&Abnormal
LF01063U StumpBandaging,Upper
LF01064U StumpBandaging,Lower
LF01069U CervicalEffacement
LF01070U BirthingStation
LF01082U Cricothyrotomy
LF01083U TracheostomyCare
LF01084U Sigmoidoscopic
Examination
LF01087U
Central Venous Cannulation
LF01095U BloodPressureArm
LF01108U InfantIntraosseousInfusion
LF01121U AdvancedIVArm
LF01131U VenipunctureandInjectionArm
LF01139U AdvancedIVHand
LF01142U AuscultationTrainer
LF01143U TesticularExam
LF01152U Male&FemaleCatheter
LF01155U AdvancedCPRDog
LF01162U VenatechIVTrainer
LF01174U NGTube&TrachSkills
LF01184U Venatech IM & Sub Q
LF01193U SpecialNeedsBaby
LF03000U CPARLENE®Series
LF03601U AdultAirwayManagement
Trainer with Stand
LF03602U AdultAirwayManagement
Manikin
LF03609U ChildAirwayManagement
Trainer with Stand
LF03616U ChildCRiSis™Manikin
LF03617U DeluxeChildCRiSis™
Manikin with Arrhythmia Tutor
LF03620U PALSUpdateKit
LF03623U InfantAirwayManagement
Trainer with Stand
LF03632U ChildIntraosseousInfusion/
Femoral Access Leg on a Stand
LF03633U ChildAirwayManagement
Trainer Torso
LF03693U Basic Buddy®CPR Manikin
LF03699U “Airway Larry” Airway
Management Trainer
LF03709U InfantCRiSis™Manikin
LF03720U Baby Buddy™Infant CPR Manikin
LF03750U BariatricCPRManikin
LF03770U ChestTube
LF03953U CRiSis™Manikin, Complete
LF03955U Deluxe CRiSis™Manikin
LF03956U Deluxe “Plus” CRiSis™Manikin
LF03965U Adult CRiSis™Auscultation
Manikin
LF03966U Adult CRiSis™Auscultation
Manikin with ECG Simulator
LF04000U GERi™/KERi™Manikin Series
LF04200U AdultSternalIntraosseous
Infusion
LF06001U CPR Prompt®Adult/Child
Manikin
LF06012U CPR Prompt®Infant Manikin
LF06200U CPR Prompt®Keychain
Rescue Aid
LF06204U CPR Prompt®Rescue and
Practice Aid
901 Janesville Avenue, P.O. Box 901
Fort Atkinson, Wisconsin 53538-0901
1.800.558.9595
eNasco.com • E-mail: [email protected]
Fort Atkinson
Products by Nasco
NP098_01.indd 1 10/9/15 1:35 PM
Congratulations for choosing the
GERi™/KERi™Auscultation Update
Package. This simple design makes
the manikin easy to use and care for. A
diagnosis of the condition selected by
the instructor can be made by compar-
ing the variation in sounds occurring at
different sites — just like a real person!
Lung sounds can be detected at five
anterior and 12 posterior locations, and
students can practice auscultation at
six anterior heart sites. Before using
this manikin with your students, please
familiarize yourself with this manual.
List of Components
•GERi™/KERi™Manikin Update
• SmartScope™
• Remote Control
General Instructions for Use
The GERi™/KERi™Update comes
ready to be attached to your existing
manikin. To do this, you will need to
use the arms, legs, and head of your
existing manikin. The arms can be
The legs detach from the body at the
hips by bending the legs backward
approximately 150° so that the feet are
near the shoulders and the keyholes
are aligned. (See figure 2.) Then pull
outward, away from the body. Reverse
this procedure to attach to the new torso.
The head may be removed by rotating
it 180° backward to align the keyholes,
and then pulling up. The internal stom-
ach reservoir will come out of the body
through the neck opening. Reverse this
procedure to attach the head to the new
torso.
Figure 1
Figure 2
Congratulations for choosing the
Figure 3
1
LF04051(N)U
Shoulder Injection Site
LF04056(N)U
Upper Arm
LF04089(N)U
Stoma Set
LF04059(N)U
Wrist
LF04077(N)U
Hand (Left)
LF04062(N)U
Upper Leg
(Left)
LF04067(N)U
Lower Leg
LF04045(N)U
Foot (Left)
LF04076(N)U
Female
Genitalia
LF04072U
Complete Set Replacement Hardware
LF04046(N)U
Foot (Right)
LF04069(N)U
Ankle
LF04066(N)U
Upper Leg
(Right)
LF04052(N)U
Leg Injection
Site
LF04078(N)U
Hand (Right)
LF04058(N)U
Forearm
LF04057(N)U
Elbow
LF04051(N)U
Shoulder
Injection Site
LF04085U
Dentures
LF04086U
KeriTM Female Wig
LF04087U
GeriTM Female Wig
LF04061(N)U
Hip
LF04082(N)U
Hip
Injection
Site
LF04075(N)U
Male Genitalia
LF04060(N)U
Hip Joint (Left)
LF04065(N)U
Hip Joint (Right)
LF04055(N)U
Shoulder (Left)
LF04070(N)U
KeriTM Upper
Torso
LF04047(N)U
GeriTM Upper
Torso
LF04083(N)U
KeriTM Head
LF04088(N)U
GeriTM Head
LF04073(N)U
KeriTM Lower
Torso
LF04048(N)U
GeriTM Lower
Torso
LF04063(N)U
Right Shoulder
Joint
LF04054(N)U
Left Shoulder
Joint
LF04064(N)U
Shoulder (Right) LF04092(N)U
Complete Left Arm
LF03136U
Regular Pupil
LF03135U
Dilated Pupil
LF04090U
Hearing Aid
LF04093(N)U
Complete
Right Leg
GERI™/KERI™THE NURSING SKILLS MANIKIN
Component Replacement Parts
LF04091(N)U
Complete Right
Arm
LF04094(N)U
Complete
Left Leg
Lavage,
Gavage
removed by bending the elbows back-
ward approximately 90° to align the
keyholes at the shoulders. (See figure
1.) Then pull outward, away from the
shoulder of the manikin. Reverse this
procedure to attach the arms to the new
GERi™/KERi™Auscultation Torso.
NP098_01.indd 3 10/9/15 1:35 PM
The remote control can be program-
med to these lung conditions:
01 Normal Lung
02 Normal Vesicular
03 Wheezes
04 Mono wheeze
05 Fine crackle
06 Coarse crackle
07 Ronchi crackle
08 Stridor
09 Cavernous
10 Bronchovesicular
11 Bronchial
12 Pulmonary edema
13 Infant
14 Friction rub
15 Egophony
16 Pectoriloquy
Consult the enclosed laminated card for
lung and heart sound site locations.
To listen to the selected sounds, place
the earpieces in ears, angled in a for-
ward position. Place the diaphragm
of the SmartScope™over one of the
appropriate sites on the manikin (see
diagram on back).
As an alternative, an Amplifier/Speaker
System (LF01189U) can be used,
allowing an entire classroom to hear
at the same time. To connect the
speaker, plug the speaker cord into
the speaker jack on the top of the
Smart Scope™ box. When a speaker
is connected to the SmartScope™, the
earpieces will not work. Place the dia-
phragm of the SmartScope™over the
appropriate sites on the manikin.
Note: The remote has a battery saver
that shuts the unit down after eight
minutes if the remote is left on the
same setting. To prevent it from shut-
ting down, select a different heart or
lung sound within the eight-minute
period of time.
Available Supplies
LF01144U Additional SmartScope™
LF01148U Replacement Remote
Control
LF01189U Amplifier/Speaker System
2
Gastrostomy Care
Lavage and Gavage
A flanged hole simulating an abdominal
incision for the insertion of a feeding
tube is included on the upper torso for
performing lavage and gavage. Inside
the upper torso is a reservoir (bag) with
a maximum capacity of 500 cc, which
is attached to the gastrostomy open-
ing with a two-part coupler. The bag
is removed by pushing in on the clear
L-shaped button and pulling it straight
away. To attach, simply push the cou-
pler body (with bag attached) onto the
coupler insert (part with a black O-ring)
that is protruding from inside the torso.
You will hear a slight snap when the
connection is complete. With extensive
use, these two coupler parts may no
longer snap, so the clear L-shaped but-
ton will have to be manually pulled all
the way out after connecting the two
parts. Test the connection by pulling
on the coupler body to ensure that it
is locked. This gastrostomy feature is
designed for use with a 16 French feed-
ing tube. It is recommended that the tip
of the feeding tube be lubricated before
inserting. Make sure the reservoir is
straight and flat before attempting to
simulate actual feeding with a liquid.
About the Auscultation Simulator
The GERi™/KERi™Auscultation
Manikin duplicates heart and lung
conditions selected by the instruc-
tor by wireless remote control. The
student should palpate to identify the
correct auscultation sites. They will hear
different heart and lung sounds as the
SmartScope™ is moved from site to site.
The simulator has six heart sites and
seven lung sound sites on the ante-
rior surface, with 10 locations on the
posterior surface and midaxillary sites.
The remote control
can select from 12
different heart conditions, as
well as
16 lung conditions. The instructor can
select any condition
easily, enabling the
student to compare sounds and make
a diagnosis.
The remote control does not have to
be pointed directly at the manikin or
stethoscope to operate. One remote
control
will operate multiple sets of
SmartScopes™
and manikins simul-
taneously. Great for group instruction.
The range of the remote control is up to
100 feet.
General Instructions for Use
To begin using the Auscultation Trainer,
press the red power button. This turns
on the remote control and sends a sig-
nal to activate the stethoscope as well.
After the unit is activated, the display
will be in the
“status” mode, displaying
the current menu settings for the heart
and lung conditions.
To select a new condition, press either
the heart or lung button. This will put
the display into the menu mode. The
user can select a condition by either
using the number buttons, or by view-
ing the conditions in sequence using
the scroll button. After the condition
is selected, press the enter button to
activate.
The remote control can be program-
med to these heart conditions:
01 Normal
02 Aortic regurgitation
03 Pulmonary stenosis
04 Mitral stenosis
05 Holosystolic
06 Mid-systolic
07 S3 Gallop
08 S4 Gallop
09 Systolic click
10 Atrial septal defect
11 PDA
12 VSD
3
NP098_01.indd 4 10/9/15 1:35 PM
The remote control can be program-
med to these lung conditions:
01 Normal Lung
02 Normal Vesicular
03 Wheezes
04 Mono wheeze
05 Fine crackle
06 Coarse crackle
07 Ronchi crackle
08 Stridor
09 Cavernous
10 Bronchovesicular
11 Bronchial
12 Pulmonary edema
13 Infant
14 Friction rub
15 Egophony
16 Pectoriloquy
Consult the enclosed laminated card for
lung and heart sound site locations.
To listen to the selected sounds, place
the earpieces in ears, angled in a for-
ward position. Place the diaphragm
of the SmartScope™over one of the
appropriate sites on the manikin (see
diagram on back).
As an alternative, an Amplifier/Speaker
System (LF01189U) can be used,
allowing an entire classroom to hear
at the same time. To connect the
speaker, plug the speaker cord into
the speaker jack on the top of the
Smart Scope™ box. When a speaker
is connected to the SmartScope™, the
earpieces will not work. Place the dia-
phragm of the SmartScope™over the
appropriate sites on the manikin.
Note: The remote has a battery saver
that shuts the unit down after eight
minutes if the remote is left on the
same setting. To prevent it from shut-
ting down, select a different heart or
lung sound within the eight-minute
period of time.
Available Supplies
LF01144U Additional SmartScope™
LF01148U Replacement Remote
Control
LF01189U Amplifier/Speaker System
2
Gastrostomy Care
Lavage and Gavage
A flanged hole simulating an abdominal
incision for the insertion of a feeding
tube is included on the upper torso for
performing lavage and gavage. Inside
the upper torso is a reservoir (bag) with
a maximum capacity of 500 cc, which
is attached to the gastrostomy open-
ing with a two-part coupler. The bag
is removed by pushing in on the clear
L-shaped button and pulling it straight
away. To attach, simply push the cou-
pler body (with bag attached) onto the
coupler insert (part with a black O-ring)
that is protruding from inside the torso.
You will hear a slight snap when the
connection is complete. With extensive
use, these two coupler parts may no
longer snap, so the clear L-shaped but-
ton will have to be manually pulled all
the way out after connecting the two
parts. Test the connection by pulling
on the coupler body to ensure that it
is locked. This gastrostomy feature is
designed for use with a 16 French feed-
ing tube. It is recommended that the tip
of the feeding tube be lubricated before
inserting. Make sure the reservoir is
straight and flat before attempting to
simulate actual feeding with a liquid.
About the Auscultation Simulator
The GERi™/KERi™Auscultation
Manikin duplicates heart and lung
conditions selected by the instruc-
tor by wireless remote control. The
student should palpate to identify the
correct auscultation sites. They will hear
different heart and lung sounds as the
SmartScope™ is moved from site to site.
The simulator has six heart sites and
seven lung sound sites on the ante-
rior surface, with 10 locations on the
posterior surface and midaxillary sites.
The remote control
can select from 12
different heart conditions, as
well as
16 lung conditions. The instructor can
select any condition
easily, enabling the
student to compare sounds and make
a diagnosis.
The remote control does not have to
be pointed directly at the manikin or
stethoscope to operate. One remote
control
will operate multiple sets of
SmartScopes™
and manikins simul-
taneously. Great for group instruction.
The range of the remote control is up to
100 feet.
General Instructions for Use
To begin using the Auscultation Trainer,
press the red power button. This turns
on the remote control and sends a sig-
nal to activate the stethoscope as well.
After the unit is activated, the display
will be in the
“status” mode, displaying
the current menu settings for the heart
and lung conditions.
To select a new condition, press either
the heart or lung button. This will put
the display into the menu mode. The
user can select a condition by either
using the number buttons, or by view-
ing the conditions in sequence using
the scroll button. After the condition
is selected, press the enter button to
activate.
The remote control can be program-
med to these heart conditions:
01 Normal
02 Aortic regurgitation
03 Pulmonary stenosis
04 Mitral stenosis
05 Holosystolic
06 Mid-systolic
07 S3 Gallop
08 S4 Gallop
09 Systolic click
10 Atrial septal defect
11 PDA
12 VSD
3
NP098_01.indd 4 10/9/15 1:35 PM
Congratulations for choosing the
GERi™/KERi™Auscultation Update
Package. This simple design makes
the manikin easy to use and care for. A
diagnosis of the condition selected by
the instructor can be made by compar-
ing the variation in sounds occurring at
different sites — just like a real person!
Lung sounds can be detected at five
anterior and 12 posterior locations, and
students can practice auscultation at
six anterior heart sites. Before using
this manikin with your students, please
familiarize yourself with this manual.
List of Components
•GERi™/KERi™Manikin Update
• SmartScope™
• Remote Control
General Instructions for Use
The GERi™/KERi™Update comes
ready to be attached to your existing
manikin. To do this, you will need to
use the arms, legs, and head of your
existing manikin. The arms can be
The legs detach from the body at the
hips by bending the legs backward
approximately 150° so that the feet are
near the shoulders and the keyholes
are aligned. (See figure 2.) Then pull
outward, away from the body. Reverse
this procedure to attach to the new torso.
The head may be removed by rotating
it 180° backward to align the keyholes,
and then pulling up. The internal stom-
ach reservoir will come out of the body
through the neck opening. Reverse this
procedure to attach the head to the new
torso.
Figure 1
Figure 2
Congratulations for choosing the
Figure 3
1
LF04051(N)U
Shoulder Injection Site
LF04056(N)U
Upper Arm
LF04089(N)U
Stoma Set
LF04059(N)U
Wrist
LF04077(N)U
Hand (Left)
LF04062(N)U
Upper Leg
(Left)
LF04067(N)U
Lower Leg
LF04045(N)U
Foot (Left)
LF04076(N)U
Female
Genitalia
LF04072U
Complete Set Replacement Hardware
LF04046(N)U
Foot (Right)
LF04069(N)U
Ankle
LF04066(N)U
Upper Leg
(Right)
LF04052(N)U
Leg Injection
Site
LF04078(N)U
Hand (Right)
LF04058(N)U
Forearm
LF04057(N)U
Elbow
LF04051(N)U
Shoulder
Injection Site
LF04085U
Dentures
LF04086U
KeriTM Female Wig
LF04087U
GeriTM Female Wig
LF04061(N)U
Hip
LF04082(N)U
Hip
Injection
Site
LF04075(N)U
Male Genitalia
LF04060(N)U
Hip Joint (Left)
LF04065(N)U
Hip Joint (Right)
LF04055(N)U
Shoulder (Left)
LF04070(N)U
KeriTM Upper
Torso
LF04047(N)U
GeriTM Upper
Torso
LF04083(N)U
KeriTM Head
LF04088(N)U
GeriTM Head
LF04073(N)U
KeriTM Lower
Torso
LF04048(N)U
GeriTM Lower
Torso
LF04063(N)U
Right Shoulder
Joint
LF04054(N)U
Left Shoulder
Joint
LF04064(N)U
Shoulder (Right) LF04092(N)U
Complete Left Arm
LF03136U
Regular Pupil
LF03135U
Dilated Pupil
LF04090U
Hearing Aid
LF04093(N)U
Complete
Right Leg
GERI™/KERI™THE NURSING SKILLS MANIKIN
Component Replacement Parts
LF04091(N)U
Complete Right
Arm
LF04094(N)U
Complete
Left Leg
Lavage,
Gavage
removed by bending the elbows back-
ward approximately 90° to align the
keyholes at the shoulders. (See figure
1.) Then pull outward, away from the
shoulder of the manikin. Reverse this
procedure to attach the arms to the new
GERi™/KERi™Auscultation Torso.
NP098_01.indd 3 10/9/15 1:35 PM
Auscultation Manikin
Update Package
KERi™ — LF04024U
GERI™ — LF04004U
Instruction Manual
COPYRIGHT © NASCO 2001 PRINTED IN U.S.A. NP 98-01/RV 10-15
Remote Control
SmartScope™
Other Available Simulators
LF00698U Adult Injectable Arm (Light)
LF00855U MaleCatheterization
LF00856U FemaleCatheterization
LF00901U ProstateExamination
LF00906U OstomyCare
LF00929U SurgicalBandaging
LF00957U EnemaAdministration
LF00958U PediatricInjectableArm
LF00961U IntramuscularInjection
LF00984U BreastExamination
LF00995U ArterialPunctureArm
LF00999U PediatricInjectableHead
LF01005U First Aid Arm
LF01008U IntradermalInjectionArm
LF01012U HeartCatheterization(TPN)
LF01019U EarExamination
LF01027U PeritonealDialysis
LF01028U SuturePracticeArm
LF01034U SuturePracticeLeg
LF01036U SpinalInjection
LF01037U HemodialysisPracticeArm
LF01038U EpisiotomySuturingSet
LF01042U SutureKit
LF01062U Pelvic,Normal&Abnormal
LF01063U StumpBandaging,Upper
LF01064U StumpBandaging,Lower
LF01069U CervicalEffacement
LF01070U BirthingStation
LF01082U Cricothyrotomy
LF01083U TracheostomyCare
LF01084U Sigmoidoscopic
Examination
LF01087U
Central Venous Cannulation
LF01095U BloodPressureArm
LF01108U InfantIntraosseousInfusion
LF01121U AdvancedIVArm
LF01131U VenipunctureandInjectionArm
LF01139U AdvancedIVHand
LF01142U AuscultationTrainer
LF01143U TesticularExam
LF01152U Male&FemaleCatheter
LF01155U AdvancedCPRDog
LF01162U VenatechIVTrainer
LF01174U NGTube&TrachSkills
LF01184U Venatech IM & Sub Q
LF01193U SpecialNeedsBaby
LF03000U CPARLENE®Series
LF03601U AdultAirwayManagement
Trainer with Stand
LF03602U AdultAirwayManagement
Manikin
LF03609U ChildAirwayManagement
Trainer with Stand
LF03616U ChildCRiSis™Manikin
LF03617U DeluxeChildCRiSis™
Manikin with Arrhythmia Tutor
LF03620U PALSUpdateKit
LF03623U InfantAirwayManagement
Trainer with Stand
LF03632U ChildIntraosseousInfusion/
Femoral Access Leg on a Stand
LF03633U ChildAirwayManagement
Trainer Torso
LF03693U Basic Buddy®CPR Manikin
LF03699U “Airway Larry” Airway
Management Trainer
LF03709U InfantCRiSis™Manikin
LF03720U Baby Buddy™Infant CPR Manikin
LF03750U BariatricCPRManikin
LF03770U ChestTube
LF03953U CRiSis™Manikin, Complete
LF03955U Deluxe CRiSis™Manikin
LF03956U Deluxe “Plus” CRiSis™Manikin
LF03965U Adult CRiSis™Auscultation
Manikin
LF03966U Adult CRiSis™Auscultation
Manikin with ECG Simulator
LF04000U GERi™/KERi™Manikin Series
LF04200U AdultSternalIntraosseous
Infusion
LF06001U CPR Prompt®Adult/Child
Manikin
LF06012U CPR Prompt®Infant Manikin
LF06200U CPR Prompt®Keychain
Rescue Aid
LF06204U CPR Prompt®Rescue and
Practice Aid
901 Janesville Avenue, P.O. Box 901
Fort Atkinson, Wisconsin 53538-0901
1.800.558.9595
eNasco.com • E-mail: [email protected]
Fort Atkinson
Products by Nasco
NP098_01.indd 1 10/9/15 1:35 PM

This manual suits for next models

1

Other Nasco Medical Equipment manuals

Nasco Life/form LF01027U User manual

Nasco

Nasco Life/form LF01027U User manual

Nasco Simulaids Brad CPR Parts list manual

Nasco

Nasco Simulaids Brad CPR Parts list manual

Nasco Life/form Basic GERi LF04040U User manual

Nasco

Nasco Life/form Basic GERi LF04040U User manual

Nasco Life/form LF01005U User manual

Nasco

Nasco Life/form LF01005U User manual

Nasco Life/form LF01174U User manual

Nasco

Nasco Life/form LF01174U User manual

Nasco Life/Form LF00984U User manual

Nasco

Nasco Life/Form LF00984U User manual

Nasco Life/form LF01235U User manual

Nasco

Nasco Life/form LF01235U User manual

Nasco CPARLENE 3000 Series User manual

Nasco

Nasco CPARLENE 3000 Series User manual

Nasco Life/form LF00855U User manual

Nasco

Nasco Life/form LF00855U User manual

Nasco Life/form LF01210U User manual

Nasco

Nasco Life/form LF01210U User manual

Nasco Life/form LF00957U User manual

Nasco

Nasco Life/form LF00957U User manual

Nasco Life/Form Child Crisis LF03632U User manual

Nasco

Nasco Life/Form Child Crisis LF03632U User manual

Nasco Life/form LF01230U User manual

Nasco

Nasco Life/form LF01230U User manual

Nasco CRiSis LF03960U User manual

Nasco

Nasco CRiSis LF03960U User manual

Nasco Life/form LF03593U User manual

Nasco

Nasco Life/form LF03593U User manual

Nasco Life/form SmartScope LF01142U User manual

Nasco

Nasco Life/form SmartScope LF01142U User manual

Nasco Life/form LF03622U User manual

Nasco

Nasco Life/form LF03622U User manual

Nasco TERi LF04300 User manual

Nasco

Nasco TERi LF04300 User manual

Nasco Life/Form ADULT CRiSis LF03965U User manual

Nasco

Nasco Life/Form ADULT CRiSis LF03965U User manual

Nasco Life/form LF00980U User manual

Nasco

Nasco Life/form LF00980U User manual

Nasco LF03500U User manual

Nasco

Nasco LF03500U User manual

Nasco Life/form LF01007 Adult IV Foot User manual

Nasco

Nasco Life/form LF01007 Adult IV Foot User manual

Nasco Life/form LF03699U User manual

Nasco

Nasco Life/form LF03699U User manual

Nasco Life/form LF00995U User manual

Nasco

Nasco Life/form LF00995U User manual

Popular Medical Equipment manuals by other brands

Balanced Body Cadillac How to assemble

Balanced Body

Balanced Body Cadillac How to assemble

inbody J10 user manual

inbody

inbody J10 user manual

Quest Engineering ART-LAP-0008 Instructions for use

Quest Engineering

Quest Engineering ART-LAP-0008 Instructions for use

Precision Medical Live Active Five Replacement instructions

Precision Medical

Precision Medical Live Active Five Replacement instructions

Johnson & Johnson DePuy Spine EXPEDIUM SFX manual

Johnson & Johnson

Johnson & Johnson DePuy Spine EXPEDIUM SFX manual

ato form Starlight Active user manual

ato form

ato form Starlight Active user manual

TensCare iTouch Sure Instructions for use

TensCare

TensCare iTouch Sure Instructions for use

O-Two e500 user manual

O-Two

O-Two e500 user manual

Alu Rehab Netti Mini user manual

Alu Rehab

Alu Rehab Netti Mini user manual

Star Micronics T300 user manual

Star Micronics

Star Micronics T300 user manual

Fahl Tracheoport operating instructions

Fahl

Fahl Tracheoport operating instructions

Granberg 343 user manual

Granberg

Granberg 343 user manual

Synthes TRS Automated Cleaning Instructions

Synthes

Synthes TRS Automated Cleaning Instructions

Teufel Ankle Air PRO user manual

Teufel

Teufel Ankle Air PRO user manual

Hologic Omni 4K Quick setup guide

Hologic

Hologic Omni 4K Quick setup guide

Beurer TL 55 Instructions for use

Beurer

Beurer TL 55 Instructions for use

Teufel DynaCox evolution instructions

Teufel

Teufel DynaCox evolution instructions

Mizuho MES-CK08-064-23EN-0 Instructions for use

Mizuho

Mizuho MES-CK08-064-23EN-0 Instructions for use

manuals.online logo
manuals.online logoBrands
  • About & Mission
  • Contact us
  • Privacy Policy
  • Terms and Conditions

Copyright 2025 Manuals.Online. All Rights Reserved.