NatComm PA1 User manual

NATCOMM USA LLC
Responsible Supplier Code :NC
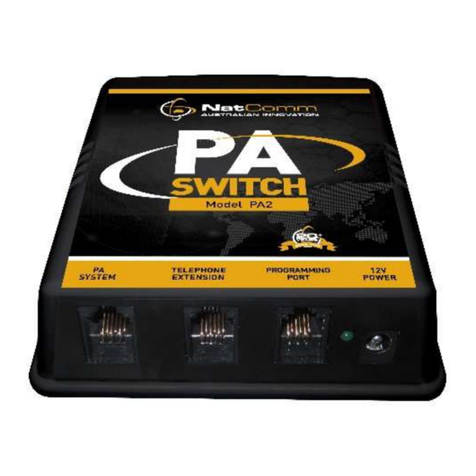
PA1
PAGING SWITCH
For Technical Assistance call
the Manufacturers direct
ph 0800 530 8645
8AM - 5PM
West Coast Pacific Time

Page 2 Natcomm
PACKING LIST
Your Model PA1 Paging Switch is supplied as a complete kit, ready for quick and
easy installation by the user.
Description Qty
PA1 Paging Switch 1
12V Power Adaptor 1
Telephone Line Cord 1
RCA to PA1 Connection cable 1
(includes integrated Isolation Transformer)

Natcomm Page 3
OPERATION
Our Model PA1 Paging Switch is designed to connect to an analogue extension of a
PABX type telephone system.
It can also be connected direct to an analogue PSTN telephone line, for special
applications such as telephone exchange based PABX solutions.
Once installed, PA1 provides you with the capability to make a Paging Call from any
extension of your PABX, as follows :
1.
DIAL AN EXTENSION NUMBER
To make a paging call, the user need only dial the telephone extension number that PA1
is connected to.
2.
MAKE YOUR ANNOUNCEMENT
PA1 will automatically answer the incoming call after 2 rings and then connect the caller
to the attached paging amplifier. The caller can then make a paging announcement and
hang up.
3.
PRESS ANY DTMF DIGIT AND HANG UP
PA1 will terminate the call on detection of the DTMF digit. PA1 will then be ready to take
another paging call.
If a DTMF digit is not pressed, PA1 will hang up after the set Maximum Call time, which is
set by default to be 30 seconds. The default maximum call time can be set from 1 to 99
seconds, minutes or hours (see P 9).
ALTERNATIVE MODELS
Model PA2 : PA2 has additional circuitry which will allow it to detect US Specification
Hang Up tones. With this model, all you need is to HANG UP after making your
announcement. PA2 will automatically hang up after detection of 2 ‘hang up’ tones.
Model PA-SIP : PA-SIP provides all the capabilities of Model PA2, but it is designed to
connect direct to a Network Point, Switch, Router or any Internet Point. It is supplied with
Quick Connect software designed to allow you to set up the Extension Number and IP
Settings quickly and easily.
Page 4 Natcomm
INSTALLATION
Refer to the Installation Diagram on Page 5.
1.
Unplug all equipment from the Analogue telephoneextension socket to be used.
2.
Connect the TELEPHONE EXTENSION port of PA1 Switch to the Analogue
telephone service, using the supplied cable fitted with a male plug.
3.
RCA to PA1 Connection cable and connect the SYSTEM port of the LIU to the PA
SYSTEM port of the PA1 Switch, using the supplied RJ to RJ telephone line cable.
4.
Connect the SOURCE end of your RCA to PA1 Connection cable
to the Line In or Auxiliary input of the Amplifier, using the supplied Audio cable which
has an RCA Audio plug.
5.
Connect the supplied power adaptor to the PA1 SWITCH and switch the power ON.
6.
Switch your Amplifier ON, place a paging call to the PA1 switch and adjust your PA
volume to suit.
7.
Press any DTMF digit and Hang Up.
If a DTMF digit is not pressed, PA1 will hang up after the set Maximum Call time,
which is set by default to be 30 seconds. The default maximum call time can be set
from 1 to 99 seconds, minutes or hours (see P 9).
8.
User Programming of PA1 Switch parameters.
Four separate User Programmable parameters are provided.
In most cases you will not need to program PA1. Refer to pages 6-9.

Natcomm Page 5
INSTALLATION DIAGRAM

Page 6 Natcomm
CALL TERMINATION OPTIONS
A paging call be terminated in any one of 2 ways :
1.
BY THE CALLER PRESSING ANY TOUCH TONE
The person making the Paging Call can terminate the paging call by pressing
ANY Touch Tone number or digit on their telephone keypad at the completion of
their announcement.
2.
AFTER A FIXED PERIOD OF TIME
PA1 will automatically terminate a paging call after a programmable length of
time. The default connection time for PA1 is : 30 seconds.
This is a handy back up in case any of the above methods fails to take place.
The default time can be set from 1 second to 99 hours (see pages 8-9).

Natcomm Page 7
SAFETY LINE ISOLATION CABLE
PA1 is supplied with a Paging Amplifier connection cable that has an
Integrated Isolation Transformer to provide Safety Isolation from harmful
voltages that could come from the Paging Amplifier should it malfunction..
Do not attempt to connect any equipment to the PA SYSTEM port of this unit
without using the supplied Paging Amplifier connection cable
PA1 is designed to only operate when the supplied Paging Amplifier connection
cable is connected.
The SYSTEM port of the Paging Amplifier connection cable has a modular (RJ11
6 pin) connector to connect to the PA SYSTEM Port of PA1 Switch, using the
supplied RJ11 to RJ11 cable.
The SOURCE port of the Paging Amplifier connection cable has a modular (RJ 4
pin) connector which should connect to the supplied Audio Cables with the RCA
Audio plug.

Page 8 Natcomm
PROGRAMMING OPTIONS
PA1 Switch provides for TWO separate User Programmable settings (as detailed
below), should they be needed.
In most cases you will not need to program PA1, as the default settings are likely
to be suitable for typical sites.
1. THE NUMBER OF RINGS BEFORE PA1 ANSWERS
You can set the number of rings before PA1 will answer incoming calls and
switch to the Paging Amplifier :
Allowable Range : 01 to 19 rings
Default Setting is : 2 rings
2. THE FIXED TIME DURATION OF A PAGING CALL
You can set a fixed CALL TIME in seconds (minutes or hours) that will take
place before PA1 will HANG UP.
Allowable Range : 01 to 99
Default Setting is : 30 seconds
You can also change the Allowable Range from 01-99 seconds to either :
01-99 minutes or 01-99 hours (see page 9, section B)

Natcomm Page 9
PROGRAMMING PROCEDURE
1.
TURN OFF POWER TO YOUR PA1 UNIT
2.
DISCONNECT THE LIU FROM PA1 SWITCH
PA1 will not program with the LIU connected.
3.
CONNECT A STANDARD ANALOGUE TELEPHONE
(or a telephone buttinski) to the Programming port of PA1
4.
TURN ON POWER TO YOUR PA1 UNIT
5.
PA1 WILL OUTPUT 3 SHORT ‘BEEPS’
Do not proceed until you have heard 3 short beeps. If you do not hear 3 beeps,
return to the start (1).
6.
ENTER THE REQUIRED SETTINGS :
A.
NUMBER OF RINGS TO ANSWER
To enter the NUMBER OF RINGS press #1xx
where xx = number of rings and can be 01-19 (for example, press #105 for 5 rings)
B.
MAXIMUM DURATION OF THE PAGING CALL
To enter the MAXIMUM PAGING TIME press #2xx
where xx = number of seconds and can be 01-99 (for example, press
#215 for 15 seconds)
If the Duration of the call needs to be more than 99
seconds, then you can change the duration as follows :
To change DURATION TIME to seconds press #31 To change DURATION TIME to
minutes press #32 To change DURATION TIME to seconds press #33 (for example,
to change to Minutes, press #32)
TO EXIT PROGRAMMING MODE - HANG UP.
ALL ENTRIES ARE SAVED IN PERMANENT MEMORY.

Page 10 Natcomm
FCC (USA) and IC (Canada) COMPLIANCE
This product has been tested by an authorized independent laboratory to comply with
all Telephone Line and Electromagnetic Compliance requirements for the USA and
Canada.
REQUIRED RADIO FREQUENCY STATEMENT
This equipment has been tested and found to comply with the limits for a Class
B digital device, pursuant to Part 15 of the FCC rules.
It has also been tested and found to comply with the limits for CS-003 of the
Industry Canada rules.
These limits are designed to provide reasonable protection against harmful
interference in a residential installation. This equipment generates and can
radiate radio frequency energy within FCC and IC limits. If not installed and
used in accordance with these instructions, it may be possible that it causes
interference to radio communications. However, there is no guarantee that the
interference will not occur in a particular installation.
If this equipment does cause interference to radio or television reception, which
can be determined by testing with the TLM equipment turned off, the user is
encouraged to try to correct the interference by one or more of the following
measures:
Increase the separation between the TLM equipment and the affected
receiver.
Connect the equipment into an outlet on a circuit different from that of the
receiver.
Consult the dealer or an experienced technician for help.
Call NATCOMM ph 800 530 8645
The Power adaptor supplied with the Door Station Controller that powers this product
complies with UL (USA) and cUL (Canada) specifications.

Natcomm Page 11
NOTES

Page 12 Natcomm
SPECIFICATIONS
Dimensions (all in mm) : 106 (W) x 106 (D) x 43 (H)
Weight : 225g
PowerSupply : 240VAC to 12VAC/500mA
PowerConsumption : When Idle - 0.5 Watts
During Call - 0.75Watts
RingerEquivalence : 0.3REN
LineConnectors : RJ 11- 6 pin (2 centre)
LIUConnector : RJ 11- 6 pin (2 centre)
PowerConnector 2.5mmbarrelconnector
ACMA COMPLIANCE : Supplier NumberN782
WARRANTY
This device is guaranteed against defects from workmanship for a period of two years (24 months)
from the date of purchase. In the event of failure, you should return the product, along with proof of
purchase date, and a written statement about the nature of the problem.
The obligation is solely to repair or replace the product. The warrantor is not liable for any incidental
or consequential damages due to such defects.
This Warranty shall not apply to any unit which has been subject to alteration, modification, abuse,
negligence, accident, external voltage/ lightning surge or used in any manner contrary to these
instructions.
The user is responsible for freight costs to the repair point. The warrantor will be responsible for
freight costs in returning this unit back to the user.
Damage caused to this device or attached equipment,by lightning strikes or over voltage surge is
not covered under this warranty.
CASE SEALED AT FACTORY
OPENING THE CASE VOIDS THE WARRANTY
Table of contents
Other NatComm Switch manuals

NatComm
NatComm PA2 User manual

NatComm
NatComm PA2 User manual

NatComm
NatComm Faxability Switch 2 User manual

NatComm
NatComm EFT-POS User manual

NatComm
NatComm PA-SIP User manual

NatComm
NatComm Speaker Switching Unit User manual

NatComm
NatComm Multiple Modem Switch User manual

NatComm
NatComm DUET SWITCH 1 User manual

NatComm
NatComm Multiple Input Unit User manual

NatComm
NatComm FAXSWITCH 2 User manual
Popular Switch manuals by other brands

Siemens
Siemens 3VM9988-0AB1 Series operating instructions

Levolor
Levolor InMotion quick start guide

TP-Link
TP-Link TL-SF1008D - 10/100M FAST ETHERNET SWITCH user manual

Altusen
Altusen KM0532 Brochure & specs

Siemens
Siemens 3KF1 Series operating instructions

Vega
Vega VEGAVIB VB6x.EZxxxN series Safety instructions