Standard Operation:
• Press the “Call” button. The car will come to the landing
and/or the door will unlock. The “Car Here” light will illu-
minate (if so equipped).
• Upon entering the car, close the outer door securely. Close
the car gate(s) securely. Press the desired floor(s) on the
C.O.P.
• After exiting the car, secure the gate and door.
The car will be ready to receive a call from anoth-
er floor.
• The car may be sent to another floor(s) by press-
ing the corresponding floor number on the C.O.P.
before exiting.
• Elevators equipped with automatic door operators
may be opened manually in the event of a power
failure.
• The car may self adjust up or down when at a
floor to automatically stay aligned with the floor.
• If the car’s upward travel is interrupted by open-
ing a gate or activating the emergency stop, the
car will descend to the floor below when the gate
is closed or the
emergency stop is deactivated. The elevator will then return to normal
operation.
Helpful Hints
If the elevator will not work, see the
Diagnostic Codes table on page 5.
Winding Drum without battery
backup
If power failure occurs:
1. Emergency car light automatically
turns on.
2. Elevator will not move.
Hydraulic and Winding Drum with
battery backup
If power failure occurs while elevator
is in use:
1. Elevator will stop.
2. Emergency car light automatically
turns on.
3. After a pause, the elevator will
descend to the next lower landing.
4. Elevator will respond to calls from
the car or hallway to any lower
level.
5. Doors will unlock, but will not
open automatically.
If power failure occurs while elevator
is at rest:
1. Emergency car light automatically
turns on.
2. Elevator will respond to calls from
the car or hallway to any lower
level.
3. Doors will unlock, but will not
open automatically.
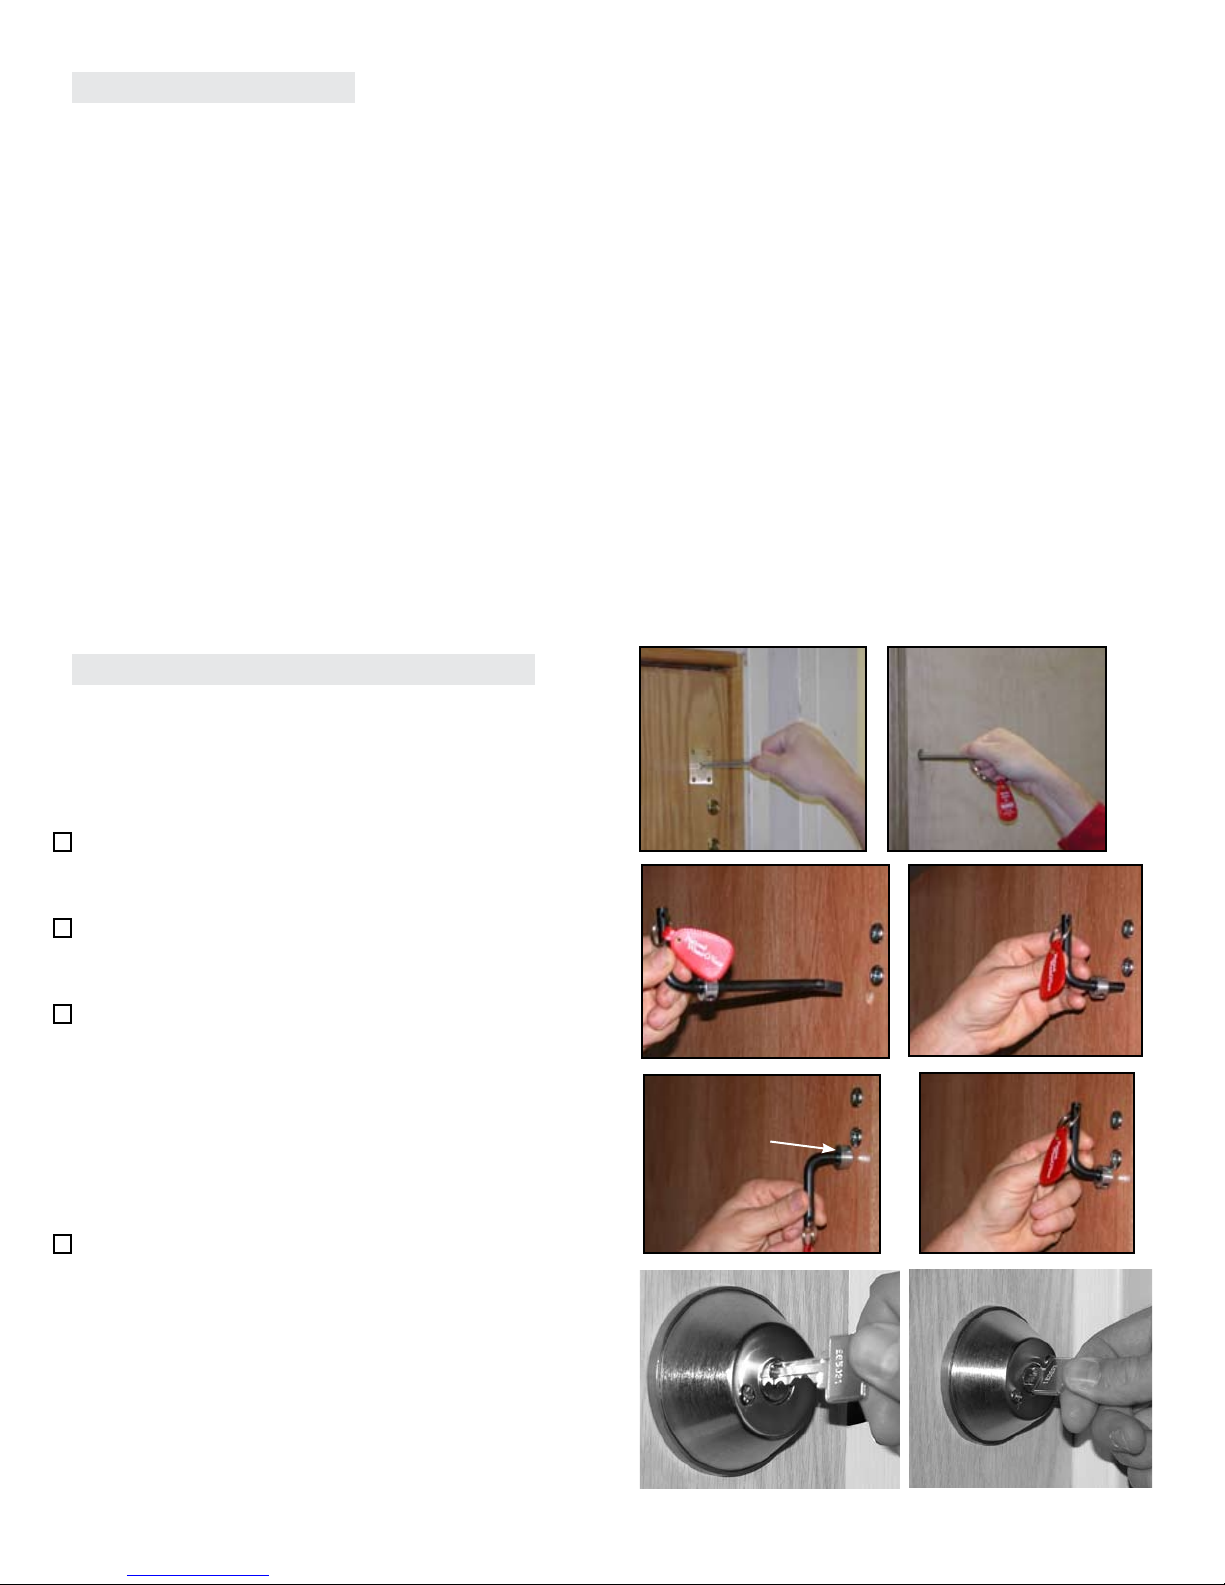
Manual Lowering:
• The manual lowering of an unoccupied elevator should only be
conducted by trained personnel in the course of routine mainte-
nance and repairs.
• If a malfunction occurs which prohibits a car’s occupant from
manually releasing the door lock and exiting the car safely, a trained
personnel or professional emergency personnel must be contacted
immediately.
• The electrical service disconnect(s) located in the elevator equip-
ment room/area, must be switched to the “off” position before
manually lowering the car. The “off” position may be verified by
closely observing the disconnects labeling. The disconnects are
lockable in the “off” position.
• Opening the circuit breaker supplying the disconnect will not deac-
tivate all the elevator’s circuits.
3
Hall Call
Car Operating Panel