Current as of 2020-03-11
26302
2630226302
26302
Mini Flash Trigger
Mini Flash Trigger Mini Flash Trigger
Mini Flash Trigger
for
for for
for Sony
Sony Sony
Sony
Instruction Manual
OREWORD
OREWORDOREWORD
OREWORD
Thank you for your purchase of a NAUTICAM product.
At NAUTICAM, we pride ourselves in the ability to recogni e the
requirements of professional as well as amateur underwater
photographers and fulfill them through the innovative designs of our
products. We strive to achieve a high level of user-friendliness by
allowing stress-free installation and easy operation of all important
functions of the camera.
Please read this manual carefully before using the product, this will
maximi e its performance as well as its lifetime.
ARRANTY
ARRANTYARRANTY
ARRANTY
All NAUTICAM Products are warranted against any material and
manufacturing defects for two years from the date of purchase for
consumer use.
This warranty only applies to products purchased from
authori ed NAUTICAM dealers and does not extend beyond the original
retail purchaser.
To return your product for service, please contact your regional
authori ed service center(s). Please note that this warranty only applies
when the product is purchased in the territory where the service center is
located.
NAUTICAM does not hold responsibility for damage, of any nature, to any
equipment used with and/or placed within our products.
NAUTICAM accepts no liability for any loss of captured images or the
inability to capture images even if it is due to the malfunctioning of our
products.
Unauthori ed modifications and/or repairs of our products will
automatically invalidate the warranty.
RECA TIONS
RECA TIONSRECA TIONS
RECA TIONS
•Use only batteries listed in this product, do not mix old and new
batteries at the same time.
•Check the battery terminals before installing into the product.
•Remove batteries for storage, do not store the product in an
environment of high humidity.
•Do not leave the product in direct sunlight for prolonged periods.
•Keep out of reach of children, failure to do so could result in injury.
•Defective products should be shipped to our distributors for service,
unauthori ed disassembling and/or modifications could result in mal-
function.
DENTIFICATION OF
DENTIFICATION OF DENTIFICATION OF
DENTIFICATION OF
ARTS
ARTSARTS
ARTS
ATTERIES
ATTERIES ATTERIES
ATTERIES
NSTALL
NSTALLNSTALL
NSTALLAT
ATAT
ATION
IONION
ION
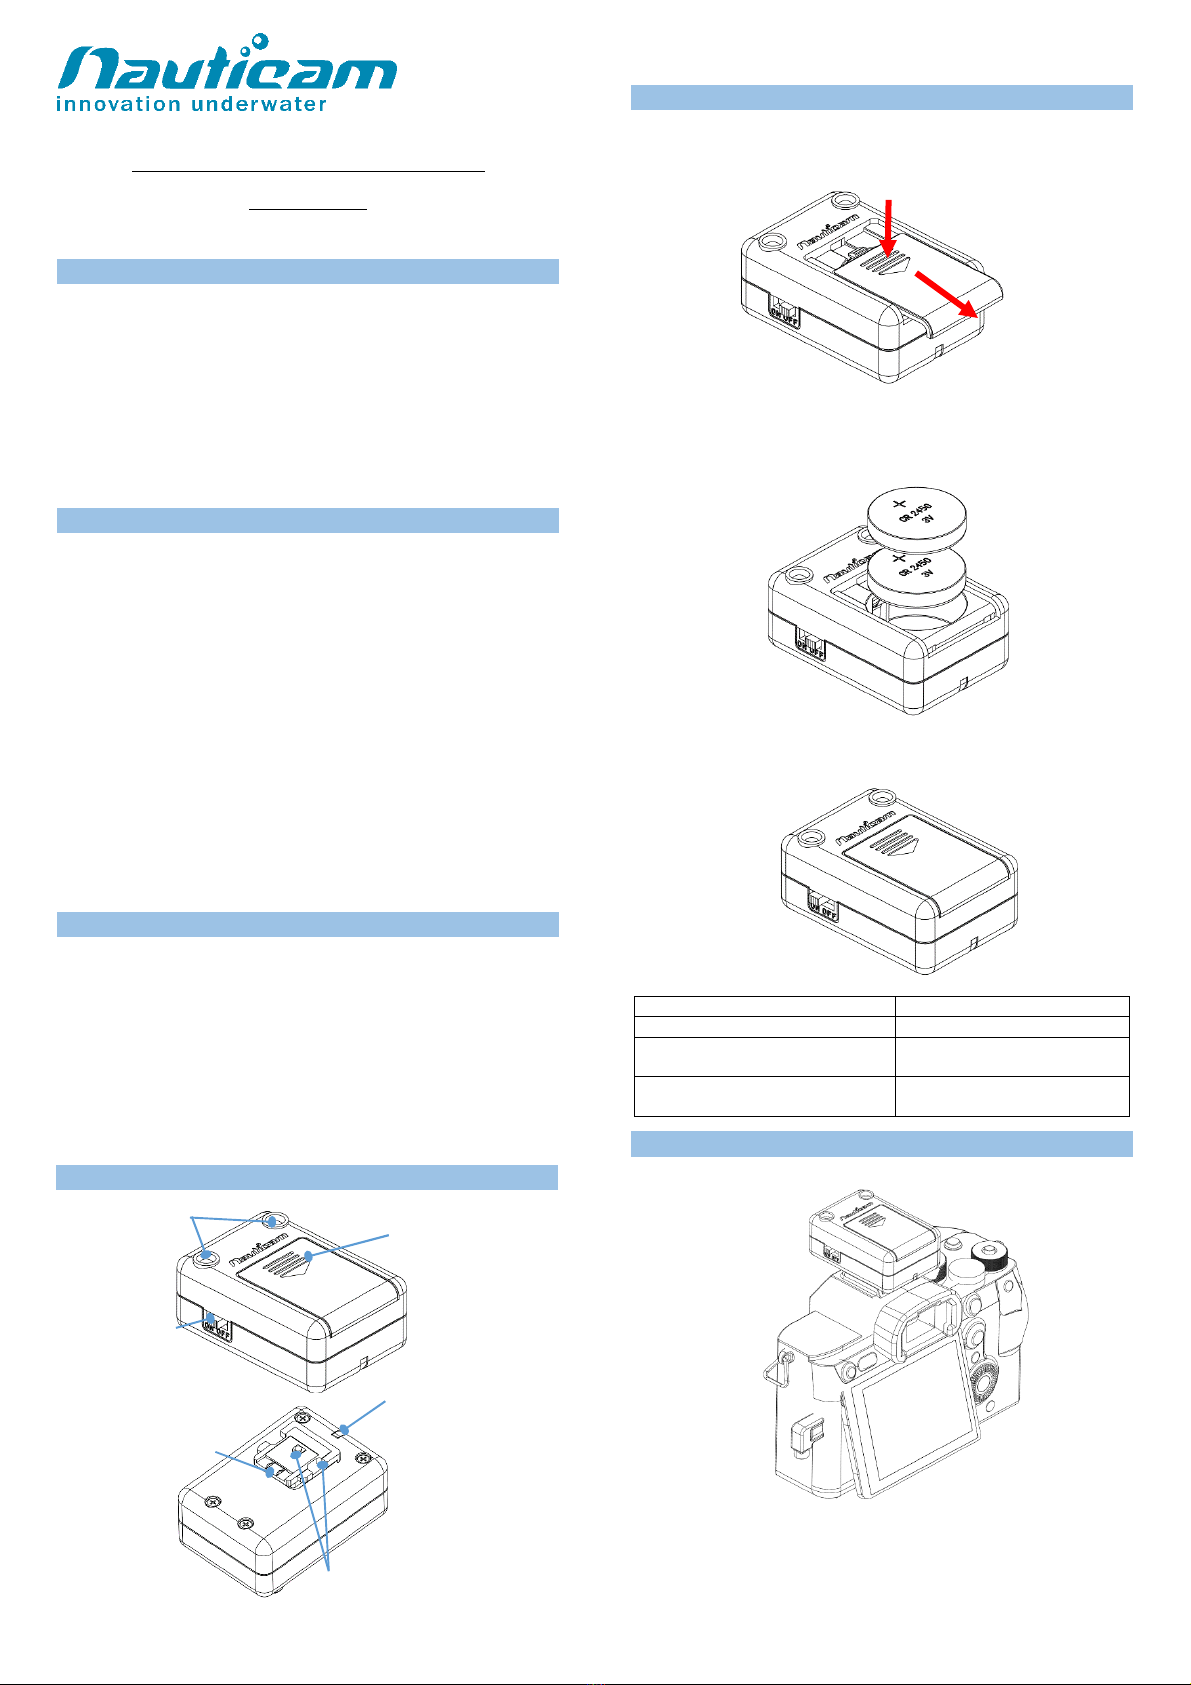
1. Make sure the On/Off switch is in the OFF position, then remove the
batteries compartment cover by sliding outwards.
2. Remove the insulation film before installing batteries.
Install the provided batteries into the battery compartment with +ve
terminal facing up as shown below.
3. Close the battery compartment cover and then switch the trigger
unit on. The indicator will turn green.
Indicator
IndicatorIndicator
Indicator
Status of flash trigger
Status of flash triggerStatus of flash trigger
Status of flash trigger
Flashing Green light (1 flash/sec)
operation.
Flashing Red light (1 flash/sec)
Low battery warning, replace
batteries.
ONNECT TO THE
ONNECT TO THE ONNECT TO THE
ONNECT TO THE
AMERA
AMERAAMERA
AMERA
1. Align the flash trigger hotshoe connector to the camera hotshoe and
slide in until it cannot go in any further. Test the flash trigger by
pressing the shutter release button of the camera, the LEDs in the
front should turn on instantaneously.
To detach the flash trigger from the camera, slightly slide it out.
Batteries Compartment Cover


