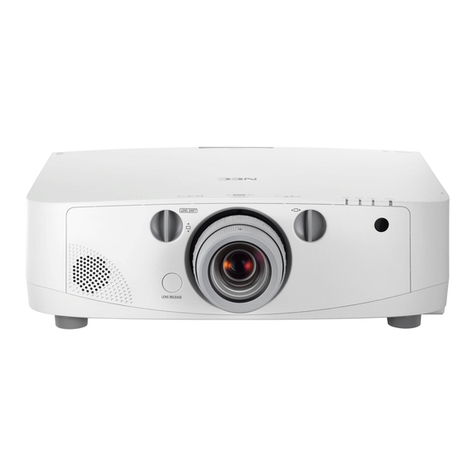
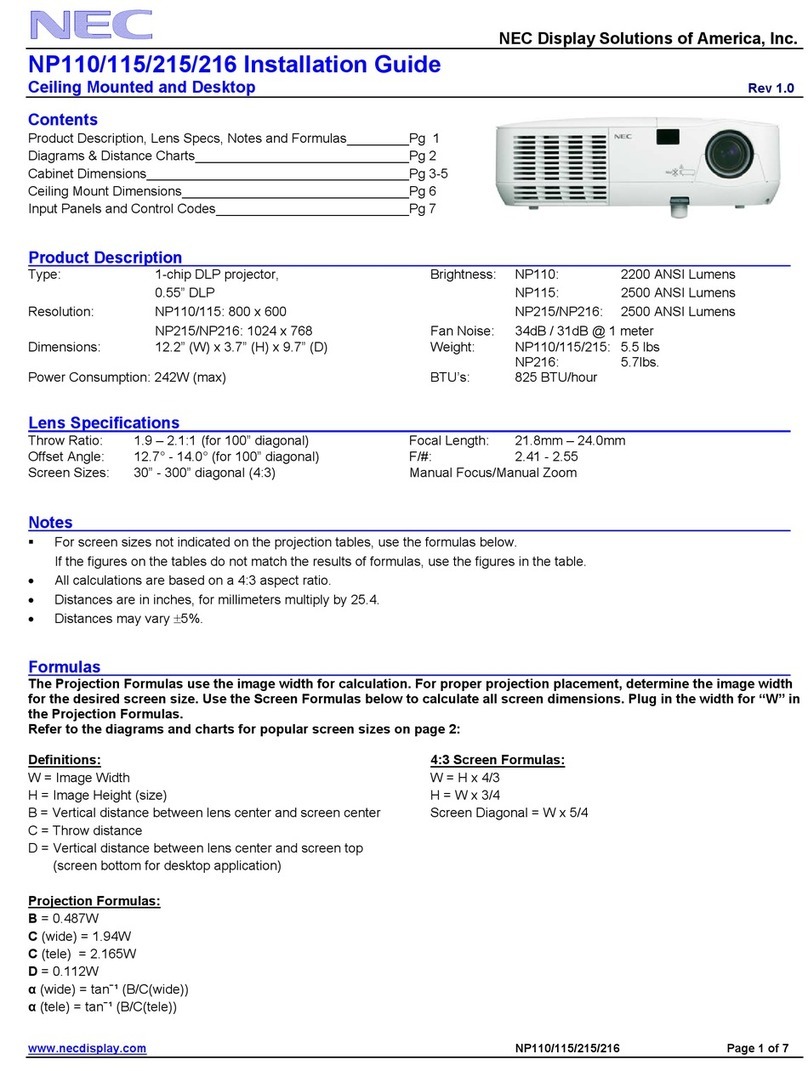
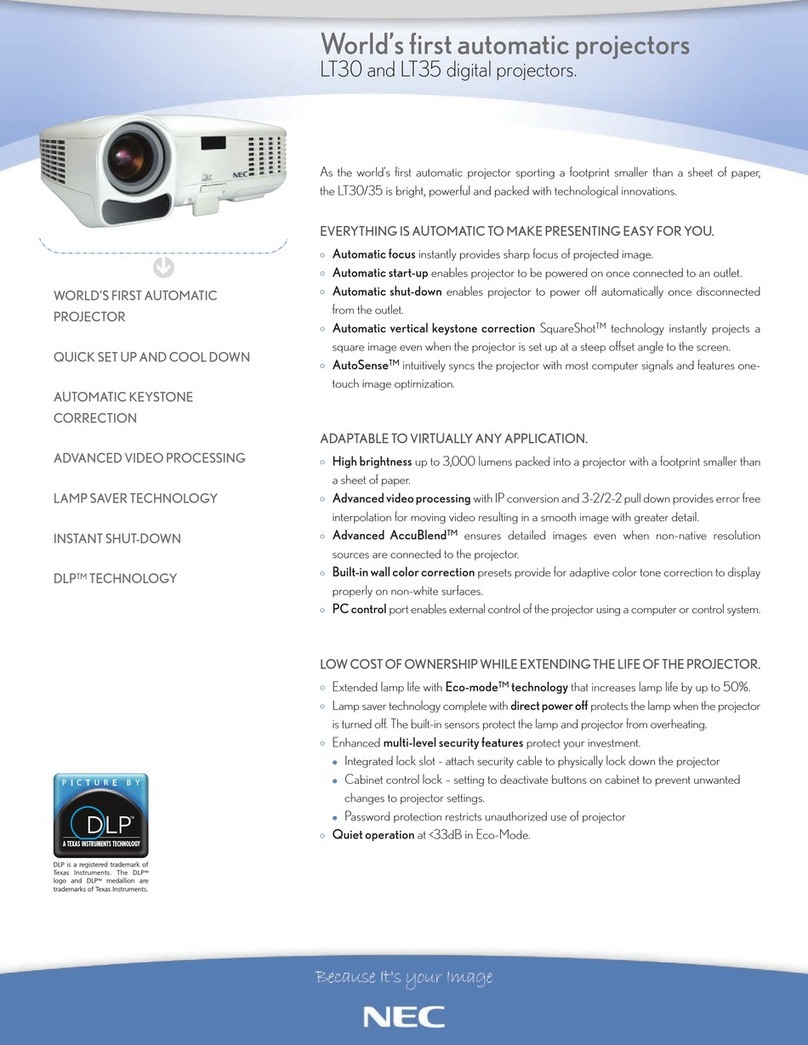
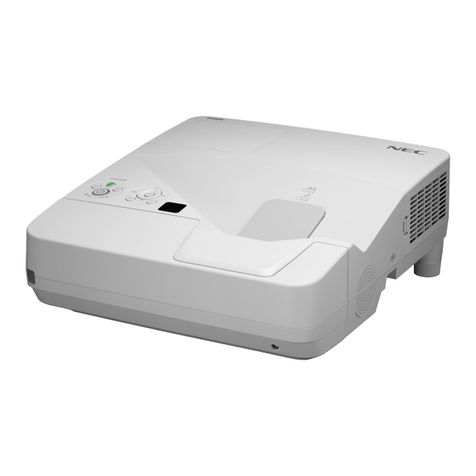
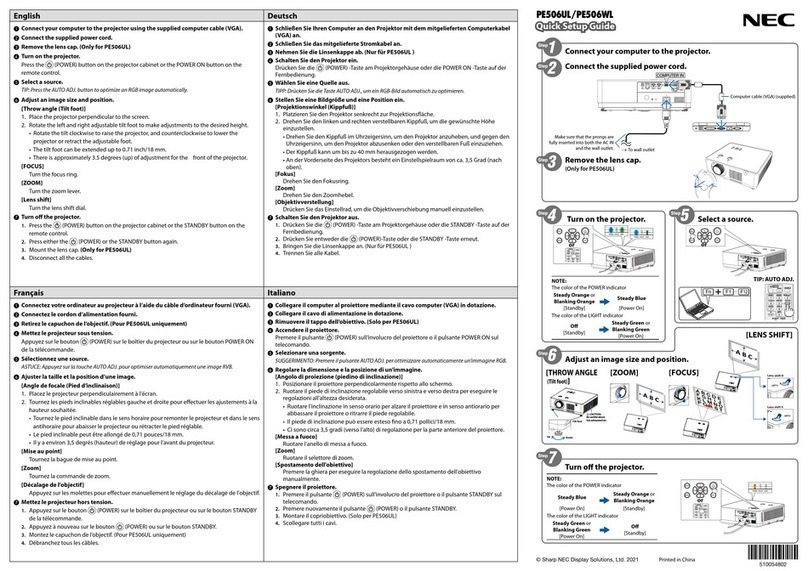
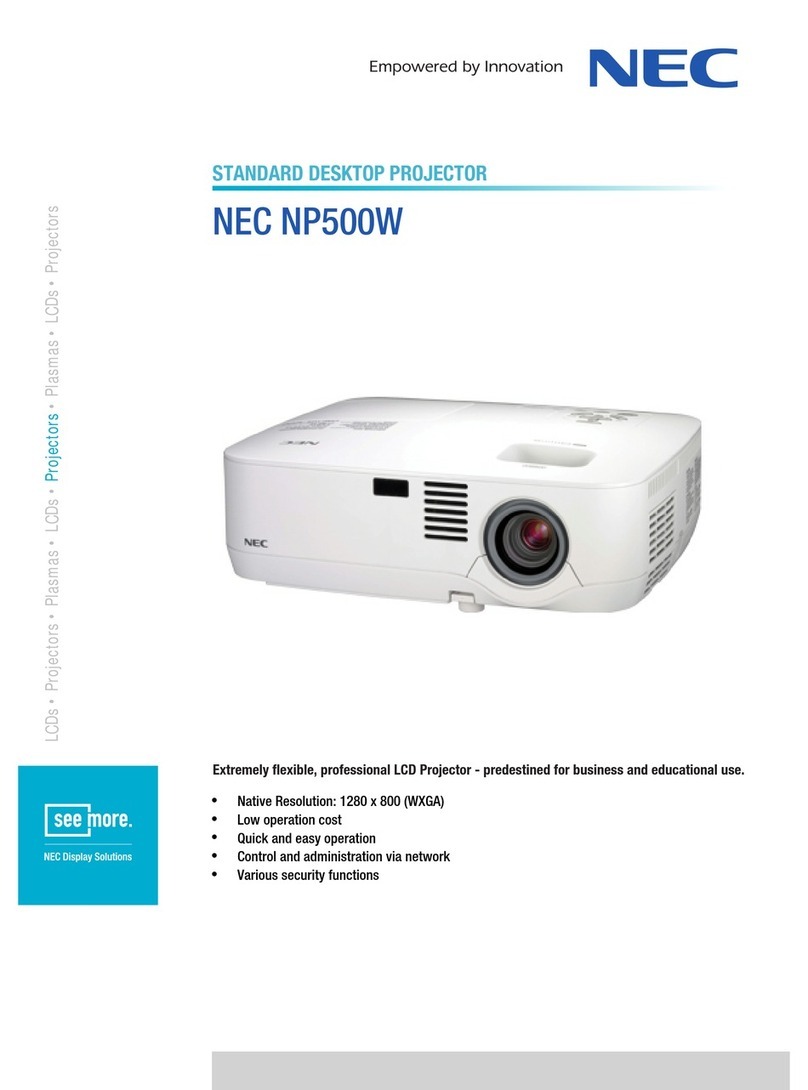
NEC PA500U Series User manual

Portable Projector
PA600X/PA500X/
PA550W/PA500U
User’s Manual
Model No.
NP-PA600X/NP-PA500X/NP-PA550W/NP-PA500U

2nd edition,March 2011
• Macintosh,MacOSXandPowerBookaretrademarksofAppleInc.registeredintheU.S.andothercountries.
• Microsoft,Windows,WindowsVista,InternetExplorer,.NETFrameworkandPowerPointareeitheraregistered
trademarkortrademarkofMicrosoftCorporationintheUnitedStatesand/orothercountries.
• MicroSaverisaregisteredtrademarkofKensingtonComputerProductsGroup,adivisionofACCOBrands.
• Adobe,AdobePDF,AdobeReader,andAcrobatareeitherregisteredtrademarksortrademarksofAdobeSystems
IncorporatedintheUnitedStatesand/orothercountries.
• IDTandHQVaretrademarksorregisteredtrademarksofIntegratedDeviceTechnology,Inc.
• VirtualRemoteToolusesWinI2C/DDClibrary,©NicomsoftLtd.
• HDMI,theHDMILogoandHigh-DenitionMultimediaInterfacearetrademarksorregisteredtrademarksofHDMI
LicensingLLC.
• DisplayPort,DisplayPortCertiedLogo,VESA,andVESAlogoaretrademarksoftheVideoElectronicsStandards
Association,registeredintheU.S.andothercountries.
• TrademarkPJLinkisatrademarkappliedfortrademarkrightsinJapan,theUnitedStatesofAmericaandother
countriesandareas.
• Wi-Fi®,Wi-FiAlliance®,andWi-FiProtectedAccess(WPA,WPA2)®areregisteredtrademarksoftheWi-FiAlli-
ance.
• Blu-rayisatrademarkofBlu-rayDiscAssociation
• Crestron,CrestronControl,andCrestronRoomViewaretrademarksorregisteredtrademarksofCrestronElectron-
ics,Inc.
• Otherproductandcompanynamesmentionedinthisuser’smanualmaybethetrademarksorregisteredtrademarks
oftheirrespectiveholders.
NOTES
(1)Thecontentsofthisuser’smanualmaynotbereprintedinpartorwholewithoutpermission.
(2)Thecontentsofthisuser’smanualaresubjecttochangewithoutnotice.
(3)Greatcarehasbeentakeninthepreparationofthisuser’smanual;however,shouldyounoticeanyquestionable
points,errorsoromissions,pleasecontactus.
(4)Notwithstandingarticle(3),NECwillnotberesponsibleforanyclaimsonlossofprotorothermattersdeemed
toresultfromusingtheProjector.

i
Important Information
Safety Cautions
Precautions
PleasereadthismanualcarefullybeforeusingyourNECprojectorandkeepthemanualhandyforfuturereference.
CAUTION
Toturnoffmainpower,besuretoremovetheplugfrompoweroutlet.
Thepoweroutletsocketshouldbeinstalledasneartotheequipmentaspossible,andshouldbeeasily
accessible.
CAUTION
TOPREVENTSHOCK,DONOTOPENTHECABINET.
THEREAREHIGH-VOLTAGECOMPONENTSINSIDE.
REFERSERVICINGTOQUALIFIEDSERVICEPERSONNEL.
Thissymbolwarnstheuserthatuninsulatedvoltagewithintheunitmaybesufcienttocauseelectrical
shock.Therefore,itisdangeroustomakeanykindofcontactwithanypartinsideoftheunit.
Thissymbolalertstheuserthatimportantinformationconcerningtheoperationandmaintenanceofthis
unithasbeenprovided.
Theinformationshouldbereadcarefullytoavoidproblems.
WARNING: TOPREVENTFIREORSHOCK,DONOTEXPOSETHISUNITTORAINORMOISTURE.
DONOTUSETHISUNIT’SPLUGWITHANEXTENSIONCORDORINANOUTLETUNLESSALLTHEPRONGS
CANBEFULLYINSERTED.
DOC Compliance Notice (for Canada only)
ThisClassB digitalapparatusmeetsall requirementsof theCanadianInterference-CausingEquipmentRegula-
tions.
Machine Noise Information Regulation - 3. GPSGV,
Thehighestsoundpressurelevelislessthan70dB(A)inaccordancewithENISO7779.
CAUTION
Avoiddisplayingstationaryimagesforaprolongedperiodoftime.
DoingsocanresultintheseimagesbeingtemporarilysustainedonthesurfaceoftheLCDpanel.
Ifthisshouldhappen,continuetouseyourprojector.Thestaticbackgroundfrompreviousimageswill
disappear.
Disposing of your used product
EU-widelegislationasimplementedineachMemberStaterequiresthatusedelectricalandelectronic
productscarryingthemark(left)mustbedisposedofseparatelyfromnormalhouseholdwaste.Thisin-
cludesprojectorsandtheirelectricalaccessoriesorlamps.Whenyoudisposeofsuchproducts,please
followtheguidanceofyourlocalauthorityand/orasktheshopwhereyoupurchasedtheproduct.
Aftercollectingtheusedproducts,theyarereusedandrecycledinaproperway.Thiseffortwillhelpus
reducethewastesaswellasthenegativeimpactsuchasmercurycontainedinalamptothehuman
healthandtheenvironmentattheminimumlevel.
ThemarkontheelectricalandelectronicproductsonlyappliestothecurrentEuropeanUnionMember
States.

ii
Important Information
WARNING TO CALIFORNIA RESIDENTS:
Handlingthecablessuppliedwiththisproductwillexposeyoutolead,achemicalknowntotheStateofCalifornia
tocausebirthdefectsorotherreproductiveharm.WASH HANDS AFTER HANDLING.
RF Interference (for USA only)
WARNING
TheFederalCommunicationsCommissiondoesnotallowanymodicationsorchangestotheunitEXCEPTthose
speciedbyNECDisplaySolutionsofAmerica,Inc.inthismanual.Failuretocomplywiththisgovernmentregu-
lationcouldvoidyourrighttooperatethisequipment.Thisequipmenthasbeentestedandfoundtocomplywith
thelimitsforaClassBdigitaldevice,pursuanttoPart15oftheFCCRules.Theselimitsaredesignedtoprovide
reasonableprotectionagainstharmfulinterferenceinaresidentialinstallation.Thisequipmentgenerates,uses,and
canradiateradiofrequencyenergyand,ifnotinstalledandusedinaccordancewiththeinstructions,maycause
harmfulinterferencetoradiocommunications.However,thereisnoguaranteethatinterferencewillnotoccurina
particularinstallation.
Ifthisequipmentdoescauseharmfulinterferencetoradioortelevisionreception,whichcanbedeterminedby
turningtheequipmentoffandon,theuserisencouragedtotrytocorrecttheinterferencebyoneormoreofthe
followingmeasures:
•Reorientorrelocatethereceivingantenna.
•Increasetheseparationbetweentheequipmentandreceiver.
•Connecttheequipmentintoanoutletonacircuitdifferentfromthattowhichthereceiverisconnected.
•Consultthedealeroranexperiencedradio/TVtechnicianforhelp.
ForUKonly:InUK,aBSapprovedpowercordwithmouldedplughasaBlack(veAmps)fuseinstalledforusewith
thisequipment.Ifapowercordisnotsuppliedwiththisequipmentpleasecontactyoursupplier.
Important Safeguards
Thesesafetyinstructionsaretoensurethelonglifeofyourprojectorandtopreventreandshock.Pleasereadthem
carefullyandheedallwarnings.
Installation
•Donotplacetheprojectorinthefollowingconditions:
-onanunstablecart,stand,ortable.
-nearwater,baths,ordamprooms.
-indirectsunlight,nearheaters,orheatradiatingappliances.
-inadusty,smokyorsteamyenvironment.
-onasheetofpaperorcloth,rugsorcarpets.
•Ifyouwishtohavetheprojectorinstalledontheceiling:
-Donotattempttoinstalltheprojectoryourself.
-Theprojectormustbeinstalledbyqualiedtechniciansinordertoensureproperoperationandreducetherisk
ofbodilyinjury.
-Inaddition,theceilingmustbestrongenoughtosupporttheprojectorandtheinstallationmustbeinaccordance
withanylocalbuildingcodes.
-Pleaseconsultyourdealerformoreinformation.

iii
Important Information
Fire and Shock Precautions
• Ensurethatthereissufcientventilationandthatventsareunobstructedtopreventthebuild-upofheatinsideyour
projector.Allowatleast4inches(10cm)ofspacebetweenyourprojectorandawall.
• Donottrytotouchtheventilationoutletontheleftfront(whenseenfromthefront)asitcanbecomeheatedwhile
theprojectoristurnedonandimmediatelyaftertheprojectoristurnedoff.Partsoftheprojectormaybecometem-
porarilyheatediftheprojectoristurnedoffwiththePOWERbuttonoriftheACpowersupplyisdisconnectedduring
normalprojectoroperation.
Usecautionwhenpickinguptheprojector.
• Preventforeignobjectssuchaspaperclipsandbitsofpaperfromfallingintoyourprojector.Donotattempttoretrieve
anyobjectsthatmightfallintoyourprojector.Donotinsertanymetalobjectssuchasawireorscrewdriverintoyour
projector.Ifsomethingshouldfallintoyourprojector,disconnectitimmediatelyandhavetheobjectremovedbya
qualiedservicepersonnel.
• Donotplaceanyobjectsontopoftheprojector.
• Donottouchthepowerplugduringathunderstorm.Doingsocancauseelectricalshockorre.
• Theprojectorisdesignedtooperateonapowersupplyof100-240VAC50/60Hz.Ensurethatyourpowersupply
tsthisrequirementbeforeattemptingtouseyourprojector.
• Donotlookintothelenswhiletheprojectorison.Seriousdamagetoyoureyescouldresult.
• Keepanyitems(magnifyingglassetc.)outofthelightpathoftheprojector.Thelightpathbeingprojectedfromthe
lensisextensive,thereforeanykindofabnormalobjectsthatcanredirectlightcomingoutofthelens,cancause
anunpredictableoutcomesuchasareorinjurytotheeyes.
• Donotplaceanyobjects,whichareeasilyaffectedbyheat,infrontofaprojectorexhaustvent.
Doingsocouldleadtotheobjectmeltingorgettingyourhandsburnedfromtheheatthatisemittedfromtheex-
haust.
WARNING
•Donotcoverthelenswiththelenscaporequivalentwhiletheprojectorison.Doingsocanleadtomeltingof
thecapduetotheheatemittedfromthelightoutput.
•Donotplaceanyobjects,whichareeasilyaectedbyheat,infrontoftheprojectorlens.Doingsocouldlead
totheobjectmeltingfromtheheatthatisemittedfromthelightoutput.
Donottilttheprojectortotheleftorright.Doingsomayresultinmalfunction.Thereisnolimitonthetiltangleupward
ordownward.Selectanappropriateoptionfor[FANMODE]accordingtotheinstallationangle.

iv
Important Information
• Handlethepowercordcarefully.Adamagedorfrayedpowercordcancauseelectricshockorre.
- Donotuseanypowercordotherthantheonesuppliedwiththeprojector.
- Donotbendortugthepowercordexcessively.
- Donotplacethepowercordundertheprojector,oranyheavyobject.
- Donotcoverthepowercordwithothersoftmaterialssuchasrugs.
- Donotheatthepowercord.
- Donothandlethepowerplugwithwethands.
• Turnofftheprojector,unplugthepowercordandhavetheprojectorservicedbyaqualiedservicepersonnelunder
thefollowingconditions:
- Whenthepowercordorplugisdamagedorfrayed.
- Ifliquidhasbeenspilledintotheprojector,orifithasbeenexposedtorainorwater.
- Iftheprojectordoesnotoperatenormallywhenyoufollowtheinstructionsdescribedinthisuser’smanual.
- Iftheprojectorhasbeendroppedorthecabinethasbeendamaged.
- Iftheprojectorexhibitsadistinctchangeinperformance,indicatinganeedforservice.
• Disconnectthepowercordandanyothercablesbeforecarryingtheprojector.
• Turnofftheprojectorandunplugthepowercordbeforecleaningthecabinetorreplacingthelamp.
• Turnofftheprojectorandunplugthepowercordiftheprojectorisnottobeusedforanextendedperiodoftime.
• WhenusingaLANcable:
Forsafety,donotconnecttotheconnectorforperipheraldevicewiringthatmighthaveexcessivevoltage.
CAUTION
• Donotusethetilt-footforpurposesotherthanoriginallyintended.Misusessuchasgrippingthetilt-footor
hangingonthewallcancausedamagetotheprojector.
• Donotsendtheprojectorinthesoftcasebyparceldeliveryserviceorcargoshipment.Theprojectorinside
thesoftcasecouldbedamaged.
• Select[HIGH]inFanmodeifyoucontinuetousetheprojectorforconsecutivedays.(Fromthemenu,select
[SETUP]→[OPTIONS(1)]→[FANMODE]→[MODE]→[HIGH].)
• Donotmovetheprojectorbyholdingthecablecover.Doingsomayresultintheprojectorfallingorcausing
injury.
• BeforeusingDirectPowerOff,besuretoallowatleast20minutesimmediatelyafterturningontheprojector
andstartingtodisplayanimage.
• Donotunplugthepowercablefromthewalloutletorprojectorwhentheprojectorispoweredon.Doingso
cancausedamagetotheACINconnectoroftheprojectorand(or)theprongplugofthepowercable.
ToturnofftheACpowersupplywhentheprojectorispoweredon,useapowerstripequippedwithaswitch
andabreaker.
• DonotturnofftheACpowerfor60secondsafterthelampisturnedonandwhilethePOWERindicatoris
blinkingblue.Doingsocouldcauseprematurelampfailure.
Caution on Handling the Optional Lens
Whenshippingtheprojectorwiththelens,removethelensbeforeshippingtheprojector.Alwaysattachthedustcap
tothelenswheneveritisnotmountedontheprojector.Thelensandthelensshiftmechanismmayencounterdamage
causedbyimproperhandlingduringtransportation.
Donotholdthelenspartwhencarryingtheprojector.
Doingsocouldcausethefocusringtorotate,resultinginaccidentaldroppingoftheprojector.
Remote Control Precautions
• Handletheremotecontrolcarefully.
• Iftheremotecontrolgetswet,wipeitdryimmediately.
• Avoidexcessiveheatandhumidity.
• Donotshort,heat,ortakeapartbatteries.

v
Important Information
• Donotthrowbatteriesintore.
• Ifyouwillnotbeusingtheremotecontrolforalongtime,removethebatteries.
• Ensurethatyouhavethebatteries’polarity(+/−)alignedcorrectly.
• Donotusenewandoldbatteriestogether,orusedifferenttypesofbatteriestogether.
• Disposeofusedbatteriesaccordingtoyourlocalregulations.
Note for US Residents
Thelampinthisproductcontainsmercury.PleasedisposeaccordingtoLocal,StateorFederalLaws.
Lamp Replacement
• Usethespeciedlampforsafetyandperformance.
• Toreplacethelamp,followallinstructionsprovidedonpage159.
• Besuretoreplacethelampandlterwhenthemessage[THE LAMP HAS REACHED THE END OF ITS US-
ABLE LIFE. PLEASE REPLACE THE LAMP AND FILTER. USE THE SPECIFIED LAMP FOR SAFETY AND
PERFORMANCE.]appears.Ifyoucontinuetousethelampafterthelamphasreachedtheendofitsusablelife,
thelampbulbmayshatter,andpiecesofglassmaybescatteredinthelampcase.Donottouchthemasthepieces
ofglassmaycauseinjury.
Ifthishappens,contactyourdealerforlampreplacement.
A Lamp Characteristic
Theprojectorhasahigh-pressuremercurylampasalightsource.
Alamphasacharacteristicthatitsbrightnessgraduallydecreaseswithage.Alsorepeatedlyturningthelampon
andoffwillincreasethepossibilityofitslowerbrightness.
CAUTION:
• DONOTTOUCHTHELAMPimmediatelyafterithasbeenused.Itwillbeextremelyhot.Turntheprojectoroff
andthendisconnectthepowercord.Allowatleastonehourforthelamptocoolbeforehandling.
• Whenremovingthelampfromaceiling-mountedprojector,makesurethatnooneisundertheprojector.Glass
fragmentscouldfallifthelamphasbeenburnedout.
About High Altitude mode
•
Set[FANMODE]to[HIGHALTITUDE]whenusingtheprojectorataltitudesapproximately5500feet/1600metersor
higher.
Usingtheprojectorataltitudesapproximately5500feet/1600metersorhigherwithoutsettingto[HIGHALTITUDE]
cancausetheprojectortooverheatandtheprotectorcouldshutdown.Ifthishappens,waitacoupleminutesand
turnontheprojector.
• Usingtheprojectorataltitudeslessthanapproximately5500feet/1600metersandsettingto[HIGHALTITUDE]
cancausethelamptoovercool,causingtheimagetoicker.Switch[FANMODE]to[AUTO].
• Usingtheprojectorataltitudesapproximately5500feet/1600metersorhighercanshortenthelifeofopticalcom-
ponentssuchasthelamp.
About Copyright of original projected pictures:
Pleasenotethatusingthisprojectorforthepurposeofcommercialgainortheattractionofpublicattentioninavenue
suchasacoffeeshoporhotelandemployingcompressionorexpansionofthescreenimagewiththefollowingfunc-
tionsmayraiseconcernabouttheinfringementofcopyrightswhichareprotectedbycopyrightlaw.
[ASPECTRATIO],[KEYSTONE],Magnifyingfeatureandothersimilarfeatures.
Turkish RoHS information relevant for Turkish market
EEE Yönetmeliğine Uygundur.
Thisdeviceisnotintendedforuseinthedirecteldofviewatvisualdisplayworkplaces.Toavoidincommodingreec-
tionsatvisualdisplayworkplacesthisdevicemustnotbeplacedinthedirecteldofview.

vi
Table of Contents
Important Information............................................................................................i
CautiononHandlingtheOptionalLens ...................................................................iv
1. Introduction.......................................................................................................... 1
1What’sintheBox?......................................................................................................... 1
IntroductiontotheProjector .......................................................................................... 2
CongratulationsonYourPurchaseoftheProjector ................................................. 2
Featuresyou’llenjoy: ............................................................................................... 2
Aboutthisuser’smanual.......................................................................................... 3
PartNamesoftheProjector .......................................................................................... 4
Front/Top.................................................................................................................. 4
Rear ......................................................................................................................... 5
ControlPanel/IndicatorSection................................................................................6
TerminalPanelFeatures .......................................................................................... 7
PartNamesoftheRemoteControl ............................................................................... 8
BatteryInstallation ................................................................................................... 9
RemoteControlPrecautions.................................................................................... 9
OperatingRangeforWirelessRemoteControl........................................................ 9
OperatingEnvironmentforSoftwareIncludedonCD-ROM ........................................ 10
OperatingEnvironment.......................................................................................... 11
2. Projecting an Image (Basic Operation) .............................................. 12
1FlowofProjectinganImage........................................................................................ 12
ConnectingYourComputer/ConnectingthePowerCord............................................. 13
TurningontheProjector .............................................................................................. 14
NoteonStartupscreen(MenuLanguageSelectscreen)...................................... 15
SelectingaSource ...................................................................................................... 16
Selectingthecomputerorvideosource................................................................. 16
AdjustingthePictureSizeandPosition....................................................................... 17
Adjustingtheverticalpositionofaprojectedimage(Lensshift)............................ 18
Focus ..................................................................................................................... 19
Applicablelens:NP11FL........................................................................................20
Zoom...................................................................................................................... 21
AdjustingtheTiltFeet ............................................................................................ 21
CorrectingKeystoneDistortion.................................................................................... 22
OptimizingComputerSignalAutomatically ................................................................. 24
AdjustingtheImageUsingAutoAdjust.................................................................. 24
TurningUporDownVolume ........................................................................................ 24
TurningofftheProjector .............................................................................................. 25
AfterUse...................................................................................................................... 26
3. Convenient Features..................................................................................... 27
1TurningofftheImageandSound ................................................................................ 27
FreezingaPicture ....................................................................................................... 27
EnlargingaPicture ...................................................................................................... 27
ChangingEcoMode/CheckingEnergy-SavingEffectUsingEcoMode[ECO
MODE] ................................................................................................................... 28

vii
Table of Contents
CheckingEnergy-SavingEffect[CARBONMETER] ............................................. 29
UsingtheOptionalRemoteMouseReceiver(NP01MR) ............................................ 30
CorrectingHorizontalandVerticalKeystoneDistortion[CORNERSTONE] ................ 32
Cornerstone ........................................................................................................... 32
DisplayingTwoPicturesattheSameTime.................................................................. 35
SelectingthePIPorPICTUREBYPICTUREMode[MODE]................................ 35
[POSITION]............................................................................................................ 36
PreventingtheUnauthorizedUseoftheProjector[SECURITY] ...................................... 37
ControllingtheProjectorbyUsinganHTTPBrowser ................................................. 40
ProjectingYourComputer’sScreenImagefromtheProjectorviaaNetwork
[NETWORKPROJECTOR].................................................................................... 47
UsingtheProjectortoOperateYourComputerviaaNetwork[REMOTE
DESKTOP]............................................................................................................. 51
4. Using the Viewer ............................................................................................. 56
❶WhatyoucandowiththeViewer................................................................................. 56
❷Preparingpresentationmaterials ................................................................................ 59
❸ProjectingimagesstoredinaUSBmemorydevice .................................................... 60
StartingtheViewer................................................................................................. 60
ExitingtheViewer .................................................................................................. 63
NamesandfunctionsofViewerscreen.................................................................. 64
Vieweroptionsettings............................................................................................ 69
❹Projectingdatafromsharedfolder .............................................................................. 72
Connectingtheprojectortothesharedfolder ....................................................... 72
Disconnectingthesharedfolderfromtheprojector ............................................... 75
❺Projectingdatafrommediaserver............................................................................... 76
Settingup“MediaSharing”inWindowsMediaPlayer11 ...................................... 76
Settingup“MediaSharing”inWindowsMediaPlayer12 ...................................... 78
Connectingtheprojectortothemediaserver........................................................ 79
Disconnectingtheprojectorfromthemediaserver ............................................... 80
❻Restrictionsondisplayingles .................................................................................... 81
SomerestrictionsonPowerPointles.................................................................... 81
SomerestrictionsonPDFles .............................................................................. 81
5. Using On-Screen Menu................................................................................ 82
1UsingtheMenus.......................................................................................................... 82
MenuElements............................................................................................................ 83
ListofMenuItems ....................................................................................................... 84
MenuDescriptions&Functions[SOURCE] ................................................................ 87
COMPUTER1, 2, and 3........................................................................................ 87
HDMI...................................................................................................................... 87
DisplayPort............................................................................................................. 87
VIDEO.................................................................................................................... 87
S-VIDEO ................................................................................................................ 87
VIEWER................................................................................................................. 87
NETWORK............................................................................................................. 87
ENTRYLIST .......................................................................................................... 87
TESTPATTERN..................................................................................................... 87

viii
Table of Contents
MenuDescriptions&Functions[ADJUST].................................................................. 91
[PICTURE] ............................................................................................................. 91
[IMAGEOPTIONS] ................................................................................................ 94
[VIDEO].................................................................................................................. 98
MenuDescriptions&Functions[SETUP].................................................................. 100
[BASIC] ................................................................................................................ 100
[MENU] ................................................................................................................ 102
[INSTALLATION(1)].............................................................................................. 103
[INSTALLATION(2)].............................................................................................. 106
[OPTIONS(1)] ...................................................................................................... 108
[OPTIONS(2)] ...................................................................................................... 110
MenuDescriptions&Functions[INFO.] .................................................................... 112
[USAGETIME] ..................................................................................................... 112
[SOURCE(1)] ....................................................................................................... 113
[SOURCE(2)] ....................................................................................................... 113
[WIREDLAN]....................................................................................................... 113
[WIRELESSLAN(1)]............................................................................................ 114
[WIRELESSLAN(2)]............................................................................................ 114
[VERSION(1)] ...................................................................................................... 114
[VERSION(2)] ...................................................................................................... 115
[OTHERS] ............................................................................................................ 115
MenuDescriptions&Functions[RESET].................................................................. 116
ReturningtoFactoryDefault[RESET]................................................................. 116
❾ApplicationMenu....................................................................................................... 118
IMAGEEXPRESSUTILITY ................................................................................. 118
DESKTOPCONTROLUTILITY........................................................................... 118
NETWORKPROJECTOR.................................................................................... 119
REMOTEDESKTOPCONNECTION .................................................................. 119
NETWORKSETTINGS........................................................................................ 120
TOOLS................................................................................................................. 136
6. ConnectingtoOtherEquipment..................................................................... 141
Mountingalens(soldseparately)..............................................................................141
Mountingthelens.................................................................................................141
Removingthelens................................................................................................142
MakingConnections.................................................................................................. 143
AnalogRGBsignalconnection.............................................................................143
DigitalRGBsignalconnection..............................................................................144
ConnectinganExternalMonitor .......................................................................... 146
ConnectingYourDVDPlayerorOtherAVEquipment.......................................... 147
ConnectingComponentInput .............................................................................. 148
ConnectingHDMIInput........................................................................................ 149
ConnectingtoaWiredLAN ................................................................................. 150
ConnectingtoaWirelessLAN(soldseparately)..................................................151
MountingawirelessLANunit...............................................................................151
ToremovethewirelessLANunit..........................................................................153
7. Maintenance .................................................................................................... 155
1CleaningtheFilters.................................................................................................... 155

ix
Table of Contents
CleaningtheLens...................................................................................................... 158
CleaningtheCabinet................................................................................................. 158
ReplacingtheLampandtheFilters........................................................................... 159
8. User Supportware......................................................................................... 164
InstallingSoftwareProgram ...................................................................................... 164
InstallationforWindowssoftware......................................................................... 164
InstallationforMacintoshsoftware....................................................................... 166
OperatingtheProjectorViatheLAN(VirtualRemoteTool) ...................................... 167
ProjectingYourComputer’sScreenImagefromtheProjectoroveraLAN(Image
ExpressUtilityLite) .............................................................................................. 170
ProjectinganImagefromanAngle(GeometricCorrectionToolinImageExpress
UtilityLite) ............................................................................................................ 172
WhatyoucandowithGCT.................................................................................. 172
ProjectingImagesorVideosfromtheProjectoroveraLAN(ImageExpressUtility
2.0)....................................................................................................................... 174
WhatyoucandowithImageExpressUtility2.0.................................................. 174
ConnectingtheprojectortoaLAN....................................................................... 175
BasicOperationofImageExpressUtility2.0....................................................... 176
UsingtheProjectortoOperateYourComputeroveraLAN(DesktopControlUtility
1.0)....................................................................................................................... 185
WhatyoucandowithDesktopControlUtility1.0................................................ 185
ConnectingtheprojectortoaLAN....................................................................... 185
Usingtheprojectortooperateyourcomputer’sdesktopscreen.......................... 186
ControllingtheProjectoroveraLAN(PCControlUtilityPro4) ....................................194
ConvertingPowerPointlestoSlides(ViewerPPTConverter3.0)........................... 195
ProjectingYourMac’sScreenImagefromtheProjectoroveraLAN(Image
ExpressUtility2forMac) ..................................................................................... 197
WhatyoucandowithImageExpressUtility2..................................................... 197
Operatingenvironment ........................................................................................ 197
ConnectingtheprojectortoaLAN....................................................................... 197
UsingImageExpressUtility2.............................................................................. 198
9. Appendix............................................................................................................. 201
Throwdistanceandscreensize.................................................................................201
Lenstypesandthrowdistance.............................................................................201
Tablesofscreensizesanddimensions................................................................204
Lensshiftingrange...............................................................................................205
CompatibleInputSignalList...................................................................................... 207
Specications ............................................................................................................ 209
CabinetDimensions .................................................................................................. 211
Mountingthecablecover(soldseparately)................................................................212
PinAssignmentsofD-SubCOMPUTERInputConnector ........................................ 213
Troubleshooting ......................................................................................................... 214
IndicatorMessages.............................................................................................. 214
CommonProblems&Solutions........................................................................... 216
Ifthereisnopicture,orthepictureisnotdisplayedcorrectly............................... 218

x
Table of Contents
PCControlCodesandCableConnection................................................................. 219
TroubleshootingCheckList........................................................................................ 220
TravelCareGuide....................................................................................................... 222

1
Projector
1. Introduction
1What’s in the Box?
Makesureyourboxcontainseverythinglisted.Ifanypiecesaremissing,contactyourdealer.
Pleasesavetheoriginalboxandpackingmaterialsifyoueverneedtoshipyourprojector.
Power cord
(US: 7N080236)
(EU: 7N080022)
Lens theft prevention screw (24V00841)
This screw makes it difficult to remove the
lens mounted on the projector. (→page 142)
Straps (24J23901) (for preventing lamp and filter covers from
falling) (x2)
Attaching the straps to the lamp and filter covers prevents
them from falling when the projector is suspended from the
ceiling.
Computer cable (VGA)
(7N520073)
NEC Projector CD-ROM
User’s manual (PDF) and the utility
software
(7N951592)
For North America only
Registrationcard
Limitedwarranty
For customers in Europe:
YouwillndourcurrentvalidGuar-
anteePolicyonourWebSite:
www.nec-display-solutions.com
• ImportantInfomation(ForNorthAmerica:
7N8N1551) (For Other countries than North
America: 7N8N1551 and 7N8N1562)
• QuickSetupGuide(ForNorthAmerica:
7N8N1571) (For Other countries than North
America: 7N8N1571 and 7N8N1581)
Remote control
(7N900961)
AA alkaline batteries
(x2)
Dust cap for lens
* The projector is shipped without a
lens. For the types of lens and throw
distances, see page 201.

2
1. Introduction
Introduction to the Projector
Thissectionintroducesyoutoyournewprojectoranddescribesthefeaturesandcontrols.
Congratulations on Your Purchase of the Projector
Thisprojectorisoneoftheverybestprojectorsavailabletoday.Theprojectorenablesyoutoprojectpreciseimages
upto500inchesacross(measureddiagonally)fromyourPCorMacintoshcomputer(desktopornotebook),VCR,
DVDplayer,ordocumentcamera.
Youcanusetheprojectoronatabletoporcart,youcanusetheprojectortoprojectimagesfrombehindthescreen,
andtheprojectorcanbepermanentlymountedonaceiling*1.Theremotecontrolcanbeusedwirelessly.
*1 Donotattempttomounttheprojectoronaceilingyourself.
Theprojectormustbeinstalledbyqualiedtechniciansinordertoensureproperoperationandreducetherisk
ofbodilyinjury.
Inaddition,theceilingmustbestrongenoughtosupporttheprojectorandtheinstallationmustbeinaccordance
withanylocalbuildingcodes.Pleaseconsultyourdealerformoreinformation.
Features you’ll enjoy:
• Liquidcrystaltypehighbrightness/highresolutionprojector
Model LCDpanel Resolution AspectRatio
PA600X 0.79"(withMLA) 1024×768dots 4:3
PA500X 0.79"(withMLA) 1024×768dots 4:3
PA550W 0.75"(withMLA) 1280×800dots 16:10
PA500U 0.76"(withMLA) 1920×1200dots 16:10
ThePA600X/PA500X/PA550WprojectorscoverinputsignalsuptoWUXGA(1920×1200dots)thankstothe
AdvancedAccuBlendfunction.
• Widerangeofoptionallensesselectableaccordingtotheplaceofinstallation
Thisprojectorsupports5typesofoptionallenses,providingaselectionoflensesadaptedtoavarietyofplaces
ofinstallationandprojectionmethods.
Inaddition,thelensescanbemountedandremovedinonetouch.
Notethatnolensismounteduponshipmentfromthefactory.Pleasepurchaseoptionallensesseparately.
• Lensshiftfunctionforeasilyadjustingthepositionoftheprojectedimage
Thepositionoftheprojectedimageismovedbyturningthetwodialsontheprojector’sfront,oneforthevertical
direction,oneforthehorizontaldirection.
• 360°installationangle(tilt-free)
Theprojectorcanbeinstalledatanyangle(360°).
Note,however,thatthe“fanmode”settingmustbechangedaccordingtotheangleofinstallation.
Also,theprojectorcannotbeinstalledtiltedtotheleftorright.
• Widerangeofinput/outputconnectors(HDMI,DisplayPort,BNC,etc.)andbuilt-inmonauralspeaker
Theprojector is equipped with a varietyof input/output connectors:computer(analog), 5-core BNC,HDMI,
DisplayPort,Video,S-Video,etc.(Thecomputer(analog)andBNCconnectorsalsosupportcomponentinputs.)
Theprojector’sHDMIandDisplayPortinputconnectorssupportHDCP.
Theprojectorisalsoequippedwithabuilt-in10Wmonauralspeaker.
• Highpicturequalityprocessingcircuit
IDTHQVprocessingtechnologyisusedtoprojecthighqualityimages.
• Energy-savingdesignwithastandbypowerconsumptionof0.2watts
Whentheon-screenmenu’sstandbymodeissetto“PowerSaving”,thepowerconsumptioninthestandbymode
is0.2watts.

3
1. Introduction
• “Ecomode”forlowpowerconsumptionand“CarbonMeter”display
Theprojector is equippedwith an“eco mode”forreducing powerconsumptionduring use.Furthermore,the
power-savingeffectwhentheecomodeissetisconvertedintotheamountofreductionsofCO2emissionsand
thisisindicatedontheconrmationmessagedisplayedwhenthepoweristurnedoffandat“Information”onthe
on-screenmenu(CARBONMETER).
• Maximumlampreplacementtimeof4000hours(3000hoursinNormalmode)andnoneedtocleanthe
filters
Whenusedintheecomode,thelampreplacementtime*isextendedtoamaximumof4000hours.
*Thistimeisnotguaranteed.
Furthermore,thisprojectoruseslarge2-layerlters.Whentheseltersarereplacedwithnewoneswhenchanging
thelamp,thereisnoneedforregularltercleaning.
• Seamlessswitchfunctionforsmootherscreenchangeswhenswitchingthesignal(PA500Uonly)
Whentheinputconnectorisswitched,theimagedisplayedbeforeswitchingisheldsothatthatthenewimage
canbeswitchedtowithoutabreakduetoabsenceofasignal.
• Simultaneousdisplayof2images(PIP/PICTUREBYPICTURE)
Twoimagescanbeprojectedsimultaneouslywithasingleprojector.
Therearetwotypesoflayoutsforthetwoimages:“picture-in-picture”inwhichasub-pictureisdisplayedonthe
mainpicture,and“picture-by-picture”inwhichthemainandsubpicturesaredisplayednexttoeachother.
• Securityfunctionforpreventingunauthorizeduse
Thisprojectorisequippedwiththefollowingsecurityfunctions:
- Passwordsecurity:Whenapasswordissetintheon-screenmenu,ascreentoinputthepasswordappears
whentheprojector’spoweristurnedon.
- Theftpreventionlock:AsecuritycablecompatiblewithKensingtonlockscanbeconnectedtotheprojector.
- Securitybar:Theprojectorhasamechanismallowingaregularsecuritycable(orwire)tobeinstalled.
• Wired/wirelessLANcompatibility(wirelessLANunitsoldseparately)
TheprojectorisequippedwithaLANport(RJ-45)forconnectiontoawiredLANfortransferringimagesfroma
computertotheprojector,controllingtheprojectorfromacomputer,etc.
Furthermore,theprojectorcanbeusedinawirelessLANbymountingtheseparatelysoldwirelessLANunit
(NP02LM).
• Convenientutilitysoftware(UserSupportware)providedasstandard
Sevenutilitysoftwareprograms(VirtualRemoteTool,ImageExpressUtilityLite,ImageExpressUtility2.0,Desktop
ControlUtility1.0,PCControlUtilityPro4,ViewerPPTConverter3.0,ImageExpressUtility2forMac)areprovided
ontheincludedNECProjectorCD-ROM.
• LAN-compatibleviewerfunction
StillandmovingimagesinsharedfoldersonacomputerconnectedbywiredorwirelessLANcanbeprojected
withtheprojector’sviewer.
- TheviewersupportstheWindowsMediaPlayer11’s“mediasharing”function.
• CrestronRoomView®compatibility
TheprojectorsupportsCrestronRoomView®,allowingmultipledevicesconnectedinthenetworktobemanaged
andcontrolledfromacomputer.
About this user’s manual
Thefastestwaytogetstartedistotakeyourtimeanddoeverythingrightthersttime.Takeafewminutesnowto
reviewtheuser’smanual.Thismaysaveyoutimelateron.Atthebeginningofeachsectionofthemanualyou’llnd
anoverview.Ifthesectiondoesn’tapply,youcanskipit.

4
1. Introduction
Part Names of the Projector
Front/Top
Thelensissoldseparately.ThedescriptionbelowisforwhentheNP13ZLlensismounted.
Control Panel
(→page 6)
Lens Shift Dial (vertical/horizontal)
(→page 18)
Lens
Remote Sensor (located on the
front and the rear)
(→page 9)
Remote Sensor
(→page 9)
Zoom Lever/Zoom Ring
(→page 21)
Lens Cap
(The optional lens is shipped with
the lens cap.)
Focus Ring
(→page 19)
Adjustable Tilt Foot
(→page 21)
Indicator Section
(→page 6)
Lens Release Button
(→page 142)
Adjustable Tilt Foot
(→page 21)
Ventilation (outlet)
Heated air is exhausted from here.
Mountingthestraps
1. Mount the straps to the filter cover and lamp cover as shown on the diagram below.
2. Insert the knot in the strap into the hole on the bottom of the projector and pull in the direction of the arrow
to fasten.
12
Lamp Cover (→page 160)
Security Bar
Attach an anti-theft device.
The security bar accepts security
wires or chains up to 0.18 inch/4.6
mm in diameter.
Monaural Speaker (10 W)
Lamp cover strap insertion hole Filter cover strap insertion hole

5
1. Introduction
Terminal Panel
(→page 7)
Rear
Remote Sensor (located on the
front and the rear)
(→page 9)
AC Input
Connect the supplied power cord’s
three-pin plug here, and plug the
other end into an active wall outlet.
(→page 13)
* ThissecurityslotsupportstheMicroSaver®SecuritySystem.
Built-in Security Slot ( )*
Cable cover connection
(right and left)
Screw holes and grooves for the
optional cable cover
(→page 212)
Ventilation (inlet) / Filter Cover
The wireless LAN unit’s USB (LAN)
port is located inside here.
(→page 151, 155)
Ventilation (outlet)
Heated air is exhausted from here.

6
1. Introduction
Control Panel/Indicator Section
1. (POWER)Button(→page14, 25)
2. POWER Indicator (→page13, 14, 25, 214)
3. STATUSIndicator(→page214)
4. LAMPIndicator(→page159, 215)
5. TEMP.Indicator(→page215)
6. SOURCEButton(→page16)
7. AUTO ADJ. Button (→page24)
8. 3DREFORMButton(→page32)
9. MENU Button (→page82)
10./VolumeButtons (→page24)
11. ENTER Button (→page82)
12. EXIT Button (→page82)
1
11
9
10
12
678
2345

7
1. Introduction
Terminal Panel Features
1. COMPUTER1IN/ComponentInputConnector(MiniD-Sub15Pin)(→page13, 143, 148)
2. COMPUTER1AUDIOINMiniJack(StereoMini)(→page143, 148)
3. COMPUTER2IN/ComponentInputConnector(MiniD-Sub15Pin)(→page143, 148)
4. COMPUTER2AUDIOINMiniJack(StereoMini)(→page145)
5. COMPUTER3IN/Component(R/Cr,G/Y,B/Cb,H,V)Connectors(BNC×5)(→page143, 148)
6. COMPUTER3AUDIOINMiniJack(StereoMini)(→page143, 148)
7. HDMIINConnector(TypeA)(→page144, 145, 149)
8. DisplayPort IN Connector (→page144)
9. MONITOROUT(COMP.1)Connector(MiniD-Sub15Pin)(→page146)
10.AUDIOOUTMiniJack(StereoMini)(→page146)
11.S-VIDEOINConnector(MiniDIN4Pin)(→page147)
12.VIDEOINConnector(RCA)(→page147)
13.VIDEO/S-VIDEOAUDIOINL/MONO,R(RCA)(→page147)
14.LANPort(RJ-45)(→page150)
15.USBPort(TypeA)(→page60)
16.PCCONTROLPort(D-Sub9Pin)(→page219)
UsethisporttoconnectaPCorcontrolsystem.Thisenablesyoutocontroltheprojectorusingserialcommunica-
tionprotocol.Ifyouarewritingyourownprogram,typicalPCcontrolcodesareonpage219.
17.REMOTEConnector(StereoMini)
UsethisconnectorforwiredremotecontroloftheprojectorusingtheNECoptionalremotecontrol.
Connecttheprojectorandoptionalremotecontrolusingacommerciallyavailablewiredremotecontrolcable.
NOTE: When a remote control cable is connected to the REMOTE connector, infrared remote control operations cannot be
performed.
14 78 15 12 34
5109131211
16
17
6

8
1. Introduction
Part Names of the Remote Control
1. Infrared Transmitter
(→page9)
2. POWER ON Button
(→page14)
3. POWEROFFButton
(→page25)
4,5,6.COMPUTER1/2/3Button
(→page16)
7. AUTO ADJ. Button
(→page24)
8. VIDEOButton
(→page16)
9. S-VIDEOButton
(→page16)
10.HDMIButton(→page16)
11. DisplayPort Button (→page16)
12.VIEWERButton(→page16, 60)
13.NETWORKButton(→page16)
14.SOURCEButton(→page16)
15.PIPButton(→page16, 35)
16.IDSETButton(→page107)
17.NumericKeypadButton/CLEARButton
(→page107)
18. MENU Button (→page82)
19. EXIT Button (→page82)
20. Button (→page82)
21. ENTER Button (→page82)
22.L-CLICKButton*(→page31)
23.R-CLICKButton*(→page31)
24.VOLUME(+)(−)Button(→page24)
25.D-ZOOM(+)(−)Button(→page27)
26.PAGE/Button*(→page31)
27. PICTURE Button (→page91, 93)
28. ECO Button (→page28)
29. ASPECT Button (→page96)
30.AV-MUTEButton(→page27)
31.3DREFORMButton(→page32)
32.FREEZEButton(→page27)
33.SHUTTERButton
(notavailableonthisseriesofprojectors)
34.LENSSHIFTButton
(notavailableonthisseriesofprojectors)
35.FOCUS/ZOOMButton
(notavailableonthisseriesofprojectors)
36.HELPButton(→page112)
* ThePAGE/, ,L-CLICKandR-CLICKbuttonsworkonlywhenaUSBcableisconnectedwithyourcom-
puter..
1
3
5
4
8
9
12
13
2
6
7
11
10
15
14
17
16
18
22
24
25
27
28
21
19
20
23
26
29
30
33
34
32
31
36
35
Other manuals for PA500U Series
2
This manual suits for next models
3
Table of contents
Other NEC Projector manuals