www.nektartech.com Using Nektar Panorama P-Series with Bitwig Studio 19
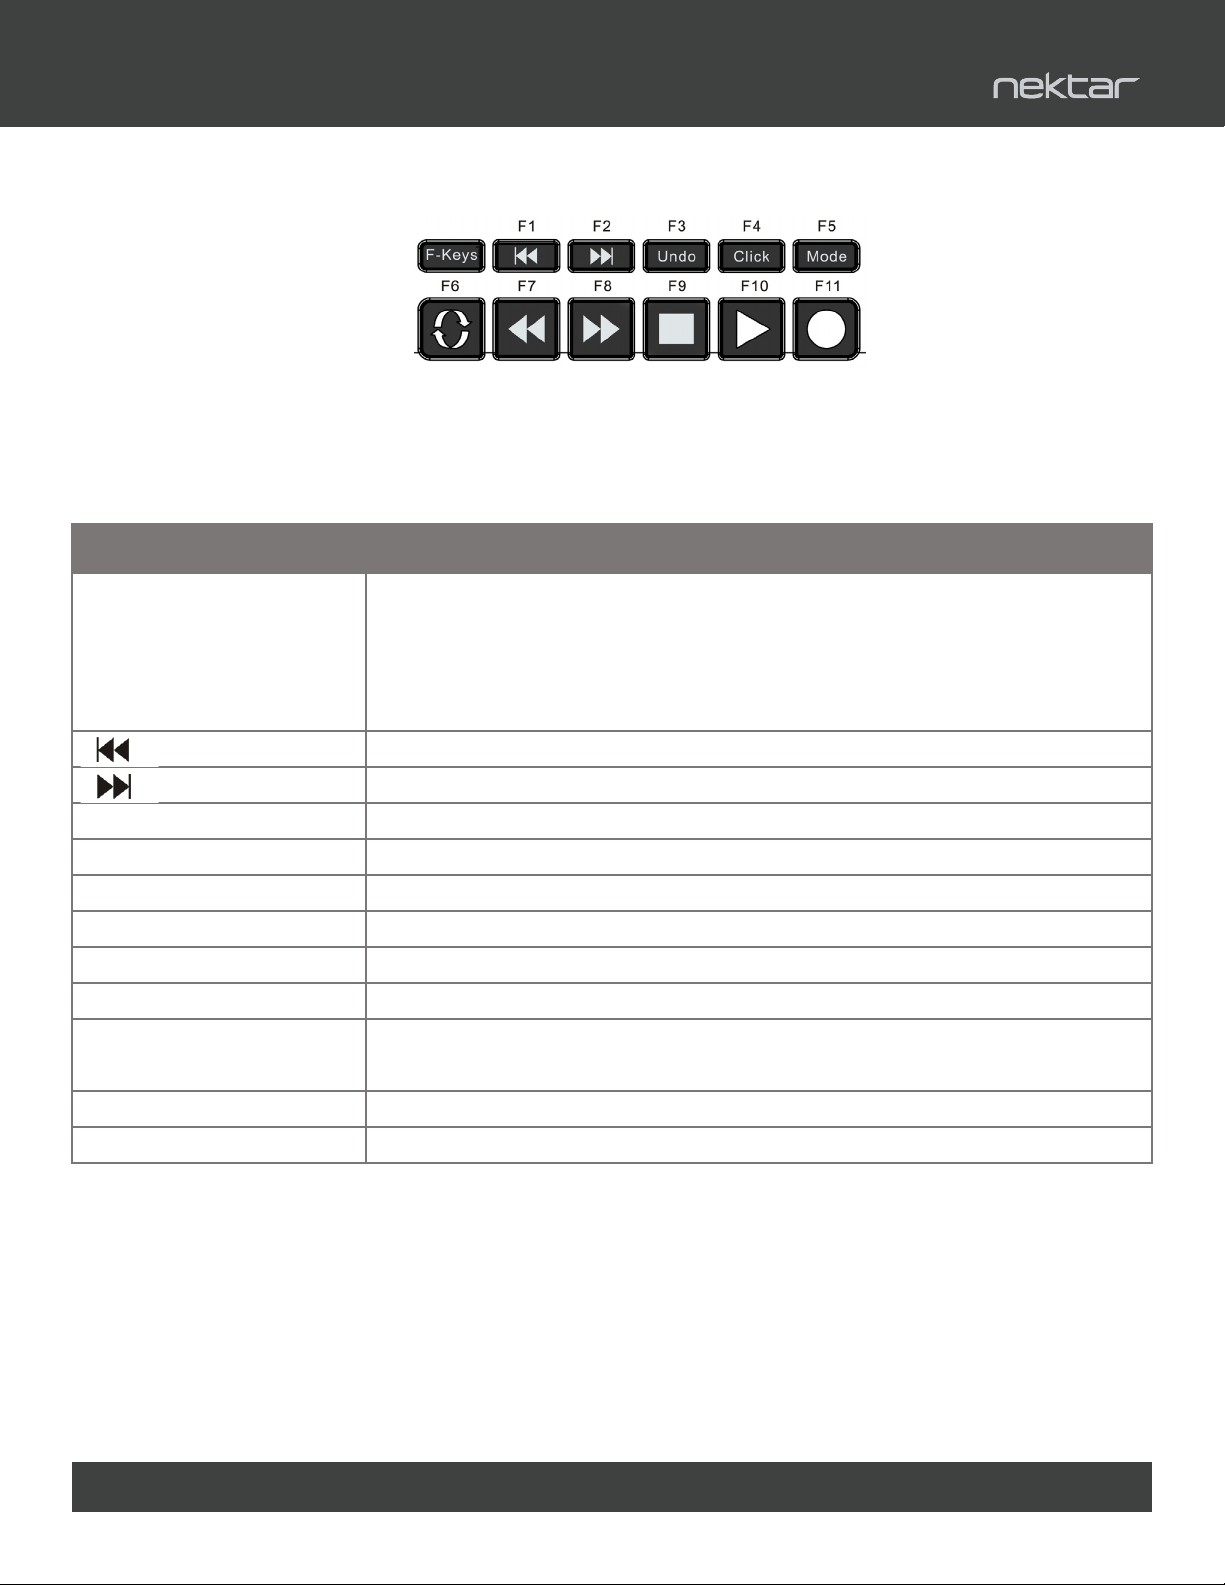
[F-Keys] Press and hold this button to use the transport buttons as F-keys. F-keys can be
used to trigger QWERTY macro’s to for example create tracks and trigger Bitwig
Studio functions. Note that QWERTY Macros are only supported in Windows.
F-Keys can be used to transmit standard MIDI messages.
Go to the Left Locator
Go to the Right Locator
[Shift]+ Sets the left loop point to current Play Start Position
[Shift]+ Sets the right loop point to current Play Start Position
[Mode] Toggles the arranger Overdub function on or o
Transport mode helps you to navigate and build up your song composition from Panorama. As explained
earlier, the transport buttons are available in any mode but the dedicated Transport Mode provides
access to extra tools that will make capturing ideas, beat creation and overdubbing easier.
Transport Home Page
Press the [Transport] button to enter Transport mode. Transport mode provides the visual feedback you
need to know where you are in your project. Below the info-bar the large font
readout shows the current Play Position which updates as you play the project.
Below the Play Position readout, you see the position of the Left and Right
locators. Here is how you set these location points:
• Move the Play Start Position to the location you want using the
[Forward] or [Rewind] transport buttons.
• Press [Shift]+[Goto L] to set the left location point or [Shift]+[Goto R] to
set the right location point.
The 8 boxes show what each of 2x4 rows of encoders are assigned to control:
The display buttons in addition control the following:
Write: Switch write automation on/o
Tap Tempo: Press this button repeatedly in a steady beat to set Bitwig Studio’s tempo
Punch: Activate Punch in and punch out
Groove: Activate the Groove parameters
Launcher: Activates the launcher menu (check next page for detail).
You can combine Transport Mode with the global navigation, transport and F-keys functions to great
eect. Use the F-keys to open Bitwig windows and menus for example, is an eective way to customize
your setup and navigate Bitwig.
Familiarity with the transport buttons and their secondary operations in addition will help you create a
faster workow. The transport buttons functionality is covered on page 3 but here is a summary of the
less obvious functions:
Transport Mode
14 Using Panorama with Bitwig Studio 2.0 www.nektartech.com
Transport Mode
Transport mode helps you to navigate and build up your song composition from Panorama. As explained earlier, the transport
buttons are available in any mode but the dedicated Transport Mode provides access to extra tools that will make capturing
ideas, beat creation and overdubbing easier.
Transport Home Page
Press the [Transport] button to enter Transport mode. Transport mode provides the visual feedback you need to know where
you are in your project. Below the info-bar the large font readout shows the current Play Position which updates as you play
the project.
Below the Play Position readout, you see the position of the Left and Right locators. Here is
how you set these location points:
• Move the Play Start Position to the location you want using the [Forward] or [Rewind]
transport buttons.
• Press [Shift]+[Goto L] to set the left location point or [Shift]+[Goto R] to set the right
location point.
The 8 boxes show what each of 2x4 rows of encoders are assigned to control:
The display buttons in addition control the following:
Write: Switch write automation on/off
Tap Tempo: Press this button repeatedly in a steady beat to set Bitwig Studio’s tempo
Punch: Activate Punch in and punch out
Groove: Activate the Groove parameters
Launcher: Activates the launcher menu (check next page for detail).
You can combine Transport Mode with the global navigation, transport and F-keys functions to great effect. Use the F-keys to
open Bitwig windows and menus for example, is an effective way to customize your setup and navigate Bitwig.
Familiarity with the transport buttons and their secondary operations in addition will help you create a faster workflow. The
transport buttons functionality is covered on page 3 but here is a summary of the less obvious functions:
Tempo Pre-Roll Shuffle Rate
Control the tempo of your Bit-
wig Studio song
Sets the Punch Out point
in Logic’s timeline
Adjusts the Shuffle
Amount
Sets the Shuffle Rate
Accent Rate Phase <Loop>
Sets the Accent Amount value Selects the Accent Rate Sets the Accent Phase Moves both the Left and Right
loop points forward or backward
Key Combination Description
[F-Keys] Press and hold this button to use the transport buttons as F-keys. F-keys can be used
[ ] Goto the Left loop point
[ ] Goto the Right loop point
[Shift]+[ ] Set Left loop point to the current song position
[Shift]+[ ] Set Right loop point to the current song position
[Mode] Toggle Overdub on/off
Key Combination Description
14 Using Panorama with Bitwig Studio 2.0 www.nektartech.com
Transport Mode
Transport mode helps you to navigate and build up your song composition from Panorama. As explained earlier, the transport
buttons are available in any mode but the dedicated Transport Mode provides access to extra tools that will make capturing
ideas, beat creation and overdubbing easier.
Transport Home Page
Press the [Transport] button to enter Transport mode. Transport mode provides the visual feedback you need to know where
you are in your project. Below the info-bar the large font readout shows the current Play Position which updates as you play
the project.
Below the Play Position readout, you see the position of the Left and Right locators. Here is
how you set these location points:
• Move the Play Start Position to the location you want using the [Forward] or [Rewind]
transport buttons.
• Press [Shift]+[Goto L] to set the left location point or [Shift]+[Goto R] to set the right
location point.
The 8 boxes show what each of 2x4 rows of encoders are assigned to control:
The display buttons in addition control the following:
Write: Switch write automation on/off
Tap Tempo: Press this button repeatedly in a steady beat to set Bitwig Studio’s tempo
Punch: Activate Punch in and punch out
Groove: Activate the Groove parameters
Launcher: Activates the launcher menu (check next page for detail).
You can combine Transport Mode with the global navigation, transport and F-keys functions to great effect. Use the F-keys to
open Bitwig windows and menus for example, is an effective way to customize your setup and navigate Bitwig.
Familiarity with the transport buttons and their secondary operations in addition will help you create a faster workflow. The
transport buttons functionality is covered on page 3 but here is a summary of the less obvious functions:
Tempo Pre-Roll Shuffle Rate
Control the tempo of your Bit-
wig Studio song
Sets the Punch Out point
in Logic’s timeline
Adjusts the Shuffle
Amount
Sets the Shuffle Rate
Accent Rate Phase <Loop>
Sets the Accent Amount value Selects the Accent Rate Sets the Accent Phase Moves both the Left and Right
loop points forward or backward
Key Combination Description
[F-Keys] Press and hold this button to use the transport buttons as F-keys. F-keys can be used
[ ] Goto the Left loop point
[ ] Goto the Right loop point
[Shift]+[ ] Set Left loop point to the current song position
[Shift]+[ ] Set Right loop point to the current song position
[Mode] Toggle Overdub on/off