Nektar Aura User manual

www.nektartech.com
www.nektartech.com
Owner’s Manual

2 Nektar Aura Owner‘s Manual www.nektartech.com
Table of Contents
Declaration of Conformity 3
Introduction 4
Box Content 4
Aura Features 4
Minimum System Requirements 5
Minimum System Requirements 5
Power 5
Connecting to a Windows/OSX Computer 5
Downloading Firmware, Nektarine and Nektar DAW Integration for Aura 5
Aura Functional Overview 6-7
Using Aura with Nektarine 8
Internal Mode: Load and Save Presets 9
Load a Preset 9
Quick-Load a Preset 9
Save a Preset 9
Rename a Preset 9
Internal Mode: Factory Preset List 10
MIDI Assign: Programming Pads & Controls 11
Selecting a Control for Programming 11
Programming Pads 11
Programming the Pad Pressure Component 12
Pad LED Color & Sensitivity [Pad Config] 12
Programming Switches 1-7, Foot Switch 1 & 2 12
Programming Pots R1-8 13
Global 14
Global MIDI Channel 14
MIDI Output Jack 14
LED Dim 14
Pad Velocity Settings 15
Repeat 16
[Repeat On] Button 16
Repeat Settings 16
Trigger Sync (Beat sync vs Key Sync) 17
Step Sequencer 18
Programming Patterns - The Quick Start Guide 18
Diving Deeper - Collection Settings 18
Collection, Patterns, Parts and Steps Explained 19
Programming Pattern Parameters 19
Programming Parts Parameters 19
Activating Parts for Playback 20
Programing Step Parameters 20
Programming Steps 20
Tying Steps Together 20
Programming Accents 20
Pattern/Part/Step Edit 21
Changing Velocity Values for Multiple Parts OR Steps, in One Move 21
Changing Velocity Values for Pattern, Parts AND Steps in One Move 21
Changing Patter/Part/Step Parameters Back to Higher Level Settings 22
Example: Revert to Use ‘Collection’ or ‘Pattern’ Setting 22
Example: Reset both Part and Pattern to Collection Setting 22
Example: Reset Part and Step Settings from Pattern Level 22
Step Sequencer: Collection Menu 23
Tempo 23
Time Signature 22
Perform 23
Save a Collection 23
Rename a Collection 24
Load a Collection 24
Step Sequencer Functions (Pads) 25
Sequencer Key Combination Table 26
Clock Source & MIDI Clock Explained 26
Firmware Updates and Factory Restore 27

www.nektartech.com Nektar Aura Owner‘s Manual 3
Declaration of Conformity
Europe
Aura has been tested to meet or exceed Emissions and Immunity requirements European Standards EN55032: 2012, EN 61000-3-3: 2013, EN 61000-3-2: 2006
+ A1: 2009 & A2: 2009 and EN55024: 2010. Aura is in conformity with the provisions of EMC Directive 2014/30/EU.
United States
Aura has been tested to comply with FCC regulations Part 15, SubPart B, Class B, test method ANSI C63.4: 2014.
Dispose of product securely, avoiding exposure to food sources and ground water. Only use the product in accordance with the instructions.
Note: This equipment has been tested and found to comply with the limits for a Class B digital device, pursuant to Part 15 of the FCC Rules. These limits are
designed to provide reasonable protection against harmful interference in a residential installation. This equipment generates, uses and can radiate radio fre-
quency energy and, if not installed and used in accordance with the instructions, may cause harmful interference to radio communications. However, there
is no guarantee that interference will not occur in a Particular installation. If this equipment does cause harmful interference to radio or television reception,
which can be determined by turning the equipment off and on, the user is encouraged to try to correct the interference by one or more of the following
measures:
• Reorient or relocate the receiving antenna.
• Increase the separation between the equipment and receiver.
• Connect the equipment into an outlet on a circuit different from that to which the receiver is connected.
• Consult the dealer or an experienced radio/TV technician for help.
Aura firmware, software and documentation is the property of Nektar Technology, Inc and subject to a License Agreement.
© 2020 Nektar Technology, Inc. All specifications subject to change without notice. Nektar is a trademark of Nektar Technology, Inc.
All rights reserved.

4 Nektar Aura Owner‘s Manual www.nektartech.com
A big thank you for buying Aura - the Nektarine Beat Composer. Aura is a great pad instrument developed with beat creation in mind. It fea-
tures a drum machine style step sequencer which allows you to program a pattern for every pad and trigger them at any time, in any com-
bination. Aura can be used in this way as part of a stand-alone MIDI system. Combined with the included Nektarine VST/VST3/AU and AAX
plugin, the Aura system in addition becomes a powerful plugin control system where you can combine sounds from your favorite plugins
with send and insert effects. With Aura hooked up to your DAW, Nektar DAW integration helps capture pad performances or Aura sequencer
for a complete beat composing experience. We designed Aura with the aim to make beat creation simpler, more transparent and most of all
fun. If Aura inspires you to create new and exciting grooves, we’ve succeeded in what we set out to achieve. Enjoy!.
Box Content
Your Aura box contains the following items:
• The Aura pad controller
• Printed Owner’s Manual
• A standard USB cable
Note: Aura is fully powered via USB so any additional power supply is optional and not included.
Aura Main Features
• 16 velocity and pressure sensitive RGB illuminated pads
• TFT color display
• 8 rotary 360 pots
• 16 RGB LED illuminated buttons
• 27 dual color LED illuminated buttons
• 4 display buttons
• USB Type B socket. USB powered and class compliant (no driver needed).
• 1/4” TRS Footswitch jack for connection of up to 2 foot switch pedals with an optional Y-cable. (Y-cable not included).
• MIDI output, can be used as a USB MIDI interface, for direct MIDI connection or both at the same time.
• DC 9V / 600mA, center positive power supply socket (PSU not included).
• Power on/off switch.
• 16 Presets store pad configurations and MIDI assignments for pots and switches.
• 16 Pattern drum machine style Step Sequencer with 4 Parts each with 16 Steps per Part.
• 16 Collections store Sequencer setups of 16 Patterns each.
• Sequencer parameters programmable down to Step level .
• Pad Repeat feature.
• MIDI Clock sync.
• Nektarine Integration*.
• Nektar DAW Integration*.
* Nektarine and Nektar DAW Integration is included with Aura as a download following product registration. See page 5.
Introduction

www.nektartech.com Nektar Aura Owner‘s Manual 5
Introduction
Minimum System Requirements
Aura: USB Class Compliant (no driver needed) works with Windows XP, Vista, 7, 8, 10 or higher. Mac OS X 10.5 or higher, Linux (Ubuntu).
Nektarine software/plugin: Windows 7, 8, 10 or higher. Mac OS X 10.7 or higher.
Nektar DAW Integration: Windows 7, 8, 10 or higher. Mac OS X 10.7 or higher. Check Nektar DAW Integration documentation or
marketing information for support of legacy DAW versions.
Power
Aura is completely powered when connected via USB to a computer, powered USB hub or even a USB charger.
You can also connect a power supply that meets the spec: 9V / 600mA, center positive, 2.1mm barrel connector (PSU optional, not includ-
ed).
Connecting to a Windows/macOS Computer
Aura is USB Class Compliant. That means there is no driver to install - it just needs to be plugged in. Aura uses the built-in Class Compliant
USB MIDI driver which is already Part of Windows and macOS.
The first Steps are simple:
• Locate the included USB cable and plug one end into your computer and the other into Aura’s USB socket on the rear panel.
• If you want to connect a footswitch, plug it into the 1/4” jack socket labeled “FOOT SWITCH“, on the back of Aura.
Aura will automatically detect the polarity of the footswitch. Using a Y-splitter (not included) or insert cables, you can connect 2 foot
switches to the same socket.
• Set the power switch on the back of the unit to it’s On position.
Your computer will now spend a few moments identifying Aura and subsequently you will be able to set it up with your DAW.
Downloading Nektarine and Nektar DAW Integration for Aura
If you are a new Nektar user, start by creating a Nektar user account here:
www.nektartech.com/registration
If you already have a Nektar account, go to our website and click the MY ACCOUNT tab to log in.
• Next register Aura by entering your unit’s serial number in the field under the “Register New Product” headline (note, products cannot
be registered from a phone). Your Aura’s serial number can be found on the bottom of the unit.
• Select your DAW and OS, then submit. If you don’t use a DAW, select ‘Not Using a DAW’.
• Download options for the selected DAWs can be found under the image of Aura, following registration.
IMPORTANT: Make sure to read the installation instructions in the PDF guide, included in the downloaded package, to ensure you don’t
miss an important Step.
Additional Online Documentation
Online articles provide supplementary and use-case information .
Go directly to the following URL: www.nektartech.com/aura-support

6 Nektar Aura Owner‘s Manual www.nektartech.com
Aura Functional Overview
1[R1-8] Eight 360 Degree Rotary Analog Pots
Extensively used throughout Aura’s modes controlling Internal, Sequencer, DAW and Nektarine mode parameters.
2[S1-16] Sixteen RGB Illuminated Buttons
Multi-purpose buttons mainly used for Step programming in Sequencer mode, Sequencer Pattern triggering in Internal mode
and Solo/Mute in Nektarine Mixer mode.
3[Part 1-4] / [Arrow Left/Right/Up Down] Buttons
The 4 buttons are referred to as both Part and Arrow buttons in the documentation as they have 2 dierent functions. When
Sequencer mode is selected they operate as Part 1-4 buttons and at other times they are used as Arrow buttons.
4[Pad 1-16]
Sixteen velocity and pressure sensitive pads. All pads are illuminated by an RGB LED with 16 color choices.
5[Repeat On]
Activates/deactivates the Repeat function. The button can be switched to either momentary or latch in the Repeat menu.
6Nektarine Mode Buttons
Select Nektarine modes Mixer, Pad Setup, Plugin, FX1, FX2, Solo, Mute and Browse. The buttons are not in use unless
Nektarine is connected.
7Transport Buttons
Seven transport buttons used for Nektar DAW integration transport control. Can be assigned to send MIDI messages or
control the Sequencer when Nektar DAW Integration is not present.
8[Shift] Button
Shift adds alternative operation to many buttons and is referenced throughout the documentation.
1
2
4
5
6
7
9
3
10
11
8

www.nektartech.com Nektar Aura Owner‘s Manual 7
9[Internal], [Lock], [Menu], [Seq], [Repeat] and [DAW] Buttons
The 4 buttons [Internal], [Seq], [Repeat] and [DAW] are mode buttons. [DAW] is only available when Nektar DAW Integration
is running. [Menu] is active when applicable to current mode selection and [Lock] is only used with Nektarine.
10 Display buttons
Four contextural buttons operate as indicated by the display labels above.
11 TFT Color Display
12 Power On/O
13 Power Supply Socket
9V / 600mA, center positive, 2.1mm barrel connector (PSU optional and not included).
14 USB Connector
Connect to USB host/computer. Aura is powered via USB.
15 Footswitch sockets 1/2
A TRS 1/4” jack socket allows connection of up to 2 external footswitch pedals.
16 MIDI Din Output Jack
Connect external MIDI equipment or use as a USB MIDI Out interface.
17 Kensington Lock
121314151617

8 Nektar Aura Owner‘s Manual www.nektartech.com
Aura can be used as a generic MIDI pad controller or with the included Nektarine plugin and stand-alone software. When Aura is used with
Nektarine, most of the Internal mode features covered from page 9 to 13 are not needed because Nektarine handles the setup of pads
and control mapping. Having said that, you can use Internal mode Presets while Nektarine is running by pressing the [Internal] button and
also on tracks in your DAW that do not host Nektarine. The pads will reconfigure to the current Preset settings when you press the display
button [MIDI Assign] .
When Nektarine is used with Aura the sections of this manual, that are directly relevant, are:
• Global - LED Dim settings page 14
• Global - Pad Velocity Settings page 14-15
• Repeat page 16-17
• Step Sequencer page 18-26
The separate PDF guide that covers how Aura and Nektarine work together, can be located in the downloaded Nektarine package.
To get started with the process of downloading Nektarine, go back to page 5 and read the section called ‘Downloading Nektarine and
Nektar DAW Integration for Aura’.
Using Aura with Nektarine

www.nektartech.com Nektar Aura Owner‘s Manual 9
Internal mode allows Aura’s pads and controls to be programmed to send MIDI messages and store the settings in any of the 16 Presets,
for use with any MIDI product. Select Internal mode by pressing the [Internal] mode button.
[Load] a Preset
Aura automatically loads the ‘GM Drum Kit’ Preset at first boot up. The Preset assigns the pads to GM (General MIDI) drum notes which
means it’s instantly compatible with other products that support the GM standard. Here are the Steps to scroll through and load any of the
other factory Presets:
• Press and hold the display button [Load]
• Move the [R1] pot while still holding [Load] to scroll through all 16 Presets.
• Locate the Preset you are looking for and release [Load].
• Press the display button [Enter] to load or [Exit] to cancel.
Quick-Load a Preset
The 16 pads can also be used to quickly load any of the 16 Presets.
• Press and hold the display button [Load], then strike a [pad 1-16] corresponding to the Preset number you want to load.
[Save] a Preset
Once modifications have been made to a Preset (covered on page 11), it can be saved to any of the 16 Preset locations.
• Press and hold the display button [Save]
• Move the [R1] pot while continuing to hold [Save] to scroll through the 16 Presets.
• Locate the Preset location you want to save to and release [Save].
• Press [Rename] to change the name of the Preset before saving (see the next section for details)
• Press display button [Enter] to save or [Exit] to cancel.
[Rename] a Preset
Renaming a Preset can only be done at the point of saving. After completing the first 4 Steps as described in the section ‘Save a Preset’, the
rename menu presents the following options:
• [R1] scroll through characters such as letters from A-Z
• [<] go to previous character in the Preset name
• [>] go to next character in the Preset name
• [A] toggle character options including upper case, lower case, numerical and symbol.
Use the above buttons to rename the Preset before saving it. Then press the display button [<Back] to return to the Save menu.
Complete the last Step as described in the ‘Save a Preset’ section to preserve the Preset name change.
Internal Mode: Load and Save Presets

10 Nektar Aura Owner‘s Manual www.nektartech.com
Aura’s factory Presets are examples of how the pads can be programmed for different usage. The Presets are not likely to cover all needs
but could be a good starting point for your own Presets or give you an idea of how to get the most out of the pads.
The 8 pots are all assigned to GM instrument controls so GM instruments will respond immediately.
The list below provides an overview and explanation of each of the factory Presets.
Preset Preset Name Description
1 GM Drum Kit GM drum mapping is used by many drum modules and plugins. This Preset color codes the
mapped pads and notes are sent to the following instruments: Blue=Kick, Orange=Snare, Amber=
Rim Shot, Green=HiHat (pedal, closed, open), Purple=Toms (hi,hi mid, low mid, low), Teal= Crash,
Cymbal Lime=Ride Cymbal.
2 GM Percussion GM Percussion sounds are mapped with the following color coding: Magenta=Bongo, Yellow=Vi-
braslap, Blue2=Bongo, Light Green=Agogo, Red2=Wood Block, Red=Timbale, Amber=Cabasa/Ma-
racas, Teal=Crash Cymbal, Lime=Ride Cymbal
3 GM Drums & Perc A blend of GM Drums & Percussion.
4 I-map Std Some drum plugins follow the I-map drum layout because it’s expanded with more instrument
options. The standard mapping is mapped with this color coding: Blue2=Soft Kick, Blue=Hard Kick,
Amber=Snare Roll/Ghost, Orange=Snare, Light Green=Hi Hat, Green=HiHat Open, Purple=Toms,
Teal=Crash.
5 I-map Ext KD/SD This Preset is for I-map layouts with extended Kick and Snare drum options: Blue2=Soft Kick,
Blue=Hard Kick, Orange=Snare, Amber=Snare articulations, Light Green=Hi Hat, Green=HiHat
Open.
6 Chromatic 1 Chromatic scale programmed from C3-Eb3. Red pad=C (root).
7 Chromatic 2 Chromatic scale programmed from C4- Eb5. Red pad=C (root).
8 Major Scale 1 C-major scale programmed from C1-D3. Red pad=C (root).
Pressure sends Channel AfterTouch.
9 Major Scale 2 C-major scale programmed from C3-D5. Red pad=C (root).
Pressure sends Channel AfterTouch.
10 Major Scale 3 C-major scale programmed from C5-D7. Red pad=C (root).
Pressure sends Channel AfterTouch.
11 C-F-G-Am Each row of pads are programmed to send notes to construct a chord. C Major Red=C3/E3/G3/C4,
F Major Green= F3/A3/C4/F4, G Major Blue=G2/B2/D3/G3, A Minor Yellow=A2/C3/E3/A3.
Pressure sends Poly AfterTouch.
12 Am-C-Dm-Em Each row of pads are programmed to send notes to construct a chord. A Minor Yellow=A2/C3/E3/
A3, C Major Red= C3/E3/G3/C4, D Minor Teal=D3/F3/A3/D4, E Minor Purple=E3/G3/B3/E4.
Pressure sends Poly AfterTouch.
13 Pressure Volume Pressure sends MIDI cc 7 (volume) with MIDI channel set to 1-16 corresponding with the pad
number.
14 Pressure Filter Pressure sends MIDI cc 74 (Brightness/cutoff) with MIDI channel set to 1-16 corresponding with
the pad number.
15 Empty -
16 Empty -
Internal Mode: Factory Preset List

www.nektartech.com Nektar Aura Owner‘s Manual 11
Aura’s pads can be programmed to send any MIDI note. You can also add expressiveness to your performance by assigning the pads’
pressure component to a continuous MIDI message, such as Pitchbend, AfterTouch or any MIDI CC. And, if you want to split the pads
between several different MIDI devices or targets, you can assign each pad to a specific MIDI channel.
Aura’s Pads, pots and buttons are programmed in the MIDI ASSIGN menu. Press [MIDI Assign] to get started.
Selecting a Control for Programming
To change a control’s assignment, it first needs to be selected.
• Pads 1-16, switch 1-7, FS 1+2: Press to select
• Pots R1-8: Press and hold display button [Pot Select] + move [R1-8]
Programming Pads
Tap any pad to select it. The MIDI Assign menu then shows the following parameters:
Range: C-2 : G8 Global, 1:16 None, Trigger, Toggle Decimal/Hex
Note Channel Note Message Data Entry
See table1 See table1 See table1 See table1
Pressure Data 1 Data 2 Data 3
The 8 pots [R1-8] change the parameters displayed.
Use the first 3 pots to change the MIDI note assigned to the selected pad:
• Set [R3 - Note Message] to either Trigger, or Toggle.
Trigger: Plays the note while the pad is held. The note will stop playing when the pad is released.
Toggle: Plays the note at first strike and continues playing when the pad is released. The second press stops the note playing.
None: The pad is not assigned to play a note. Make sure [R3 - Note Message] is set to ‘Trigger’ or ‘Toggle’ for this example.
• Use [R1 - Note] to select the desired note. Play the selected pad to verify the change.
• If needed, change the MIDI channel using [R2]. If Channel is set to Global, the Global MIDI channel (set in the Global menu) will be
used.
MIDI Assign: Setting the Pad Note Message

12 Nektar Aura Owner‘s Manual www.nektartech.com
Programming the Pad Pressure Component
Use [R5 - Pressure] to select the assignment type for the pads pressure component. The table below lists the options and what parameters
[R6-8] can adjust for each type. Note that knowledge of which messages a receiving MIDI device can respond to is essential to get the right
result. Consult your receiving MIDI device’s user guide to obtain that information.
The ‘Min’ value represents the value sent when pressure on the pad is released. The ‘Max’ value is the value sent out when maximum
pressure is applied. The values sent will gradually increase towards the ‘Max’ value as more pressure is applied to the pad and decrease to
‘Min’ as the pressure is gradually reduced.
If the ‘Max’ value is set lower than ‘Min’, values decrease as more pressure is applied and increase as the pressure is reduced. This concept
works Particularly well with pitchbend - set MIN to value 64 (which means no pitchbend) and then set max to either 0 to decrease pitch
with pressure, or 127 to increase pitch with pressure.
Type Options for Pad Pressure Data 1 Data 2 Data 3
MIDI CC MIDI CC (0-127) Max (0-127) Min (0-127)
Pitch Bend n/a Max (0-127) Min (0-127)
Poly AT (AfterTouch) n/a Max (0-127) Min (0-127)
Channel AT (AfterTouch) n/a Max (0-127) Min (0-127)
NRPNc (Coarse) Value (0-127) MSB (0-127) LSB (0-127)
NRPNf (Fine) Value (0-127) MSB (0-127) LSB (0-127)
ToggleC (NRPN Coarse Toggle) Value (0-127) MSB (0-127) LSB (0-127)
ToggleF (NRPN Fine Toggle) Value (0-127) MSB (0-127) LSB (0-127)
StepC (NRPN Coarse Step) Value (0-127) MSB (0-127) LSB (0-127)
StepF (NRPN Fine Step) Value (0-127) MSB (0-127) LSB (0-127)
Fixed Velocity n/a Max (0-127) Min (0-127)
O n/a n/a n/a
Pad LED Color & Sensitivity [Pad Config]
Press [Pad Config] to set the RGB color and strike sensitivity for the currently selected pad.
• Move [R1 - Color] to select any of the 16 pad colors. The pad LED updates in realtime as you turn the pot.
• Move [R4 - Pad Sensitivity] to adjust the pads strike sensitivity.
* 0 is the default factory setting.
* Negative values lower the pad’s sensitive threshold.
* Positive values raises the pad’s sensitive threshold.
If one pad is not as sensitive to play as other pads, try reducing the Pad Sensitivity value. Equally, if a pad is triggering too easily or even
constantly, try raising the Pad Sensitivity value.
Programming Switches 1-7 and Footswiches 1&2
Press [MIDI Assign] again to assign any of the switches 1-7 and/or Footswitch 1/2.
When a switch is selected, the MIDI Assign display looks like the table below:
Range: C-2 : G8 Global, 1:16 Decimal/Hex
Message Type Channel n/a Data Entry
See table1 See table1 See table1
n/a Data 1 Data 2 Data 3
MIDI Assign: Pad Pressure, LED Color and Sensitivity

www.nektartech.com Nektar Aura Owner‘s Manual 13
Type Options for Switches Data 1 Data 2 Data 3
MIDI CC MIDI CC (0-127) Press (0-127) Release (0-127)
Pitch Bend n/a Press (0-127) Release (0-127)
Fixed Velocity n/a n/a n/a
Note Note (0-127) Velocity (0-127) Release Vel (0-127)
Note Toggle Note (0-127) Press 1 Vel (0-127) Press 2 Vel (0-127)
Program & Bank Program (0-127) Bank LSB (0-127) Bank MSB (0-127)
Program Step n/a Start (0-127) End (0-127)
MIDI CC Tog MIDI CC (0-127) Press 1 (0-127) Press 2 (0-127)
MIDI CC Stp MIDI CC (0-127) Start (0-127) Stop (0-127)
ToggleC NRPN Coarse Value (0-127) LSB (0-127) MSB (0-127)
ToggleF NRPN Fine Value (0-127) LSB (0-127) MSB (0-127)
StepC NRPN Coarse Value (0-127) LSB (0-127) MSB (0-127)
StepF NRPN Coarse Value (0-127) LSB (0-127) MSB (0-127)
MIDI Machine Control Device ID (0-127) Command (0-127) n/a
O n/a n/a n/a
Play
Stop
Repeat
Programming Pots R1-8
With [MIDI Assign] selected, press and hold the display button [Pot Select] while moving any of [R 1-8]. This will select the pot for editing.
The display updates with parameters as illustrated below. When [R1] is moved, the message type changes which in turn also updates the
parameters for [R6-8]. Table 2 lists the message type options and their associated parameters.
Range: see table 1 Global, 1:16 Decimal/Hex
Message Type Channel n/a Data Entry
See table1 See table1 See table1
n/a Data 1 Data 2 Data 3
Type Options for Pots R1-8 Data 1 Data 2 Data 3
MIDI CC MIDI CC (0-127) Max (0-127) Min (0-127)
Pitch Bend n/a Max (0-127) Min (0-127)
Chan Pressure n/a Max (0-127) Min (0-127)
NRPNc Coarse Value (0-127) LSB (0-127) MSB (0-127)
NRPNf Fine Value (0-127) LSB (0-127) MSB (0-127)
Fixed Velocity Max (0-127) Min (0-127)
Program Program (0-127) Max (0-127) Min (0-127)
MIDI CC Rel MIDI CC (0-127) n/a n/a
O n/a n/a n/a
Example: The message type MIDI cc is selected. Moving [R6 - MIDI cc] now adjusts the MIDI cc number and [R7-8] adjusts the Maximum
and Minimum value range that the control will send. For most applications the value range will be set to the default max=127 and Min=0.
MIDI Assign: Programming Pots R1-8

14 Nektar Aura Owner‘s Manual www.nektartech.com
Global MIDI Channel [R1]
Aura’s controls and pads send their messages on a MIDI channel from 1 to 16. The Internal mode Presets are assigned to the Global MIDI
channel, except for Presets 13 & 14. Changing the Global MIDI channel will therefore aect Presets 1-12.
To change the Global MIDI channel do the following:
• Press the [Internal] button. The LED button is illuminated blue to indicate
setup is active.
• Press the display button labelled [Global]
• Move [R1 - Global Ch] to change the global MIDI channel from 1-16.
MIDI Out [R2]
The MIDI Out jack can be used to send MIDI messages directly from Aura, indirectly
when used as a USB MIDI interface or both at the same time.
Internal (Default): All MIDI messages are sent to the MIDI Output Jack on the rear.
USB: MIDI messages sent from software to Aura’s MIDI USB Port 1 output is sent to the MIDI out jack on the rear.
Merge: Both internal and USB MIDI messages are sent to the MIDI out jack on the rear.
By default, the MIDI Out jack is set to Internal. To change the setting do the following:
• Press the [Internal] button. The LED button is illuminated blue to indicate setup is active.
• Press the display button labelled [Global]
• Move [R2 - MIDI Out] and select either Internal, USB or Merge.
LED Dim
Dim LED colors are used by Aura to indicate a status for [S1-16] and [Pads 1-16].
For example, in the Sequencer menu, the [S1-16] buttons represent the Steps in a Part. Steps that are not programmed to play and within
the ‘Last Step’ range, will be dim.
Pads representing Patterns that are active/not playing (for example when you press [stop] to pause playback) are also dim.
Depending on conditions, you may want to adjust the illumination of the dim LEDs:
• Press the [Internal] button. The LED button is illuminated blue to indicate that setup is active.
• Press the display button labelled [Global]
• Move [R3 - Led Dim] and select a value between 1-10. The factory default setting is 5.
Global

www.nektartech.com Nektar Aura Owner‘s Manual 15
Pad Velocity Settings
Aura does not have a traditional selection of xed pad curves but instead provides parameters so that a curve can be more precisely tailored
to dierent playing styles.
The Global menu has 4 dierent Pad Curve options and as they are selected, the parameters for [R5-6] change according to the below table.
Pad Curve [R5] Parameter [R6] Max Pressure [R7] Description
Fixed Value n/a [R6] selects the xed velocity value sent by all 16 pads.
Dynamic Output at 3100 Max Pressure 3100 is at a medium strike point. The value set by [R6] is the velocity
value that’s sent at that point. The rest of the curve dynamically adapts to
that point.
Curve Bias Max Pressure Bias sets the slant of the curve. At 100% the curve is linear. Values above
100% create an exponential curve and values below result in a
logarithmic curve. See graph below.
Step Number of Steps Max Pressure Creates a tiered velocity response. Select the number of Steps you want
using [R6].
The parameter ‘Max Pressure’ denes how early maximum velocity value is reached.
Lowering ‘Max Pressure’ reduces the force required to reach the maximum velocity value of 127.
Increasing ‘Max Pressure’ extends the range over which the pads respond which may provide a more precise respnse.
Curve Graph
VELOCITY
Global
Bias set to 100% creates a linear velocity response.
Bias set above 100% creates a logarithmic velocity response
with more emphasis on the higher velocity values.
Bias set above100% creates an exponential velocity response
with more emphasis on the lower velocity values.
BIAS

16 Nektar Aura Owner‘s Manual www.nektartech.com
Aura’s Repeat feature can be used to add a steady beat, rolls/flams to your own pad performance or allow you to create note arrays that
otherwise can be difficult to play. Repeated notes are sent via MIDI. This means you can use Repeat with external MIDI equipment or
record repeated notes in your DAW.
[Repeat On] Button
To activate/deactivate Repeat, press the dedicated [Repeat On] button when striking and holding a pad.
By default the button is set to momentary which means Repeat is only on while the button is held but it can also be set to latching as
described in the section about Repeat Settings. Press and hold [Repeat On] and notice how the notes are repeated.
Repeat Settings
Press the [Repeat] mode button to select the Repeat menu. The display now shows
the Repeat parameter assigned to [R1-8].
Repeat parameters are adjustable in realtime so in many cases they can also be
used as performance parameters.
The display updates to show the parameters as listed in the table below.
R1-8 Function Range Description
Tempo 30-240 BPM Sets the tempo when Clock Source is set to ‘Internal’. If Clock Source is set to ‘MIDI Clock’, the
tempo value reads ‘External’ and can only be changed when Clock Source is set to ‘Internal’ again
Gate 1%-99% The Gate value determines how long a note is playing as a percentage of the Repeat rate. The
default value is 50% which means that if Repeat Rate is set to 1/4, the note will play for the
duration of 1/8. Set to 99% if you want the length to match the Repeat Rate.
Accent Oset -50 to +50 Osets the velocity of accent notes by the value selected. To hear an accent when notes are
repeated, the Accent Oset parameter needs to be set to a value other than 0.
An accent will play up to 50 velocity values higher than the originally played velocity value, if
positive and up to 50 values below, when negative.
Accent Interval 2-16 With a minimum setting of 2, every other note repeated will play at the velocity originally played
+/- the Accent Oset value. For example, a setting of 9 means every 9th note will be played with
the accent oset value, etc.
Adjusting the interval in realtime can be a very eective performance tool so don’t hesitate to ex-
periment with settings. To repeat notes without an accent playing, set the Accent Oset value to 0.
Repeat Rate 1/4, 1/8,
1/16,1/32, 1/64,
1/96
Choose the rate notes are repeated at. Options are 1/4, 1/8, 1/16, 1/32, 1/64,1/96.
[S1-6] RGB buttons can also be used to select the Repeat Rate and oer a more direct option, ideal
for realtime performance changes.
The [T] button changes the Repeat Rate value to triplets.
Swing -49% to + 49% By default the swing value is 0% which means that swing is o.
Changing to values < 0% will move every second note closer to the preceding note and setting the
value > 0% will move it further away from the preceding note.
Set the value to 0% when you want it o.
Trigger Sync Beat 8, Beat 16,
Key 1, Key 2
See further details in the Trigger Sync section on the following page
Clock Source Internal, MIDI
Clock, Auto
See further details in the Clock Source section on page 26.
Repeat

www.nektartech.com Nektar Aura Owner‘s Manual 17
The 4 display buttons do the following:
Display buttons
1-4 Function
Description
Latch When on, this setting changes the [Repeat On] button behavior to latch which means Repeat is on, until the
button is pressed again. When Repeat is active, the [Repeat On] LED is blue.
Pres>Vel Assigns the pads pressure to control velocity.
TChanges the Repeat rates to triplet values. The options are now 1/6, 1/12, 1/24, 1/48, 1/80, 1/96
Tap Tempo Tap the button to change tempo when Clock Source is set to Internal.
Trigger Sync
It may not be immediately obvious why multiple trigger sync options are needed, but it becomes clearer as the Repeat feature is used for
different purposes.
Beat 8/12/16
The default Trigger Sync setting is ‘Beat 8’ because it ensures tight synchronization to every 1/8 note value, when multiple pads are
pressed at the same time with Repeat active.
With the Repeat Rate set to 1/4, you can be sure that every pad plays exactly the same beat, if they are triggered the same time.
Striking a second pad 1/8 after the first pad will result in both pads playing alternating 1/4 notes.
Choosing Trigger Sync setting ‘Beat 16’ does essentially the same thing but now Repeat notes are synchronized to every 1/16 note value
which gives more options for offsetting the triggering of the second pad (or more pads for that matter) in relation to the first pad but
therefore also greater margin for error.
If [T] is active, Beat sync is set to ‘Beat 12’.
Key 1 & 2
Beat sync is great when you just want to strike pads and let Repeat do the job of repeating notes.
If you prefer to play your own groove and add Repeat notes now and then, you’ll realize that a different approach is needed. With Repeat
active, and Trigger Sync set to ‘Beat 8’, try playing a beat manually on the pad. You’ll notice that not all the pads trigger a note because the
‘Beat 8’ setting triggers it on the next 1/8 beat rather than exactly when the pad is hit.
Change the Trigger Sync setting to ‘Key 1 Sync’ to fix this. Playing your own groove on the pads while Repeat is active, now works
as expected. That’s because each note now plays from point of striking the pad and notes are repeated from that point forward. It
also means that notes are not synced relative to each other as was the case with ‘Beat 8’ but that can result in some very interesting repeat
performances as well as of course complete mayhem.
The ‘Key 2’ play repeats the first note from point of striking the pad but once notes are repeated, any subsequent pads will trigger repeat
notes in time with the first pad held.
Repeat

18 Nektar Aura Owner‘s Manual www.nektartech.com
Aura‘s Step Sequencer is intended as a scratchpad sequencer with a hands-on user interface that enables immediate changes for both
composing and performing. MIDI notes can be sent to external MIDI equipment or recorded in a DAW for further editing.
To get the most out of the Sequencer, it is important to understand its structure. Having said that, you may be itching to get started so
here is a very brief guide to programming your first Patterns.
Programming Patterns - The Quick Start Guide
The Aura Step Sequencer can play up to 16 Patterns at the same time.
1. Press the [Run/Stop] display button to activate playback of all 16 Patterns.
2. Press a pad to select the Pattern for programming. The 16 RGB buttons are now illuminated in the color of the selected Pattern and a
white play head indicates which Step is currently playing.
3. Press the [S1-16] RGB buttons to program Steps in the Pattern (you are programming 1 of 4 Parts in the Pattern, but more about that
later). Each Step currently represents a 1/16 note. The Pattern now plays the note the corresponding pad is assigned to play (either in
Internal mode or via Nektarine).
4. Repeat Steps 2-3, selecting new Patterns by striking [Pads 1-16] and program each of them to build up a beat.
5. Press [Shift]+[Pad 1-16] to stop playback of a playing Pattern or activate playback of a Pattern that’s currently not playing. The LED of a
non-playing Pattern is off.
6. Press [Run/Stop] to stop playback at any time.
If the Sequencer is running but no sound is heard, press [Internal] and play the pads to check that they are triggering sound in a plugin or
external MIDI hardware. If the pads don‘t trigger sound, go back to read about how to set up your pads or check your sound source.
Diving Deeper - Collection Settings
Using the Patterns created in the previous section, let’s now try some of the
realtime parameters.
1. Activate playback again by pressing [Run/Stop].
2. Press [SEQ] to select the Collection setup page.
3. With the Sequencer playing, adjust the top row parameters, using [R1-4].
Below, you‘ll find a description of each parameter:
Play Rate: Sets the Step play value of all Patterns. Changing it results in playing your Patterns slower or faster.
Velocity: Changes the velocity Steps are played at.
Gate/Length: Changes the duration of each Step (you won‘t hear a change if the sounds triggered have long release).
Last Step: Sets which Step should be the last one played.
The Collection level is the highest tier that parameters can be set. By default they therefore affect all Patterns. The same settings can be
set individually per Pattern, per Part and in the case of the first 3 parameters, even per Step. The setting at the lowest level is always taking
precedence over higher level settings.
For example, if you change the play rate for 4 Steps out of 16 in a Part, changing the play rate at the Collection, Pattern or Part level will not
affect those 4 Steps, but will affect the other 12 Steps.
Step Sequencer: Quick Start Guide

www.nektartech.com Nektar Aura Owner‘s Manual 19
Collection, Pattern, Parts and Steps Explained
A single Collection consists of Patterns, Parts and Steps. Some parameters can be programmed at every level so settings can be 4 levels
deep. A parameter set at a lower level overrules the setting for this parameter, set at a higher level. The factory default only contains
settings at the Collection level so changing Collection level parameters affects all Patterns. If a parameter is subsequently changed at the
Pattern level, the Collection level parameter setting no longer affects that Pattern (but will affect other Patterns in a Collection that have
not been changed).
Level Contains Description
Collection 16 Patterns Collection settings aect all Patterns unless parameters are set at lower levels. A total of 16 Collection
locations store all Sequencer data for recall at any time. Only one Collection can be loaded at any time.
Pattern 4 Parts A Pattern triggers the note assigned to the pad it’s paired with. Pattern settings aect all Parts and Steps
unless parameters are set at the 2 lower levels.
Part 16 Steps Each of the 4 Parts in a Pattern can be programmed independently of the others and contains up to 16
Steps. The maximum amount of Steps per Pattern is therefore 64 Steps.
Step n/a A Step is either on or o. Play Rate, Velocity and Gate/Length can be programmed individually for every
Step and will therefore override any higher level settings.
The below chart shows which parameters can be programmed at every level.
Parameter Range Collection Pattern Part Step
Play Rate 1/4, 1/6, 1/8, 1/12, 1/16, 1/24, 1/32, 1/48, 1/64, 1/80, 1/96 x x x x
Velocity 1 - 127 x x x x
Gate/Length 1% - 99% x x x x
Last Step 1 - 16 x x x
Accent Oset -100 - 0 - +100 x x x
Swing -49% - 0 - +49% x x x
Play Mode Loop, Reverse Loop, Ping-pong, One-Shot, Step-Note/Trig-
ger. Restart and Resume options available
x x
Trigger Mode Immediate, Snap to Start, Next 1/4, Next 1/8, Next 1/16 x x
Programming Pattern Parameters
To program a Pattern’s parameters, the Pattern first needs to be selected.
• To select a Pattern, strike the pad that’s paired with the Pattern.
• The currently selected Pattern number is listed in the display header.
• Changing the parameters listed in Aura’s display now only affects the selected
Pattern.
Programming Part Parameters
When a Pattern is playing, it cycles through the Parts that are activated for playback. Part 1 is the only Pattern that will be active, by default
but you can program Parts regardless of whether they are playing or not.
• Press a [Part 1-4] button to select the corresponding Part. To select multiple Parts, hold the first [Part 1-4] button and press additional
[Part 1-4] buttons following.
• The currently selected Pattern and Part number(s) are listed in the display header.
• Changing the parameters listed in Aura’s display now affect the selected Part(s).
To deselect a Part, either select another one using the same method or select a Pattern by striking a pad.
Step Sequencer : Collections, Patterns,Parts and Steps

20 Nektar Aura Owner‘s Manual www.nektartech.com
Activating Parts for Playback
Any of the 4 Parts can be activated/deactivated to play in realtime by pressing [Shift]+[Part 1-4].
The [Part 1-4] button of the Part currently playing is illuminated in full and Parts activated for playback but not yet playing are dim.
Any Part that’s deactivated for playback is off.
The display also shows this information. The colored squares to the left of the Step
grid indicate when a Part is on and the arrow shows which Part is the currently
selected.
Note that Parts are selected as a Pattern cycles through its active Parts, unless a Part
is specifically selected, as explained on the previous page.
Programming Step Parameters
As with Patterns and Parts, Steps have to be selected to program Step parameters.
• First make sure the correct Pattern and Part is selected.
• Press and hold [Shift] while pressing [S1-16] to select one or more Steps.
You can glide over buttons to select multiple Steps faster.
• The display header updates to show which Steps are selected in the current
Part as illustrated in the right image.
• Changing the parameters listed in Aura’s display now only affects the selected
Steps.
To deselect the Steps, select another Step, Part or Pattern.
Programming Steps
[S1-16] update as the currently selected Part changes. If a Pattern is selected with multiple Parts active for playback, the Step buttons
simply update as Parts are playing. To program Steps in a specific Part, select it by pressing the Part buttons.
Steps can be programmed regardless of whether their parent Part is actively playing or not.
Tying Steps Together
Multiple Steps can be tied together to extend the length of a note. Press and hold the [S1-16] button you want extended and then press
another [S1-16] button. The tied note will span the distance between the two pressed [S1-16] buttons.
Programming Accents
If an accent is programmed on a Step, its velocity will play at its velocity setting plus the Accent Offset value. In the top right display image,
the velocity is set to 90 and the Accent Offset is set to 37 so the velocity value triggered by an accent will therefore be 127.
• To program an accent, press and hold the display button labeled [Accent].
• While holding [Accent], press [S1-16] buttons to program an accent on the Steps pressed.
Accents are an easy and flexible way to program simple dynamics. The Accent Offset value can be changed in realtime, making it easy to
increase the velocity accentuation gradually, change to negative values or neutralize Accents again by setting the value to 0.
Step Sequencer: Parts, Steps and Accents
Other manuals for Aura
2
This manual suits for next models
1
Table of contents
Other Nektar Recording Equipment manuals
Nektar
Nektar Reason T4 User manual

Nektar
Nektar Impact iX49 User manual
Nektar
Nektar Impact iX49 User manual
Nektar
Nektar SE49 User manual
Nektar
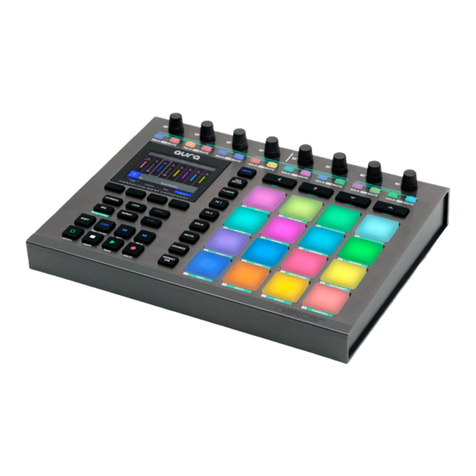
Nektar Aura Safety guide
Nektar
Nektar Impact LX49+ User manual
Nektar
Nektar Impact LX49+ Manual
Nektar
Nektar Impact LX Mini User manual

Nektar
Nektar SE49 User manual

Nektar
Nektar IMPACT GXP 49 User manual
