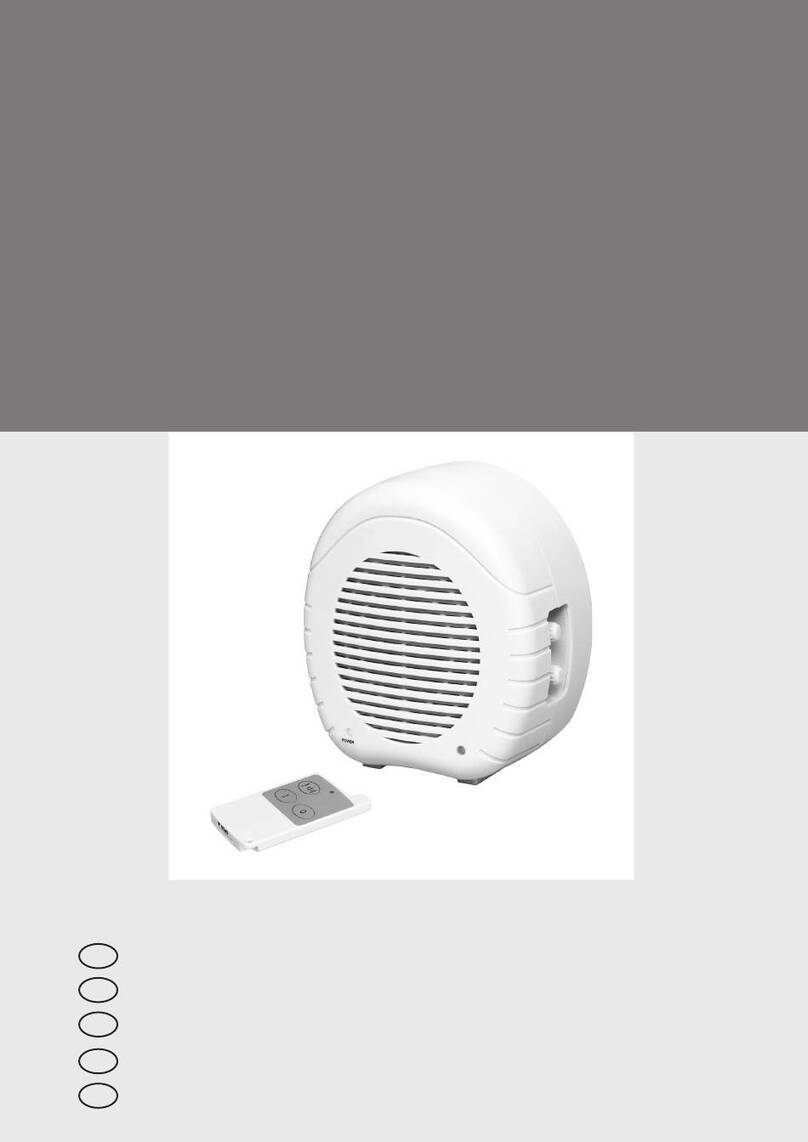
Ness Radio Siren Quick start guide

1
FEATURES
Siren only or Satellite Siren models
Wireless Trigger from Alarm Panel
Program up to 8 radio devices including:
Ness Radio Siren Transmitter
Radio Keys
Radio PIRs
Radio Reed Switches
Radio Smoke Detectors
Two siren sounds, FIRE and ALARM
Loud 116dB Siren Volume
Plug Pack Powered
Fully Tamper Protected
RSS SATELLITE SIREN also features
Backup battery
External siren and strobe outputs
Hardwired tamper input
•
•
•
•
•
•
•
•
•
•
InstallatIon notes
NESS RADIO SIREN
RSI Radio Siren
RSS Radio Satellite
The Ness Radio Siren is a unique self-
contained radio operated miniature
internal siren which can be used as a
WIRELESS REMOTE SIREN option for
alarm control panels or as a STANDALONE
SIREN operated by Radio Keys or other
Ness radio devices.
The Ness Radio Satellite can even drive
an optional EXTERNAL SIREN & STROBE
for truly wireless sirens - inside and out.
Many and varied applications: Wireless
EVAC Siren / WARNING siren / DELIVERY
DOOR warning / extension ALARM siren
/ MACHINERY warning / and anywhere
else you might need a remote siren.

2
TAMPER
APPLICATION EXAMPLES
RADIO KEY
[OR ANY NESS RADIO TRANSMITTER]
RADIO SIGNAL
WIRELESS SIREN OR SATELLITE SIREN
For alarm control panels.
STANDALONE PANIC SIREN
Triggered by a Radio Key
This example shows
a N/O Tamper Switch
wired in parallel.
ALARM CONTROL PANEL
RSS Radio
Satellite
RST
TRANSMITTER
OPTIONAL WIRED external
Siren/Strobe/Tamper
RSS Satellite model only.
RADIO REEDRADIO PIR
[OR ANY NESS RADIO TRANSMITTER]
RADIO SIGNAL
STANDALONE SATELLITE SIREN
Triggered by a Radio PIR or Radio Reed
RSi Radio SiRen
RSS Radio Satellite
OPTIONAL WIRED external
Siren/Strobe/Tamper
RSS Satellite model only.

3
OPERATION
The Ness Radio Siren is designed to be installed
indoors as a wireless internal siren. This provides
the convenience of an extension siren without
the trouble of cabling between the control panel
and the siren.
For an external siren option the RSS Satellite
model has provision for an optional wired horn
speaker and strobe light to be cabled off the
internal unit.
The Radio Siren can program up to 8 radio
devices, meaning it can receive signals from
more than one control panel or from other Ness
radio devices such as Radio Keys, Radio Smoke
Detectors and Radio PIRs.
Both models are powered by a 17VAC plug pack
and the RSS Satellite model has an internal
backup battery for independent operation in case
of mains failure.
INSTALLATION
Mark a level reference line on the wall in the
position you will be installing the Ness Radio
Siren. See Diagram 1.
Line-up the reference mark with the Level
Reference slot in the base plastics.
Secure the base to the wall using the mounting
hardware provided.
Attach the provided spring to the tamper switch.
See Diagram 2.
Feed the plug pack cable through the cable
entry hole in the base and connect the two
17V AC wires to the 17V AC terminals on the
Radio Siren board. Polarity is not observed. The
earth wire is not used.
Insert the battery in the battery holder in the
base plastics and plug the battery leads into
the Battery terminal on the Radio Siren board.
(RSS Satellite model only).
The Radio Siren will be in program mode as
soon as power is applied with the tamper
switch unsealed. At this stage, if you need to
program radio devices, follow the programming
instructions in this manual.
Once programming is complete, attach the
Radio Siren cover to the base and secure it with
the screw provided. Double check to ensure the
plug pack is turned on.
•
•
•
•
•
•
•
•
th st
Programming a Radio Device into the Radio Siren
Installation
17V AC +V
SIREN STROBE
Z1 0V
TAMPER
▲ ▲
17V AC +V
SIREN STROBE
Z1 0V
TAMPER
▲ ▲
106-081
106-080
Radio message summary:
Siren Mode/Reset Mode Panel Mode
Message
ON
OFF
PANIC
AUX
Radio Key Radio Sensor
Siren Alarm Siren Alarm
Alarm Off Alarm Off
Fire Alarm Fire Alarm
Strobe -
Inputs
Tamper:
The onboard tamper switch is connected to a 24 hour input and it must be sealed in normal
operation. There is also a terminal provided for connection of external tamper switch and
this terminal input must be terminated with a 2k2 EOL resistor even if unused.
Zone:
The zone input must be terminated with a 2k2 EOL resistor even if unused when operating
as a mini alarm panel mode.
In siren mode add the 2k2 EOL resistor to operate as reset mode.
Outputs
External Siren:
The radio siren capable of driving one 8ohm/4ohm horn speaker and its time out period is
preset to 5minutes.
Strobe:
Strobe output will time out after 11 hours. If mains power is off, the output will time out after
1 hour.
LED Operation:
Double fast flash every 2 seconds during program mode, one fast flash every 2 seconds to
indicate normal operation and continuous flash for low battery condition.
Battery:
The back up battery is float charged at 13.5V - 13.8V.
Battery test under load is carried out every hour, the battery load test timer also expires 2
seconds when a programmed radio device message is received.
Battery test without load is carried out every 50mS.
AC Plug Pack:
The radio siren is designed to work on a 17VAC 300mA plug pack, the use of higher current
rating will have no additional benefit as the internal circuit is designed to current limit to
250mA.
Mode of Operation:
The siren operation depends on the message it receives as well as the type of mode it is set
to. The following radio message summary describes its operation for each radio message it
receives:
Siren Mode:
This is the default mode, no shunt on J11
• Mark a short level line where the NESS Radio Siren will be installed.
• Line the mark just sketched with the level reference on the base and secure it
• to the wall using the mounting hardware provided. (see diagram 1)
• Place the spring provided onto the tamper (see diagram 2)
• Feed the power supply cable provided through the cable hole in the plastic and connect
• it to the 17V and AC terminals (see diagram 3)
• If you are programming devices into the Radio Siren, follow the instructions.
• Once complete, connect the battery* to the correct connector, place the battery into the
• base and attach the top to the base. Secure the top to the base with the included screw.
• Turn on the power point if it is not on already.
•
Power up the radio siren with tamper unsealed. The radio siren will then be in learn mode
for 30 seconds or until programmed, LED will double flash.
•
Activate the radio device that will operate radio siren. The siren will chirp for each radio
message and chirp twice on the third message to acknowledge the button is programmed.
•
Radio siren is now programmed.
•
To program a second device, disconnect the siren from its power source, then power up
again, repeat above steps.
•
Up to 8 devices can be programmed.
•
Programming a 9 device will erase the 1 device so that there are no more than 8 devices
programmed.
•
To erase all devices, Press the “OFF” button on a Programmed key 5 times while the
Radio Siren is in program mode.
1
Cable Entry
Level Reference Slot
BASE
th st
Programming a Radio Device into the Radio Siren
Installation
17V AC +V
SIREN STROBE
Z1 0V
TAMPER
▲ ▲
17V AC +V
SIREN STROBE
Z1 0V
TAMPER
▲ ▲
106-081
106-080
Radio message summary:
Siren Mode/Reset Mode Panel Mode
Message
ON
OFF
PANIC
AUX
Radio Key Radio Sensor
Siren Alarm Siren Alarm
Alarm Off Alarm Off
Fire Alarm Fire Alarm
Strobe -
Inputs
Tamper:
The onboard tamper switch is connected to a 24 hour input and it must be sealed in normal
operation. There is also a terminal provided for connection of external tamper switch and
this terminal input must be terminated with a 2k2 EOL resistor even if unused.
Zone:
The zone input must be terminated with a 2k2 EOL resistor even if unused when operating
as a mini alarm panel mode.
In siren mode add the 2k2 EOL resistor to operate as reset mode.
Outputs
External Siren:
The radio siren capable of driving one 8ohm/4ohm horn speaker and its time out period is
preset to 5minutes.
Strobe:
Strobe output will time out after 11 hours. If mains power is off, the output will time out after
1 hour.
LED Operation:
Double fast flash every 2 seconds during program mode, one fast flash every 2 seconds to
indicate normal operation and continuous flash for low battery condition.
Battery:
The back up battery is float charged at 13.5V - 13.8V.
Battery test under load is carried out every hour, the battery load test timer also expires 2
seconds when a programmed radio device message is received.
Battery test without load is carried out every 50mS.
AC Plug Pack:
The radio siren is designed to work on a 17VAC 300mA plug pack, the use of higher current
rating will have no additional benefit as the internal circuit is designed to current limit to
250mA.
Mode of Operation:
The siren operation depends on the message it receives as well as the type of mode it is set
to. The following radio message summary describes its operation for each radio message it
receives:
Siren Mode:
This is the default mode, no shunt on J11
• Mark a short level line where the NESS Radio Siren will be installed.
• Line the mark just sketched with the level reference on the base and secure it
• to the wall using the mounting hardware provided. (see diagram 1)
• Place the spring provided onto the tamper (see diagram 2)
• Feed the power supply cable provided through the cable hole in the plastic and connect
• it to the 17V and AC terminals (see diagram 3)
• If you are programming devices into the Radio Siren, follow the instructions.
• Once complete, connect the battery* to the correct connector, place the battery into the
• base and attach the top to the base. Secure the top to the base with the included screw.
• Turn on the power point if it is not on already.
•
Power up the radio siren with tamper unsealed. The radio siren will then be in learn mode
for 30 seconds or until programmed, LED will double flash.
•
Activate the radio device that will operate radio siren. The siren will chirp for each radio
message and chirp twice on the third message to acknowledge the button is programmed.
•
Radio siren is now programmed.
•
To program a second device, disconnect the siren from its power source, then power up
again, repeat above steps.
•
Up to 8 devices can be programmed.
•
Programming a 9 device will erase the 1 device so that there are no more than 8 devices
programmed.
•
To erase all devices, Press the “OFF” button on a Programmed key 5 times while the
Radio Siren is in program mode.
1
Tamper Spring
COVER (Rear view)
Optional External
Antenna mount
Diagram 1
Diagram 2
TERMINALS
Z1 should remain
unconnected
unless the RESET
Mode is Required
The Plugpack should always
be connected to mains to keep
the internal backup battery
charged. (The black earth wire
is not used).
BLUE / RED
RSS Radio Satellite
The RSI Siren model is solely powered by 17V AC.
The plugpack should always be connected to mains.
(The black earth wire is not used).
RSi Radio SiRen
BLUE / RED

4
ONBOARD TAMPER
The onboard tamper switch is supplied with
a through-body spring mechanism for tamper
detection of cover removal and back housing
tamper.
LED OPERATION
The LED is visible on the front of the Radio
Siren externally and internally when the cover
is removed.
One Flash every 2 sec OPERATING MODE
Double Flash every 2 sec PROGRAM MODE
Continuous Flash LOW BATTERY*
* RSS Satellite model only
PLUG PACK
The plug pack supplied must always be plugged
into a mains power outlet.
The RSI Siren is solely powered by the plug
pack.
The RSS Satellite uses mains power for normal
operation and to float charge the backup
battery.
ONBOARD SIREN
The onboard siren can output either an Alarm
sound or Fire sound depending on the type of
signal it receives from the transmitting device.
EXTERNAL ANTENNA
The Radio Siren has an internal antenna which
should provide excellent radio range in most
cases.
An external antenna is also supplied and can be
fitted in cases where local radio conditions may be
reducing or interfering with the radio signal.
Please note that if the RF conditions are particularly
adverse, the external antenna may not improve
reception.
OUTPUTS (RSS Satellite model only)
SIREN: The external siren output can drive
2 x 8 Ohm horn speakers. The siren sound can
be either the Alarm Siren or Fire Siren depending
on the type of signal received. The siren timer is
fixed at 5 minutes.
STROBE: The external strobe output can drive
1 x standard mini strobe light.
The strobe output turns on when a Strobe On
message is received and turns off when it receives
a Strobe Off message or after maximum run time.
The strobe will also turn on when the siren turns on
even without a Strobe On message, but in this case
the strobe turns off with the siren. Maximum run
time is 11 hours or 1 hour if mains power is off.
Note: In Strobe Mode, the strobe output is designed
to drive a strobe light only. However the output can be
configured as a Reset output if needed, see below.
RESET MODE: To convert the strobe output into
a Reset output, connect a 2k2 EOL resistor on the
Z1 input (across Z1 & 0V).
The strobe output will now reset after 5 minutes,
and the output voltage will be suitable to drive a
device such as a piezo screamer.
This option is useful in cases where you need
an additional wired internal screamer or even
a screamer/strobe combination on the same
output.
BATTERY (RSS Satellite model only)
If mains power is off, the battery can power the
siren and strobe for one alarm activation.
The battery is tested under load every hour. Low
battery condition is indicated by the LED flashing
continuously.
Note that when mains is restored after a power
failure, the LED will continue to flash for several
hours until the battery reaches full charge.
INPUTS (RSS Satellite model only)
EXTERNAL TAMPER: The 24hr Tamper input
terminals are provided for connection of an
external tamper if using the external siren option.
The Tamper input must be terminated with a 2k2
End Of Line resistor even if unused.
ZONE: The Zone input should normally be left
unconnected unless you need require the Strobe
output to operate in Reset mode, (See RESET
MODE).

5
PROGRAMMING
Programming of transmitters to the Radio Siren
is a simple two-step process.
1. ENTER PROGRAM MODE
To enter Program Mode, power-up the Radio
Siren with the internal tamper unsealed. The
Radio Siren will then be in learn mode for 30
seconds or until programmed. Program Mode is
indicated by the LED double flashing.
Once in program mode, resealing the tamper
will exit program mode immediately.
2. LEARNING TRANSMITTERS
Send a Learn Message from the radio device/
transmitter that will operate the Radio Siren.
The siren will chirp twice + double-chirp to
acknowledge it has successfully learned the
transmitter’s code.
As soon as the radio device is programmed,
the Radio Siren will automatically exit program
mode.
MESSAGE TYPES
The internal siren (and RSS model external
siren output) can output different siren sounds
depending on the type of message received.
The Ness RST Radio Siren Transmitter can send all
message types understood by the Radio Sirens.
TRANSMITTER MESSAGE TYPES
RADIO SIREN
ACTION
RST
TRANSMITTER
RK4
RADIO KEY
RK3
RADIO KEY
R15
RADIO PIR
R12
RADIO PIR
RSM
RADIO SMOKE
RR1/RR2
RADIO REED
SIREN ON ON ALARM ALARM ALARM ALARM SIREN ALARM
OFF OFF OFF RESTORE RESTORE RESTORE RESTORE ALARM OFF
FIRE PANIC PANIC – TAMPER – TAMPER FIRE ALARM
STROBE ON AUX#– – – – – STROBE ON*
STROBE OFF – – – – – – STROBE OFF*
# The RK4 AUX button also resets Siren. * RSS Satellite model only
Other Ness transmitters may send a different set
of alarms, see the table below.
Normally only the RST Transmitter should
be programmed to the Radio Siren.
(Program other devices such as Radio PIRs or
Radio Keys for special purposes such as stand-
alone use.)
PROGRAMMING ADDITIONAL DEVICES
To program a second device, remove power from
the Radio Siren (mains and battery) then power-up
and repeat Step 2 above.
Up to 8 devices can be programmed.
Programming a 9th device will erase the 1st
device so that there are no more than 8 devices
programmed.
TO ERASE DEVICES
To erase all devices, enter Program Mode and
press the OFF button of a Radio Key 5 times.
(Must be a valid programmed radio key).
Ness Radio Transmitter s
HOW TO SEND A LEARN MESSAGE
Radio Keys: Press and hold the Panic button for
at least 10 seconds.
Devices with removable batteries: Insert the
battery.
Make sure the Radio Siren is still in Program
Mode when you send it a Learn message.

6
RADIO SIREN TRANSMITTER
The Ness Radio Siren Transmitter (RST) is
purpose designed to send a variety of alarm
signals to the RSI and RSS Radio Sirens.
The RST is a miniature transmitter board with
flying leads fitted allowing it to be easily connected
to a control panel.
INPUTS
12V +/- wires: Constant 12VDC input.
Input 1 - White: Sends ON signal or AUX signal
depending on the setting of LINK 1.
Input 2 - Blue: Sends PANIC signal or ON signal
depending on the setting of LINK 1.
LEARN MESSAGE
The RST sends a learn message when power
is applied.
LED INDICATOR
SINGLE FLASH Alarm Transmitted
THREE FLASHES Learn Signal Sent
CONTINUOUS FLASH Error Condition
PROGRAMMING LINKS
The RST has two programming links.
LINK 1 determines the type of signal sent by
inputs 1 and 2.
LINK 1
Alarm Type Setting
LINK 1 POSITION
oFF
(DEFAULT)
on
action type oF meSSage Sent
ALARM INPUT 1 (White) Strobe Siren
ALARM INPUT 2 (Blue) Siren Fire
RESTORE INPUT 1 Off Off
RESTORE INPUT 2 Off Off
LINK 2 sets both inputs for positive or negative
trigger.
Link OFF: Negative Trigger (Factory Default).
Each input can be held high or floating. Pull
low to trigger.
Link ON: Positive Trigger. Each input must
be held low by an external 2k2 resistor. Pull
high to trigger.
R8 eco8x
d24
d8x / d16x
0V C 0V
SIREN+ +12V +12V
PIEZ – RESET – RESET –
* STR – STR –
* STROBE wire is not used on the R8 panel.
The RSS strobe output will still turn on but it
will reset after 5 minutes along with the siren
output.
RST CONNECTION EXAMPLE FOR MOST NESS CONTROL PANELS
Link 1 is off for negative trigger
A 2K2 resistor is required across +12V and RESET- if a 12V Piezo Siren is
also connected to the RESET output. The resistor can be omitted if the RST
is the only device on the RESET output.

7
SPECIFICATIONS
Ness Radio Siren - RSI/RSS models
NUMBER OF RADIO DEVICES 8 max.
RADIO COMPATIBILITY All Ness transmitters
ONBOARD TAMPER SWITCH Front and rear protection
POWER SUPPLY 17VAC 300mA plug pack
ONBOARD SIREN Twin Piezo 116bB
FUSES 500mA Auto reset electronic fuse for onboard siren
SIREN DURATION 5 minutes
RADIO FREQUENCY 303.85MHz or 868.35MHz depending on region
DIMENSIONS 141 x 114 x 45mm
Ness Radio Siren - RSS Satellite model only
EXTERNAL INPUTS Tamper Input - 2k2 EOL
Z1 input 2k2 - enables Reset Mode
EXTERNAL OUTPUTS Siren Output - 1 x 4 Ohm or 2 x 8 Ohm horn speakers max.
Duration 5 minutes
Strobe output - 1 x Mini Strobe Light max.
Duration 11 hours or 1 hour if mains power is off
STROBE OUTPUT DURATION If the RST is wired to send a Strobe message
11 hours or 1 hour if mains power is off
If the RST wired not to send a Strobe message
5 minutes
If the Strobe Output is converted into a Reset Output
5 minutes
FUSES 2A Auto reset electronic fuse for external Siren & Strobe outputs
BACKUP BATTERY 12V 0.8Ah Sealed Lead Acid
DYNAMIC BATTERY TEST Every hour and on receipt of any radio message
Ness Radio Siren Transmitter
INPUTS Alarm Input 1, Alarm Input 2 on flying leads
MESSAGE TYPES Siren / Strobe / Fire / Off
TRANSMISSION TIMEOUT 2 seconds per message
INDICATION LED indicates transmission
OPERATING VOLTAGE 4.5V ~ 16V DC
CURRENT DRAW Standby 150uA, Transmit 10mA
RADIO FREQUENCY 303.85MHz or 868.35MHz depending on region
DIMENSIONS 45 x 24 x 12mm

8
NESS RADIO SIREN
INSTALLATION NOTES
Revision 1.1
Document Part Number 890-368
For Ness Radio Siren models:
106-080 RSI Siren 303.85MHz
106-081 RSS Satellite 303.85MHz
106-084 RST Transmitter 303.85MHz
106-082 RSI Siren 868.35MHz
106-083 RSS Satellite 868.35MHz
106-087 RST Transmitter 868.35MHz
COPYRIGHT NOTICE
All rights reserved. No part of this publication may be reproduced, transmitted or
stored in a retrieval system in any form or by any means, electronic, mechanical,
photocopying, recording, or otherwise, without the prior written permission of Ness.
Ness reserves the right to make changes to features and specifications at any
time without prior notification in the interest of ongoing product development and
improvement.
© 2008 Ness Security Products Pty Ltd ABN 28 069 984 372
Table of contents
Other Ness Security System manuals

Ness
Ness 5000 Series User manual

Ness
Ness MEDI-ALARM Owner's manual
Ness
Ness Guardpost User manual

Ness
Ness Lux Quick start guide

Ness
Ness PRO-LD User manual
Ness
Ness Guardpost User manual
Ness
Ness 5000 Series User manual

Ness
Ness LUX Quick start guide
Ness
Ness SecurityGuard III User manual

Ness
Ness Guardpost Assembly instructions
