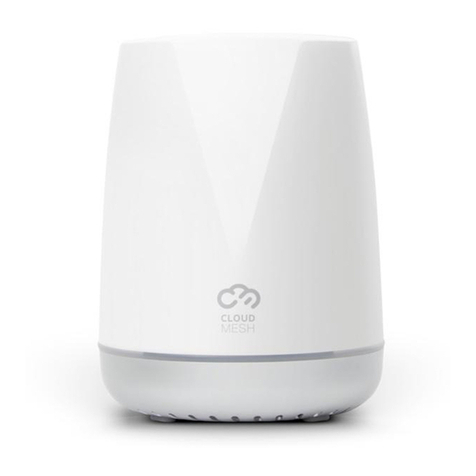
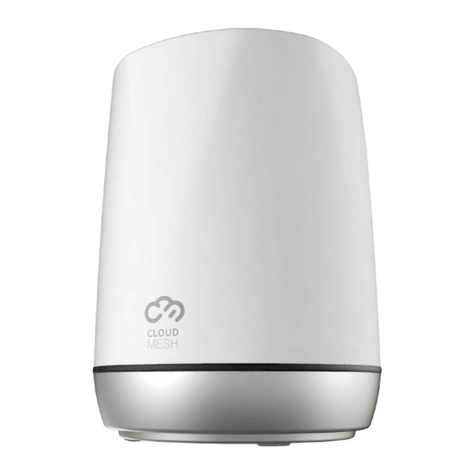
NetComm CloudMesh NS-01 Quick start guide

Firmware Upgrade Guide

Firmware Upgrade Guide
2
of
11
FW01226 v1.0 24 March 2020 © NetComm Wireless 2020
Copyright
Copyright© 2020 etComm Wireless Limited. All rights reserved.
etComm Wireless Limited was acquired by Casa Systems, Inc. a Delaware company on 1 July 2019. The information
contained herein is proprietary to Casa Systems, Inc. o part of this document may be translated, transcribed, reproduced, in
any form, or by any means without prior written consent of Casa Systems, Inc.
Trademarks and registered trademarks are the property of etComm Wireless Limited or their respective owners.
Specifications are subject to change without notice. Images shown may vary slightly from the actual product.
Note – This document is subject to change without notice.
Document history
This document covers the following product:
CloudMesh Satellite (NS-01)
V E R . D O C M E N T D E S C R I P T I O N D A T E
v1.0 Initial document release 20 April 2020
Table i. - Document revision history

Firmware Upgrade Guide
3
of
11
FW01226 v1.0 24 March 2020 © NetComm Wireless 2020
Contents
Introduction ........................................................................................................................................................................................ 4
Prerequisites ..................................................................................................................................................................................................................... 4
otation ..................................................................................................................................................................................................................... 4
Preliminary – Preparing IP connectivity ............................................................................................................................................................................ 5
NS-01 Certificate injection instructions ................................................................................................................................................ 7
NS-01 Firmware upgrade instructions .................................................................................................................................................. 9
Preliminary – Set a Static IP address ................................................................................................................................... Error! Bookmark not defined.
Upgrading the CloudMesh Satellite’s firmware ................................................................................................................................................................ 9
Set aside any NS-01 MAC address end with E or F .............................................................................................................................. 11

Firmware Upgrade Guide
4
of
11
FW01226 v1.0 24 March 2020 © NetComm Wireless 2020
Introduction
Periodically both the gateway and its satellites will have firmware updates released to improve their performance.
We recommend always applying the latest upgrade when it becomes available, and at the same time you should check that
the other components of the mesh also have their most recent version of firmware installed.
Prerequisites
Before continuing with the installation of any new firmware, please confirm that you have:
A PC running Windows
A CloudMesh Satellite(s) with power supply
A Barcode Reader (recommended)
An Ethernet cable (Straight-through, supplied in the boxes)
This document is to rework devices which do not have certificates.
This document is applicable for S-01 CloudMesh Satellites running Firmware: V1.77
This instruction applies to S-01 CloudMesh Satellites with S 997125193800001-997125194400805
This script is to rework one device at a time
otation
The following symbols may be used in this document:
Note – This note contains useful information.
Important –
This is important information that may require your attention.
Warning – This is a warning that may require immediate action in order to avoid damage or injury.

Firmware Upgrade Guide
5
of
11
FW01226 v1.0 24 March 2020 © NetComm Wireless 2020
Preliminary – Preparing IP connectivity
As the CloudMesh Satellite does not have its own DHCP server, you must manually set the IP address of your PC to be in the
192.168.1.x subnet.
The static IP address cannot be 192.168.1.1 and must be any number in the range: 192.168.1.2 to 192.168.1.254
To set a static IP address:
1On the computer that you will use to perform the upgrade, click the Windows Start button in the lower left:
Figure 1 – Windows Start button
2Type View Network Connections.
3Select View Network Connections when it appears in the search results box:
Figure 2 – Select View networ connections
4From the Network connections page, right click on the connection that you had used to connect to the Gateway:
Figure 3 – List of Networ Connections
5Select Properties from the popup menu:
Figure 4 – Select Properties for current connection
6In the etworking tab of the Ethernet Properties dialog box, go to the list of This connection uses the following
items:
Internet Protocol Version (TCP/IPv4)
Internet Protocol Version 6 (TCP/IPv6)

Firmware Upgrade Guide
6
of
11
FW01226 v1.0 24 March 2020 © NetComm Wireless 2020
Ensure the checkbox for IPv6 is enabled
Figure 5 – Select
Internet Protocol Version (TCP/IPv4)
7Double click on The Internet Protocol Version (TCP/IPv4) Properties page appears:
Figure 6 – Set the static IP address
8Select se the following IP address to enter the details of the new static IP address for the S-01 CloudMesh
Satellite:
aIn the IP address text box enter any IP address in the range: 192.168.1.2 to 192.168.1.254
bIn the Subnet mask text box enter: 255.255.255.0
cIn the Default gateway text box enter the IP address of the CloudMesh Satellite: 192.168.1.1
9Click the OK button to close the Internet the Ethernet Properties dialog box.
10 Click the close button to close the Network connections page.

Firmware Upgrade Guide
7
of
11
FW01226 v1.0 24 March 2020 © NetComm Wireless 2020
S-01 Certificate injection instructions
IMPORTANT: The certificate must inject first before the upgrade
Using the same computer that you had set the static IP address on in the previous section:
1Connect the supplied RJ45 Ethernet cable from one of the ethernet ports on the bottom of the S-01 to your
computer.
2Connect the supplied power adapter to your S-01.
3Allow 60 seconds for the S-01 to power up.
4Copy the Tiger Certificate Injection Script.zip to your desired location right click and click on Extract all to decompress
the script
5Click Extract. This may take a couple of minutes.
6Browse to the extracted contents. There should be two folders. Double Click to enter the runner folder.
7Double click on Tiger Cert Injection Script.exe to run the script.

Firmware Upgrade Guide
8
of
11
FW01226 v1.0 24 March 2020 © NetComm Wireless 2020
8The Script Interface should be presented. Type “1” to select S-01 and press enter to continue
9Enter the MAC Address via typing in or Scanning the MAC Barcode with the barcode scanner
10 Enter the Serial umber via typing in or Scanning the S/ Barcode with the barcode scanner
Note – The password for S-01 does not need to be input because the password is the serial number.
11 This should bring you to the confirmation page. Confirm the information then Press 1 then press Enter to continue
12 The Certificates should inject correctly.
13 Success! You have successfully reworked one device.
14 Pressing 1 then enter will allow you to restart this process.

Firmware Upgrade Guide
9
of
11
FW01226 v1.0 24 March 2020 © NetComm Wireless 2020
S-01 Firmware upgrade instructions
Upgrading the CloudMesh Satellite’s firmware
Using the same computer that you had set the static IP address on in the previous section:
15 Connect the supplied power adapter into the USB connection on the bottom of your CloudMesh Satellite ( S-01) and
plug the power adaptor into a power point.
If necessary, switch the power point switch on at the wall.
16 Allow 60 – 90 seconds for the S-01 to power up.
17 Connect the supplied RJ45 Ethernet cable from one of the two yellow ETHERNET ports on the bottom of the S-01
CloudMesh Satellite to an Ethernet port on your computer.
18 Open a web browser (e.g. Internet Explorer, Firefox, Safari, etc) and type in the static IP address that you had set in
the previous section, for example 196.168.1.1, into the address bar and press the Enter button.
19 At the Authorization Required screen:
Figure 7 – Log in to NS-01 user interface
aType admin into the sername field,
bEnter the serial number (Serial No) printed on the label on the label on the bottom of the S-01 into the
Password field, and
cClick the Login button.
20 Select System > Backup/Flash Firmware from the menu in the toolbar of the screen:
Figure 8 – Chec current firmware version
Firmware Upgrade Guide
10
of
11
FW01226 v1.0 24 March 2020 © NetComm Wireless 2020
21 From the Flash Operations screen select the Actions tab and in the Flash new firmware image section make the
following settings:
aDeselect the Keep settings option
bClick the Browse button to locate and upload the S-01 firmware upgrade file.
Figure 9 – Update firmware interface
cWhen the file has been uploaded, its filename will appear immediately to the right of the Browse button.
dClick the Flash image button to proceed.
22 The system will read the file and ask you to Verify its details:
Figure 10 – Uploading in progress message
23 Click the Proceed button to finalise the upgrade process.

Firmware Upgrade Guide
11
of
11
FW01226 v1.0 24 March 2020 © NetComm Wireless 2020
24 A progress message page appears:
Figure 11 – Uploading in progress message
25 Wait four to six minutes and then refresh the browser, you will be returned to the Authorization Required screen.
26 Log in as you did in step 5, above.
Upon successful login, the Status page will display.
Set aside any S-01 MAC address end with E or F
1After the previous steps has taken place, repack the unit
2Check the device label under the S-01
3Check the MAC address printed on the device label
4If the MAC address end with E or F, put that in a separate carton box as those units can not ship to customer.
Eg of MAC address that end with E or F
•F8CA5918C3DE
•F8CA5918C26E
Result
The upgrades FOR S-01 Satellite(s) are now complete.
Other manuals for CloudMesh NS-01
2
Table of contents
Other NetComm Wireless Access Point manuals

NetComm
NetComm NP731 User manual

NetComm
NetComm NP725 User manual

NetComm
NetComm NP6800 User manual

NetComm
NetComm NP5400 User manual

NetComm
NetComm NS-02 User manual

NetComm
NetComm NP720 User manual

NetComm
NetComm NP6800 User manual

NetComm
NetComm AV SERIES User manual

NetComm
NetComm CloudMesh NS-01 User manual

NetComm
NetComm NP730 User manual
Popular Wireless Access Point manuals by other brands

Ubiquiti
Ubiquiti Lite Beam AC LR LBE-5AC-LR quick start guide

NETGEAR
NETGEAR ProSafe WG102-500 Reference manual

D-Link
D-Link DAP-2660 Quick installation guide

IgniteNet
IgniteNet SunSpot AC Wave2 quick start guide

Aironet
Aironet 3500 Series user guide

Gigabyte
Gigabyte AirCruiser MIMO GN-AP03GM user manual