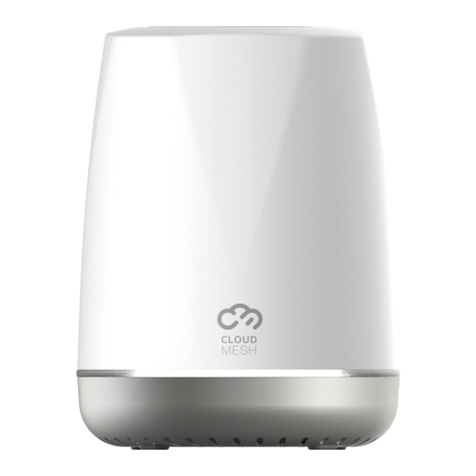
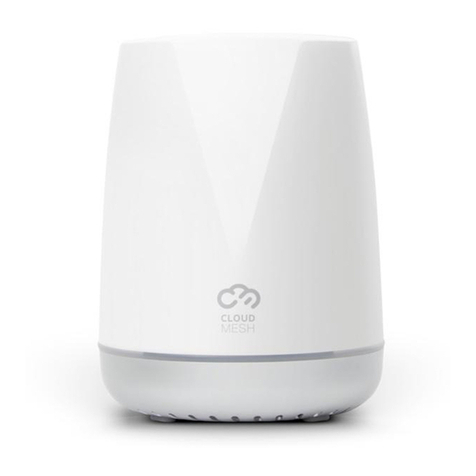
NetComm NS-02 User manual

User Guide
CloudMesh Satellite – NS-02
Doc No. UG01350

2 of 22
CloudMesh Satellite – User Guide
UG01350 v1.00 14 July 2021
Important notice
This device, like any wireless device, operates using radio signals which cannot guarantee the transmission
and reception of data in all conditions. While the delay or loss of signal is rare, you should not rely solely on
any wireless device for emergency communications or otherwise use the device in situations where the
interruption of data connectivity could lead to death, personal injury, property damage, data loss, or other
loss. NetComm Wireless accepts no responsibility for any loss or damage resulting from errors or delays in
transmission or reception, or the failure of the NetComm wireless devices to transmit or receive such data.
Copyright
Copyright© 2021 Casa Systems. All rights reserved.
The information contained herein is proprietary to Casa Systems. No part of this document may be
translated, transcribed, reproduced, in any form, or by any means without prior written consent of Casa
Systems.
Trademarks and registered trademarks are the property of Casa Systems or their respective owners.
Specifications are subject to change without notice. Images shown may vary slightly from the actual product.
NetComm Wireless Limited was acquired by Casa Systems in 2019.
Note
–
This document is subject to change without notice.
Document history
This document relates to the following product:
NetComm CloudMesh Satellite
Ver. Document description Date
v1.00 First document release 14 July 2021
Tablei. – Document revision history

3 of 22
CloudMesh Satellite – User Guide
UG01350 v1.00 14 July 2021
Contents
Product features/functionality........................................................................................................................ 4
Key features............................................................................................................................................................................................ 4
Interfaces .................................................................................................................................................. 5
Front view............................................................................................................................................................................................... 5
Rear view................................................................................................................................................................................................ 6
Bottom view............................................................................................................................................................................................ 7
Physical dimensionsand weight............................................................................................................................................................. 7
CloudMesh Satellite location.......................................................................................................................... 8
Common location considerations........................................................................................................................................................... 8
Avoiding obstacles and interference................................................................................................................................................ 8
Pairing the CloudMesh Satellite with your CloudMesh Gateway............................................................................ 9
Pre-configured (already paired).............................................................................................................................................................. 9
Pairing via WPS push button.................................................................................................................................................................. 9
Pairing via Ethernet cable..................................................................................................................................................................... 10
LED indicators.......................................................................................................................................... 10
Connecting client devices............................................................................................................................ 11
Connect a client via WPS...................................................................................................................................................................... 12
Connect a client via Ethernet cable...................................................................................................................................................... 12
Connect a client by entering wireless credentials................................................................................................................................. 12
Turning off the LED light ............................................................................................................................. 13
Web interface........................................................................................................................................... 13
Firmware upgrade................................................................................................................................................................................ 13
Viewing the log..................................................................................................................................................................................... 17
Resetting the CloudMesh Satellite ................................................................................................................ 17
Appendix A – Safety Information .................................................................................................................. 18
Appendix B – Set CloudMesh Satellite IP to access web interface........................................................................ 20
4 of 22
CloudMesh Satellite – User Guide
UG01350 v1.00 14 July 2021
Product features/functionality
Key features
Automated Wi-Fi issue resolution with Wi-Fi Auto Pilot
Seamless connection with a CloudMesh Gateway
CloudMesh App for Wi-Fi Analytics and Troubleshooting
LED light bar for indicating the optimal placement of each satellite
Two Gigabit Ports for versatile connectivity
Vertical PCB and Antenna design for increased Wi-Fi coverage and cooling
Qualcomm-based chipset for powerful Wi-Fi
Zero-touch setup, Cloud Orchestration and Seamless Wi-Fi Client Roaming for the best user
experience

5 of 22
CloudMesh Satellite – User Guide
UG01350 v1.00 14 July 2021
Interfaces
Front view
F i g ure 1 – Front view interface
No Interface Description
1 LED indicator Provides a visual representation of the status of the CloudMesh Satellite.
Refer to the LED indicator section on page 10.
T a b l e 1 - Front vi ew interfa ces
1

6 of 22
CloudMesh Satellite – User Guide
UG01350 v1.00 14 July 2021
Rear view
F i g ure 2 – Rear vi ew interfaces
No. Interface Description
1 Ethernet ports Gigabit Ethernet LAN ports. Can be used to connect clients in bridge
mode.
2 Power adapter port Connect the included power adapter here.
3 WPS button Push this button within 2 minutes of pushing the 5GHz WPS button on
the CloudMesh Gateway to connect (pair) them.
During the pairing process, the LED indicator on the front side of the
CloudMesh Satellite will be flashing purple, see page 9.
T a b l e 2 - Rea r view i nterfa ces
1
1
2
3

7 of 22
CloudMesh Satellite – User Guide
UG01350 v1.00 14 July 2021
Bottom view
F i g ure 3 – Bott om vi ew i nterfa ces
No Interface Description
1 ON/OFF button Turns the CloudMesh Satellite on or off.
2 Reset button To reset the CloudMesh Satellite, insert a straightened paper clip or
similarly shaped object into the small hole marked with the reset icon
and hold for ten (10) seconds.
T a b l e 3 - Bottom view interface
Physical dimensions and weight
The table below lists the physical dimensions and weight of the CloudMesh Satellite.
Dimensions
Width 113 mm
Height 145 mm
Depth 110 mm
Weight 320 grams
T a b l e 4 - Physical dimensions and weight
2
1

8 of 22
CloudMesh Satellite – User Guide
UG01350 v1.00 14 July 2021
CloudMeshSatellitelocation
Your CloudMesh Satellite works best when it is placed in a central location to the area you want to cover.
Ideally, it should be located no more than two rooms away from the CloudMesh Gateway. To increase the
size of your mesh network, you can add multiple CloudMesh Satellites.
F i g ure 4 - Wi -Fi coveragediagram
Common location considerations
If you have concerns about your network’s performance that might be related to range or obstruction
factors, try moving the device to a position between three to five metres from the CloudMesh Satellite or
CloudMesh Gateway to see if distance is the problem.
Note
–
While some of the items listed below can affect network performance, they will not prohibit your wireless network from
functioning; if you are concerned that your network is not operating at its maximum effectiveness, this check list may help.
Try not to place the CloudMesh Satellite near a cordless telephone that operates at the same radio
frequency as the CloudMesh Satellite (2.4GHz/5GHz).
Avoiding obstacles and interference
Avoid placing your CloudMesh Satellite near devices that may emit radio “noise,” such as microwave ovens.
If your wireless signal seems weak in some spots, make sure that objects such as those listed below are not
blocking the signal’s path between your devices and the CloudMesh Satellite.
Dense objects that can inhibit wireless communication include:
Refrigerators
Washers and/or dryers
Metal cabinets
Metallic-based, UV-tinted windows

9 of 22
CloudMesh Satellite – User Guide
UG01350 v1.00 14 July 2021
Pairing the CloudMesh Satellite with your
CloudMesh Gateway
Pre-configured (already paired)
If the CloudMesh Satellite and the CloudMesh Gateway have been pre-configured by your Internet Service
Provider, the devices will already have been paired together and you can turn on both devices and begin
using them.
To set up your CloudMesh Gateway and CloudMesh Satellite:
1Turn on your CloudMesh Gateway (refer the Clo udMesh Gateway User Guide) and connect to the
Internet.
2Position the CloudMesh Satellite near the CloudMesh Gateway (refer to
CloudMesh Satellite location
section of this guide, above).
3Connect the power adapter to the CloudMesh Satellite. The LED flashes green then starts to flash blue
after a minute or so.
4Wait for up to 10 minutes as the CloudMesh Satellite attempts to pair with the CloudMesh Gateway.
The LED flashes blue. When the Satellite has been paired with the Gateway, the LED will display as
solid white, blue, or red, depending on the signal strength.
I m porta nt
–
If the LED is solid red, this means the signal is poor.
Reposition the Satellite closer to the Gateway.
Refer to
CloudMesh Satellite location
section of this guide, above.
The CloudMesh Satellite is now ready to use.
Pairing via WPS push button
If the CloudMesh Satellite and the CloudMesh Gateway have not been set up by your Internet Service
Provider, you will need to pair them yourself. The CloudMesh Satellite can pair with a CloudMesh Gateway
using the WPS (Wi-Fi Protected Setup™) functionality.
1Place the CloudMesh Satellite next to your CloudMesh Gateway.
2Connect power to both devices, switch them on and wait for them to power on. If the CloudMesh
Satellite LED light is still flashing blue after 20 minutes, you will need to pair it with the CloudMesh
Gateway manually.
3Ensure that the CloudMesh Gateway is connected to the Internet.
4Press and release the WPS button on the rear of the CloudMesh Satellite. The LED on the CloudMesh
Satellite flashes purple to indicate that the WPS pairing window has started and will last for two
minutes.
5Press and release the WPSbutton on the CloudMesh Gateway while the CloudMesh Satellite LED is
still flashing purple. The pairing process can take up to five minutes.

10 of 22
CloudMesh Satellite – User Guide
UG01350 v1.00 14 July 2021
6When the pairing process is complete, the CloudMesh Satellite’s LED light will indicate signal strength.
See the LED indicators section below.
7Position the CloudMesh Satellite in the desired location in your premises and begin using your new
mesh Wi-Fi network. You should refer to the LED signal strength table on the next page to determine
the optimal location to achieve the best signal strength.
Pairing via Ethernet cable
An alternative pairing method to using WPS (see page 9) is to use the Ethernet cable (supplied with the
satellite) connected to the Ethernet port of each device to pair the CloudMesh Satellite with a CloudMesh
Gateway.
1Place the CloudMesh Satellite next to your CloudMesh Gateway.
2Connect power to both devices, switch them on and wait for them to power on. If the CloudMesh
Satellite LED light is still flashing blue after ten minutes, continue to step 3 to pair it with the
CloudMesh Gateway manually.
3Ensure that the CloudMesh Gateway is connected to the Internet.
4Connect the Ethernet cable (supplied with the CloudMesh Satellite) into any of the LAN ports on the
back of each device.
5Allow up to ten minutes for the CloudMesh Satellite to download information from CloudMesh
Gateway. The LED turns solid green, indicating that it has paired with the gateway.
6Disconnect the Ethernet cable from both devices and wait 10 minutes. As the CloudMesh Satellite
attempts to pair with the CloudMesh Gateway, the LED will flash pink.
7Position the CloudMesh Satellite in the desired location in your premises and begin using your new
mesh Wi-Fi network. You should refer to the LED signal strength table on the next page to determine
the optimal location to achieve the best signal strength.
LED indicators
Your CloudMesh Satellite LED follows this sequence when first turned on.
Sequence LED LED activity Meaning
1
Blinking green Powering up
2
Blinking blue Ready for pairing
T a b l e 5 – LED sequence on power up

11 of 22
CloudMesh Satellite – User Guide
UG01350 v1.00 14 July 2021
When connected to the CloudMesh Gateway, the LED shows the signal strength as follows:
LED LED activity Meaning
Solid white Good signal
Solid blue Medium signal
Solid red Poor signal
Blinking
blue
No signal / too far from gateway / not connected to mesh
network
Blinking
purple WPS pairing activated
F i g ure 5 - LED signal strength statuses
The LED may also display the following statuses.
LED LED activity Meaning
Solid pink Paired but no Internet connection
Blinking purple WPS pairing activated
Blinking pink Pairing in progress
Solid green Wired connection to the gateway.
F i g ure 6 - Additional LED statuses
Connecting client devices
You can connect any number of Wi-Fi enabled client devices to the internet via the CloudMesh Satellite using
the WPS (Wi-Fi Protected Setup™) functionality of each device.

12 of 22
CloudMesh Satellite – User Guide
UG01350 v1.00 14 July 2021
In addition, you can connect two peripheral client devices using the Ethernet ports on the back of the
CloudMesh Satellite.
Connect a client via WPS
The CloudMesh Satellite provides three methods to establish a connection with client devices:
WPS (Wi-Fi Protected Setup™) functionality.
Connection via Ethernet.
Entering the Wi-Fi credentials into your client’s wireless configuration options.
Connect a device using the WPS button (default setting)
1Bring a WPS enabled device within Wi-Fi range and press the WPSbutton on the back of the
CloudMesh Satellite.
2The LED on the front of the CloudMesh Satellite flashes purple for up to two minutes.
3When the device is connected, the WPS LED displays the signal strength (between the satellite and the
gateway) listed in Figure 5.
Connect a client via Ethernet cable
Alternatively, you can directly connect a device, for example a printer, to the CloudMesh Satellite using an
Ethernet cable.
1Connect the Ethernet cable provided to one of the yellow Ethernet ports on the bottom of the
CloudMesh Satellite.
2Connect the other end of the Ethernet cable to your client device.
Connect a client by entering wireless credentials
The Wi-Fi Security Card that ships with the CloudMesh Gateway includes your unique network name and
password. Type the information into your wireless device when connecting or scan the QR code that is
printed on the card. If you have changed the wireless network name (SSID) or password, select the wireless
network from your client and enter the chosen password instead of the details listed on the Wi-Fi Security
Card.

13 of 22
CloudMesh Satellite – User Guide
UG01350 v1.00 14 July 2021
F i g ure 7 – Wi-Fi Security card
Turning off the LED light
In some locations, for example a bedroom, the LED light may become an unwanted distraction.
To control the display of the CloudMesh Satellite’s LED light, press and hold the WPS button for six (6)
seconds to switch the light’s display between ON or OFF.
F i g ure 8 – Turn off LED display
Web interface
The CloudMesh Satellite features a web interface for advanced configuration, though it is not required for
everyday operation of the device.
Firmware upgrade
If a firmware update is released, you can apply it to the satellite by accessing the web interface. In situations
where your gateway and satellite were provided to you pre-configured by your Internet Service Provider, the
firmware upgrade is remotely managed by the provider.
There are two ways of accessing the web interface of the satellite. The method to use depends on whether
the CloudMesh Satellite is paired with the Gateway.

14 of 22
CloudMesh Satellite – User Guide
UG01350 v1.00 14 July 2021
If the CloudMesh Satellite is paired to a CloudMesh Gateway, you can access the web interface by typing its
unique hostname into the address bar of a web browser.
The unique hostname for each CloudMesh Satellite is defined in the following format:
http://NS-02-XXXX.local
Where XXXX is the last four digits of the Satellite’s unique serial number.
The CloudMesh Satellite’s serial number can be found on the label affixed to the bottom:
F i g ure 9 – Last four digits of the serial number
If the device is not paired, please first follow
Appendix B – Set Cl oud Mesh S a tellite I P to a ccess web interface
to
set up a static IP for the Satellite and then continue from step 3b of this section, below.
To access the Satellite’s web interface:
1Connect the supplied power adapter to the power port on the CloudMesh Satellite and plug the
power adapter into a power point. Turn on the power at the wall and allow 60 – 90 seconds for the
satellite to power up.
2Connect the supplied Ethernet cable from one of the two yellow LAN ports on the bottom of the
CloudMesh Satellite to an Ethernet port on your computer.

15 of 22
CloudMesh Satellite – User Guide
UG01350 v1.00 14 July 2021
F i g ure 10 – Ethernet cable connecting PC with CloudMesh Satellite
3Open a web browser and type in the address of your Satellite:
aIf your CloudMesh Satellite is paired to a CloudMesh Gateway, type the unique hostname as
described earlier in this section.
bIf your CloudMesh Satellite is not paired to a CloudMesh Gateway, type the static IP address that
you defined using the instructions in
Appendix B – Set Clo udMesh Sa tellite I P t o a ccess w eb
i nt erface
.
4At the Authorization Required screen:
F i g ure 11 – Log in to NS-02 user i nterface
aType admin into the Username field,
bEnter the serial number (Serial No) printed on the label on the label on the bottom of the
satellite into the Password field, and
cClick the Login button. The status page is displayed.
5Select System > Backup/Flash F irmware from the menu in the toolbar of the screen:
F i g ure 12 – Check current firmware version

16 of 22
CloudMesh Satellite – User Guide
UG01350 v1.00 14 July 2021
6From the F lash Operations screen, select the A c ti ons tab and in the F lash new firmware image section
make the following settings:
aDeselect the Keep settings option.
bClick the Browse button to locate and upload the firmware upgrade file.
F i g ure 13 – Upda te firmware i nt erface
cWhen the file has been uploaded, its filename will appear immediately to the right of the Browse
button.
7Click the Flash image button to proceed. The system will read the file and ask you to Verify its details:
F i g ure 14 – Upl oadi ng in progress message
8Click the Pro ceed button to finalise the upgrade process. A progress message page appears:
F i g ure 15 – Upl oadi ng in progress message
9Wait four to six minutes and then refresh the page. The Authorization Required screen is displayed.
The upgrade is complete.

17 of 22
CloudMesh Satellite – User Guide
UG01350 v1.00 14 July 2021
Viewing the log
The CloudMesh Satellite compiles a chronological log of all recent events.
In the web interface, click Status in the main menu and select System Log from its drop-down menu.
F i g ure 16 – System Log
Each log entry has a date and timestamp and a short description of the event.
Resetting the CloudMesh Satellite
To reset the CloudMesh Satellite, insert a straightened paper clip or similarly shaped object into the small
hole on the bottom of the satellite marked with the reset icon .
F i g ure 17 – Location of reset button on bottom
Press and hold the reset button for ten (10) seconds to return the satellite to its factory default settings.
Note
–
The gateway and its satellite(s) will still be paired once connected to the Internet.
You will not have to repeat the pairing process, just start both up, connect the gateway to the Internet and they will automatically
pair (this pairing process may take a few minutes).

18 of 22
CloudMesh Satellite – User Guide
UG01350 v1.00 14 July 2021
Appendix A – Safety Information
Please read before use:
LOCATION
This device is designed for indoor use only.
AIRFLOW
Do not restrict airflow around the device.
The device is air cooled and may overheat where airflow has
been restricted.
Always allow minimum clearance of 5cm around all sides and
the top of the device.
Do not cover, do not put in an enclosed space, do not put
under or behind large items of furniture.
Your device may become warm during normal use
ENVIRONMENT
Do not place this device in direct sunlight or any hot areas. Safe
operating temperature of this device is between 0° and 40°C
Do not allow this device to come in contact with any liquid or
moisture. Do not place this device in any wet or humid areas
such as kitchen, bathroom or laundry rooms.
POWER SUPPLY
Always use only the power supply unit that came with the
device. You should immediately stop using the power supply
unit if the cable or power supply unit is damaged.

19 of 22
CloudMesh Satellite – User Guide
UG01350 v1.00 14 July 2021
SERVICE
There are no user-serviceable components in the device.
Do not attempt to disassemble, repair, or modify the device.
SMALL CHILDREN
Do not leave your device and its accessories within the reach of
small children or allow them to play with it. Your device contains
small parts with sharp edges that may cause an injury or which
could become detached and create a choking hazard.
RF EXPOSURE
The device contains a transmitter and a receiver. When it is on,
it receives and transmits RF energy. The device conforms with
the radio frequency (RF)
exposure limits adopted by the Australian Communications and
Media Authority Radiocommunications (Electromagnetic
Radiation - Human Exposure) Standard 2014, when used at a
distance of not less than 20 cm from the body.
PRODUCT HANDLING
Always treat your device and its accessories with care and keep
it in a clean and dust-free place.
Do not expose your device or its accessories to open flames.
Do not drop, throw or try to bend your device or its accessories.
Do not use harsh chemicals, cleaning solvents, or aerosols to
clean the device or its accessories.
Do not paint your device or its accessories.
Please check local regulations for disposal of electronic
products.
Arrange power and Ethernet cables in a manner such that they
are not likely to be stepped on or have items placed on them.

20 of 22
CloudMesh Satellite – User Guide
UG01350 v1.00 14 July 2021
Appendix B – Set CloudMesh Satellite IP to access
web interface
If your CloudMesh Satellite is not paired to a CloudMesh Gateway you can access the Satellite directly by
setting a static IP address for your PC that is in the same subnet as the satellite.
As the CloudMesh Satellite does not have its own DHCP server, you must manually set the IP address of your
PC to be in the 192.168.1.x subnet.
The static IP address cannot be 192.168.1.1and must be any number in the range: 192.168.1.2 to
192.168.1.254
To set a static IP address on a Windows 10 system:
1On the computer that you will use to connect to the Satellite, click the Windows Start button in the
lower left:
F i g ure 18 – Windows Start button
2Type View Network Connections.
3Select View Network Connections when it appears in the search results box.
F i g ure 19 – Select View network connections
4From the Network connections page,right click on the connection that you had used to connect to the
Gateway.
F i g ure 20 – List of Network Connections
5Select P ro perties from thepopup menu:
Table of contents
Other NetComm Wireless Access Point manuals

NetComm
NetComm NP720 User manual

NetComm
NetComm NP5400 User manual

NetComm
NetComm NP730 User manual

NetComm
NetComm NP726 Operational manual

NetComm
NetComm NP720 User manual

NetComm
NetComm AV SERIES User manual

NetComm
NetComm NP5400 User manual

NetComm
NetComm NP720 User manual

NetComm
NetComm NP725 User manual

NetComm
NetComm CloudMesh NS-01 User manual
Popular Wireless Access Point manuals by other brands

Dell
Dell PowerConnect W-IAP3WN user guide

Hotpoint
Hotpoint HotPoint 5200 Installation & setup guide

D-Link
D-Link UNIFIED WIRED & WIRELESS ACCESS SYSTEM... user manual

Digitus
Digitus DN-7018 user manual

D-Link
D-Link AirPremier N DAP-2690 Quick installation guide

ADTRAN
ADTRAN NetVanta 2054 quick start guide