netvox R602B User manual

WirelessLoRa Siren with Rechargeable Battery Backup
Model: R602B
Wireless Siren with
Rechargeable Battery Backup
R602B
User Manual
Copyright©Netvox Technology Co., Ltd.
This document contains proprietary technical information which is the property of NETVOX Technology. It shall
be maintained in strict confidence and shall not be disclosed to other parties, in whole or in part, without written
permission of NETVOX Technology. The specifications are subject to change without prior notice.

1
Table of Content
1. Introduction.......................................................................................................... 2
2. Appearance........................................................................................................... 3
3. Main Features ...................................................................................................... 3
4. Set up Instruction................................................................................................. 4
5. Data Report.......................................................................................................... 6
6. Installation and Precaution................................................................................... 8
7. Important Maintenance Instruction...................................................................... 9

2
1. Introduction
R602B is a long-range wireless alarm device for Netvox Class C type devices based on the LoRaWAN open protocol, compatible
with the LoRaWAN protocol, and it can be controlled through AppServer.
The R602B has five kinds of alarm sounds - fire/ emergency / burglar / doorbell /mute mode.After receiving an alarm, it will emit
a high-brightness flash and an alarm sound, which can be applied to security-related scenes. The switch and mode can be
customized, and only the alarm sound or the flashing light can be turned on, or both can be turned on.
The device supports rechargeable backup batteries. When the external power supply fails to provide power for the R602B, the
backup batteries (3*AAA 1.2v rechargeable Ni-MH batteries) will be activated to continue the power supply.
LoRa Wireless Technology:
LoRa is a wireless communication technology dedicated to long distances and low power consumption. Compared with other
communication methods, LoRa spread spectrum modulation method greatly increases to expand the communication distance.
Widely used in long-distance, low-data wireless communications. For example, automatic meter reading, building automation
equipment, wireless security systems, and industrial monitoring. Main features include small size, low power consumption,
transmission distance, anti-interference ability and so on.
LoRaWAN:
LoRaWAN uses LoRa technology to define end-to-end standard specifications to ensure interoperability between devices and
gateways from different manufacturers.

3
1
2
3
4
5
6
2. Appearance
3. Main Features
Compatible with LoRaWAN
12V DC power supply
Backup 3 sections rechargeable AAA1.2v NiMH batteries for power supply
Simple operation and setting
Five types of alarm sounds and different ways of flashing lights, and can be controlled separately
Compatible with LoRaWANTM Class C (Please make sure the Network Server support Class C.)
Frequency hopping spread spectrum.
Applicable to third-party platforms: Actility/ThingPark, TTN, MyDevices/Cayenne
Network Indicator
Function Key
Function Key
DC in
Alarm Indicator*6
Battery Compartment

4
4. Set up Instruction
On/Off
Power on
Connect 12V DC power supply to the power interface or directly load 3 AAA rechargeable Ni-
MH batteries for power supply. When the power is turned on, the network indicator flashes o
nce
and a clear sound is heard.
Note:
When the battery is installed under the condition of 12V DC power supply, the DC power
supply will be used first)
Network Joining
Never joined the network
(Or at factory setting )
After power-on, R602B will request to join the network.
The network indicator stay on : success
The network indicator stay off : fail
Had joined the network
(Not at factory setting.)
After power-on, R602B will search the network.
The network indicator stay on: success
The network indicator stay off: fail
Fail to join the network
(when the device is on)
Suggest checking the device verification information on the gateway or consulting your
platform service provider.
Function Key
Press 2 function key for 5 seconds
Restore to factory setting
The network indicator flashes for 10 times: success
The network indicator is not flash: fail
Short press any function key
Function: trigger reporting.
Phenomenon: When the device has been connected to the network, the network indicator flashes
once, and an uplink command is reported immediately at the same time. When the device is not
connected to the network, there is no indication.
Remote Control
Remote Control
The R602B
can be controlled by sound and light alarms, and there are five alarm sounds that can
be controlled are as follows:
1. Fire Mode
2. Emergency Mode
3. Burglar
4. Doorbell
5. Mute Mode

5
According to the received command, it can also be determined whether the alarm flash of the
device is blinking, and the alarm flash of the device is divided into three types of flashing
modes: flowing light, blink, and unlighted.
Battery Backup Function
Battery Backup Function
1. R602B supports a backup battery power supply. When the DC power supply and backup
battery exist at the same time, the device will preferentially use the DC power supply for
power supply.
2. When the DC power supply fails due to power failure or other reasons, the device will
automatically switch to the backup battery for power supply.
3. When powered by a backup battery, the device can operate for about 24 hours without any
alarm, and if there is a continuous alarm, the device can operate for about 3 hours. If the DC
power supply is restored during this period, the device will automatically switch to DC
power supply.
4. The backup battery must be powered by three rechargeable AAA 1.2V Ni-MH batteries.
5. When the device is under low voltage (3.6V) and
the DC power supply is present at the same
time, the battery charging function will be activated. The network indicator light will flash
once every 5 seconds to indicate that it is currently charging, and it will stop flashing after it
is fully charged.
6. It is forbidden to install non-rechargeable batteries, otherwise, it may cause serious
abnormalities such as battery explosion and other problems.
7. When the battery is under low voltage, if the external DC power supply is still not restored,
the backup battery power is used until it runs out of power, and the device may generate non-
alarm abnormal sounds.Therefore, please provide DC power for the device in time after low
voltage so that the device can charge the backup battery.

6
5. Data Report
Data report configuration and sending period are as following:
5.1 Example of ReportDataCmd
FPort:0x06
Bytes 1 1 1 Var (Fix=8 Bytes)
Version DeviceType ReportType NetvoxPayLoadData
Version– 1 byte –0x01——the Version of NetvoxLoRaWAN Application Command Version
DeviceType– 1 byte – Device Type of Device
The devicetype is listed in Netvox LoRaWAN Application Devicetype doc
ReportType – 1 byte –the presentation of the NetvoxPayLoadData, according the devicetype
NetvoxPayLoadData– Fixed bytes (Fixed =8bytes)
Device DeviceType ReportType NetvoxPayLoadData
R602B 0x69 0x01 Hearbeattime
(2Bytes,Unit:1s)
WarningStatus(1Byte)
0x00_NoWarnring,
0x01_Warning
Battery
(1Byte, unit:0.1V)
Reserved
(4Bytes,fixed 0x00)
Example of Uplink1: 0169010E10000000000000
// Heartbeat is 3600s, no warning and DC power supply.//0E10 (Hex) = 3600
Example of Uplink2: 0169010E10002A00000000
// Heartbeat is 3600s, no warning and battery power supply (4.2V)
Min Interval (Unit: second) Max Interval (Unit: second)
Any number between 1~65535 Any number between 1~65535
When the device is turned on, it will immediately send a version package.
Data will be reported by default setting before any configuration.
Default setting:
Maximum time: 0x0E10 (3600s)
Minimum time: 0x0E10 (3600s)// Mintime and Maxtime must be set to the same report time.
The reported data is decoded by the Netvox LoRaWAN Application Command document and
http://cmddoc.netvoxcloud.com/cmddoc

7
5.2 Example of ConfigureCmd
FPort:0x07
Bytes 1 1 Var (Fix =9 Bytes)
CmdID DeviceType NetvoxPayLoadData
CmdID– 1 byte
DeviceType– 1 byte – Device Type of Device
NetvoxPayLoadData– var bytes (Max=9bytes)
Description Device Cmd
ID
Device
Type NetvoxPayLoadData
StartWarning
R602B
0x90
0x69
WarningMode (1byte)
0x00_FireMode,
0x01_EmergencyMode,
0x02_Burglar,
0x03_Doorbell,
0x04_MuteMode
Other Value is Reserved
StrobeMode (1byte)
0x00_NoLedIndication,
0x01_LedBlinkMode1
in Parallel to Warning,
0x02_ LedBlinkMode2
in Parallel to Warning
Warning
Duration
(2bytes,Unit:1s)
Reserved
(5Bytes,
Fixed 0x00)
Config
ReportReq 0x01 MinTime
(2bytes Unit:s)
MaxTime
(2bytes Unit:s)
Reserved
(5Byte,Fixed 0x00)
Config
ReportRsp 0x81 Status
(0x00_success)
Reserved
(8Bytes,Fixed 0x00)
ReadConfig
ReportReq 0x02 Reserved
(9Bytes,Fixed 0x00)
ReadConfig
ReportRsp 0x82 MinTime
(2bytes Unit:s)
MaxTime
(2bytes Unit:s)
Reserved
(5Byte,Fixed 0x00)
StartWarning
WithAckReq 0x03
WarningMode(1byte)
0x00_FireMode,
0x01_EmergencyMode,
0x02_Burglar,
0x03_Doorbell,
0x04_MuteMode
Other value is Reserved
StrobeMode(1byte)
0x00_NoLedIndication,
0x01_LedBlinkMode1
in Parallel to Warning,
0x02_LedBlinkMode2
in Parallel to Warning
Warning
Duration
(2bytes,Unit:1s)
Reserved
(5Bytes,
Fixed 0x00)
StartWarning
WithAckRsp 0x83 Status
(0x00_success)
Reserved
(8Bytes,Fixed 0x00)

8
(1) Command Configuration:
a. WarningMode= FireMode、StrobeMode= LedBlinkMode1、WarningDuration=10s
Downlink:90690001000A0000000000
b. WarningMode= Doorbell 、StrobeMode= NoLedIndication、WarningDuration=10s
Downlink:90690300000A0000000000
c. WarningMode= MuteMode、StrobeMode= LedBlinkMode1、WarningDuration=10s
Downlink:90690401000A0000000000
d. Stopping sounds and flashing lights
( WarningMode= MuteMode、StrobeMode= NoLedIndication、WarningDuration=0s
Downlink:9069040000000000000000
e. Setting MinTime / MaxTime = 300s = 5min //MinTime / MaxTime must equal.
Downlink: 0169012C012C0000000000 012C (Hex) = 300 (Dec)
Response: 8169000000000000000000 (Configuration success)
8169010000000000000000 (Configuration failure)
f. Read MinTime / MaxTime
Downlink: 0269000000000000000000
Response: 8269012C012C0000000000 (Current configuration)
Note:
If the StartWarning (0x90) is issued, the action will be executed but the status will not be reported.If you want to receive the
report status, you need to issue StartWarningWithAckRsp (0x03) instead.
6. Installation and Precaution
This product does not have a waterproof function. After the join the network, please place it indoors.
1. Use screws (should be purchased) to fix it on the wall.
It is recommended that the distance between the screw head
and the wall is more than 3mm, so that the sound and light
alarm can be hung, as shown below.
Note:
Do not install the device in a metal enclosure or other
electrical equipment around it to avoid affecting the wireless
transmission of the device.
2. Hang the groove on the back of the sound and light alarm
(red circle in the figure below) on the screw head .

9
7. Important Maintenance Instruction
Kindly pay attention to the following in order to achieve the best maintenance of the product:
• Keep the device dry. Rain, moisture, or any liquid, might contain minerals and thus corrode electronic circuits. If the device gets
wet, please dry it completely.
• Do not use or store the device in dusty or dirty environment. It might damage its detachable parts and electronic components.
• Do not store the device underexcessive heat condition.High temperaturecan shorten the life of electronic devices, destroy batteries,
and deform or melt some plastic parts.
• Do not store the device in places that are too cold. Otherwise, when the temperature rises to normal temperature, moisture will
form inside, which will destroy the board.
• Do not throw, knock or shake the device. Rough handling of equipment can destroy internal circuit boards and delicate structures.
• Do not clean the device with strong chemicals, detergents or strong detergents.
• Do not apply the device with paint. Smudges might block in the device and affect the operation.
• Do not throw the battery into the fire, or the battery will explode. Damaged batteries may also explode.
All of the above applies to your device, battery and accessories.
If any device is not working properly, please take it to the nearest authorized service facility for repair.
3. Insert the adapter output cable (included) interface into the
power interface (DC 12V) of the sound and light alarm, as
shown on the right.
The other end of the adapter is plugged into a traditional
socket (AC 220V) to power the sound and light alarm
(as shown below).
4. The device is compatible with the LoRaWAN open protocol
Class C class device, which supports four kinds of sound and
mute functions such as fire alarm, emergency, burglar, doorbell
and the like through the downlink command control device;
and also supports the LED light function: flowing light, blink
and unlighted.
R602B can be applied to the following scenarios:
1.Family
2.Engine room
3.School
4.Mining plant site
As a reminder of a security alert.
Table of contents
Other netvox Security System manuals
netvox
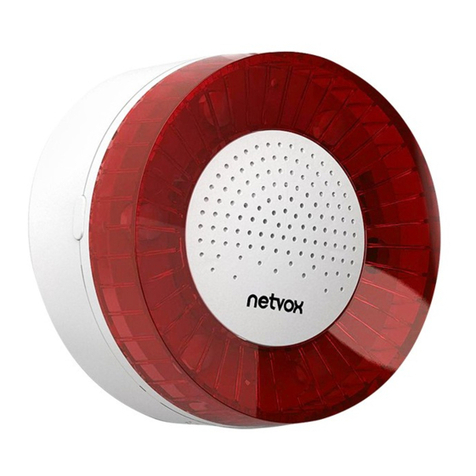
netvox LoRa R602A User manual
netvox
netvox ZigBee Z602A User manual
netvox
netvox R309 Series User manual

netvox
netvox R312A User manual
netvox
netvox Z308 User manual
netvox
netvox Z309 User manual
netvox
netvox Z602B User manual
netvox
netvox RA03A User manual
netvox
netvox LoRa R602A User manual
netvox
netvox RA02G User manual
Popular Security System manuals by other brands
BASETech
BASETech 1546853 operating instructions
Tecnoalarm
Tecnoalarm Evolution EV SAEL BWL quick start guide

DSC
DSC PC1500 instruction manual
Alderon Industries
Alderon Industries Versa'larm VA01A Operation, maintenance and installation manual

Triplett
Triplett CamView PTZ 2 instruction manual
ALC
ALC AHSS51 quick start guide
