NEXIQ Technologies Brake-Link User manual

NEXIQ Brake-Link™
Haldex Trailer ABS
Application Operator’s
Manual

NEXIQ Brake-Link™ Haldex Trailer ABS Application Operator’s Manual
IDSC Holdings LLC r etains a ll o wnership rights to Haldex T railer A BS A pplication and its do cumentation. The
Haldex Trailer ABS Application source code is a confidential trade secret of IDSC Holdings LLC. You may not
decipher or de-compile Haldex Trailer ABS Application, develop source code for Haldex Trailer ABS Application,
or knowingly allow others to do so. Haldex Trailer ABS Application and its documentation may not be sublicensed
or transferred without the prior written consent of IDSC Holdings LLC.
This manual, as w ell as t he so ftware it describes, is furnished und er l icense a nd m ay on ly be us ed or copied i n
accordance w ith t he t erms of su ch license. Th e c ontent of t his m anual i s f urnished f or i nformational u se on ly, i s
subject to change without notice, and should not be construed as a commitment by IDSC Holdings LLC. IDSC
Holdings LLC assumes no responsibility or liability for any errors or inaccuracies that may appear in this book.
Except as permitted by such license, no part of this publication may be reproduced, or transmitted, in any form or by
any means, electronic, mechanical, or otherwise, without the prior written permission of IDSC Holdings LLC.
Haldex is a registered trademark of Haldex Group.
Brake-Link™ and NEXIQ Technologies are trademarks of IDSC Holdings LLC.
2003−2009 IDSC Holdings LLC. All Rights Reserved.
www.nexiq.com
Part No. 193049H Revised 01/06/2009

NEXIQ Brake-Link™ Haldex Trailer ABS Application Operator’s Manual i
Getting Started..................................................... 1
Getting Started .............................................................................. 2
Safety Warnings & Cautions................................................................. 3
Using this Manual.......................................................................... 4
Specialized Text ................................................................................... 4
Navigation Icons................................................................................... 5
General Icons ....................................................................................... 5
Connecting Components............................................................... 6
Navigating Brake-Link™................................................................ 8
Home Button......................................................................................... 8
Enter Button.......................................................................................... 8
Menu Buttons........................................................................................ 9
Direct Access Buttons......................................................................... 10
Light-Emitting Diodes (LEDs) ............................................................. 12

ii NEXIQ Brake-Link™ Haldex Trailer ABS Application Operator’s Manual
Using Haldex Trailer ABS Application..................... 13
Registering ECU & Selecting Navigation Method ....................... 14
Using the Haldex Trailer ABS Application Features.................... 16
ECU Information................................................................................. 16
Faults.................................................................................................. 20
Viewing Active Faults...................................................................... 21
Viewing Stored Faults..................................................................... 25
Clearing Stored Faults .................................................................... 29
Data List ............................................................................................. 33
Tests................................................................................................... 36
Testing Valves................................................................................. 37
Testing Sensors.............................................................................. 40
Modify................................................................................................. 43
Edit Parameters .............................................................................. 43
Tire Scale Factor ............................................................................... 43
Distance to Service............................................................................ 48
Reset Trip Distance......................................................................... 51
Clear Configuration ......................................................................... 53

NEXIQ Brake-Link™ Haldex Trailer ABS Application Operator’s Manual iii
Haldex Trailer ABS Data List Parameters ............... 57
Data List Parameters - 2S/1M ..................................................... 58
Data List Parameters - 2S/2M ..................................................... 59
Data List Parameters - 4S/2M ..................................................... 60
Haldex Trailer ABS Fault Codes............................. 61
Haldex Trailer ABS Fault Codes.................................................. 62

NEXIQ Brake-Link™ Haldex Trailer ABS Application Operator’s Manual 1
1
Getting Started
u
Getting Started, page 2
u
Safety Warnings & Cautions, page 3
u
Using this Manual, page 4
u
Connecting Components, page 6
u
Navigating Brake-Link™, page 8
Brake-Link™ is a hand-held diagnostic tool primarily designed to troubleshoot heavy-
duty vehicle Anti-lock Braking Systems (ABS). This tool also provides a variety of utilities
and configuration options. The end-user documentation is therefore divided into a set of
task-oriented operator’s manuals. This manual details the Haldex Trailer ABS Application.

2 NEXIQ Brake-Link™ Haldex Trailer ABS Application Operator’s Manual
Chapter 1• Getting Started
Getting Started
Brake-Link™is a multi-faceted, hand-held, ABS diagnostic tool that offers a
variety of utilities, diagnostic applications, and configuration options.
Component connection procedures and navigation vary depending on the
utility or application you’re using. The connection and navigation sections in
this manual are specific to the Haldex Trailer ABS Application.
Refer to the
NEXIQ Brake-Link™ Operator’s Manual
for:
—a list of safety warnings and cautions
—an overview of the documentation
—a formal introduction to Brake-Link™
—
general
Brake-Link™connection instructions
—
general
navigation information
—GENERIC PLC TEST and RP1210A PC LINK option details
Refer to the manufacturer-specific application Brake-Link™manual for
the controller you’re testing.
Figure 1.1
Brake-Link™

Getting Started
NEXIQ Brake-Link™ Haldex Trailer ABS Application Operator’s Manual 3
Safety Warnings & Cautions
To protect yourself from injury and the test vehicle from damage:
✔Always wear approved eye protection.
✔Always refer to and follow the vehicle manufacturer’s WARNINGS, CAU-
TIONS and service procedures.
✔Exhaust gas contains deadly poison. Always test outdoors or use prop-
erly vented exhaust hose.
✔Keep yourself and your test equipment clear of all moving or hot engine
parts.
✔Unless otherwise noted, set the parking brake and place the gear selec-
tor in the NEUTRAL or PARK position. If the vehicle has an automatic
parking brake release, temporarily disconnect the release mechanism.
Also, block the drive wheels before performing a test with the engine
running.
✔Unless otherwise directed, turn the ignition switch OFF before discon-
necting or connecting any electrical components.
✔Read and understand this manual before operating your Brake-Link™.
✔NEXIQ Technologies recommends having an assistant drive the vehicle
while you use the Brake-Link™to perform vehicle road testing.
✔Never leave the vehicle unattended while testing.
Certain Electro-Static Discharge (ESD) and/or Electrical Fast Transient
(EFT) events may lock up the Brake-Link™. Disconnect the Brake-Link™
from the power source and re-connect to regain full operation.

4 NEXIQ Brake-Link™ Haldex Trailer ABS Application Operator’s Manual
Chapter 1• Getting Started
Using this Manual
This manual contains comprehensive information to teach you how to use the
Haldex Trailer ABS Application. It also provides the following features to
support quick reference once you’re familiar with the application.
•A detailed
Table of Contents
to help you find exactly what you’re looking
for quickly and easily
•
All-inclusive discussions
to minimize referencing other sections
•
Comprehensive illustrations
to help you visualize concepts
•
Troubleshooting Tips
to help you solve or avoid common issues
Additionally, each chapter begins with an “at-a-glance”list of the chapter’s con-
tents, along with corresponding page numbers.
Specialized Text
This manuals features the following specially formatted text to help you differ-
entiate software elements presented by the Brake-Link™.
•Menu items: Whenever the manual instructs you to select from a list of
menu items, it presents the desired choice with this format.
•Screen titles: Once you select a menu item, Brake-Link™presents the
selected item’s screen. The screen title appears in bolded type.
•Field/Line: The manual presents a field or line of text from a display with
this formatting.
•
Emphasis
: This format draws your attention to particularly important
information.
Using this Manual
NEXIQ Brake-Link™ Haldex Trailer ABS Application Operator’s Manual 5
Navigation Icons
Brake-Link™offers two methods of navigation: menu and direct access
buttons.
See“Navigating Brake-Link™”,onpage 8.
Ifa task can be performed
with both methods, the manual provides separate instructions for each
method. Topic introductions indicate when there are two sets of instructions
and the following icons help you to easily locate the desired set.
For example:
Clear Faults via menu navigation:
Clear Faults via buttons navigation:
General Icons
This manual also presents icons that denote specific types of peripheral
information.
Troubleshooting Tips help you diagnose or anticipate potential issues.
Caution Tips help you avoid injury or prevent damage to Brake-Link™.
?Frequently asked questions, industry definitions and other relevant back-
ground information.
6 NEXIQ Brake-Link™ Haldex Trailer ABS Application Operator’s Manual
Chapter 1• Getting Started
Connecting Components
Brake-Link™interfaces with the vehicle’s ECU(s) via:
•the 6-pin or 9-pin Deutsch connector,
typically
located under the dash,
beside the driver’s seat or near the trailer’s brake ECU;
or
•the J560 power line connector on the outside of the tractor or trailer.
The brake controllers
supported by this application
transmit information over
the vehicle’s power lines. If the trailer is connected to the tractor, attach
Brake-Link™to the tractor’s Deutsch connector; otherwise, attach to the trail-
er’s power line with the J560 PLC Cable Set.
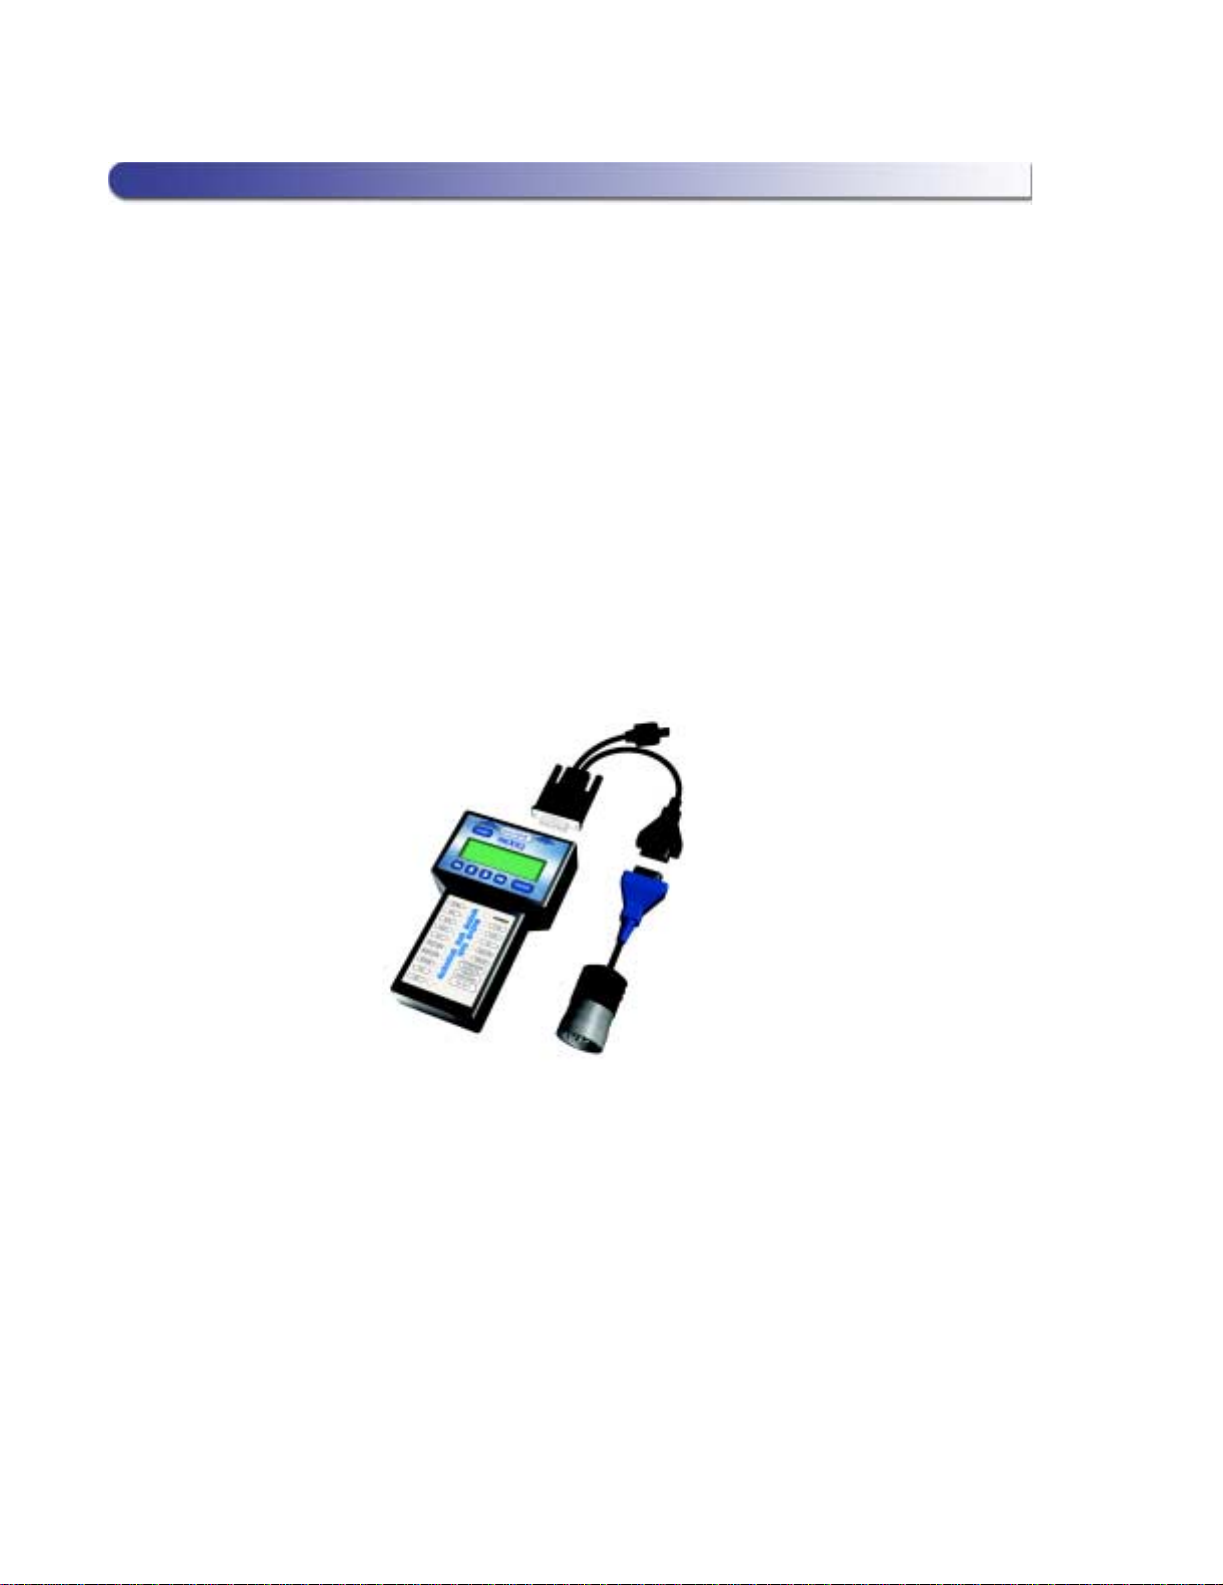
Figure 1.2 shows how to connect Brake-Link™components for ABS
diagnostics.
Figure 1.2
Connectivity diagram for ABS diagnostics.
Power/
Data Cable
6 or 9-pin Deutsch
Note: Where
applicable,
substitute with
J560 PLC Cable
Set (Figure 1.3)
Connecting Components
NEXIQ Brake-Link™ Haldex Trailer ABS Application Operator’s Manual 7
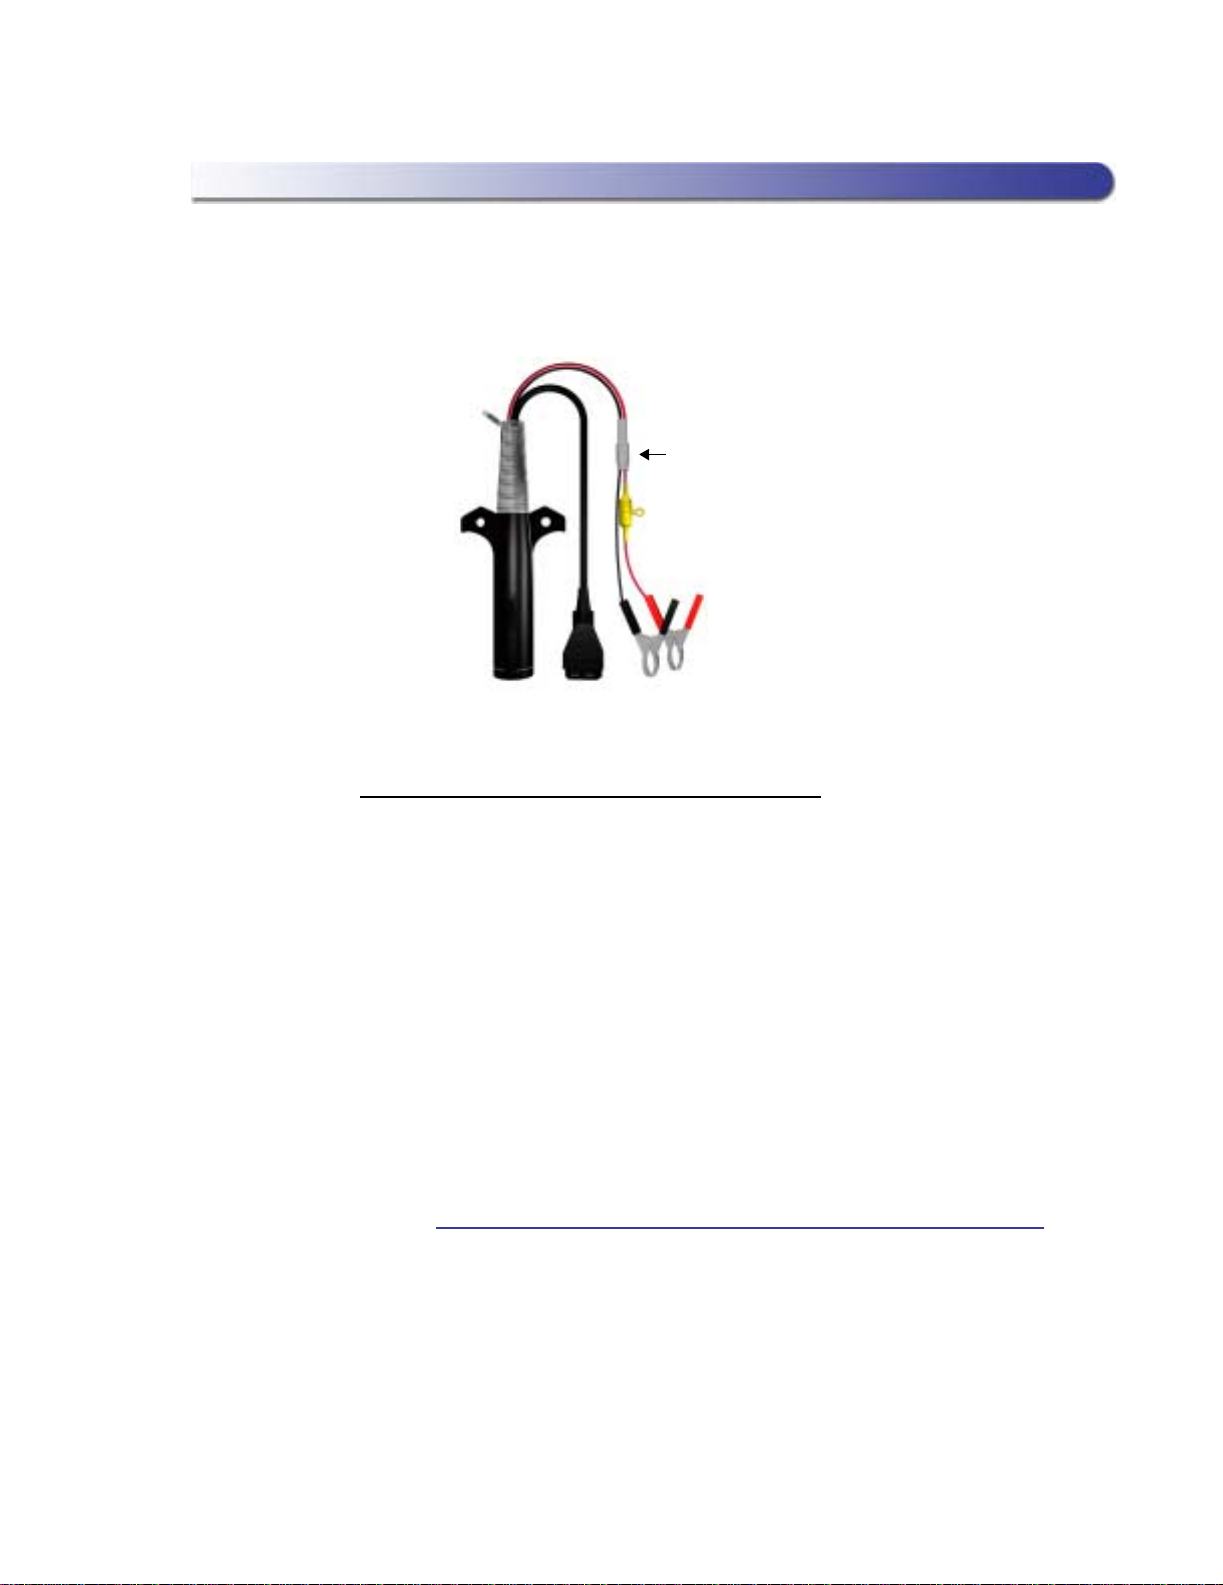
Use the J560 PLC Cable Set in place of the Deutsch adapter if you’re connect-
ing to the trailer’s Power Line.
To connect Brake-Link™ components and power-up:
1Attach the Power/Data Cable DB15 Connector to the data port (labeled
To Vehicle) on the Brake-Link™; tighten the thumbscrews.
2Plug the Data Cable Atari End into the Atari End on the vehicle interface
cable (i.e. Deutsch adapter or J560 PLC Cable Set).
3Attach the vehicle interface cable to the vehicle.
—If you’re using the J560 PLC Cable Set, plug into the power line con-
nector on the outside of the trailer.
—If you’re using the Deutsch Adapter, plug into the Deutsch connector
typically located under the dash on the driver’s side, beside the
driver’s seat.
Note: If the trailer is connected to the tractor, you can attach
Brake-Link™to the tractor or trailer Deutsch connectors.
4If you’re using the J560 PLC Cable Set, connect the alligator clips to an
external power supply; otherwise, turn the tractor’s key to the “on”
position.
Figure 1.3
J560 PLC Cable Set
Quick
Disconnect

8 NEXIQ Brake-Link™ Haldex Trailer ABS Application Operator’s Manual
Chapter 1• Getting Started
Navigating Brake-Link™
Brake-Link™offers the following navigation options:
•Menu navigation: use the arrow buttons to scroll through the menu
screens and select the menu options.
•Button navigation: use the direct access buttons to access specific
Brake-Link™options directly.
This section provides an
overview
of button functionality. The procedure dis-
cussions specify which buttons to push and when.
Home Button
Press the button to return to the Select Application screen.
Enter Button
Press the button to select a menu item, confirm a response, or instruct
Brake-Link™to proceed to the next step.
SELECT APPLICATION
GENERIC PLC TEST
BENDIX/KB/EATON ABS
MERITOR WABCO ABS

Navigating Brake-Link™
NEXIQ Brake-Link™ Haldex Trailer ABS Application Operator’s Manual 9
Menu Buttons
If you choose MENUNAVIGATION,use the menu buttons (located below the
tool’s LCD) to navigate through the menu screens.
When the LCD displays a list of options,
•press the or key to scroll through the available options;
Note: A dashed line displays after the last option indicating the end
of the menu or list.
•press to select the option the blinking cursor is on;
•press to exit your selection and return to the previous menu or
screen.
Figure 1.4
Menu buttons
Menu buttons

10 NEXIQ Brake-Link™ Haldex Trailer ABS Application Operator’s Manual
Chapter 1• Getting Started
Direct Access Buttons
The direct access buttons reside on the lower portion of the Brake-Link, and
are grouped by functionality. These buttons operate differently depending on
the application you’re using and/or controller you’re diagnosing. This section
provides an overview for how the direct access buttons are used within the
Haldex Trailer ABS Application.
Note: If you are not currently using the Haldex Trailer ABS Appli-
cation,refer to the manual specific to the application you are using
to find out how these buttons function within that application.
The following table lists the direct access buttons that are supported by the
Haldex Trailer ABS Application.
Figure 1.5
Direct Access Buttons
Button
group
tags

Navigating Brake-Link™
NEXIQ Brake-Link™ Haldex Trailer ABS Application Operator’s Manual 11
Note: Buttons
not
included on this list are not enabled and do not
function when using this application.
Direct Access
Button Menu Feature Use
View Active Faults To view stored faults
View Stored Faults To view existing faults
Clear Faults Clear active/stored faults
from the ECU
View Data List To view Data List parameters
View Data List To view Data List parameters
View ECU Information To view ECU information
12 NEXIQ Brake-Link™ Haldex Trailer ABS Application Operator’s Manual
Chapter 1• Getting Started
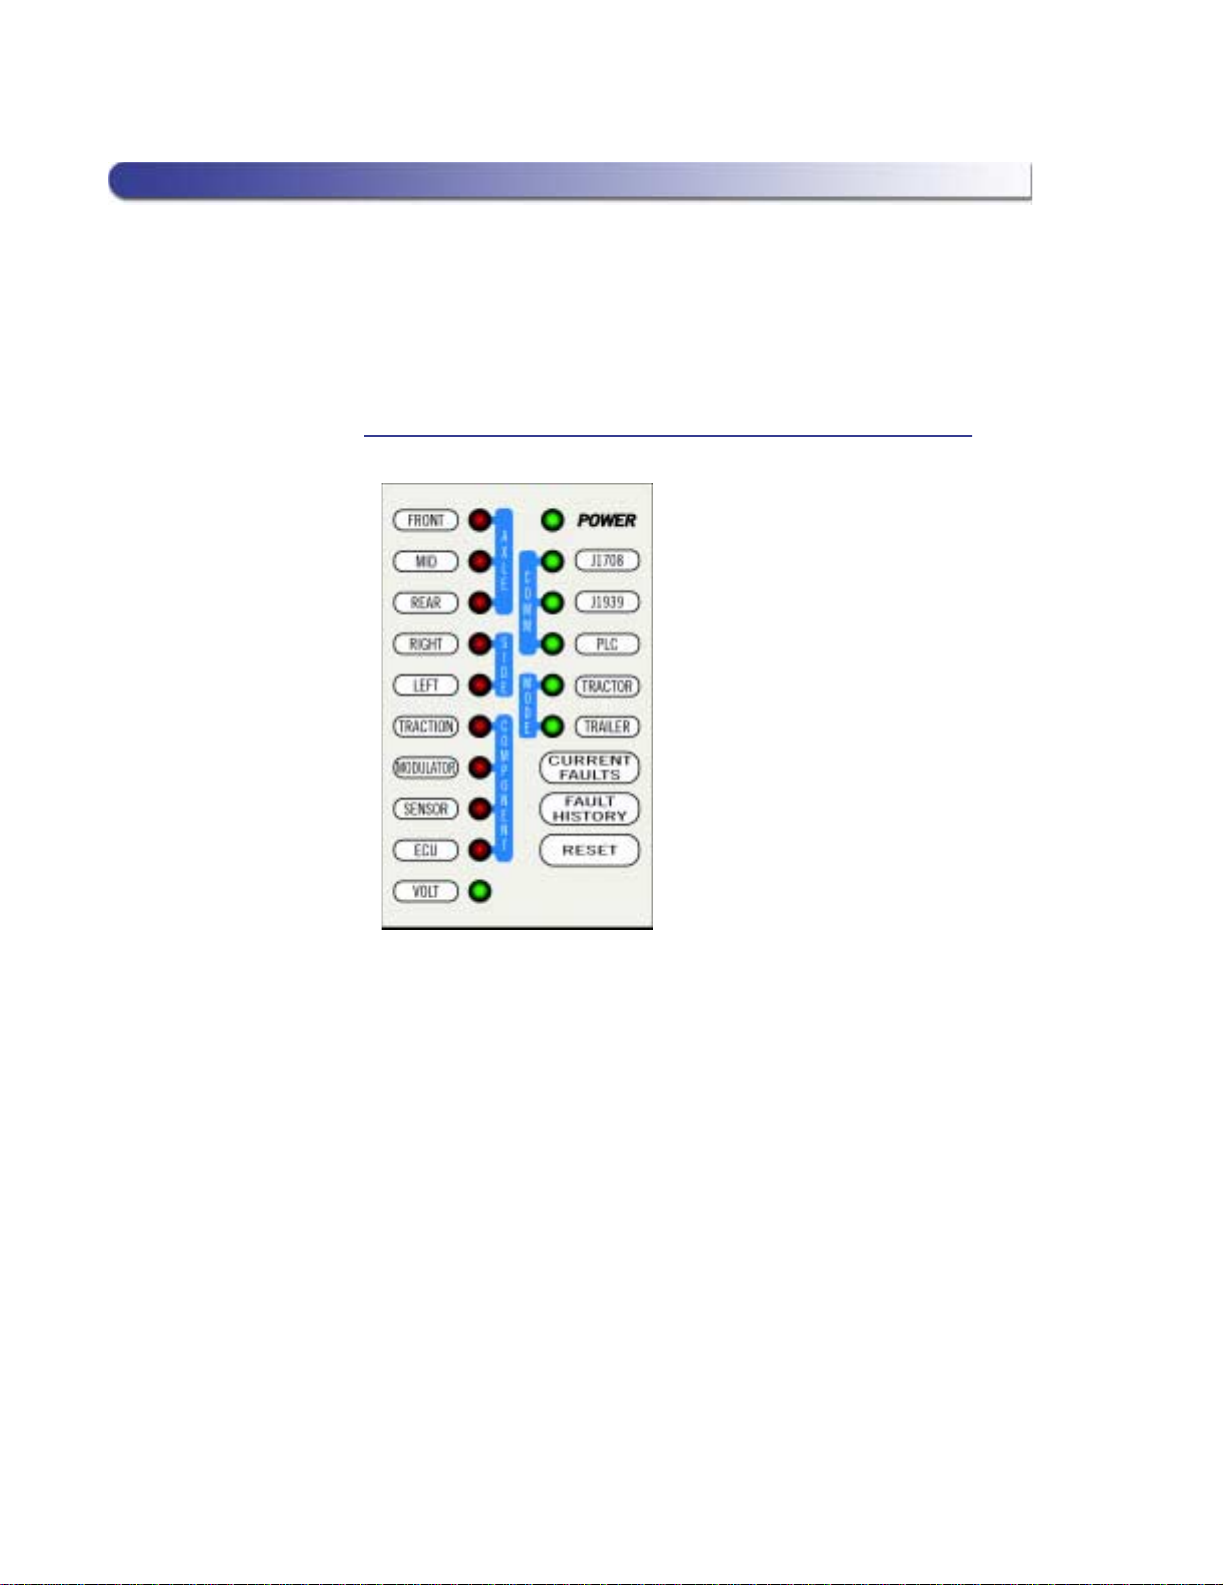
Light-Emitting Diodes (LEDs)
OncetheBrake-Link™establishes power,thePOWER LEDilluminates.Then,
once the Haldex Trailer ABS Application is loaded, the PLC and TRAILER
LEDs illuminate, and remain lit while the application is being used.
Note: No other LEDs illuminate for this application.
Figure 1.6
Light-Emitting Diodes

NEXIQ Brake-Link™ Haldex Trailer ABS Application Operator’s Manual 13
2
Using Haldex Trailer
ABS Application
u
Registering ECU & Selecting Navigation Method, page 14
u
Using the Haldex Trailer ABS Application Features, page 16
Brake-Link™features the Haldex Trailer ABS Application for diagnosing Haldex
Trailer Anti-lock Brake System issues.
This chapter provides instructions for using the Haldex Trailer ABS Application.
14 NEXIQ Brake-Link™ Haldex Trailer ABS Application Operator’s Manual
Chapter 2• Using Haldex Trailer ABS Application
This application supports two methods of navigation (see pg. 8). Most discus-
sions in this chapter provide a separate set of instructions for each method.
Instructions for completing a task via a certain navigation method are indicated
with an icon, as follows:
•
menu navigation
is indicated by this icon ;
•
button navigation
is indicated by this icon .
Registering ECU & Selecting Navigation Method
After powering up Brake-Link™and selecting a diagnostic application,
Brake-Link™attempts to establish communication with the applicable ECU.
This process is called
registration
. The following procedure provides step-by-
step instructions for registering the ECU, as well as details on selecting a nav-
igation method.
To register the ECU & select a navigation method:
1Connect Brake-Link™to the tractor or trailer and power-up (see “Con-
necting Components”, on page 6). Brake-Link™boots up and presents
the Select Application screen.
2Press the or key to select HALDEX ABS, then press
. Brake-Link™displays the navigation options.
Note: The Test and Modify application features do
not
support
BUTTON NAVIGATION. Please select the MENU NAVIGATION
when using these features.
3Press the or key to select the desired navigation method,
then press .
SELECT APPLICATION
WABASH NATIONAL ABS
EATON ABS
HALDEX ABS
MENU NAVIGATION
BUTTON NAVIGATION

Registering ECU & Selecting Navigation Method
NEXIQ Brake-Link™ Haldex Trailer ABS Application Operator’s Manual 15
Brake-Link™auto-detects the Haldex Trailer ABS ECU, then presents
the ECU ID and indicates whether there are current and/or stored
faults.
4Press to continue.
—If you select menu navigation, Brake-Link™presents the Haldex
Trailer ABS Application main menu.
—If you select button navigation, Brake-Link™displays the
CONTINUE BY PRESSING BUTTONS prompt.
You have successfully registered the ECU and selected a navigation method,
andare nowreadyto use the Haldex Trailer ABS Application. Refer to thenext
section for detailed instructions.
PLC SELECT 2S/1M
ACTIVE FAULTS YES
STORED FAULTS NO
[ENTER] TO CONTINUE
If you see the message, ECU NOT RESPONDING:
•the ECU is not an appropriate Haldex Trailer ECU.
•the ECU or Data Bus is not working properly.
ECU INFORMATION
FAULTS
DATA LIST
TESTS
Other manuals for Brake-Link
1
Table of contents
Other NEXIQ Technologies Diagnostic Equipment manuals

NEXIQ Technologies
NEXIQ Technologies USB-Link User guide

NEXIQ Technologies
NEXIQ Technologies USB-Link 3 Wireless User guide

NEXIQ Technologies
NEXIQ Technologies Brake-Link Wabash National User manual

NEXIQ Technologies
NEXIQ Technologies Brake-Link User manual

NEXIQ Technologies
NEXIQ Technologies Blue-Link 2 User manual


