NI SPEEDY-33 Installation Guide 10 ni.com
LED on the front panel. The NI SPEEDY-33 digital output port
LED #3 stays lit the entire time.
If the NI SPEEDY-33 is not set up properly, you receive an error
message. If this occurs, check your connections and verify that the
power LED on the NI SPEEDY-33 is lit. If your connections are good,
unplug the NI SPEEDY-33 and repeat Step 1. Install the Software and
Driver.
7. Click the STOP button on the front panel to stop the VI.
Tip You can also test the NI SPEEDY-33 by right-clicking the SPEEDY-33 target in the
Project Explorer window and selecting Basic Test from the shortcut menu. Click the
Start button in the Basic Test dialog box and read the information on the screen. The basic
test establishes communication with the NI SPEEDY-33, checks the memory, blinks all the
LEDs, and then generates a frequency sweep through the analog output channel. Click the
Close button when the test finishes.
8. Close LabVIEW. You do not need to save changes to the VI or project.
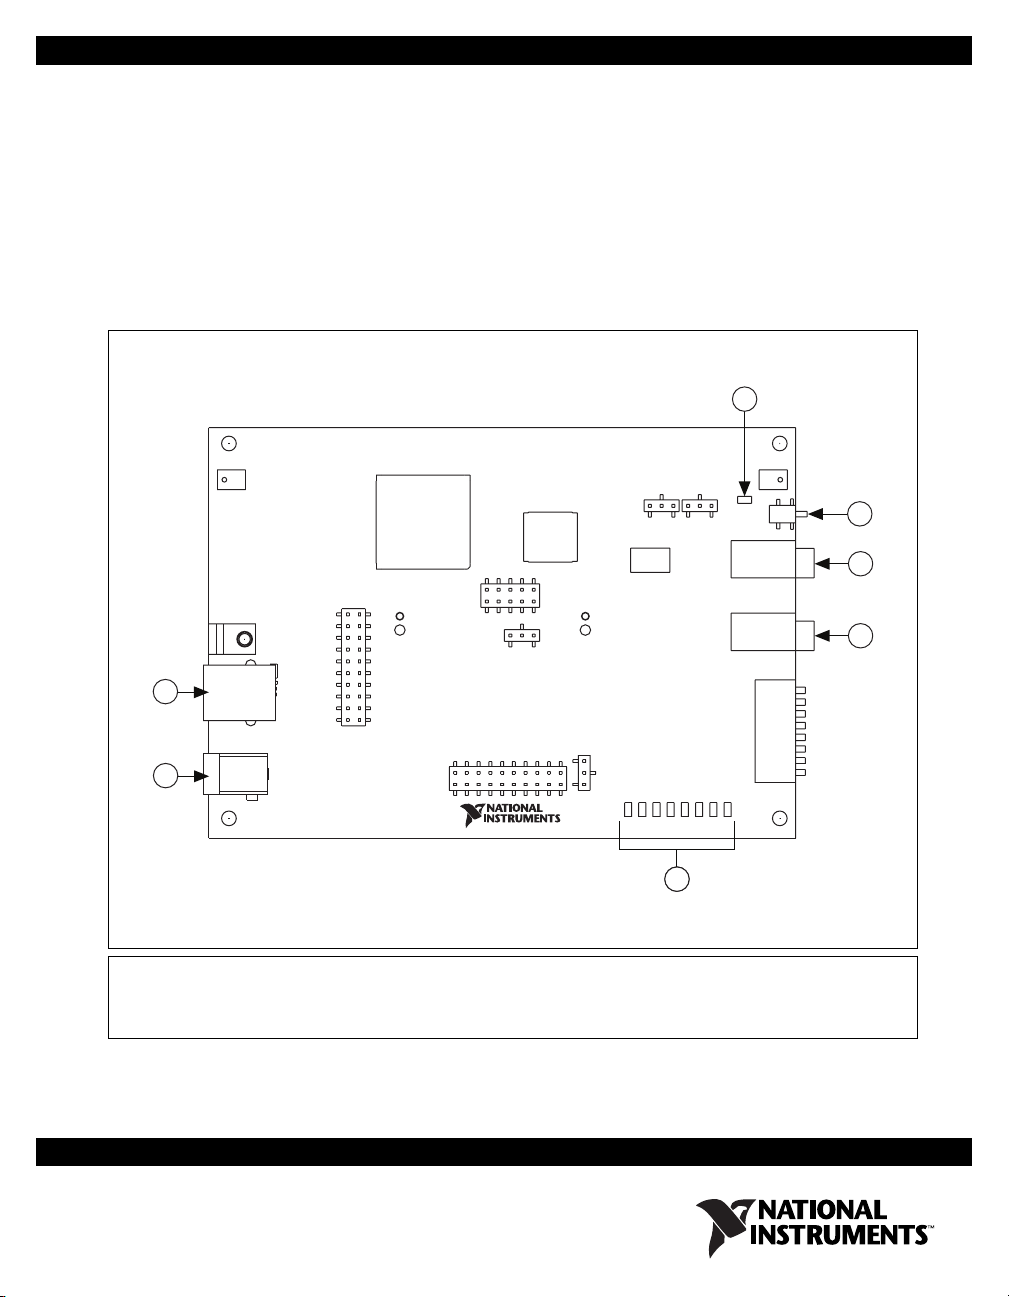
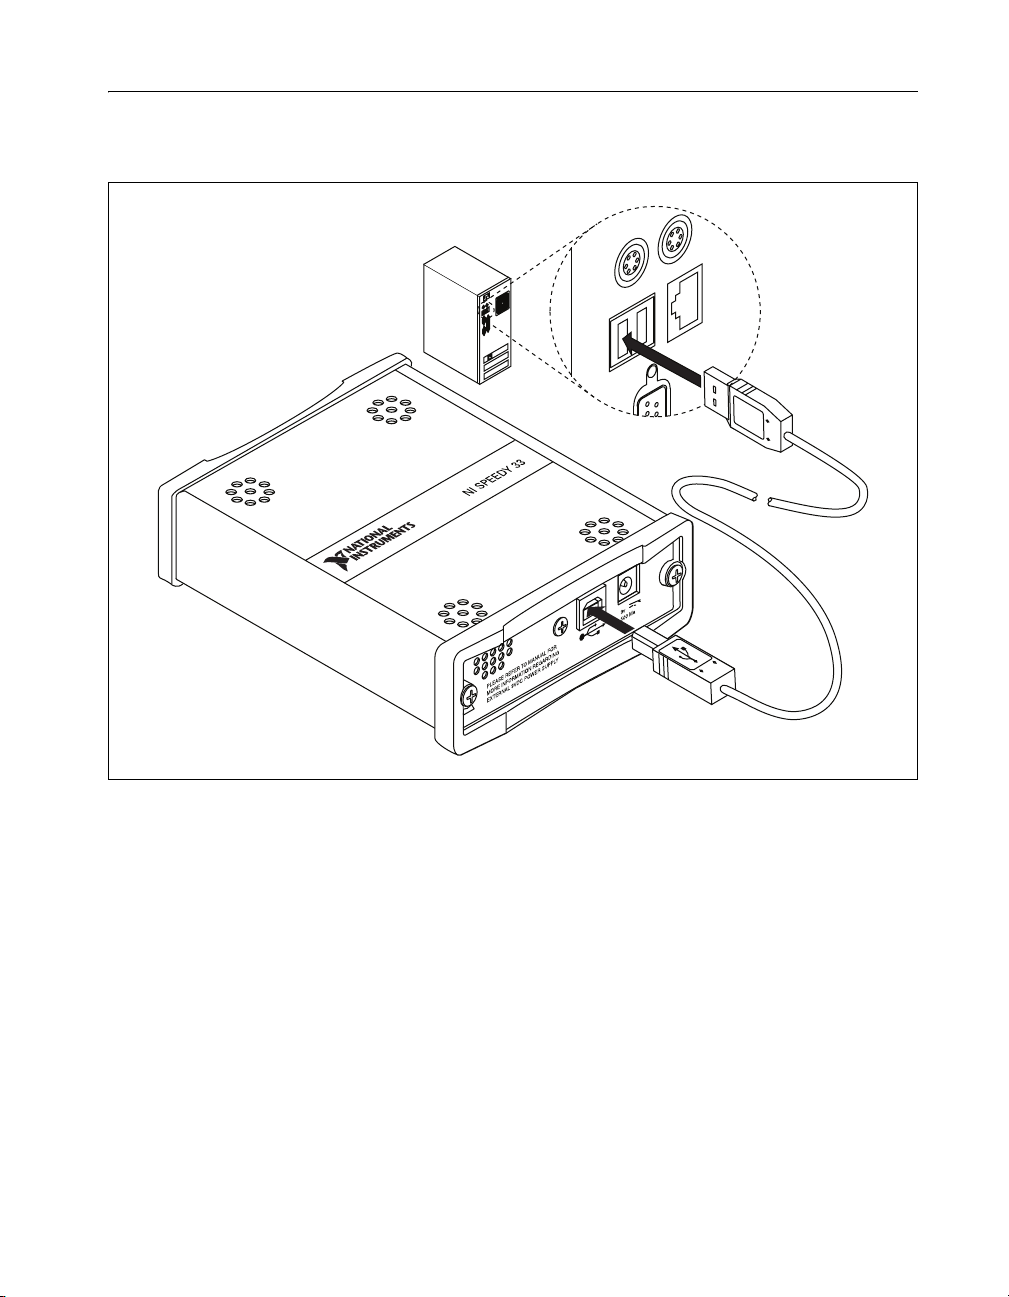
Connecting Accessories to the NI SPEEDY-33
Refer to Figure 1 to connect accessories to the NI SPEEDY-33 as described
in Table 1.
Caution Do not connect the power source to the power port while the NI SPEEDY-33
device is connected to the PC.
Table 1. NI SPEEDY-33 Accessories
Accessory NI SPEEDY-33 Port
Microphone, CD player, MP3 player, PDA, cell phone, or any
peripheral with mini jack connector output
Audio stereo input port
Audio speakers (included with Infinity Technology Kit) or any audio
speakers or headphones with mini jack connector input
Audio stereo output port
Any 9 VDC at 500 mA power port with appropriate safety and EMC
Certification marks, which are acceptable in the country in which the
product is to be installed
Power port for standalone
mode