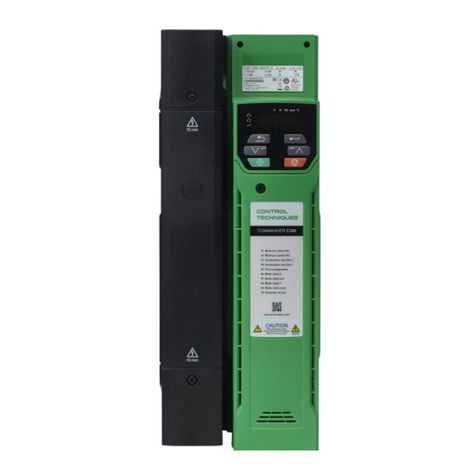
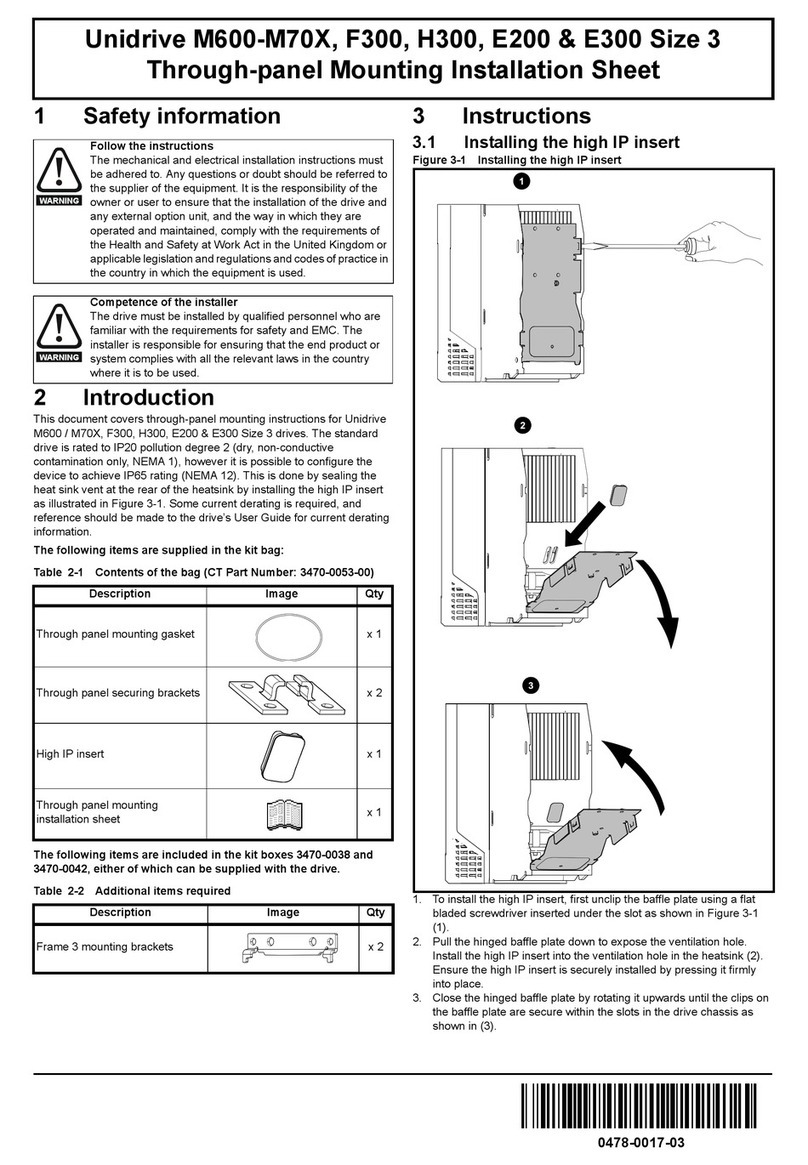
Nidec Profinet Module User manual


General Information
The manufacturer accepts no liability for any consequences resulting from inappropriate, negligent or
incorrect installation or adjustment of the optional parameters of the equipment or from mismatching the
starter with the motor.
The contents of this guide are believed to be correct at the time of printing. In the interests of commitment
to a policy of continuous development and improvement, the manufacturer reserves the right to change
the specification of the product or its performance, or the content of the guide without notice.
All rights reserved. No parts of this guide may be reproduced or transmitted in any form or by any means,
electrical or mechanical including, photocopying, recording or by an information storage or retrieval
system, without permission in writing from the publisher.
Copyright: © December 2017 Nidec
Issue: B

Contents
1. Important User Information ......................................................................................4
1.1 Safety .................................................................................................................................... 4
1.2 Product Design ...................................................................................................................... 4
1.3 Compatibility .......................................................................................................................... 4
1.4 Disclaimer.............................................................................................................................. 4
2. Installation .................................................................................................................5
2.1 Installation Procedure ............................................................................................................ 5
3. Connection.................................................................................................................6
3.1 Soft Starter Connection.......................................................................................................... 6
3.2 Network Connection............................................................................................................... 6
3.3 Network Establishment .......................................................................................................... 7
3.4 Communication Protocols ...................................................................................................... 7
3.5 Addressing............................................................................................................................. 7
4. Device Configuration ................................................................................................8
4.1 Ethernet Device Configuration Tool ....................................................................................... 8
5. Operation .................................................................................................................10
5.1 Device Classification............................................................................................................ 10
5.2Master Configuration............................................................................................................ 10
5.3 LEDs.................................................................................................................................... 10
6. Packet Structures....................................................................................................11
6.1 Ensuring Safe and Successful Control................................................................................. 11
6.2 Control Commands (Write Only) .......................................................................................... 11
6.3 Status Commands (Read Only) ........................................................................................... 12
6.4 Parameter Management (Read/write) .................................................................................. 17
6.5 Examples............................................................................................................................. 18
7. Network Design .......................................................................................................19
7.1 Star Topology ...................................................................................................................... 19
7.2 Line Topology ...................................................................................................................... 19
7.3 Ring Topology...................................................................................................................... 20
7.4 Combined Topologies .......................................................................................................... 20
8. Specifications ..........................................................................................................21
Profinet Module: User Guide 3
Issue: B www.nidec.com

1. Important User Information
1.1 Safety
Observe all necessary safety precautions when controlling the soft starter remotely. Alert personnel that
machinery may start without warning.
It is the installer's responsibility to follow all instructions in this manual and to follow correct electrical
practice.
Close attention is required to the electrical installation and the system design to avoid hazards either in
normal operation or in the event of equipment malfunction. System design, installation, commissioning
and maintenance must be carried out by personnel who have the necessary training and experience.
They must read this safety information and this guide carefully.
1.2 Product Design
The Profinet Module allows a Nidec soft starter to connect to an Ethernet network and be controlled or
monitored using an Ethernet communication model.
Separate modules are available for Profinet, Modbus TCP and Ethernet/IP networks.
The Profinet Module operates at the application layer. Lower levels are transparent to the user.
Familiarity with Ethernet protocols and networks is required to operate the Profinet Module successfully.
For difficulties using this device with third party products, including PLCs, scanners and commissioning
tools, contact the relevant supplier.
1.3 Compatibility
The Profinet Module is compatible with the following Nidec soft starters:
•Digistart D2 – 110/240 Vac control voltage.
The Profinet Module is not suitable for use with Digistart D2 starters using 380/440 Vac
control voltage.
•Digistart D3 – all models.
1.4 Disclaimer
The examples and diagrams in this manual are included solely for illustrative purposes. The information
contained in this manual is subject to change at any time and without prior notice. In no event will
responsibility or liability be accepted for direct, indirect or consequential damages resulting from the use
or application of this equipment.
4 Profinet Module: User Guide
www.nidec.com Issue: B

2. Installation
CAU
TION
Remove mains and control voltage from the soft starter before attaching or removing
accessories. Failure to do so may damage the equipment.
2.1 Installation Procedure
1. Remove control power and mains supply from the soft starter.
2. Fully pull out the top and bottom retaining clips on the module.
3. Line up the module with the comms port slot.
4. Push in the top and bottom retaining clips to secure the module to the starter.
5. Insert the network connector.
6. Apply control power to the soft starter.
Figure 2-1 Attach the module to the starter
1 2 3
10178.B
Figure 2-2 Remove the module from the starter
Remove the module using the following procedure:
1. Remove control power and mains supply from the soft
starter.
2. Disconnect all external wiring from the module.
3. Fully pull out the top and bottom retaining clips on the
module.
4. Pull the module away from the soft starter.
03550.B
Profinet Module: User Guide 5
Issue: B www.nidec.com

3. Connection
3.1 Soft Starter Connection
The Profinet Module is powered from the soft starter.
Digistart D2: For the Profinet Module to accept fieldbus commands, a link must be fitted across terminals
CSL-DI2 on the soft starter.
The Profinet Module is not suitable for use with Digistart D2 starters using 380/440 Vac control
voltage.
Digistart D3: Input links are required across the stop and reset inputs if the soft starter is being operated
in Remote mode. In Local mode, links are not required.
NOTE
Digistart D3: Control via the fieldbus communication network is always enabled in local control
mode, and can be enabled or disabled in remote control mode (Pr 3O Comms in Remote). See
the soft starter user manual for parameter details.
Figure 3-1 Profinet Module connections
Digistart D2
Digistart D3
15633.A
1
3
2
15634.A
1
3
2
Digistart D2
Digistart D3 (Remote mode)
CSL, DI2: Stop input
DI2, +24V: Stop input
DI3, +24V: Reset input
Profinet Module
Profinet Module
RJ45 Ethernet ports
RJ45 Ethernet ports
3.2 Network Connection
3.2.1 Ethernet Ports
The Profinet Module has two Ethernet ports. The ports are equal and interchangeable - if only one
connection is required, either port can be used.
3.2.2 Cables
Use Category 5, 5e, 6 or 6e cable to connect to the Profinet Module.
3.2.3 EMC Precautions
To minimise electromagnetic interference, Ethernet cables should be separated from motor and mains
cables by 200 mm.
If the Ethernet cable must cross motor or mains cables, the crossing should be at an angle of 90°.
6 Profinet Module: User Guide
www.nidec.com Issue: B

3.3 Network Establishment
The controller must establish communications directly with each module before the module can
participate in the network. Once communications are established, the module can participate in an
existing network.
3.4 Communication Protocols
The Profinet Module supports the following protocols:
Table 3-1 Supported communication protocols
CL-RPC Connectionless remote procedure call
DCP Discovery and configuration protocol
LLDP Link layer discovery protocol
MRP Media redundancy protocol
RTC Real-time cyclic protocol; Class 1 and 2 (unsynchronised), Class3 (synchronised)
SNMP Simple network management protocol
The Profinet Module does not support the following protocols:
Table 3-2 Unsupported communication protocols
DHCP Dynamic host configuration protocol
MCR Multicast communication relation
RTA Real-time acyclic protocol
Flexible
RT_CLASS_2
Real-time cyclic protocol; Class 2 synchronised
RT_CLASS_UDP Unsynchronised cross-subnet communication between different subnets
The maximum data length for input and output data is 256 bytes each.
3.5 Addressing
Each device in a network is addressed using a MAC address and an IP address, and can be assigned a
symbolic name associated with the MAC address.
•The module must be assigned a static IP address (see Ethernet Device Configuration Tool on page
8), or can be assigned an IP address by the master via DCP. The Profinet Module does not support
DHCP addressing.
•The symbolic name is optional and must be configured within the device.
•The MAC address is fixed within the device and is printed on a label on the front of the module.
Figure 3-2 MAC ID location
MAC: 00-02-A2-25-DC-B3
1 2
TX/RX 2
TX/RX 1
Li nk 2
Li nk 1
Error
Status
Power
14701.B
Profinet Module: User Guide 7
Issue: B www.nidec.com

4. Device Configuration
To permanently configure attributes in the Profinet Module, use the Ethernet Device Configuration Tool
and untick "Store settings temporary".
NOTE
The Error LED flashes whenever the module is receiving power but is not connected to a
network. The Error LED will flash throughout the configuration process.
4.1 Ethernet Device Configuration Tool
The Ethernet Device Configuration Tool can be downloaded from www.nidec.com.
To configure the device using the Ethernet Device Configuration Tool:
1. Attach the module to a soft starter.
2. Connect one Ethernet port on the module to the Ethernet port of the PC.
3. Apply control power to the soft starter.
4. Start the Ethernet Device Configuration Tool.
5. Click on Search Devices. The software will search for connected devices.
6. The search results will contain two entries for each connected device. Select the DCP Protocol
entry for the required device.
8 Profinet Module: User Guide
www.nidec.com Issue: B

7. To set a static IP address, click Configure then select Set IP address.
8. To configure a device name, click Configure then select Device Name.
Profinet Module: User Guide 9
Issue: B www.nidec.com

5. Operation
The Profinet Module has been designed for use in a system complying with the Profinet standard. For
successful operation, the controller must also support all functions and interfaces described in this
document.
5.1 Device Classification
The Profinet Module is a Profinet IO-Device and must be managed by an IO-Controller over Ethernet.
5.2 Master Configuration
Import the latest GSDML file into your Master configuration tool. This file is available from
www.nidec.com.
If your Master uses on-screen icons, two graphic bitmap files are available from the website.
SSPM_N.bmp indicates normal mode. SSPM_D.bmp indicates diagnostic mode.
5.3 LEDs
Figure 5-1 Feedback LEDs
1 2
TX/RX 2
TX/RX 1
Link2
Link1
Error
Status
Power
14702.A
LED
name
LED Status
Description
Power
Off
Module is not powered up.
On
Module is receiving power.
Error
Off
No error.
Flashing
No data exchange.
On
No physical link or slow physical link.
No configuration.
Status
Off
No error.
Flashing
DCP signal service initiated via the bus.
Link x
Off
No network connection.
On
Connected to a network.
TX/RX x
Flashing
Invalid controller.
On
Transmitting data.
10 Profinet Module: User Guide
www.nidec.com Issue: B

6. Packet Structures
NOTE
Some soft starters do not support some functions.
The following functions are only available with Digistart D3 soft starters:
parameter management, dual motor control, digital inputs, jog, current measurement in
amperes, power information, warnings.
6.1 Ensuring Safe and Successful Control
Data written to the Profinet Module will remain in its registers until the data is overwritten or the module is
reinitialised. The Profinet Module will not transfer successive duplicate commands to the soft starter.
NOTE
If the soft starter is started via fieldbus communications but stopped via the keypad or a remote
input, an identical start command cannot be used to restart the starter.
In order to operate safely and successfully in an environment where the soft starter may also be
controlled via the keypad or the remote inputs (as well as via fieldbus communications), a control
command should be immediately followed by a status query to confirm the command has been actioned.
6.2 Control Commands (Write Only)
Use the following structures to send a control command to the soft starter:
Table 6-1 Control I/O data structure
Byte 0
Bit 7
Bit 6
Bit 5
Bit 4
Bit 3
Bit 2
Bit 1
Bit 0
Reserved
Reserved
Reserved
Quick stop
(coast to
stop)
Motor set
Reserved
Reserved
Byte 1
Bit 7
Bit 6
Bit 5
Bit 4
Bit 3
Bit 2
Bit 1
Bit 0
Reserved
Reserved
Reserved
Reserved
Reset
Reserved
Reserved
Fwd run
6.2.1 Motor Set Bits
Selects which parameter set to use when starting:
0 = selected from soft starter remote input (programmable input must be set to 'Motor Set Select')
1 = soft starter primary motor set (ensure soft starter programmable input is not set to 'Motor Set Select')
2 = soft starter secondary motor set (ensure soft starter programmable input is not set to 'Motor Set
Select')
3 = Reserved
6.2.2 Quick Stop Bit
When Fwd run bit changes from 1 to 0:
0 = stop action will be a soft stop (as selected on the soft starter).
1 = stop action will be a quick stop (ie coast to stop).
NOTE
The Quick stop bit must be set to 0 before the soft starter can perform a start.
6.2.3 Forward Run
When Forward run changes from 0 to 1, the soft starter will start according to the Motor set setting.
When Forward run changes from 1 to 0, the soft starter will stop according to the Quick stop setting.
Profinet Module: User Guide 11
Issue: B www.nidec.com

6.3 Status Commands (Read Only)
Starter status information is always available when the module is connected to a soft starter, in the
following format:
Table 6-2 Status word structure
Byte 0
Byte 1
Byte 2
Byte 3
Byte 4
Byte 5
Byte 6
Byte 7
Byte 8
Byte 9
Control status
(low byte)/(high byte)
Starter state
(low byte)/(high byte)
Trip code
(low byte)/(high byte)
Motor current
(low byte)/(high byte)
Motor temperature
(low byte)/(high byte)
6.3.1 Control status
Table 6-3 Status word structure
Byte 0
Bit 7
Bit 6
Bit 5
Bit 4
Bit 3
Bit 2
Bit 1
Bit 0
Ramping
Local mode
Motor current (% FLC) 1
Byte 1
Bit 7
Bit 6
Bit 5
Bit 4
Bit 3
Bit 2
Bit 1
Bit 0
Reserved
Reserved
Reserved
Reserved
Warning
Fault
On
Ready
1Motor current (% FLC) represents current as a percentage of the set motor full load current. A maximum
value of 63 represents 200% full load current. To convert this value to a readable percentage, divide by
0.315. For models D3-1x-0053-B and smaller this value will be 10 times greater than the value displayed
on the keypad.
Ready is set when the soft starter is ready to start the motor.
On is set when the soft starter is starting, running or soft stopping the motor.
Warning is set when the soft starter detects a warning condition.
Fault is set when the soft starter has tripped.
Ramping is set when the soft starter is starting or soft stopping the motor.
Local is set when the soft starter is set to Local mode.
6.3.2 Starter state
Table 6-4 Status word structure
Byte 2
Bit 7
Bit 6
Bit 5
Bit 4
Bit 3
Bit 2
Bit 1
Bit 0
Communi-
cation failure
between
module and
starter
Initialised
(set after first
start once
phase
sequence
has been
confirmed)
Current
exceeds FLC
Positive
phase
sequence
The decimal value of bits 0 to 3 indicates the starter's
state:
0 = Unknown (communication error between module
and soft starter)
1 = Ready
2 = Starting
3 = Running
4 = Stopping
5 = Not ready (restart delay, restart temperature
check, run simulation, input A (DI4, +24V) not shorted)
6 = Tripped
7= Menu open (cannot start)
8 = Jog forward
9 = Jog reverse
Byte 3
Reserved
12 Profinet Module: User Guide
www.nidec.com Issue: B

6.3.3 Trip Codes
Table 6-5 Trip messages
Trip Code
Description
Digistart D2
Digistart D3
1
Excess start time
2
Motor overload
3
Motor thermistor
4
Current imbalance
5
Frequency
6
Phase sequence
7
Instantaneous overcurrent
8
Power loss
10
Heatsink overtemperature
11
Motor Connection Tx
12
Input A trip
13
FLC too high
14
Unsupported option (function not available in inside delta)
15
Starter communication (between module and soft starter)
16
Network communication (between module and network)
17
Internal fault x (where x is the fault code detailed in the table
below)
201
Ground fault
23
Parameter out of range
24
Input B trip
26
L1 phase loss
27
L2 phase loss
28
L3 phase loss
29
L1-T1 shorted
30
L2-T2 shorted
31
L3-T3 shorted
32
Motor 2 overload
332
Time-overcurrent (Bypass overload)
35
Battery/clock
36
Thermistor circuit
37
RTD/PT100 A
381
RTD/PT100 B
391
RTD/PT100 C
401
RTD/PT100 D
411
RTD/PT100 E
421
RTD/PT100 F
431
RTD/PT100 G
45
RTD/PT100 X Circt
46
Analog input trip
47
Overpower
48
Underpower
255
No trip
1Available with Digistart D3 only if the appropriate option card is fitted.
2For Digistart D3, time-overcurrent protection is only available on internally bypassed models.
Profinet Module: User Guide 13
Issue: B www.nidec.com
Internal Fault x
The table below details the internal fault code associated with trip code 17.
Table 6-6 Internal fault X
Internal fault
Message displayed on the keypad
70 to 72
Current Read Err Lx
73
ATTENTION! Remove Mains Volts
74 to 76
Motor Connection Tx
77 to 79
Firing Fail Px
80 to 82
VZC Fail Px
83
Low Control Volts
84 to 98
Internal fault X
Contact your local supplier with the fault code (X).
6.3.4 Motor current
Bytes 6 and 7 report motor current in amperes. For models D3-1x-0053-B and smaller this value will be
10 times greater than the value displayed on the keypad.
6.3.5 Motor temperature
Bytes 8 and 9 report motor temperature as a percentage of the motor service factor (calculated by the
soft starter's thermal model).
14 Profinet Module: User Guide
www.nidec.com Issue: B

6.3.6 Extended information
Bytes 10~73 report information from the soft starter’s internal registers.
Table 6-7 Internal register data
Byte
Description
Bits
Details
10-11
Version
0 to 5
Reserved
6 to 8
Product parameter list version
9 to 15
Product type code 1
12-13
Device details
14-15
Changed parameter
number
2
0 to 7
0 = no parameters have changed
1 to 255 = index number of the last parameter changed
8 to 15
Total number of parameters available in the starter
16-17
Changed parameter
value
2
0 to 13
Value of the last parameter that was changed, as indicated
in register 2
14 to 15
Reserved
18-19
Starter state
0 to 4
0 = Reserved
1 = Ready
2 = Starting
3 = Running
4 = Stopping
5 = Not ready (restart delay, restart temperature check, run
simulation, input A (DI4, +24V) not shorted)
6 = Tripped
7 = Programming mode
8 = Jog forward
9 = Jog reverse
5
1 = Warning
6
0 = Unintialised
1 = Initialised
7
0 = Local control
1 = Remote control
8
0 = Parameter(s) have changed since last parameter read
1 = no parameters have changed
2
9
0 = Negative phase sequence
1 = Positive phase sequence
10 to 15
See Trip Codes on page 13 3
20-21
Current
0 to 13
Average rms current across all three phases 4
14 to 15
Reserved
22-23
Current
0 to 9
Current (% motor FLC)
10 to 15
Reserved
24-25
Motor temperature
0 to 7
Motor 1 thermal model (%)
8 to 15
Motor 2 thermal model (%)
26-27
Power
5
0 to 11
Power
12 to 13
Power scale
14 to 15
Reserved
28-29
% Power factor
0 to 7
100% = power factor of 1
8 to 15
Reserved
30-31
Reserved
0 to 15
32-33
Current
4
0 to 13
Phase 1 current (rms)
14 to 15
Reserved
34-35
Current
4
0 to 13
Phase 2 current (rms)
14 to 15
Reserved
Profinet Module: User Guide 15
Issue: B www.nidec.com

Byte
Description
Bits
Details
36-37
Current
4
0 to 13
Phase 3 current (rms)
14 to 15
Reserved
38-39
Reserved
40-41
Reserved
42-41
Reserved
44-45
Parameter list version
number
0 to 7
Parameter list minor revision
8 to 15
Parameter list major version
46-47
Digital Input state
0 to 15
For all inputs, 0 = open, 1 = closed (shorted)
0 = Start
1 = Stop
2 = Reset
3 = Input A
4 = Input B
5 = Input C, if fitted
6 = Input D, if fitted
7 to 15 = Reserved
48-73
Reserved
1Product type code:
4 = Digistart D2
8 = Digistart D3
2Reading register 3 (Changed parameter value) will reset registers 2 (Changed parameter number) and 4
(Parameters have changed). Always read registers 2 and 4 before reading register 3.
3Bits 10 to 15 of register 4 report the soft starter's trip or warning code. If the value of bits 0 to 4 is 6, the
soft starter has tripped. If bit 5 = 1, a warning has activated and the starter is continuing to operate.
4For models D3-1x-0053-B and smaller this value will be 10 times greater than the value displayed on the
keypad.
5Powerscale functions as follows:
0 = multiply Power by 10 to get W
1 = multiply Power by 100 to get W
2 = Power is represented in kW
3 = multiply Power by 10 to get kW
16 Profinet Module: User Guide
www.nidec.com Issue: B

6.4 Parameter Management (Read/write)
The Profinet Module can read parameter values from and write parameter values to the soft starter. The
module handles one parameter at a time.
The module references parameters according to their position in the starter's parameter list.
•Parameter number 1 corresponds to Pr 1A Motor Full Load Current
•The Digistart D3 has 160 parameters. Parameter number 160 corresponds to Pr 16X Low Control
Volts.
Use the following structures to read parameter values from or write parameter values to the soft starter.
Master > Slave output bytes are structured as follows.
Table 6-8 Programming output byte structure
Bit 7
Bit 6
Bit 5
Bit 4
Bit 3
Bit 2
Bit 1
Bit 0
Byte 2
Parameter number to read/write
Byte 3
Reserved Reserved Reserved Reserved Reserved
Write
parameter
Read
parameter
Reserved
Byte 4
Low byte parameter value to write to soft starter/ zero data values for read
Byte 5
High byte parameter value to write to soft starter/ zero data values for read
Slave > Master input bytes are structured as follows.
Table 6-9 Programming input byte structure
Bit 7
Bit 6
Bit 5
Bit 4
Bit 3
Bit 2
Bit 1
Bit 0
Byte 114
Echo parameter number
Byte 115
Reserved Reserved Reserved Reserved Reserved Reserved
Invalid
parameter
value
Invalid
parameter
number
Byte 116
Low byte parameter value read from soft starter
Byte 117
High byte parameter value read from soft starter
Profinet Module: User Guide 17
Issue: B www.nidec.com

6.5 Examples
6.5.1 Control Commands
Start the motor using parameter set 1
Byte 0
Byte 1
Byte 2
Byte 3
Byte 4
Byte 5
Byte 6
Byte 7
4
1
Start the motor, select via remote input
Byte 0
Byte 1
Byte 2
Byte 3
Byte 4
Byte 5
Byte 6
Byte 7
0
1
Stop the motor using the programmed soft stop for motor set 2
Byte 0
Byte 1
Byte 2
Byte 3
Byte 4
Byte 5
Byte 6
Byte 7
8
0
Quick stop the motor
Byte 0
Byte 1
Byte 2
Byte 3
Byte 4
Byte 5
Byte 6
Byte 7
16
0
Reset a trip
Byte 0
Byte 1
Byte 2
Byte 3
Byte 4
Byte 5
Byte 6
Byte 7
≤ 28
8
6.5.2 Status Commands
Read control status - Ready
Byte 0
Byte 1
Byte 2
Byte 3
Byte 4
Byte 5
Byte 6
Byte 7
0
1
Read starter status - Running
Byte 0
Byte 1
Byte 2
Byte 3
Byte 4
Byte 5
Byte 6
Byte 7
3
0
Read starter status - Tripped, trip code 4 (Current imbalance)
Byte 0
Byte 1
Byte 2
Byte 3
Byte 4
Byte 5
Byte 6
Byte 7
6
0
4
0
6.5.3 Parameter Read/Write
Write parameter to starter: parameter number 1, 1A Motor Full Load Current = 55
Byte 0
Byte 1
Byte 2
Byte 3
Byte 4
Byte 5
Byte 6
Byte 7
1
4
55
0
Acknowledge parameter write
Byte 112
Byte 113
Byte 114
Byte 115
Byte 116
Byte 117
Byte 118
Byte 119
1
0
55
0
Read parameter from Digistart D3: parameter number 12, 2H Stop Mode
Byte 0
Byte 1
Byte 2
Byte 3
Byte 4
Byte 5
Byte 6
Byte 7
12
2
0
0
Parameter read response: Pr 2H Stop Mode = 1 (TVR Soft Stop)
Byte 112
Byte 113
Byte 114
Byte 115
Byte 116
Byte 117
Byte 118
Byte 119
12
0
1
0
18 Profinet Module: User Guide
www.nidec.com Issue: B

7. Network Design
The Profinet Module supports star, line and ring topologies.
7.1 Star Topology
In a star network, all controllers and devices connect to a central network switch.
Figure 7-1 Star network topology
14697.A
7.2 Line Topology
In a line network, the controller connects directly to one port of the first Profinet Module. The second
Ethernet port of the Profinet Module connects to another module, which in turn connects to another
module until all devices are connected.
Figure 7-2 Line network topology
14695.A
NOTE
The Profinet Module has an integrated switch to allow data to pass through in line topology. The
Profinet Module must be receiving control power from the soft starter for the switch to operate.
NOTE
If the connection between two devices is interrupted, the controller cannot communicate with
devices after the interruption point.
NOTE
Each connection adds a delay to communication with the next module.
The maximum number of devices in a line network is 32. Exceeding this number may reduce
the reliability of the network.
Profinet Module: User Guide 19
Issue: B www.nidec.com

7.3 Ring Topology
In a ring topology network, the controller connects to the first Profinet Module, via a network switch. The
second Ethernet port of the Profinet Module connects to another module, which in turn connects to
another module until all devices are connected. The final module connects back to the switch.
Figure 7-3 Ring network topology
14696.A
NOTE
The network switch must support loss of line detection.
7.4 Combined Topologies
A single network can include both star and line components.
Figure 7-4 Combined star/line network topology
14700.A
20 Profinet Module: User Guide
www.nidec.com Issue: B
Table of contents
Other Nidec Control Unit manuals
Popular Control Unit manuals by other brands

Gaspardo
Gaspardo PRECIMAT USE AND ASSEMBLY INSTRUCTIONS / SPARE PARTS

Aventics
Aventics LS04 operating instructions

vacuubrand
vacuubrand VV 6 Instructions for use

BIRD
BIRD 4421B540-2 Operation manual

National Instruments
National Instruments Isolated Analog Output Module SCC-AO10 user guide

Miele
Miele SE 247 operating instructions