manuals.online logo
Brands
  1. Home
  2. •
  3. Brands
  4. •
  5. Nidec
  6. •
  7. Measuring Instrument
  8. •
  9. Nidec MT-100 Installation manual

Nidec MT-100 Installation manual

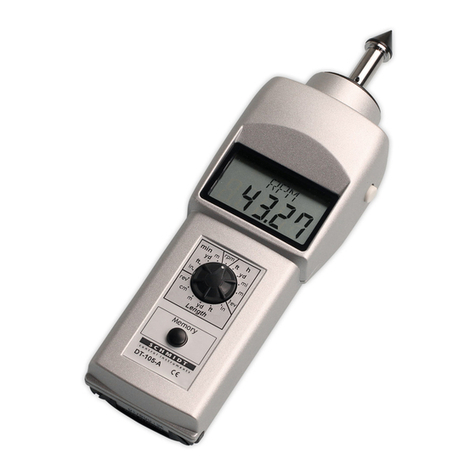
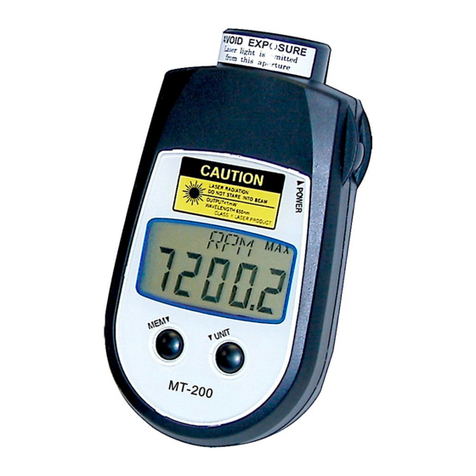
MT-100 Contact Pocket Tachometer
Operation Manual
When using the master wheel, do not use an extension shaft
as the wheel may come off of the shaft and cause damage or injury.
Although the tachometer is able to achieve higher measurements
than what is listed, the master wheel has a maximum speed
limitation of 5000 ft/min (for safety reasons).
When a high-speed rotating object is measured for hours using a cone
or funnel-shaped contact probe the surface of the probe in contact with
the object may become very hot.
When making surface speed or distance measurements, ensure that
the 6” circumference wheel’s perimeter is parallel to the object to be
measured.
SPECIFICATIONS
Display Range:Revolutions: 1.0 – 25,000 RPM , 0.1 - 99,999 Rev.
(total) Speed Using 6” Cir. Wheel: meters/min: 0.1 - 3,809.8; yards/
min: 1.0 - 4,166.4; inch/min: 3 - 99,999; feet/min: 0.2 - 12,499
Length Using 6” Cir. Wheel: meters: 0.01 - 99,999; yards: 0.01 -
99,999; feet: 0.1 - 99,999; inch: 1 - 99,999
Accuracy: Revolution: 1.0 - 599.9 rpm: ±1 rpm, 600 - 25,000 rpm:
±0.006% of reading ±0.5 digit Surface Speed, Length: ±0.4% of
reading ±1 digit
Display:5 digit 0.47” (12 mm) high LCD
Memory System:Readings are stored in memory and retained
for 5 minutes (last, max., min., and 10 user logged measurements)
Detection:Backlit LCD
Resolution: 60 ~12,000 FPM = 0.1 FPM; 12,001~120,000 FPM
= 1 FPM; 1~200 HZ = 0.01 Hz; 201~2000 = 0.1 Hz
Over Range Indicator:Flashing numerals
Power Requirement:3 AA 1.5V batteries
Operating Temperature:32º - 113ºF (0º - 45ºC)
Construction:ABS Resin housing
Product Weight:0.37 lb (170 g)
Package Weight:12 V Pulse Input
Dimensions:4.83”L x 2.52”W x 1.24”H (122.5 mm x 64 mm x
31.5 mm))
Warranty:2-Year
Included Accessories:Three AA Batteries, cone adapter, funnel
adapter, master wheel (6” cir.) carrying case, NIST certificate
The MT-100 Contact Pocket Tachometer with microprocessor
technology possesses the precision of the standard Shimpo Ta-
chometer line, yet within a compact, pocket-style enclosure. The
MT-100 provides users with the capabilities of measuring and re-
cording speeds of rotational, linear and surface plus total length.
These battery-operated tachometers feature the same rugged,
high quality components that have made Shimpo tachometers the
benchmark in the industry. The user-friendly, value-packed units
feature memory storage; quick selection unit’s button; length
functions; retrieval of last, maximum and minimum values; plus
each unit comes standard with a free N.I.S.T. calibration certifi-
cate. Each unit ships in a protective carrying case which includes
a cone adapter, funnel adapter and 6” circumference wheel.
DISPLAY
DIMENSIONS
OPERATION
Contact Measurements
Measuring rotation speed using the cone or funnel-shaped con-
tact probe:
1. Attach the cone or funnel adapter to the tachometer by plac-
ing on the adapter shaft. Align the shaft pin with the notch of the
adapter stem.
2. Press the POWER button to turn the tachometer on.
3. Select RPM (revolutions per minute) or REV (total number of
revolutions) by pressing the UNIT button.
4. Press and hold down the POWER button to start measuring.
5. Bring the contact probe into contact with the object to be mea-
sured by touching the contact probe slowly to the center of the
rotating object. If the measuring range of the tachometer is ex-
ceeded, “OVR” will appear on the tachometer’s display.
6. Press and hold the POWER button to take another measure-
ment.
7. Press the UNIT button to convert between ranges.
Measuring surface speed and distance using the 6” circumfer-
ence wheel.
1. Attach the 6” circumference wheel to the tachometer by plac-
ing the wheel on the adapter shaft. Align the shaft pin with the
notch of the wheel stem.
2. Press the POWER button to turn the tachometer on.
3. Press the UNIT button to select measuring unit: meters/min-
ute [m/M], yards/minute [Y/M], inches/minute [I/M], feet/minute
[F/M], meters [m], yards [YRd], inch [IN], or feet [FT].
4. Bring the 6” circumference wheel into contact with the object to
be measured by slowly touching the contact wheel to the moving
object.
5. Press and hold down the POWER button to start measuring.
6. Press the UNIT button to convert between ranges.
NOTE: When using the master wheel, accuracy can be affected
as much as 0.3% of reading.
Memory Function
The tachometer’s memory capabilities are as follows:
1. Minimum, maximum and last measurements are re-corded au-
tomatically by the tachometer.
2. Ten selectable measurements can be programmed into mem-
ory by pressing the MEM button while the POWER button is fully
depressed (M1, M2, M3, … M10).
3. The average value of sequentially stored memory, up to ten,
can be viewed by pressing the memory button.
NOTE: If the memory button (MEM) is not selected while the POW-
ER button is pressed the measurement will not be re-corded into
its memory location, The memory will be recorded automatically
into memory if the measurement made is the maximum, minimum
or last measurement.
To delete stored memories do one of the following:
1. Press the MEM button for five seconds or more. All memory will
be erased after [CCCCC] is displayed.
2. Changing the units of measurements and then making addi-
tional measurements.
3. Memory will be automatically erased if the TACHOMETER turns
off automatically after five minutes.
Battery Replacement
When “LO BAT” flashes on the display, replace the batteries with
new ones.
To replace the batteries:
1. Slide open the battery cover (located on the rear of the tachom-
eter).
2. Remove old batteries and insert three fresh AA size batteries,
observing proper polarity. Do not mix old and new batteries.
3. Slide the battery cover back into place.
NOTE: Do not mix old and new bartteries, and when replacing
batteries, use AA batteries. The tachometer may be damaged if
liquid leaks from the batteries. This may happen if the batteries
are left inside the tachometer’s enclosure for long periods of time.
Remove the batteries after using the tachometer.
TROUBLESHOOTING
No Display:
• Confirm that the POWER button is operating properly.
• Confirm that the batteries are fresh. Install new batteries.
• Confirm that the batteries are inserted into the tachometer with
correct polarity.
1.91”
(48.5 mm)
6” Circumference Wheel Dimensions
Other Nidec Measuring Instrument manuals

Nidec DT-361 User manual

Nidec

Nidec DT-361 User manual

Nidec TNP Series User manual

Nidec

Nidec TNP Series User manual

Nidec FG-7000L User manual

Nidec

Nidec FG-7000L User manual

Nidec DT-501X User manual

Nidec

Nidec DT-501X User manual

Nidec FG-3000R-S User manual

Nidec

Nidec FG-3000R-S User manual

Nidec MF-2 User manual

Nidec

Nidec MF-2 User manual

Nidec Kato Engineering KRM2000 User manual

Nidec

Nidec Kato Engineering KRM2000 User manual

Nidec ST-1100 User manual

Nidec

Nidec ST-1100 User manual

Nidec TNX Series User manual

Nidec

Nidec TNX Series User manual

Nidec TNP-0.5 User manual

Nidec

Nidec TNP-0.5 User manual

Nidec FG-7000T User manual

Nidec

Nidec FG-7000T User manual

Nidec Shimpo MT-200 User manual

Nidec

Nidec Shimpo MT-200 User manual

Nidec FGE-HXY Installation manual

Nidec

Nidec FGE-HXY Installation manual

Nidec MT-200 User manual

Nidec

Nidec MT-200 User manual

Nidec ST-1100 User manual

Nidec

Nidec ST-1100 User manual

Nidec FG -3000 Series User manual

Nidec

Nidec FG -3000 Series User manual

Nidec ST-1100 User manual

Nidec

Nidec ST-1100 User manual

Nidec FG-7000TA User manual

Nidec

Nidec FG-7000TA User manual

Nidec Shimpo DT-5TS User manual

Nidec

Nidec Shimpo DT-5TS User manual

Nidec PT-120 User manual

Nidec

Nidec PT-120 User manual

Nidec PG-35 User manual

Nidec

Nidec PG-35 User manual

Nidec PG-35H Series User manual

Nidec

Nidec PG-35H Series User manual

Nidec DT-200LR-S12 User manual

Nidec

Nidec DT-200LR-S12 User manual

Nidec MFD-02 User manual

Nidec

Nidec MFD-02 User manual

Popular Measuring Instrument manuals by other brands

Uniden LRD950 Basic user manual

Uniden

Uniden LRD950 Basic user manual

Simco-Ion FMX-004 user manual

Simco-Ion

Simco-Ion FMX-004 user manual

Galvanic Applied Sciences 943-TGX Operation manual

Galvanic Applied Sciences

Galvanic Applied Sciences 943-TGX Operation manual

JVA ZLM4 Technical manual

JVA

JVA ZLM4 Technical manual

Foxtech TEMPHAWK user manual

Foxtech

Foxtech TEMPHAWK user manual

Measurement Computing USB-5203 user guide

Measurement Computing

Measurement Computing USB-5203 user guide

Velleman DTO6234 manual

Velleman

Velleman DTO6234 manual

GWF Unico Installation and operating instructions

GWF

GWF Unico Installation and operating instructions

Lovato DME D330 installation manual

Lovato

Lovato DME D330 installation manual

AEMC 1510 user manual

AEMC

AEMC 1510 user manual

BRONKHORST mini CORI-FLOW ML120 instruction manual

BRONKHORST

BRONKHORST mini CORI-FLOW ML120 instruction manual

Renishaw RMP600 quick start guide

Renishaw

Renishaw RMP600 quick start guide

Hella 8PE 185 103-261 operating instructions

Hella

Hella 8PE 185 103-261 operating instructions

Keithley 2500 Service manual

Keithley

Keithley 2500 Service manual

Alderon Industries Mini Power Post PRPT-00003 quick start guide

Alderon Industries

Alderon Industries Mini Power Post PRPT-00003 quick start guide

ELSEC 774 user manual

ELSEC

ELSEC 774 user manual

TESTO 316-3 instruction manual

TESTO

TESTO 316-3 instruction manual

Hanna Instruments HI5321 instruction manual

Hanna Instruments

Hanna Instruments HI5321 instruction manual

manuals.online logo
manuals.online logoBrands
  • About & Mission
  • Contact us
  • Privacy Policy
  • Terms and Conditions

Copyright 2025 Manuals.Online. All Rights Reserved.