EP1400
EC/pH/°C METER
_____________________________________________________________________________________________
5
2 TECHNICAL SPECIFICATIONS
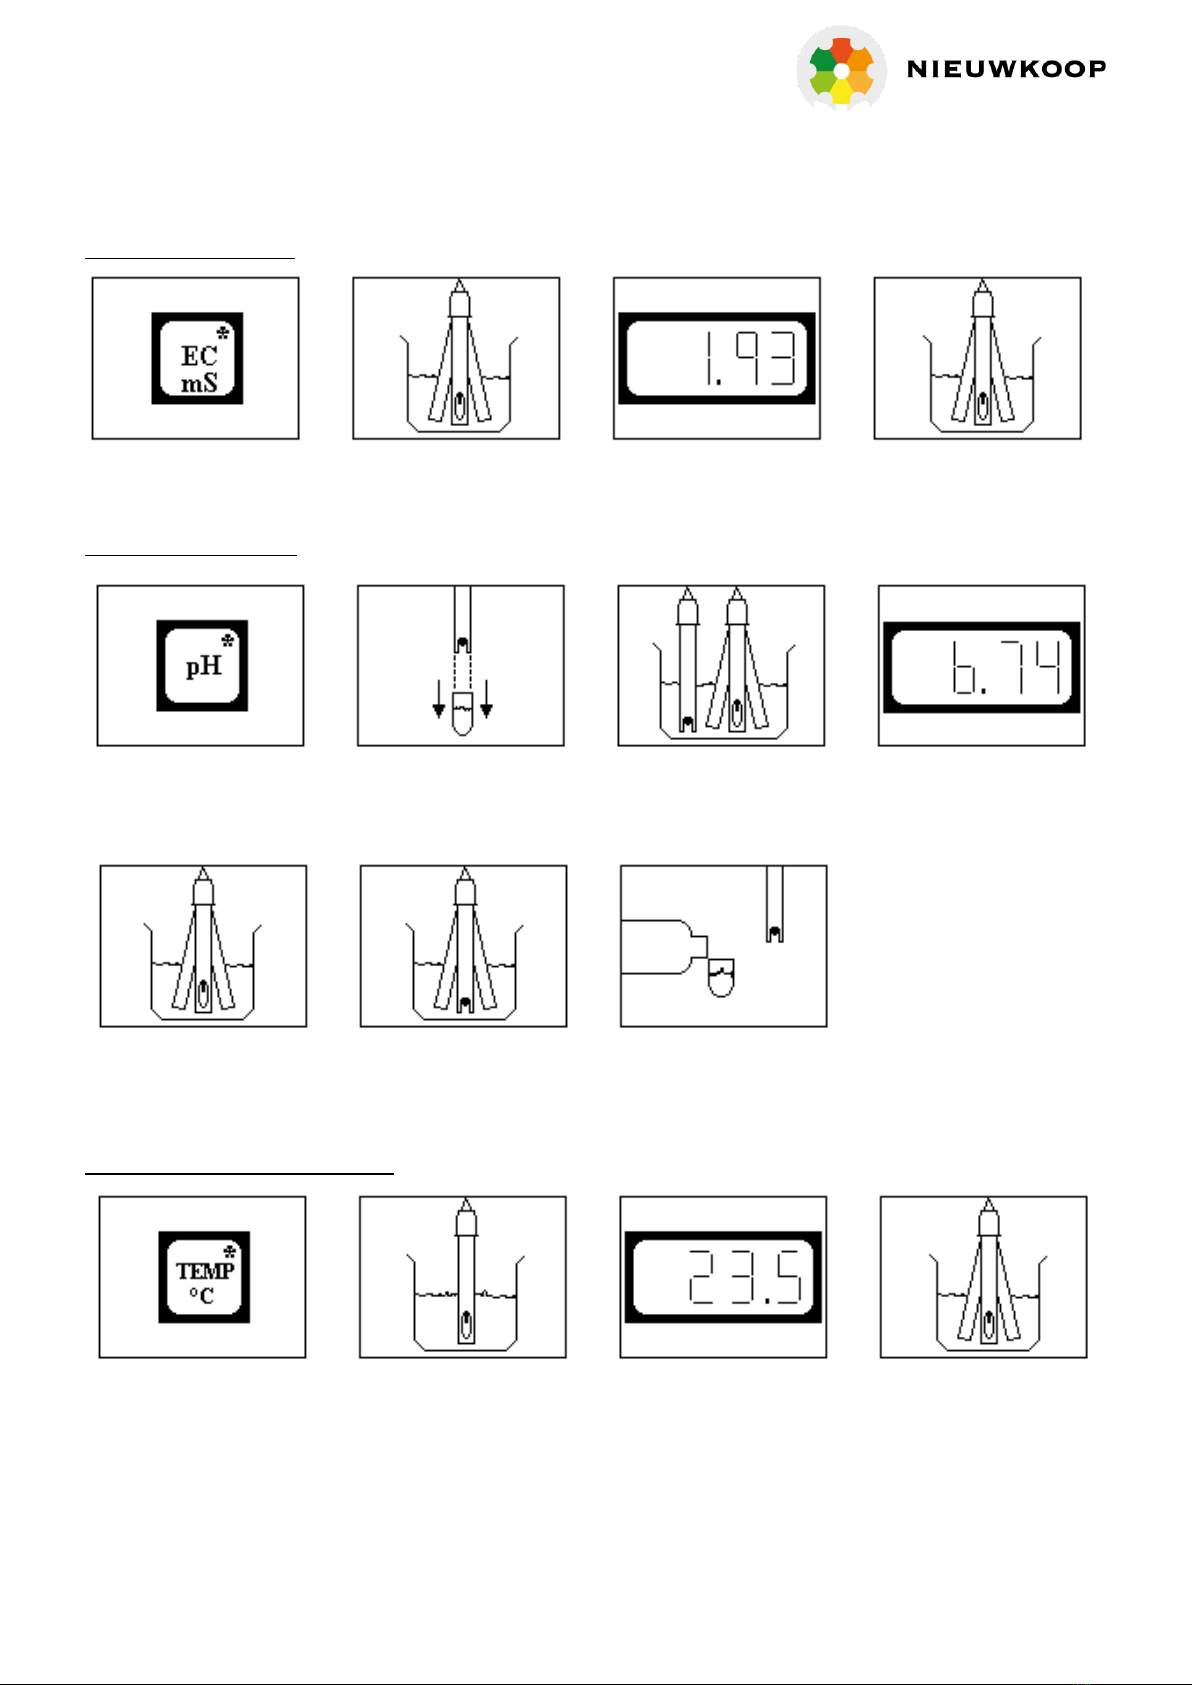
1) EC
Range : 0-20,00 mS
Resolution : ± 0,01 mS
Accuracy : dependent on calibration
Temperature compensation : manual or automatic by electrode
Temperature coefficient : 2,2 %/°C (during calibration 2,1 %/°C)
Reference temperature : adjustable to 18, 20 or 25°C (during calibration fixed
to 25°C)
1-Point calibration with automatic recognition of standard buffer solutions (2 mS and 4 Ms KCl).
Possibility for manual calibration with other buffer solutions.
2) pH
Range : 0-14,00 pH
Resolution : ± 0,01 pH
Accuracy : dependent on calibration
Temperature compensation : manual or automatic by electrode
Recognition pH-7 : ± 1,00 pH
Recognition pH-4 : 90-105%
2-Points calibration with automatic recognition of standard buffer solutions (pH-4, pH-6.86 and pH-9).
Possibility for manual calibration with other buffer solutions.
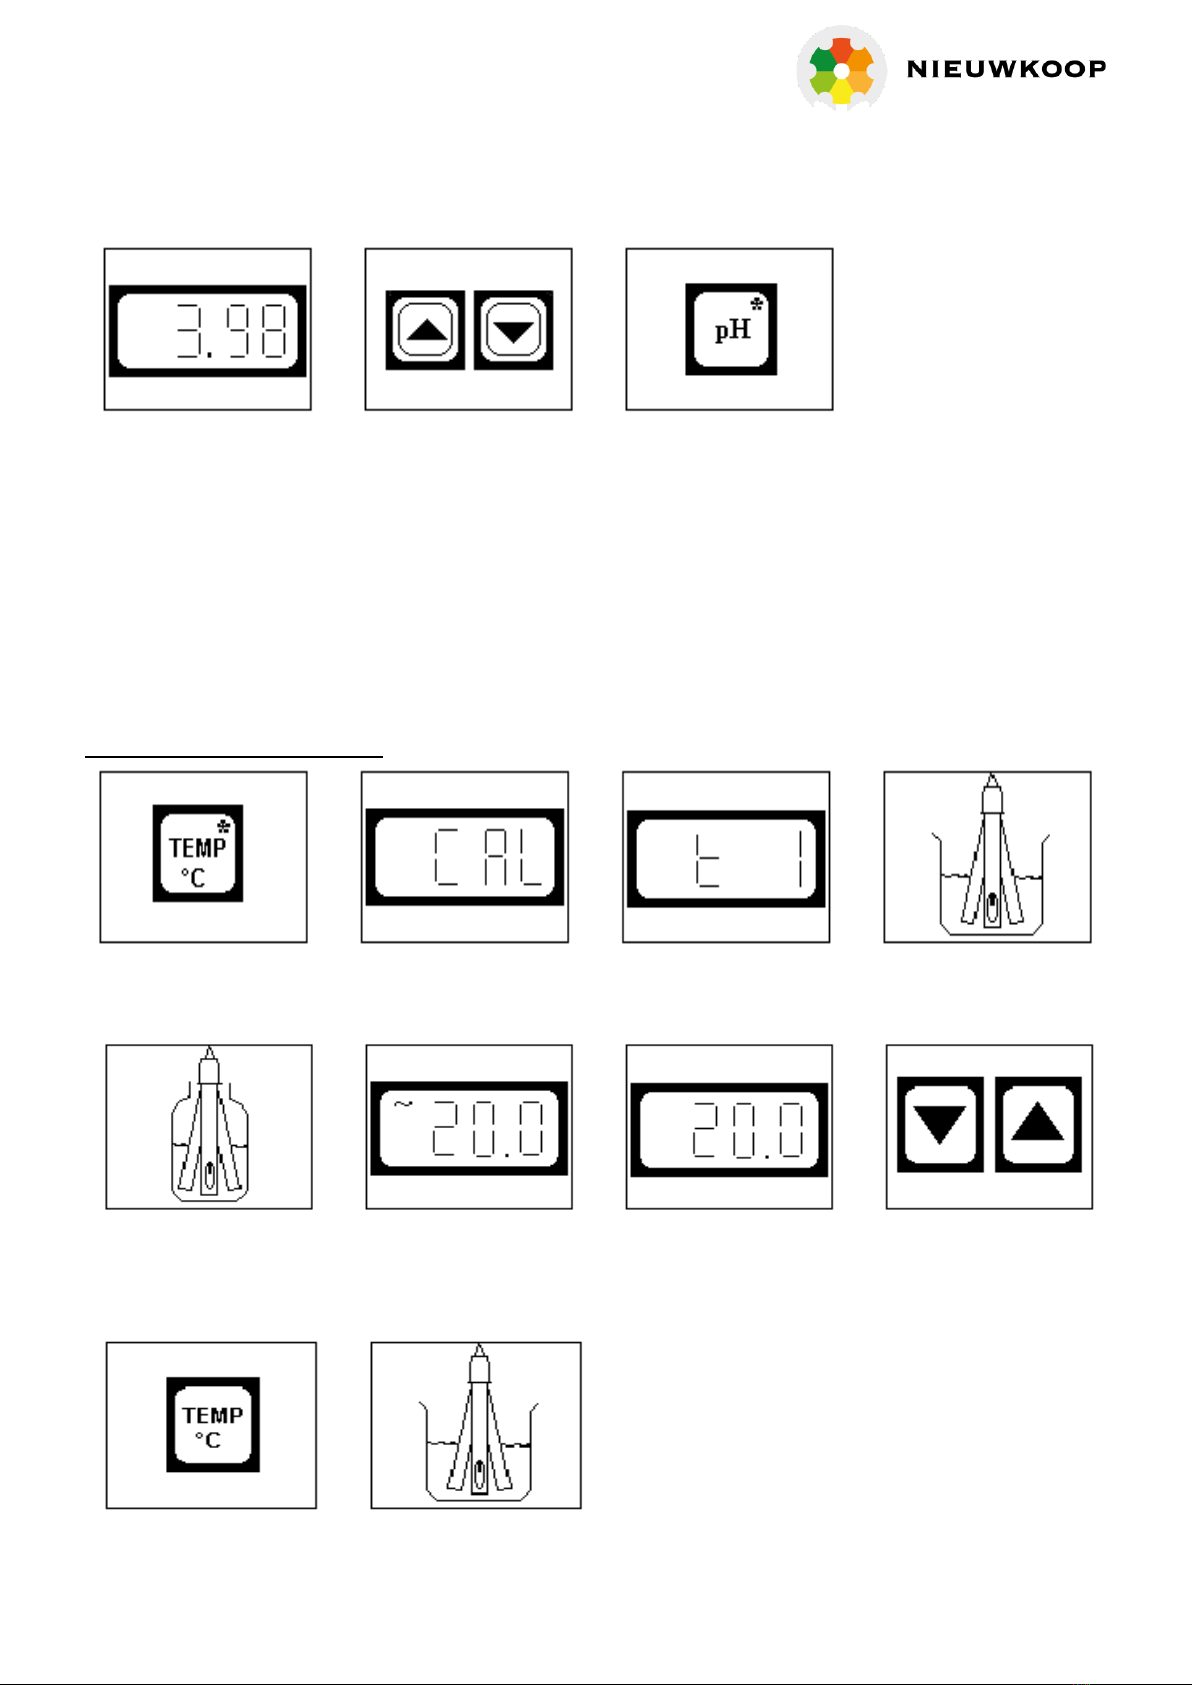
3) Temperature
Electrode : RTD Pt1000
Range : 0-65°C
Resolution : ± 0,1°C
Accuracy : dependent on calibration
1-Point calibration, manual in steps of 0,1°C.
Manual temperature adjustment (when temperature electrode is not connected) in steps of
0,1°C with the "▼" en de "▲"buttons.
4) General
Power supply: 9V battery (4 x 1,5V on request)
Absorption : EP1400 15mA
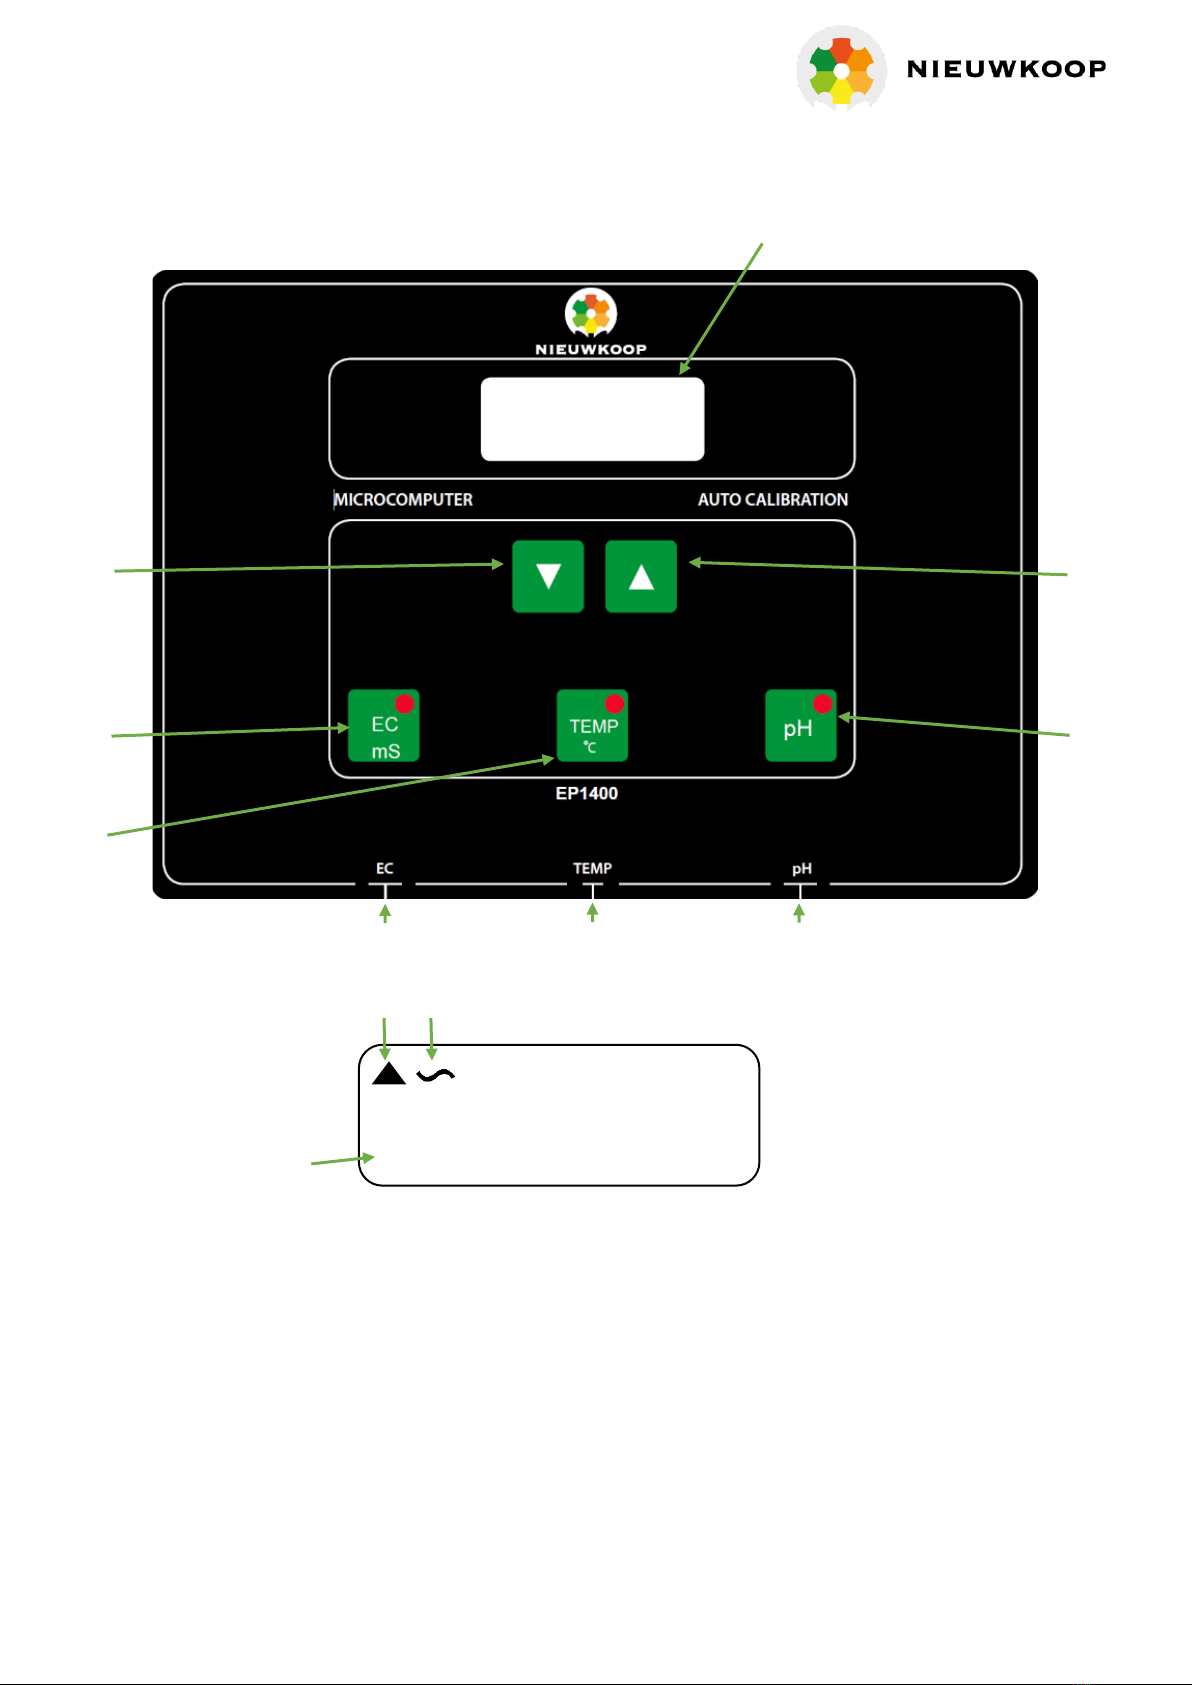
Low battery indication : "BATT"
Display : LCD 3½ digit
Size : 190x135x45mm
Weight (instrument) : 460 grams
Label : polycarbonate membrane
Guarantee : 1 year (3 months on pH-electrode)
The chosen measurement will by indicated by a blinking "LED" at the corresponding button.
Switching off the instrument can be manual or automatic. The time before the instrument
switch off can be adjusted at 90 or 180 seconds.