manuals.online logo
Brands
  1. Home
  2. •
  3. Brands
  4. •
  5. Nikon
  6. •
  7. Camera Accessories
  8. •
  9. Nikon FSB-5 User manual

Nikon FSB-5 User manual

●フォーカス フィールドスコープ、ファーブルフォトそれぞれで仮のピント合わせを行います。最終ピン
トはカメラのオートフォーカスで行ってください。
●撮影 ケーブルレリーズで行います。静かに押してください。
●カメラのズーム 広角側での撮影は、接眼レンズの種類や撮影条件により画面の四隅に影が出ます。MC・MCⅡ
ズーム接眼レンズを使用する場合は、最望遠側でのご使用をおすすめします。
●AFランプが点灯しない時 ケーブルレリーズを半押しにしてオートフォーカスが作動しない状態で、
COOLPIXの液晶モニターを見ながら再度フィールドスコープのピントリング、あるいはフ
ァーブルフォトのピント合わせノブでピントを合わせます。
COOLPIXの設定は下記の設定をおすすめします。その他の設定は初期設定のままです。
・オート撮影モード:「MENU」による設定
画像モード 高画質
連写 連写
AFエリア選択 マニュアル(機種によっては選択できません)
ISO感度設定 50
・「SETUP」モードでの設定
オートパワーオフ 5分
AF補助光 OFF
手ブレお知らせ OFF(機種によっては選択できません)
使用説明書 /Instruction Manual
Printed in Japan (177K) 68-21X/1DE
J/E
フィールドスコープコンパクトデジタルカメラブラケットFSB-5
Fieldscope Digital Camera Bracket FSB-5
NIKON VISION CO., LTD.
Customer Service Department
3-25, Futaba 1-chome, Shinagawa-ku,
Tokyo 142-0043, Japan
Tel: +81-3-3788-7699 Fax: +81-3-3788-7698
CSセンター
住所:〒142-0043東京都品川区二葉1丁目3番25号
Tel:03-3788-7699Fax:03-3788-7692
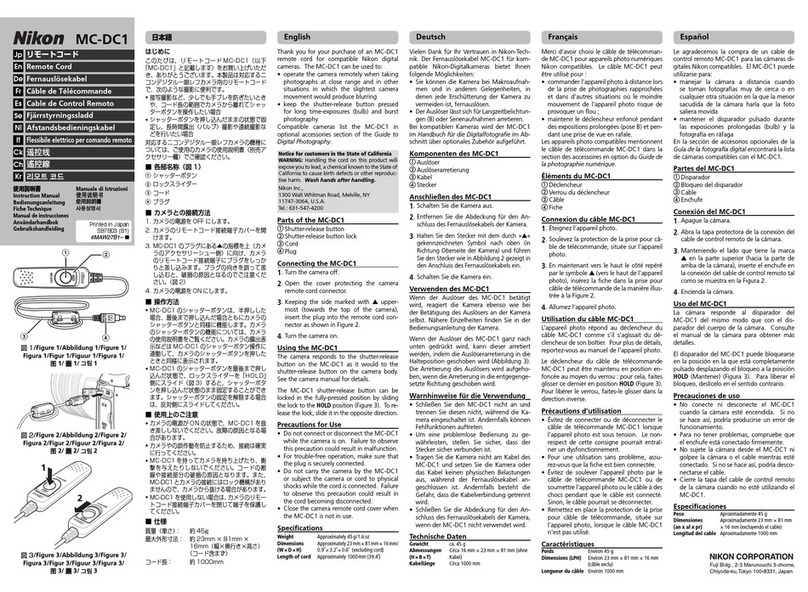
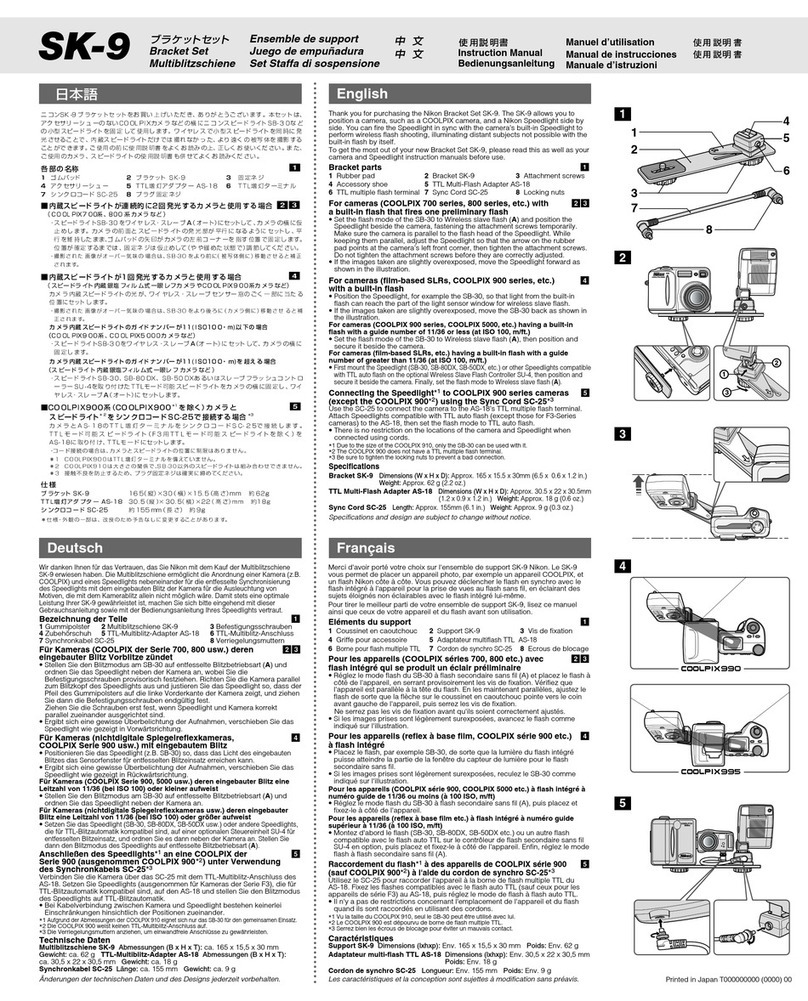
このたびは、COOLPIXSシリーズ専用カメラブラケットをお買い上げいただきまして、ま
ことにありがとうございます。本製品はフィールドスコープとの組み合わせにより、超望遠
でのデジタル写真撮影が可能となります。また、ファーブルフォトとの組み合わせにより、
顕微鏡写真撮影も行えます。
構成
・ブラケット本体 1
・ケーブルレリーズ(50cm)1
・ブラケットリングFSBR-5 1(本体に装着済)
*ブラケットリングFSBR-5は他のブラケットには使用できません。ご注意ください。
各部名称
1ケーブルレリーズ取付け座
2本体固定ねじ
3接眼レンズ挿入部
4ブラケットリング(FSBR-5)
5本体
6遮光フード
7左右位置決めコマ
8シャッターボタン
9カメラ前部当て板
!p カメラ取付座
!q カメラ取付座固定ねじ
!w カメラ固定ねじ
カメラの設定
1. カメラの取付け方
・準備(図A)
1) 左右位置決めコマ(7)を使用するCOOLPIXに合わせます。
a) 左右位置決めコマ(7)を引き出し、回転できるようにします。(図a)
b) 下記の「番号と機種一覧」を参考に、左右位置決めコマの番号が正立するよう回転させます。
(図bでは1にセットされています)
c) 左右位置決めコマ(7)を押し込めば、取付けは完了です。
番号と機種一覧
1:S6、S7、S7c 2:—3:S5、S8 4:S1、S3
2) シャッターボタン(8)を押し込み、図dの状態にします。
・取付け
1) COOLPIXを右側からセットし、カメラ固定ねじ(!w)で軽く留めます。カメラ取付座(!p)が動く状態が目
安です。(図B)
2) COOLPIXを左右位置決めコマ(7)に押しあてたまま、カメラ取付座(!p)の位置を調整して、カメラ取付
座の凸部がCOOLPIXにあたるようにします。(図C)
3) COOLPIXを左右位置決めコマ(7)に押しあてたままで、カメラ固定ねじ(!w)を締めます。(図D)
4) COOLPIXをカメラ前部当て板(9)に押しあて、カメラ取付座固定ねじ(!q)で固定します。(図E)
2. カメラの取りはずし方(図F)
1) まず、カメラ取付座固定ねじ(!q)をゆるめます。
2) 次に、カメラ固定ねじ(!w)を写真のように傾くまでゆるめます。
3) シャッターボタン(8)に当たらないように注意しながら、カメラをはずします。
3. ブラケットリング(FSBR-5)の取りはずし方
1) 接眼レンズ挿入部側からリングに指を引っ掛けてはずします。
2) 図Fの★印の部分を押すとはずれます。
*カメラ取付座固定ねじ(!q)とカメラ固定ねじ(!w)は締めすぎないように注意してください。
*シャッターボタン(8)がカメラのレリーズボタンの中央になくてもレリーズは行えます。レリーズが行えな
い時には、再度セットしなおしてください。
組み立て
撮影について
撮影時のご注意
・超望遠あるいは超拡大での撮影はブレやすくなりますので、三脚は頑丈なものを使用してください。
・比較的像揺れが起こりやすいため、撮影には十分ご注意ください。
・超望遠あるいは超拡大での撮影となるため、カメラのオートフォーカスではピントが合いにくい場合が
あります。連写モードで、複数枚の撮影をおすすめします。
運搬時のご注意
・持ち運びや移動の際は、接眼レンズおよびファーブルフォトからブラケットを取りはずした状態で行う
ことをおすすめします。
フィールドスコープ接眼レンズ
16x / 24x / 30x ワイド DS
27x / 40x / 50x ワイド DS
40x / 60x / 75x ワイド DS
フィールドスコープ
16x/24x/30x Wide DS用
ブラケットリングFSBR-5
COOLPIX Sシリーズ(S2、S4、S10を除く)+
フィールドスコープコンパクトデジタルカメ
ラブラケットFSB-5
取付け方
B
ワイドMC・MCⅡズーム接眼レンズ +
FSA-1、2
A
21
C
・ 仕様・外観などは改善のため予告なしに変更する場合があ
ります。
・ 本「使用説明書」に掲載されている文章・イラスト等の無
断転載を禁じます。
お買い上げいただきましたニコンフィールドスコープコンパク
トデジタルカメラブラケットを、安心してご愛用いただきます
よう、固定ネジなどの補充部品を準備しております。在庫につ
きましては当社CSセンター、あるいはニコンのサービス機関
へお問い合わせください。
• Specifications and design are subject to change
without notice.
• No reproduction in any form of this manual, in whole
or in part (except for brief quotation in critical articles
or reviews), may be made without written
authorization from NIKON VISION CO., LTD.
■COOLPIXと組み合わせた場合の合成焦点距離 [ブラケット使用時の35mm判換算焦点距離]= [COOLPIXSシリーズ(S2、S4、S10を除く)の35mm判換算焦点距離]× [接眼レンズの倍率]
1:AまたはB、いずれかの組み合わせで接眼レンズをフィールドスコープにねじ込みます。
2:Cを接眼レンズあるいはファーブルフォトに取り付けます。
* : ブラケットは押しあてて固定してください。
: 16x/24x/30xワイド DS接眼レンズを使用する場合には、ブラケットリングFSBR-5をFSB-5本体に組み込みます。
・ 黒いゴムリングは本体奥のみぞに、パシッと音がするまで、確実に押し込んでください。
・ 押し込みが不十分なときや未装着の場合、条件により画像の四隅に影が出ることがあります。
: その他のレンズを使用する場合には、ブラケットリングFSBR-5をはずしてください。
・ リングの内側に指を引っかけて引くとはずれます。ゴムリングによる抵抗により、はずれにくい場合があります。
・ 装着したまま使用した場合には、画像の四隅の影が大きくなります。
A: ワイドMC、またはMCⅡズーム接眼レンズにFSA-1、2を組んだもの。
B: フィールドスコープ接眼レンズ(16x/24x/30x、27x/40x/50x、40x/60x/75x)
ワイドDS
C: フィールドスコープコンパクトデジタルカメラブラケットFSB-5にCOOLPIXSシリー
ズ(S2、S4、S10を除く)を組み合わせたもの。
影(ケラレ)が生じた場合には
・撮影した写真や、撮影中のカメラの液晶モニター右側に大きく影(ケラレ)が生じた場合、カメラが位置
ずれを起こしている可能性があります。カメラの取付け位置を確認して、液晶モニター画像を利用し、
再度取付けを行ってください。
・ワイド端では全機種でケラレ(滅光)が出ます。
7
8
ファーブルフォト
!w
!p
!w
!q
!w
8
!q
図A 図B
図C 図D
図E 図F
図c
(OUTの状態)
図d
(INの状態)
図a
図b
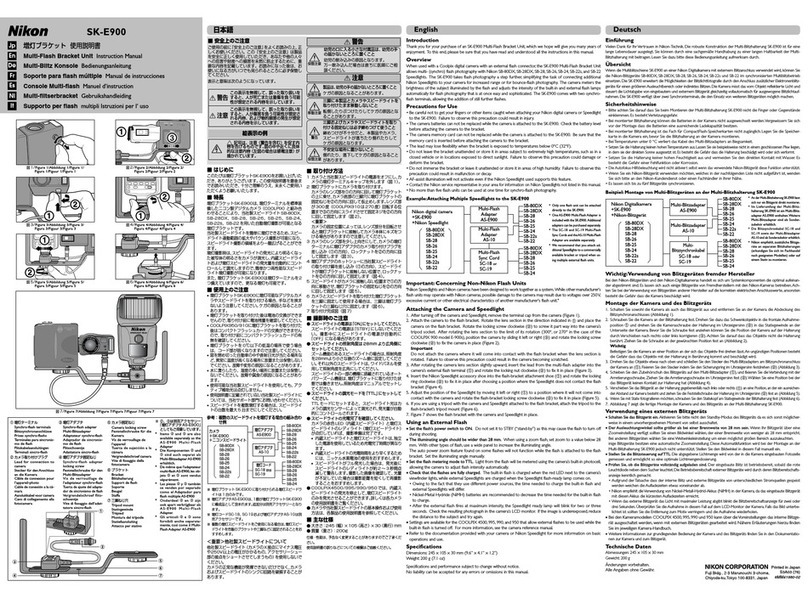
Thank you for purchasing Nikon's Fieldscope Digital Camera Bracket for the COOLPIX
S series. Using your digital camera in combination with a Fieldscope enables you to
take super-telephoto digital pictures. Furthermore, when used in combination with a
Nikon EZ-Micro Fieldmicroscope this bracket enables photomicroscopy.
Items supplied
• Bracket x 1
• Cable release (50cm) x 1
• Bracket ring FSBR-5 x 1 (comes attached to the bracket)
Note: Bracket ring FSBR-5 cannot be used with other brackets.
Nomenclature
Notes for shooting
• Use a solid tripod during super-telephoto or super-closeup shooting to ensure steady images.
• Beware of camera shake as small vibrations at high magnification can ruin a photograph.
• With super-telephoto or super-closeup shooting, it may be difficult to obtain a precise focus
with the camera's AF function. We recommend that you take a series of pictures of the same
subject in sequence, to ensure that you capture the desired image.
Note for carrying
• For carrying or transport, we recommend that you remove the bracket from the lens or EZ-
Micro Fieldmicroscope.
Attaching the FSB-5 to a digital camera
1. Setting up the digital camera
• Preparations for use (Fig. A)
1) Adjust the positioning block (7) to fit your particular COOLPIX digital camera.
a) Pull up the positioning block (7) to allow it to be rotated. (Fig. a)
b) Referring to the “Number and COOLPIX digital camera” information shown
immediately below, rotate the positioning block to adjust the number. (In Fig. b, it
is set to “1”.)
c) Push back the positioning block (7) to complete the setting.
Number and COOLPIX digital camera
1: S6, S7, S7c 2: S9 3: S5, S8 4: S1, S3
2) Push the shutter button (8), as shown in Fig. d.
• Setting up
1) Slide the COOLPIX to the left, then lightly fasten the camera mount screw (!w) to secure
the position. The camera mount (!p) should remain movable. (Fig. B)
2) Adjust the position of the camera mount (!p), then, while keeping the COOLPIX pressed
against the positioning block (7), fit the projection on the mount into the base of the
COOLPIX. (Fig. C)
3) While keeping the COOLPIX pressed against the positioning block (7), tighten the
camera fixing screw (!w). (Fig. D)
4) Press the COOLPIX against the positioning plate (9) and tighten the camera mount screw
(!q) to secure the COOLPIX in place. (Fig. E)
2. Removing the digital camera (Fig. F)
1) Release the camera mount screw (!q).
2) Next, release the camera fixing screw (!w) until it leans as shown in the photo.
3) While taking care to avoid touching the shutter button (8), remove the COOLPIX from
the camera mount (!p).
3. Removing bracket ring FSB-5
1) Remove the FSB-5 by inserting a finger in the ring from the side of eyepiece lens socket
(3) and pulling.
2) The FSB-5 can be removed by pushing the area marked ★in Fig. F.
Notes:
• Do not tighten the camera mount screw (11) or the camera fixing screw (12) excessively.
• Even when the shutter button is not placed over the center of the COOLPIX shutter release
button of, you can shoot. If you are unable to do so, realign your COOLPIX with the FSB-5.
Camera settings
Use the following COOLPIX settings. Keep other settings at their original default positions.
• With [MENU]
Image mode FINE
Continuous Continuous
AF area mode Manual (Not available on some COOLPIX models.)
Sensitivity (ISO) 50
• With [SET UP]
AUTO OFF 5 minutes
AF assist OFF
Blur warning OFF (Not available on some COOLPIX models.)
• Focusing
Focus first using controls on the Fieldscope or EZ-Micro, then make fine adjustments with the
camera's AF function.
• Shooting
Use the cable release, depressing it gently.
• Camera zoom setting
When shooting with the zoom at a wide-angle setting, depending on the type of eyepiece you
are using, the four corners of the image may appear shaded, giving it a rounded appearance.
With the MC or MC II Zoom Eyepiece, we recommend using the maximum telephoto setting.
• When the AF lamp does not turn on
After locking the focus by pressing the shutter release button halfway, set the focus by
adjusting the focus ring on the Fieldscope or the focus knob on the EZ-Micro while viewing the
LCD monitor. This turns on the AF lamp.
Setting for shooting
Fieldscope Eyepiece
16x / 24x / 30x Wide DS
27x / 40x / 50x Wide DS
40x / 60x / 75x Wide DS
Fieldscope
Bracket ring FSBR-5 for
16x/24x/30x Wide DS
Eyepiece
COOLPIX S series (except S2, S4, S10)
+
Digital Camera Bracket FSB-5
Attachment
B
Wide MC or MC II Zoom Eyepiece +
FSA-1&-2
A
2
1
C
1Screw the eyepiece (Aor B) into the eyepiece
socket.
2Attach the assembly in Cto the eyepiece or the EZ-
Micro Fieldmicroscope.
* While fixing it in place, keep the bracket pressed.
With the 16x/24x/30x Wide DS Eyepiece, attach the
bracket ring FSBR-5 to the bracket FSB-5.
• Press the bracket ring against the bracket until the
black rubber ring snaps into the groove on the
bracket.
• If the bracket ring is not attached or not attached
securely, shade may appear in the four corners of the
image.
With other eyepieces, remove the bracket ring FSBR-5.
• The bracket ring can be removed by inserting a
finger in the ring and pulling. (It may be tight due to
resistance from the rubber.)
• If the bracket ring is not removed, the four corners of
the image will appear more shaded.
AWide MC or MC II Zoom Eyepiece with FSA-1
and FSA-2 attached.
BFieldscope Eyepiece (16x/24x/30x, 27x/40x/50x,
40x/60x/75x) Wide DS.
CCOOLPIX S series (except S2, S4, S10) with
Digital Camera Bracket FSB-5 attached.
[Focal length (35mm [135] format equivalent) with FSB-5] = [Focal length (35mm [135] format equivalent) of the COOLPIX S series (except S2, S4, S10)] x [magnification of eyepiece]
If vignetting occurs
• If vignetting occurs at the right edges of your images or in the camera's LCD monitor, the
camera may not have been correctly attached to the equipment. Re-attach the camera and
confirm proper camera alignment while viewing the LCD monitor.
• In wideangle, vignetting may occur with any COOLPIX digital camera.
1Cablereleasesocket
2Bracketfixingscrew
3Eyepiecelenssocket
4Bracketring(FSBE-5)
5Body
6Lightinterceptionhood
7Positioningblock
8Shutterbutton
9Positioningplate
!p Cameramount
!q Cameramountscrew
!w Camerafixingscrew
7
8
EZ-Micro
!w
!p
!w
!q
!w
8
!q
Fig. A Fig. B
Fig. C Fig. D
Fig. E Fig. F
(Fig. c) When
the button is
not pushed.
(Fig. d) When
the button is
pushed.
Fig. a
Fig. b

Other Nikon Camera Accessories manuals

Nikon MONARCH Series User manual

Nikon

Nikon MONARCH Series User manual

Nikon AF-S NIKKOR 85mm f/1.8G User manual

Nikon

Nikon AF-S NIKKOR 85mm f/1.8G User manual

Nikon WP-CP2 User manual

Nikon

Nikon WP-CP2 User manual

Nikon WP-CP1 - Underwater Housing User manual

Nikon

Nikon WP-CP1 - Underwater Housing User manual

Nikon EN-EL4 User manual

Nikon

Nikon EN-EL4 User manual

Nikon FTZ User manual

Nikon

Nikon FTZ User manual

Nikon NIKKOR Z User manual

Nikon

Nikon NIKKOR Z User manual

Nikon SB-29 User manual

Nikon

Nikon SB-29 User manual

Nikon EN-EL3a User manual

Nikon

Nikon EN-EL3a User manual

Nikon HL-E5000 User manual

Nikon

Nikon HL-E5000 User manual

Nikon MC-36 User manual

Nikon

Nikon MC-36 User manual

Nikon MC-DC2 User manual

Nikon

Nikon MC-DC2 User manual

Nikon AF-S NIKKOR 24-70mm f/2.8E ED VR User manual

Nikon

Nikon AF-S NIKKOR 24-70mm f/2.8E ED VR User manual

Nikon FSB-U1 User manual

Nikon

Nikon FSB-U1 User manual

Nikon AF-S DX NIKKOR 35mm f/1.8G User manual

Nikon

Nikon AF-S DX NIKKOR 35mm f/1.8G User manual

Nikon AF-S TC-20E III User manual

Nikon

Nikon AF-S TC-20E III User manual

Nikon AF-S NIKKOR 24-70mm f/2.8 ED User manual

Nikon

Nikon AF-S NIKKOR 24-70mm f/2.8 ED User manual

Nikon AF Nikkor 20mm f/2.8D User manual

Nikon

Nikon AF Nikkor 20mm f/2.8D User manual

Nikon BG-N16 User manual

Nikon

Nikon BG-N16 User manual

Nikon 20mm 1/2.80 User manual

Nikon

Nikon 20mm 1/2.80 User manual

Nikon FC-E9 User manual

Nikon

Nikon FC-E9 User manual

Nikon EN-EL15 User manual

Nikon

Nikon EN-EL15 User manual

Nikon EN-EL3e User manual

Nikon

Nikon EN-EL3e User manual

Nikon Universal Bracket User manual

Nikon

Nikon Universal Bracket User manual

Popular Camera Accessories manuals by other brands

FUTABA HT6F1800B instruction manual

FUTABA

FUTABA HT6F1800B instruction manual

Hamron 015302 operating instructions

Hamron

Hamron 015302 operating instructions

Metz MECABLITZ REFLEXSCHIRM 60-30 operating instructions

Metz

Metz MECABLITZ REFLEXSCHIRM 60-30 operating instructions

Exide EV640 user guide

Exide

Exide EV640 user guide

Aquatica Digital A5D mkIII operating manual

Aquatica Digital

Aquatica Digital A5D mkIII operating manual

wayscral YJ39 1003 operating instructions

wayscral

wayscral YJ39 1003 operating instructions

Recsea WHOM-TF3/4 manual

Recsea

Recsea WHOM-TF3/4 manual

CAM GEAR MARK 4 MS AL user guide

CAM GEAR

CAM GEAR MARK 4 MS AL user guide

Moog Videolarm MR7N Installation and operation instructions

Moog Videolarm

Moog Videolarm MR7N Installation and operation instructions

Flycam Swivel Assembly manual

Flycam

Flycam Swivel Assembly manual

Filmcity FC-A7RS-CSH Assembly manual

Filmcity

Filmcity FC-A7RS-CSH Assembly manual

RAK RAK9155 quick start guide

RAK

RAK RAK9155 quick start guide

Spectronik PROTIUM-2500 user guide

Spectronik

Spectronik PROTIUM-2500 user guide

TechNexion Vizionlink PCIE-VL-3480 Quick install guide

TechNexion

TechNexion Vizionlink PCIE-VL-3480 Quick install guide

Fantasea EyeDaptor G Series-F67 instruction manual

Fantasea

Fantasea EyeDaptor G Series-F67 instruction manual

Avidsen 114257 manual

Avidsen

Avidsen 114257 manual

GRASS VALLEY LDX 80 Series Maintenance manual

GRASS VALLEY

GRASS VALLEY LDX 80 Series Maintenance manual

Ikelite EOS-40D instruction manual

Ikelite

Ikelite EOS-40D instruction manual

manuals.online logo
manuals.online logoBrands
  • About & Mission
  • Contact us
  • Privacy Policy
  • Terms and Conditions

Copyright 2025 Manuals.Online. All Rights Reserved.