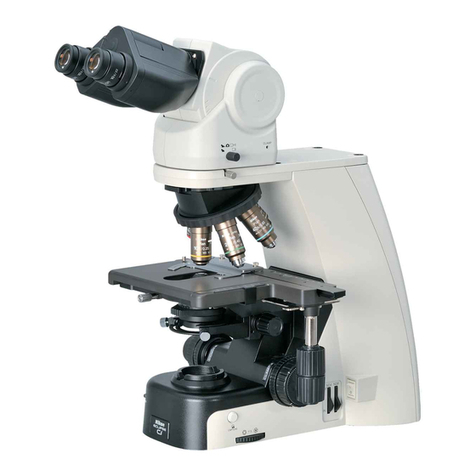
Nikon ECLIPSE E200 MV Series User manual

Microscope
ECLIPSE
E200 MV Series
E200LED MV Series
Instructions
M588E 11.10.NC.1 (1/2)


i
Introduction
Thank you for purchasing a Nikon product.
This instruction manual is written for users of the Nikon ECLIPSE E200 MV Series and E200LED MV
Series Microscopes.
To ensure correct usage, read this manual carefully before operating the product.
•No part of this manual may be reproduced or transmitted in any form without prior written permission from
Nikon.
•The contents of this manual are subject to change without notice.
•The equipment described in this manual may differ from the actual product in its appearance.
•Although every effort has been made to ensure the accuracy of this manual, errors or inconsistencies may
remain. If you note any points that are unclear or incorrect, please contact your nearest Nikon
representative.
•Some of the equipment described in this manual may not be included in the set you have purchased.
•If you intend to use any other equipment with this product, read the manual for that equipment too.
•If the equipment is used in a manner not specified by the manufacturer, the protection provided by the
equipment may be impaired.
Training
You can use this product without the need of special training sessions by reading this manual thoroughly
before use. Please contact your nearest Nikon representative if you have any questions or find any errors
and anything you are aware of.

Contents
ii
Contents
Introduction ................................................................................................. i
Safety Precautions ..................................................................................... iv
WARNING and CAUTION Symbols Used in This Manual...............................iv
Symbols on the Product..........................................................................v
WARNING .......................................................................................vi
CAUTION ...................................................................................... viii
Notes on Handling the Product................................................................... ix
Chapter 1 Nomenclature of Each Part....................................................... 2
Chapter 2 Switches and Controls.............................................................. 4
Chapter 3 Microscopy Procedure (Quick Reference)................................. 6
Chapter 4 Microscopy Procedure (Detailed) ............................................. 8
Preparation Operations previous to the microscopy ...................................... 8
1 Turn on the power switch. ............................................................ 8
2 Lower the condenser slightly from its upper limit. ............................ 8
3 Fully open the field aperture and condenser aperture diaphragms.
(Field diaphragm control is only for microscopes
with the field diaphragm.) ............................................................ 9
4 Bring the 10x objective into the optical path. .................................. 9
5 Place the specimen slide on the stage and bring the specimen
into the optical path. ..................................................................10
6 Focus on the specimen. ..............................................................10
7 Adjust the diopter ring on the eyepieces........................................12
8 Adjust the interpupillary distance. ................................................13
9 Focus on the field diaphragm and center its position.
(This adjustment is only for microscopes with the field diaphragm.) ..14
Microscopy Operations for actual microscopy............................................15
10 Select the objective....................................................................15
11 Adjust the condenser aperture diaphragm. ....................................15
12 Focus on the specimen. ..............................................................17
13 Adjust the field diaphragm.
(This adjustment is only for microscopes with the field diaphragm.) ..18
14 Perform the microscopy. .............................................................18
15 Turn off the power switch............................................................21

Contents
iii
Chapter 5 Miscellaneous Operations....................................................... 22
1 Oil-Immersion Observation ..............................................................22
2 Torque Adjustment of the Coarse Focus Knob .....................................24
3 Upper Limit Bolt.............................................................................24
4 Eye Level Raiser.............................................................................25
5 Photomicrography and TV Microscopy ...............................................25
6 ND Filter for the Objective ...............................................................26
7 Cord Hangers ................................................................................27
Chapter 6 Assembly................................................................................ 28
1 Assembly of Standard Set ...............................................................28
2 Assembly of Additional Components..................................................30
3 Replacement of Consumable Materials...............................................32
Chapter 7 Optical Characteristics ........................................................... 34
1 Combinations of 10x (Field No. 20) Eyepiece with E-Plan Objectives ......34
2 Microscope Terminology ..................................................................34
Chapter 8 Troubleshooting ..................................................................... 36
1 Optical .........................................................................................36
2 Operational ...................................................................................41
3 Electrical.......................................................................................43
Chapter 9 Care and Maintenance ............................................................ 44
1 Cleaning the Lenses .......................................................................44
2 Cleaning the Microscope..................................................................44
3 Disinfecting the Microscope .............................................................44
4 Storing the Microscope....................................................................44
5 Periodical Inspections (Charged) ......................................................44
Chapter 10 Specifications......................................................................... 45
1 Microscopy (Principles) ...................................................................45
2 Performance Properties ...................................................................45
3 Physical Properties .........................................................................47

iv
Safety Precautions
To ensure correct and safe operation, read this manual before using the product.
WARNING and CAUTION Symbols Used in This Manual
Although this product is designed and manufactured to be completely safe during use, incorrect usage or
failure to follow the safety instructions provided may cause personal injury or property damage. To ensure
correct usage, read this manual carefully before using the product. Do not discard this manual and keep it
handy for easy reference.
Safety instructions in this manual are marked with the following symbols to highlight their importance. For
your safety, always follow the instructions marked with these symbols.
Symbol Description
WARNING Disregarding instructions marked with this symbol may lead to serious injury or death.
CAUTION Disregarding instructions marked with this symbol may lead to injury or property damage.

Safety Precautions
v
Symbols on the Product
The symbols on the product indicate the need for caution at all times during use. Before operating a part
labeled with the following symbols, refer to the instruction manual and read the relevant instructions.
Symbol Meaning
Biohazard
This symbol can be found on the microscope body, and cautions the following:
•WARNING: The product may become biohazardous if a specimen is spilled onto the
product.
•To avoid exposure to biohazard, do not touch contaminated parts with your bare hands.
•Decontaminate the contaminated parts according to the standard procedures for your
facility.
CAUTION and CAUTION: HOT (for E200 MV series only)
This symbol can be found on the field lens unit (the lamp is set underneath the field lens unit),
and cautions the following:
•The lamp and its surrounding areas (including the field lens unit, field diaphragm centering
screws, and bottom of the microscope unit) will be extremely hot while and immediately
after using the lamp.
•To avoid the risk of burns, do not touch the lamp and its surrounding areas while or
immediately after using the lamp.
•When replacing the lamp, wait approximately 30 minutes after turning off the lamp, and
make sure that the lamp and its surrounding areas have cooled sufficiently before working.
•When replacing the lamp, see “WARNING: 5. Cautions on lamp replacement (for E200 MV
series only)” on P. vi to follow what is described there.
CAUTION: HOT (for E200 MV series only)
This symbol can be found when the field lens unit is removed from the microscope body, and
cautions the following:
•To avoid the risk of burns, do not touch the lamp and its surrounding areas immediately
after using the lamp.
•When replacing the lamp, wait approximately 30 minutes after turning off the lamp, and
make sure that the lamp and its surrounding areas have cooled sufficiently before working.
•When replacing the lamp, see “WARNING: 5. Cautions on lamp replacement (for E200 MV
series only)” on P. vi to follow what is described there.
CAUTION (for E200LED MV series only)
This symbol can be found on the field lens unit (the LED is set underneath the field lens unit),
and cautions the following:
•Make sure that the field lens unit is securely attached.
•Illuminating the LED with the field lens unit removed, a light of high intensity gets in your
eyes and causes an irritating discomfort in your eyes, resulting in a harmful effect on the
microscopy for a while.
•A light leak may lead to inability of observation when the filed lens unit is left removed.
Safety Precautions
vi
WARNING
1. Do not disassemble.
Disassembling this product may result in electric shock or malfunction. Malfunctions and damage
due to such mishandlings will not be warranted. Do not disassemble any part that is not indicated
in this manual. If you experience problems with the product, contact your nearest Nikon
representative.
2. Read the instructions thoroughly.
To ensure safety, thoroughly read this manual and the manuals for other equipment to be used
with this product. In particular, be sure to follow the warnings and cautions at the beginning of the
manuals.
3. Input voltage
This product can be used with 100 to 240 V AC at 50/60 Hz, and can be used with most wall
outlets in the world. However, note that you avoid using the product under an environment where
the supply voltage may extremely fluctuate.
4. Use the specified lamp. (for E200 MV series only)
Use the specified lamp. Using an incorrect lamp may damage the product or cause a fire.
•Specified lamp
Halogen lamp 6 V-30 W (PHILIPS 5761)
5. Cautions on lamp replacement (for E200 MV series only)
•When replacing the lamp, wait approximately 30 minutes after turning off the lamp, and make
sure that the lamp and the field lens unit have cooled sufficiently.
•To prevent electric shock and product damage, turn off the power switch (press to the “{”
position) and unplug the power cord from the wall outlet before replacing the lamp.
•When replacing the lamp, be sure that the lamp socket is not damaged. If it is damaged, it may
cause lamp failure or overheating. In addition, install the lamp into the lamp socket until it hits
the limit. If the lamp is not properly installed, it may fall off or cause overheating or smoke due
to mal-connection.
•After replacing the lamp, be sure to attach the field lens unit. Never use the product without the
field lens unit attached.
•Do not break the used lamp. It should be disposed of as an industrial waste, according to the
local regulations and rules.
6. Cautions on the power cord
Be sure to use provided (or specified) power cord. Use of other power cords may result in
malfunction or fire.
•See Chapter 10, “Specifications” for the specified power cord.
•To prevent electric shock, turn off the power switch (press to the “{” position) before
connecting or disconnecting the power cord.
•Note that this product is classified as Class Ifor electric shock protection. Be sure to connect it
to a protective earth terminal.

Safety Precautions
vii
WARNING
7. Cautions on heat from the light source (for E200 MV series only)
The lamp becomes hot during use. Do not remove the field lens unit while the lamp is on, and be
sure the lamp has been off for 30 minutes before touching it.
•When replacing the lamp, make sure that the lamp is cool enough to touch (the light should be
off at least 30 minutes).
•Do not touch the lamp while it is on or until the lamp has been off for 30 minutes, as doing so
may result in burns.
•Never bring cloth, paper or flammable volatile substances such as gasoline, petroleum
benzine, acetone, thinner, or alcohol near a hot lamp, as a fire may result.
•Do not block the air vents on the field lens unit. If the field lens unit is covered or items are
placed on the field lens unit, heat dissipation may be hindered, causing the field lens unit to
become abnormally hot.
8. Notes on handling flammable solvents
The following flammable solvents are used with the product:
•Immersion oil (Nikon Immersion Oil for oil immersion objectives)
•Absolute alcohol (ethyl alcohol or methyl alcohol for cleaning optical parts)
•Petroleum benzine (for wiping off the immersion oil)
•Medical alcohol (for disinfecting the microscope)
Never hold a flame near these solvents. When using a solvent, thoroughly read the instructions
provided by the manufacturer, and handle correctly and safely. Note the following precautions
when using solvents with the product.
•Keep solvents away from the lamp, the field lens unit, and any other parts that may become
hot.
•Keep solvents away from the product and its surroundings when turning on/off the power
switch or plugging/unplugging the power cord.
•Be careful not to spill the solvents.
9. Notes on handling hazardous specimens
This microscope is mainly for use in microscopic observation of cells and tissue fixed on the slide.
When handling a sample, check to determine whether the sample is hazardous.
Handle hazardous samples according to the standard procedure for your laboratory.
If the sample is of an infectious nature, wear rubber gloves to avoid infection, and be careful not to
touch a sample. In the event of contact of a sample to the microscope, decontaminate the
contaminated portion according to the standard procedure for your laboratory.

Safety Precautions
viii
CAUTION
1. Turn off the power switch before assembling the microscope, replacing the lamp (for
E200 MV series only), and plugging in or unplugging the power cord.
Turn off the power switch before you plug or unplug the power cord to prevent electrical shock or
fire. Also turn off the power switch and then unplug the power cord before assembling the
microscope, and before changing the lamp. To turn off the power, press the power switch to the
“{” position.
2. Do not wet the product or allow intrusion of foreign matters.
Do not wet or spill liquids onto the product, as it may result in malfunction, overheat, or electric
shock. If water or other liquids are accidentally spilled onto the product, immediately turn off the
power switch (press to the “{” position) and unplug the power cord from the wall outlet. Then,
wipe off the liquid with a piece of dry cloth. Intrusion of foreign matters into the product may also
result in malfunctions. If liquids or foreign matters enter the product, do not use the product, and
contact your nearest Nikon representative.
3. Cautions on moving the product
•When carrying the microscope, hold the microscope firmly by the bottom
front recess and the top rear.
•When moving the product, do not hold by the focusing knobs, eyepiece tube,
and stage, etc. The parts may become detached and cause the product to
fall, and may also result in malfunctions and loss of precision.
4. Cautions on assembling the product
•Take care to avoid pinching your fingers and hands.
•Scratches and dirt (i.e. fingerprints) on optical components such as lenses and filters will
degrade the microscope image. When assembling the product, be careful not to scratch or
directly touch the optical components.
5. Stage rack
The stage rack will protrude when the stage is operated. Be careful
not to hit the rack with your hand or other parts of your body when
handling the microscope as you may get hurt by an edge of the
rack.
6. Disposal of the microscope
To avoid biohazard risks, dispose of the microscope as contaminated equipment, according to
the standard procedures for your facility.
Rack

ix
Notes on Handling the Product
1. Handle with care.
The product is a precision optical instrument. Handle the product with care and avoid physical shocks
and vibrations.
In particular, the precision of objectives may be lost by even weak physical shocks.
2. Weak electromagnetic waves
This product emits weak electromagnetic waves. So as to avoid degrading the performance of precision
electronic devices, do not install this product near such devices. If TV or radio reception is affected,
move the TV or radio further from this product.
3. Installation location and storage location
The product is a precision optical instrument. Use or storage of the product under inappropriate
conditions may result in malfunctions or loss of precision. The following conditions must be considered
for the installation location and the storage location.
•Install the product in a location with a temperature of 0 to +40ºC and a relative humidity of 60% or
less (no condensation).
Store the product in a location with a temperature of -20 to +60ºC and a relative humidity of 90% or
less (no condensation).
Use or storage of the product in a hot or humid location may result in molding of or condensation on
the lenses, loss of precision, and malfunctions.
•Install the product in a place with little dust and dirt.
When storing the product, place a cover over the product to protect it from dust.
•Install the product in a place with little vibration.
•Install and store the product on a level and sturdy table or stage that can bear the weight of the
product.
Install the product in a location with minimal exposure to hazards in the event of earthquakes and
other potential disasters. If necessary, secure the product to the working desk or other heavy and
stable items with a strong rope or other means, so as to prevent it from falling.
•Install the product so that the power cord to the microscope can be unplugged immediately from the
AC inlet in case of an emergency.
•Avoid placing the product in direct sunlight or immediately under the room lights.
The image quality is degraded in a bright environment due to the extraneous light entering the
objective. A room light immediately above the microscope may also enter the objective as
extraneous light, especially when using a condenser lens with a longer working distance. In this
case, it is recommended that you turn off the room light above the microscope.
•Install the product at least 10 cm away from the surrounding walls.
•Do not install the product in a closed space such as a locker or a cabinet.
•Do not place items on the product.
4. Notes on handling the lamp (for E200 MV series only)
Do not touch the glass part of the lamp with bare hands. Wear gloves or use a cloth when handling the
lamp so as not to leave fingerprints on the surface. Wipe off any fingerprints or stains using a clean
cloth moistened with alcohol. Fingerprints will etch into the hot surface of the lamp and reduce the
brightness, damage the lamp or reduce its service life.
Handle the lamp gently. Shocks and vibrations will damage the lamp or reduce its service life.
5. Notes on handling optical parts
Scratches and dirt (i.e. fingerprints) on optical components such as lenses and filters will degrade the
microscope image.
Handle the optical components with care, so as not to damage them. If they require cleaning, see
Chapter 9, “Care and Maintenance”.

Notes on Handling the Product
x
Make sure
not to hit the
field lens.
6. Refocusing
When changing specimens using the refocusing mechanism,
gently lower the stage by hand taking care not to hit the field
lens with the condenser holder (P.19).
7. Focus knobs
Do not turn the right and left focus knobs simultaneously in
opposite directions. Do not turn the coarse focus knob any
further after the stage has been moved up or down to its limit.
These operations will damage the focusing mechanism.
(The coarse focus knob has a protection device. The knob turns
freely for a while after it has reached its upper limit.)
8. Oil-immersion observation
Use only a minimum quantity of oil. If too much oil is applied, surplus oil may flow out to the stage and
the condenser which may lead to degraded performance.
When using petroleum benzine or absolute alcohol to wipe off immersion oil or
to clean the lenses, follow the instructions provided by their manufacturers.
Absolute alcohol and petroleum benzine are inflammable. Take great care when
handling them.
9. Shipping clamps
The microscope is held tightly by the clamps during shipment.
Be sure to remove the clamps before use. For details, see P.29.
Do not turn the knobs in
opposite directions.
WARNING
Shipping Clamps


2
Nomenclature of Each Part
1
The microscope is made up of the following components.
(1) Main Body
(2) Eyepieces
Screwed on to the eyepiece tube.
(3) Eyepiece Tube
This is a binocular eyepiece tube. A trinocular eyepiece tube is available for
photomicrography and TV microscopy.
(4) Objectives
Objectives with various magnifying powers are available.
(5) Condenser
Used for condensing light.
The condenser should be positioned slightly lower than its upper limit.
Adjust the aperture diaphragm lever according to the objective.
(6) Field Lens Unit
Draw out the field lens unit when changing lamp. (for E200 MV series only)
The microscope may have a field diaphragm. A field diaphragm is used to control the
illumination range and should be adjusted according to the objective. (Note that there
are two types of microscopes; the one with the field diaphragm, and the one without.)
(7) Lamp (for E200 MV series only)
Halogen lamp 6 V-30 W is used.
(8) Power Cord
Use the power cord provided.

Chapter 1 Nomenclature of Each Part
3
1
* The main body in this figure is an example of ECLIPSE E200 MV RS.
* The light source for E200 MV series is halogen lamp, and the light source for E200LED MV
series is white LED.
(2) Eyepieces
(3) Eyepiece Tube
(1) Main Body
(4) Objectives
(5) Condenser
(6) Field Lens Unit
(7) Lamp
(8) Power Cord

4
Switches and Controls
2
(1) Diopter ring
Adjust the diopter ring to
compensate for the difference
between your right and left
eyesight. (P.12)
(2) Revolving nosepiece
Can hold up to four objectives.
(3) Stage
(4) Specimen holder
Put your finger at the root or the
tip tilt of the claw to open the claw.
(P.10, 21, 31)
(5) Condenser aperture diaphragm
lever
Set the lever to match the
magnifying power of the objective.
(P.15)
(6) Condenser clamp screw
(7) Condenser auxiliary lens
Screw on to the bottom of the
condenser.
(8) Filter holder
The blue filter is provided for E200
MV series.
(9) Longitudinal stage motion
(Y Axis) knob
(10) Lateral stage motion (X Axis)
knob
These knobs are located either to
the right or the left of the stage.
(11) Field diaphragm ring
Set the ring to match the
magnifying power of the objective.
(P.18)
This ring is equipped only on the
microscope with a field diaphragm.
(12) Field diaphragm centering
screws
Used to center the field diaphragm
image. (P.14)
These screws are equipped only on
the microscope with a field
diaphragm.
(13) Fine focus knob
Used for fine focusing.
(14) Power switch
When pressed to the “l” position,
power is turned on and the lamp
lights.
When pressed to the “○” position,
power is turned off and the lamp
goes off.
(15) Brightness control dial
When turned clockwise, the lamp
voltage increases and the viewfield
becomes brighter.
When turned counterclockwise, the
lamp voltage decreases and the
viewfield becomes darker.
(16) Condenser focus knob
Use this knob when focusing the
field diaphragm image on the
specimen. (P.14)
The condenser focus knob is
located on the opposite side
depending on the model of he
microscope.
(17) Fine focus knob
Used for fine focusing.
(18) Coarse focus Knob
Used for coarse focusing.
The coarse focus knob is
located on the opposite
side of the stage motion
knobs.
(19) Coarse focus knob torque
adjustment ring
Used to adjust the tension (torque)
of the coarse focus knob. (P.24)
(20) Nameplate
Indicates the input voltage.
(21) AC inlet
Plug the power cord into this inlet.
Make sure that the power switch is
off (turned to “{”) before plugging
the cord in.

Chapter 2 Switches and Controls
5
2
(1) Diopter ring
(2) Revolving
nosepiece
(3) Stage
(4) Specimen holder
(5) Condenser aperture
diaphragm lever
(7) Condenser auxiliary lens
(6) Condenser clamp
screw
(16) Condenser focus knob
(19) Coarse focus knob torque
adjustment ring
(20) Nameplate
(17) Fine focus knob
(21) AC inlet
(13) Fine focus knob
(10) Lateral stage motion
(X Axis) knob
(9) Longitudinal stage
motion (Y Axis) knob
(15) Brightness control dial
(14) Power switch
(12) Field diaphragm
centering screws
(11) Field diaphragm ring
(8) Filter holder
(18) Coarse focus Knob

6
Microscopy Procedure
(Quick Reference)
3
1 Turn on the power switch.
Press the power switch to the “l” position.
2 Lower the condenser slightly down from its upper limit.
Rotate the condenser focus knob to lower the condenser slightly down from its upper limit.
3 Fully open the field aperture and condenser aperture
diaphragms. (Field diaphragm control is only for microscopes with the field
diaphragm.)
Turn the field diaphragm ring to the left limit to fully open the diaphragm.
Turn the condenser aperture diaphragm lever to the left limit to fully open the diaphragm.
4 Bring the 10× objective into the optical path.
Rotate the revolving nosepiece to bring the 10×objective into the optical path.
5 Place the specimen slide on the stage and brin
g
the specimen
into the optical path.
Rotate the stage motion (Y axis and X axis) knobs to bring the specimen into the optical path.
6 Focus on the specimen. ⇒P10
Turn the focus knobs to focus on the specimen.
7 Adjust the diopter. ⇒P12
Turn the diopter ring on the eyepieces.
8 Adjust the interpupillary distance.
Match the distance between the eyepieces with the distance between your eyes.
9 Focus on the field diaphragm and center its position.
(This adjustment is only for microscopes with the field diaphragm.) ⇒P14
Use the condenser focus knob, field diaphragm ring and field diaphragm centering screws for this
adjustment.
10 Select the objective.
Rotate the revolving nosepiece to the desired objective magnification.
11 Adjust the condenser aperture diaphragm.
Turn the condenser aperture diaphragm lever to the same figure as the magnification of the
objective in the optical path.
12 Focus on the specimen.
Turn the brightness control dial to adjust the brightness of the viewfield and focus on the
specimen with the focus knobs.

Chapter 3 Microscopy Procedure (Quick Reference)
7
3
13 Adjust the field diaphragm. (This adjustment is only for microscopes
with the field diaphragm.)
Turn the field diaphragm ring until the diaphragm image just circumscribes the viewfield.
14 Perform the microscopy. ⇒P18
Whenever the objective is changed, adjust the condenser aperture and field aperture
diaphragms.
15 Turn off the power switch.
Press the power switch to the “○” position.

8
Microscopy Procedure
(Detailed)
4
★Note that the figures in this manual show the “stage motion knobs” located on the right side and the
“condenser focus knob” located on the left side of the microscope body. These operating parts are
located on the opposite side depending on the model of the microscope. The “coarse focus knob” and
“coarse focus knob torque adjustment ring” are located on the opposite side of the “stage motion
knobs”. The “fine focus knob” is coaxial and located on both sides.
Preparation Operations previous to the microscopy
1 Turn on the power switch.
Press the power switch to the “l” position and the
lamp will come on.
2 Lower the condenser slightly from its upper limit.
Turn the condenser focus knob to raise the
condenser to its upper limit once, and then lower it
slightly. (The condenser click-stops at its upper
limit.)
Power ON
Condenser focus knob
This manual suits for next models
1
Table of contents
Other Nikon Microscope manuals

Nikon
Nikon E800 User manual

Nikon
Nikon LABOPHOT2-POL User manual

Nikon
Nikon ECLIPSE Ni-E User manual

Nikon
Nikon E800 User manual

Nikon
Nikon Eclipse Ci-E User manual

Nikon
Nikon ECLIPSE Ni-E User manual

Nikon
Nikon Eclipse LV100POL User manual

Nikon
Nikon Eclipse LV100DA-U User manual

Nikon
Nikon SMZ1500 User manual

Nikon
Nikon Eclipse E400 POL User manual

Nikon
Nikon SC User manual

Nikon
Nikon SMZ-1 User manual

Nikon
Nikon coolscope User manual

Nikon
Nikon A1R User manual

Nikon
Nikon Live Cell 2 User manual

Nikon
Nikon Ee1078 User manual

Nikon
Nikon eclipse Ti-U/B User manual

Nikon
Nikon Eclipse E400 POL User manual

Nikon
Nikon ECLIPSE Ei User manual

Nikon
Nikon T1-FM User manual