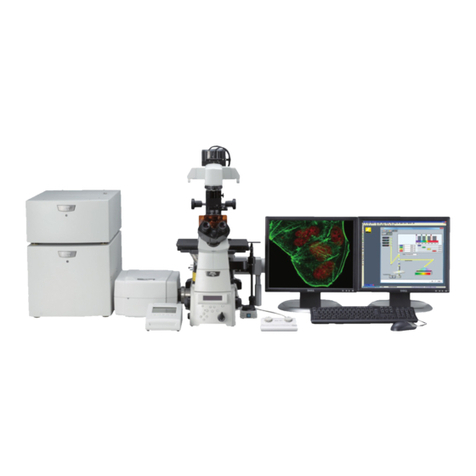
Nikon ECLIPSE Si User manual

M795E 20.11.NC.1
Upright Microscope
Instructions

Introduction
Introduction
Thank you for purchasing a Nikon product.
This instruction manual is intended for users of the Nikon Upright Microscope ECLIPSE Si RS.
No part of this manual may be reproduced or transmitted in any form without prior written permission from
Nikon.
• The contents of this manual are subject to change without notice.
• The equipment described in this manual might differ from the actual product in its appearance.
• Although every effort has been made to ensure the accuracy of this manual, errors or inconsistencies
might remain.
• If you notice any points that are unclear or incorrect, please contact your local Nikon representative.
• Some of the equipment described in this manual may not be included in the set you have purchased.
• If you intend to use any other equipment with this product, read the manual for that equipment too.
• If the equipment is used in a manner not specified by the manufacturer, the protection provided by the
equipment might be impaired.

Contents
1
Contents
Safety Precautions ...................................................................................................................................3
Meaning of Symbols Used on the Product.....................................................................................3
WARNING and CAUTION Symbols...............................................................................................3
WARNING................................................................................................................................4
CAUTION .................................................................................................................................6
Sicherheitsvorkehrungen..........................................................................................................................7
Consignes de sécurité............................................................................................................................12
Precauciones de seguridad....................................................................................................................17
Precauzioni per la sicurezza ..................................................................................................................22
Veiligheidsvoorschriften..........................................................................................................................27
Sikkerhedsforanstaltninger.....................................................................................................................32
Precauções de segurança ......................................................................................................................37
Turvatoimet.............................................................................................................................................42
Προφυλάξεις ασφαλείας.........................................................................................................................46
Notes on Handling the Product ..............................................................................................................51
Chapter 1 Nomenclature of Each Part .......................................................................................................54
Chapter 2 Microscopy Techniques ............................................................................................................56
2.1 Bright-field Microscopy.................................................................................................................57
2.2 Phase Contrast Microscopy .........................................................................................................64
2.3 Simple Polarizing Microscopy ......................................................................................................68
2.4 Diascopic Fluorescence Microscopy............................................................................................72
2.5 Dark-field Microscopy...................................................................................................................76
Chapter 3 Detailed Explanation..................................................................................................................79
3.1 Turning the Power On and Off .....................................................................................................79
3.1.1 Turn On/Off the Power to the Microscope ......................................................................79
3.1.2 ECO Mode and SLEEP Mode ........................................................................................79
3.2 Operating Diascopic Illumination..................................................................................................80
3.2.1 Turning Diascopic Illumination On and Off and Adjusting the Brightness ......................80
3.2.2 Using Light Intensity Management .................................................................................80
3.3 Operating the Stage Specimen Holder ........................................................................................81
3.3.1 Placing a Specimen Using the Specimen Holder ...........................................................81
3.3.2 Operating the Stage........................................................................................................81
3.4 Operating the Nosepiece and Objectives ....................................................................................82
3.4.1 Switching Objectives.......................................................................................................82
3.4.2 Oil-Immersion Observation .............................................................................................82
3.4.3 Performing Water-Immersion Microscopy ......................................................................83
3.5 Focusing Operations ....................................................................................................................84
3.5.1 Focusing on a Specimen ................................................................................................84
3.5.2 Torque Adjustment of the Coarse Focus Knob ...............................................................85
3.5.3 Replacing a Specimen Using the Stage Vertical Movement Stopper.............................86
3.6 Operating the Binoculars..............................................................................................................87
3.6.1 Adjustment of Diopter .....................................................................................................87
3.6.2 Adjusting Interpupillary Distance ....................................................................................88
3.7 Operating the Condenser.............................................................................................................89
3.7.1 Focusing the Condenser.................................................................................................89
3.7.2 Centering the Condenser................................................................................................89
3.8 Adjustment of Aperture Diaphragm..............................................................................................90
3.9 Adjustment of field diaphragm......................................................................................................91
Contents
2
3.10 Tips for Each Microscopy Method................................................................................................92
3.10.1 Tips for Phase Contrast Microscopy...............................................................................92
3.10.2 Tips for Simple Polarizing Microscopy............................................................................93
3.10.3 Tips for Diascopic Fluorescence Microscopy .................................................................94
3.10.4 Tips for Dark-field Microscopy ........................................................................................95
3.11 Combinations of Optical Parts......................................................................................................96
3.12 Microscope Terminology ..............................................................................................................97
Chapter 4 Assembly ....................................................................................................................................98
4.1 Configuration Diagrams ...............................................................................................................98
4.2 Assembly......................................................................................................................................99
4.2.1 Basic Configuration (for Bright-field Microscopy) ...........................................................99
4.2.2 Configuration for Phase Contrast Microscopy ..............................................................103
4.2.3 Configuration for Simple Polarizing Microscopy...........................................................104
4.2.4 Configuration for Diascopic Fluorescence Microscopy.................................................105
4.2.5 Configuration for Dark-Field Microscopy ......................................................................108
4.3 Setting Up the Microscope.........................................................................................................109
Chapter 5 Troubleshooting .......................................................................................................................111
5.1 Problems With the Microscope Image ....................................................................................... 111
5.1.1 Common Problems for Each Microscopy ..................................................................... 111
5.1.2 Problems in Phase Contrast Microscopy......................................................................112
5.1.3 Problems in Simple Polarizing Microscopy...................................................................113
5.1.4 Problems in Diascopic Fluorescence Microscopy ........................................................113
5.1.5 Problems in Dark-field Microscopy ...............................................................................114
5.2 Problems in Operation ...............................................................................................................115
5.3 Electrical.....................................................................................................................................116
Chapter 6 Care and Maintenance.............................................................................................................117
6.1 Cleaning the Lenses ..................................................................................................................117
6.2 Cleaning the Microscope............................................................................................................117
6.3 Disinfecting the Microscope .......................................................................................................117
6.4 Storing the Microscope ..............................................................................................................117
6.5 Periodical Inspections (Charged)...............................................................................................117
Chapter 7 Specifications...........................................................................................................................118
7.1 Microscopy (Principles) ..............................................................................................................118
7.2 Performance Properties .............................................................................................................119
7.3 Physical Properties ....................................................................................................................120
7.4 AC adapter .................................................................................................................................120
7.5 Power Cord ................................................................................................................................121
7.6 Safety standards ........................................................................................................................121
7.7 External dimensions (unit: mm)..................................................................................................122

Safety Precautions
3
Safety Precautions
Although this product is designed and manufactured to be completely safe during use, incorrect usage or
failure to follow the safety instructions provided may cause personal injury or property damage. To ensure
correct usage, read this manual carefully before using the product. Do not discard this manual and keep it
handy for easy reference.
Meaning of Symbols Used on the Product
Symbols that appear on the product indicate the need for caution at all times during use. Always refer to the
instruction manual and read the relevant instructions before manipulating any part to which the symbol has
been affixed.
Symbol Contents
Biohazard
This symbol can be found on the stage of the microscope
body (stage handle side), and cautions the following:
• WARNING: The product may become biohazardous if
a sample is spilled onto the product.
• To avoid exposure to biohazard, do not touch
contaminated parts with your bare hands.
• Decontaminate the contaminated parts according to
the standard procedures for your facility.
Microscope main body
(stage handle side)
WARNING (photobiological safety)
This symbol can be found on the microscope body (stage
handle side), and cautions the following:
• Photobiological safety risk group classification of
diascope illumination
• Do not look into diascopic illumination.
For details, see
WARNING, “7. Photobiological
safety” and “8. Do not look into the illumination section.”
WARNING and CAUTION Symbols
Safety instructions in this manual are marked with the following symbols to highlight their importance. For your
safety, always follow the instructions marked with these symbols.
Symbol Contents
WARNING Disregarding instructions marked with this symbol may lead to serious injury or death.
CAUTION Disregarding instructions marked with this symbol may lead to injury or property
damage.
Biohazard
symbol
WARNING
symbol

Safety Precautions
4
! WARNING
1. Do not disassemble.
Disassembling this product may result in electric shock or malfunction. Malfunctions and damage due
to disassembly will not be warranted. Do not disassemble any part unless instructed to do so in this
manual. If you experience problems with the product, contact your nearest Nikon representative.
2. Read the instructions thoroughly.
To ensure safety, thoroughly read this manual and the manuals for other equipment to be used with
this product. In particular, be sure to follow the warnings and cautions at the beginning of the
manuals.
3. Input voltage, AC adapter, power cord
The AC adapter for supplying power to this product can be used with 100 to 240 VAC at 50 to 60 Hz.
Use only the AC adapter and power cord specified in “Chapter 7 Specifications.” Use of another AC
adapter or power cord may result in malfunction or fire.
• Avoid using the product in an environment where the supply voltage may fluctuate excessively.
• The AC adapter for this product is classified as Class I for electrical shock protection. Be sure to
connect it to a protective earth terminal.
• If the AC adapter is covered or items are placed on the AC adapter, heat dissipation may be
hindered, causing it to become abnormally hot.
4. Handling flammable solvents
The following flammable solvents are used with the product:
• Immersion oil (Nikon Immersion Oil for oil immersion objectives
• Absolute alcohol (ethyl alcohol or methyl alcohol for cleaning optical parts)
• Petroleum benzine (for wiping off the immersion oil)
• Medical alcohol (for disinfecting the microscope)
Never hold a flame near these solvents. When using a solvent, ensure correct and safe use by
thoroughly reading the instructions provided by the solvent manufacturer.
When using a solvent with this product, observe the following precautions:
• Keep solvents away from the product and its surroundings when plugging/unplugging the AC
adapter or power cord.
• Be careful not to spill the solvents.
5. Hazardous samples
This microscope is mainly for use in microscopic observation of a sample such as cells and tissue
affixed to a slide.
When handling a specimen, check to determine whether the specimen is hazardous. Handle
hazardous specimens according to the standard procedure for your laboratory. If the specimen is of
an infectious nature, wear rubber gloves to avoid infection, and be careful not to touch a specimen.
If such a sample comes in contact with the microscope, decontaminate the contaminated portion
according to the standard procedure for your laboratory.
6. Notes on operating the sliders on the condenser part
A slider for microscopy has two set positions. It is attached to the condenser part and used for
switching the observation methods or magnifications by changing the set position. The bright light
might reach the eyepiece tube when you move the slider to change the set position.
Remove your eyes from the binoculars or turn off the diascopic illumination when you operate a
slider.
Especially in diascopic fluorescence microscopy, the very bright illumination is used, so the intense
flashes might reach the eyepiece tube when you operate the slider.

Safety Precautions
5
!WARNING
7. Photobiological safety
This product is designed and manufactured in accordance with the safety standard IEC 62471
“Photobiological safety of lamps and lamp systems.”
Illumination near the stage and light from the binocular part of the eyepiece tube or the teaching
head, and light from the camera port of the trinocular eyepiece tube are classified into the following
risk group. The distance (hazard distance) from the vicinity of the stage or from the binocular part of
the eyepiece tube or the teaching head, or from the opening of the camera port where the risk group
classification is equivalent to the exempt group that does not cause photobiological injury is as
follows.
Risk group classification Hazard distance
Retinal blue light hazard Risk group 3 36 m
Infrared radiation hazard to eyes Risk group 3 127 m
Illumination in risk group 3 can be hazardous. Pay attention to brightness adjustment by the
brightness control knob and avoid looking strong light for a long time.
• The LED light source is built in at the bottom part of the microscope. Illumination light from the
field lens goes through the condenser and illuminates the specimen. Do not stare at the
condenser lens, specimen or periphery of the specimen, and do not look into the field lens.
• Do not look into strong light from the binocular part of the eyepiece tube or the teaching head.
• Do not remove the eyepieces from the binocular part when illumination is turned on.
• Do not look into strong light from the camera port from directly above.
• When you do not attach the camera, attach the supplied cap to the camera port.
8. Do not look into the illumination section.
The following warning label indicating the highest risk (Risk Group 3) to photobiological safety is
affixed on the handle side of the stage to remind the user of the following precautions. (For the
locations of this label, see the figure in “Chapter 1 Nomenclature of Each Part.”)
WARNING (Risk Group 3)
IR and possibly hazardous light is emitted from the camera port when the trinocular eyepiece
tube is used.
Never look into the camera port.
CAUTION (Risk Group 2)
Possibly hazardous light is emitted from the condenser lens when diascopic illumination is
used.
Do not stare at emitted light. It may be harmful to the eyes.
NOTICE (Risk Group 1)
Possibly hazardous light is emitted from the eyepiece lenses when diascopic illumination is
used.
Avoid long-time microscopic observation with strong illumination.

Safety Precautions
6
! CAUTION
1. Assembly of the microscope
• Assemble the microscope while the AC adapter is not connected to it.
• Take care to avoid pinching your fingers and hands.
2. Do not wet the product or allow ingress of foreign matter.
Do not allow the product to become wet, as doing so may result in malfunction, overheating, or
electric shock.
If water or other liquids are accidentally spilled onto the product, immediately unplug the power
cord from the AC adapter. Then, wipe off the liquid with a dry cloth.
Ingress of foreign matter may also result in malfunction. If liquids or foreign matter gets in the
product, cease use of the product, and contact your nearest Nikon representative.
3. Moving the product
• The microscope has carrying handholds and
handles.
There are two handholds on both sides of the
base and two handles on the arm on the rear side
of the microscope.
When carrying the microscope, hold the
microscope firmly by these handholds and
handles.
• The storage part on the rear of the microscope is
not a handle. Do not hold this part as it stores the
AC adapter and power cord.
• When moving the product, do not hold by the
focus knobs, eyepiece tube, and stage, etc. The
parts may become detached and also result in
malfunctions.
Hold a handle and a handhold. Hold the handles.
4. Disposal of the microscope
To avoid biohazard risks, dispose of the microscope as contaminated equipment, according to the
standard procedures for your facility.
Handhold
(both sides)
Handles

Sicherheitsvorkehrungen
7
Sicherheitsvorkehrungen
Obwohl dieses Gerät auf einen sicheren Gebrauch ausgelegt ist, kann eine falsche Verwendung oder
Nichtbeachtung der Sicherheitshinweise zu Verletzungen oder Sachschäden führen. Lesen Sie vor Gebrauch
des Geräts dieses Handbuch aufmerksam durch, um einen korrekten Gebrauch zu gewährleisten. Entsorgen
Sie dieses Handbuch nicht. Bewahren Sie es zum einfachen Nachschlagen auf.
Bedeutung der Symbole auf dem Gerät
Die Symbole auf dem Gerät zeigen an, dass während des Gebrauchs stets Vorsicht geboten ist. Lesen Sie
immer die entsprechenden Anweisungen in der Bedienungsanleitung, bevor Sie Arbeiten an Teilen
durchführen, die mit Symbolen versehen sind.
Symbol Inhalt
Biologisches Risiko
Dieses Symbol befindet sich auf dem Objekttisch des
Mikroskopkörpers (Tischgriffseite) und bedeutet
Folgendes:
• WARNUNG: Das Gerät kann ein biologisches Risiko
darstellen, wenn eine Probe auf dem Gerät verschüttet
wird.
• Fassen Sie zum Schutz vor biologischen Risiken keine
kontaminierten Stellen mit bloßen Händen an.
• Dekontaminieren Sie kontaminierte Stellen
entsprechend den Standardprozessen Ihrer
Einrichtung.
Mikroskopkörper
(Tischgriffseite)
WARNUNG (photobiologische Sicherheit)
Dieses Symbol befindet sich auf dem Körper des
Mikroskops (Tischgriffseite) und bedeutet Folgendes:
• Risikogruppenklassifizierung der photobiologischen
Sicherheit der Diaskop-Beleuchtung
• Blicken Sie nicht in die Diaskop-Beleuchtung.
Weitere Informationen finden Sie unter WARNUNG,
„7. Photobiologische Sicherheit“ sowie „8. Blicken Sie
nicht in den Beleuchtungsbereich“
Symbole WARNUNG und VORSICHT
Die Sicherheitshinweise in diesem Handbuch sind mit den folgenden Symbolen gekennzeichnet, um ihre
Bedeutung hervorzuheben. Befolgen Sie zu Ihrer eigenen Sicherheit stets alle Anweisungen, die mit diesen
Symbolen gekennzeichnet sind.
Symbol Inhalt
WARNUNG Nichtbeachtung von mit diesem Symbol gekennzeichneten Anweisungen kann zu
schweren oder tödlichen Verletzungen führen.
VORSICHT Nichtbeachtung von mit diesem Symbol gekennzeichneten Anweisungen kann zu
Verletzungen oder Sachschäden führen.
Symbol für
biologisches
Risiko
Symbol
WARNUNG

Sicherheitsvorkehrungen
8
!WARNUNG
1. Nicht zerlegen.
Das Zerlegen dieses Geräts kann Stromschläge oder Fehlfunktionen nach sich ziehen.
Fehlfunktionen und Schäden durch Zerlegung sind nicht von der Garantie abgedeckt. Bauen Sie
keine Teile auseinander, außer Sie werden in diesem Handbuch dazu aufgefordert. Wenden Sie sich
bei Problemen mit dem Gerät an einen Nikon-Vertreter in Ihrer Nähe.
2. Lesen Sie sich die Anweisungen gründlich durch.
Lesen Sie sich für einen sicheren Gebrauch dieses Handbuch sowie die Handbücher anderer
Ausrüstung durch, die mit diesem Gerät verwendet werden soll. Beachten Sie insbesondere die
Warn- und Vorsichtshinweise am Anfang der Handbücher.
3. Eingangsspannung, Netzteil, Netzkabel
Das Netzteil für die Stromversorgung dieses Geräts kann mit 100 bis 240 V AC bei 50 bis 60 Hz
verwendet werden. Verwenden Sie nur das in „Chapter 7 Specifications“ angegebene Netzteil und
Netzkabel. Die Verwendung eines anderen Netzteils oder Netzkabels kann zu Fehlfunktionen oder
einem Brand führen.
• Vermeiden Sie den Einsatz des Geräts in einer Umgebung mit übermäßig schwankender
Versorgungsspannung.
• Das Netzteil für dieses Gerät entspricht der Schutzklasse I gegen Stromschläge. Schließen Sie es
immer an eine Erdung an.
• Wenn das Netzteil verdeckt wird oder Gegenstände auf dem Netzteil abgelegt werden, kann dies
die Wärmeableitung beeinträchtigen, wodurch das Netzteil ungewöhnlich heiß wird.
4. Umgang mit brennbaren Lösungsmitteln
Die folgenden brennbaren Lösungsmittel werden mit dem Gerät verwendet:
• Immersionsöl (Nikon Immersionsöl für Ölimmersion)
• Ethanol (Ethylalkohol oder Methylalkohol zur Reinigung optischer Bauteile)
• Petroleumbenzin (zum Abwischen des Immersionsöls)
• Medizinischer Alkohol (zur Desinfektion des Mikroskops)
Halten Sie offenes Feuer stets fern von diesen Lösungsmitteln. Lesen Sie sich bei Verwendung eines
Lösungsmittels sorgfältig die Herstelleranweisungen durch und achten Sie auf die korrekte und
sichere Verwendung.
Beachten Sie bei der Verwendung eines Lösungsmittels in Verbindung mit diesem Produkt die
folgenden Vorsichtsmaßnahmen:
• Halten Sie Lösungsmittel vom Gerät und von dessen Umgebung fern, während Sie das Netzteil
oder Netzkabel anschließen oder vom Produkt trennen.
• Verschütten Sie kein Lösungsmittel.
5. Gefährliche Proben
Dieses Mikroskop ist hauptsächlich für die Betrachtung von Proben wie Zellen und Gewebe
vorgesehen, die auf einem Objektträger fixiert sind.
Prüfen Sie beim Umgang mit einer Probe, ob diese gefährlich ist. Befolgen Sie beim Umgang mit
gefährlichen Proben die Standardverfahren Ihres Labors. Tragen Sie beim Umgang mit
ansteckenden Proben Gummihandschuhe, um sich vor Ansteckung zu schützen, und berühren Sie
die Probe nicht.
Falls eine solche Probe mit dem Mikroskop in Kontakt kommt, dekontaminieren Sie die kontaminierte
Stelle entsprechend des Standardverfahrens Ihres Labors.

Sicherheitsvorkehrungen
9
!WARNUNG
6. Hinweise zur Bedienung der Schieber an der Kondensoreinheit
Ein Schieberegler für die Mikroskopie hat zwei festgelegte Positionen. Er ist an der Kondensoreinhei
t
angebracht und dient zum Umschalten der Beobachtungsmethoden oder Vergrößerungen durch
Veränderung der eingestellten Position. Das helle Licht kann das Okularrohr erreichen, wenn Sie
mittels des Schiebereglers die eingestellte Position ändern.
Schauen Sie nicht durch das Okular oder schalten Sie die Diaskop-Beleuchtung aus, wenn Sie einen
Schieberegler betätigen.
Insbesondere bei der Diaskop-Fluoreszenzmikroskopie wird die sehr helle Beleuchtung verwendet,
sodass die intensiven Blitze das Okularrohr erreichen könnten, wenn Sie den Schieberegler
betätigen.
7. Photobiologische Sicherheit
Dieses Gerät entspricht der Sicherheitsnorm IEC 62471 („Photobiologische Sicherheit von Lampen
und Lampensystemen“).
Die Beleuchtung des Objekttischs und das Licht vom binokularen Teil des Okularrohrs oder des
Lehrkopfes und Licht vom Kameraport des trinokularen Okularrohrs entsprechen der folgenden
Risikogruppe. Der Abstand (Gefahrenabstand) vom Objekttisch, dem binokularen Teil des
Okularrohrs, des Lehrkopfes oder von der Öffnung des Kameraports, bei dem die
Risikogruppenklassifizierung der Ausnahmegruppe entspricht, die keine photobiologischen Schäden
verursacht, lautet wie folgt.
Risikogruppenklassifizierung Gefahrenabstand
Risiko von Netzhautschäden durch
blaues Licht Risikogruppe 3 36 m
Gefahr von Augenschäden durch
Infrarotstrahlung Risikogruppe 3 127 m
Beleuchtung in Risikogruppe 3 kann gefährlich sein. Achten Sie auf die Helligkeitseinstellung des
Helligkeitsreglers, und blicken Sie nicht zu lange in eine starke Lichtquelle.
• Die LED-Lichtquelle ist im unteren Teil des Mikroskops integriert. Das Beleuchtungslicht von der
Feldlinse geht durch den Kondensor und beleuchtet die Probe. Blicken Sie nicht auf die
Kondensorlinse, die Probe oder den Randbereich der Probe und blicken Sie nicht in die Feldlinse.
• Blicken Sie nicht in das starke Licht vom binokularen Teil des Okularohrs oder des Lehrkopfes.
• Entfernen Sie die Okulare nicht vom binokularen Teil, während die Beleuchtung eingeschaltet ist.
• Blicken Sie nicht direkt von oben in starkes Licht vom Kameraport.
• Bringen Sie die im Lieferumfang enthaltene
A
bdeckung am Kameraport an, wenn Sie die Kamera
nicht verwenden.

Sicherheitsvorkehrungen
10
!WARNUNG
8. Blicken Sie nicht in den Beleuchtungsbereich.
Das folgende Warnetikett, auf dem vor dem höchsten Risiko (Risikogruppe 3) für die
photobiologische Sicherheit gewarnt wird, ist an der Griffseite des Objekttisches angebracht, um den
Benutzer an die folgenden Vorsichtsmaßnahmen zu erinnern. (Die Positionen dieses Etiketts finden
Sie in der Abbildung unter „Chapter 1 Nomenclature of Each Part“.)
WARNUNG (Risikogruppe 3)
Infrarotstrahlung und möglicherweise gefährliches Licht werden vom Kameraanschluss
abgegeben, wenn das trinokulare Okular verwendet wird.
Blicken Sie niemals in den Kameraanschluss.
VORSICHT (Risikogruppe 2)
Möglicherweise tritt bei Verwendung einer Diaskop-Beleuchtung von der Kondensorlinse
gefährliches Licht aus.
Blicken Sie nicht in das ausgestrahlte Licht. Es kann schädlich für die Augen sein.
HINWEIS (Risikogruppe 1)
Bei Verwendung einer Diaskop-Beleuchtung tritt möglicherweise gefährliches Licht von den
Okularlinsen aus.
Vermeiden Sie es, Objekte lange mit starker Beleuchtung mikroskopisch zu betrachten.

Sicherheitsvorkehrungen
11
!VORSICHT
1. Zusammenbau des Mikroskops
• Bauen Sie das Mikroskop nicht bei angeschlossenem Netzteil zusammen.
• Achten Sie darauf, sich nicht die Finger oder Hände einzuklemmen.
2. Verhindern Sie, dass das Gerät nass wird oder Fremdstoffe in das Gerät eindringen.
Lassen Sie das Gerät nicht nass werden, da dies zu Fehlfunktionen, Überhitzung oder
Stromschlägen führen kann.
Wenn versehentlich Wasser oder andere Flüssigkeiten auf dem Gerät verschüttet werden, ziehen
Sie das Netzkabel sofort vom Netzteil ab. Wischen Sie dann die Flüssigkeit mit einem trockenen
Tuch ab.
Das Eindringen von Fremdstoffen kann ebenfalls zu Fehlfunktionen führen. Falls Flüssigkeiten
oder Fremdstoffe in das Gerät gelangen, stellen Sie den Gebrauch des Geräts ein und wenden
Sie sich an Ihren Nikon-Ansprechpartner.
3. Bewegen des Geräts
• Das Mikroskop verfügt über Haltegriffe.
Es befinden sich zwei Haltegriffe an beiden Seiten
der Basis und zwei Griffe am Arm auf der
Rückseite des Mikroskops.
Halten Sie das Mikroskop beim Tragen fest an
diesen Haltegriffen.
• Das Aufbewahrungsfach auf der Rückseite des
Mikroskops ist kein Haltegriff. Halten Sie das
Gerät nicht daran fest, da dort das Netzteil und
das Netzkabel aufbewahrt werden.
• Halten Sie das Gerät beim Bewegen nicht an den
Fokusdrehknöpfen, dem Okularrohr, dem
Objekttisch usw. fest. Die Teile können sich lösen
oder zu Fehlfunktionen führen.
Halten Sie einen Griff und einen Haltegriff fest. Halten Sie die Griffe fest.
4. Entsorgung des Mikroskops
Entsorgen Sie das Mikroskop entsprechend den Standardverfahren zur Entsorgung kontaminierter
Geräte in Ihrer Einrichtung, um biologischen Risiken vorzubeugen.
Haltegrif
f
(beide Seiten)
Griffe

Consignes de sécurité
12
Consignes de sécurité
Ce produit a été conçu et fabriqué de façon à ne présenter aucun risque de sécurité lié à son utilisation.
Cependant, une utilisation incorrecte ou le non-respect des consignes de sécurité fournies peut entraîner des
blessures ou des dommages matériels. Pour garantir une utilisation correcte, lisez attentivement ce manuel
avant d'utiliser le produit. Ne jetez pas ce manuel et gardez-le à portée de main pour pouvoir le consulter
facilement.
Signification des symboles utilisés sur le produit
Les symboles qui apparaissent sur le produit indiquent qu'il est nécessaire de faire preuve de prudence à tout
moment pendant l'utilisation. Reportez-vous toujours au manuel d'instructions et lisez les instructions
correspondantes avant de manipuler toute pièce sur laquelle le symbole a été apposé.
Symbole Contenu
Risque biologique
Ce symbole se trouve sur le boîtier du microscope (côté
poignée de la platine) et attire l'attention sur les éléments
suivants :
• AVERTISSEMENT : Le produit peut présenter un
risque biologique si un échantillon est renversé sur le
produit.
• Pour éviter toute exposition à un risque biologique, ne
touchez pas les pièces contaminées à mains nues.
• Décontaminez les pièces contaminées conformément
aux procédures standard de votre établissement.
Corps principal du microscope
(côté poignée de la platine)
AVERTISSEMENT (sécurité photobiologique)
Ce symbole se trouve sur le boîtier du microscope (côté
poignée de la platine) et attire l'attention sur les éléments
suivants :
• Classification groupe de risque de sécurité
photobiologique de l'éclairage diascopique
• Ne pas regarder l'éclairage diascopique.
Pour plus de détails, voir AVERTISSEMENT, « 7.
Sécurité photobiologique » et « 8. Ne regardez pas la
section d'éclairage. »
Symboles AVERTISSEMENT et MISE EN GARDE
Les consignes de sécurité de ce manuel sont signalées par les symboles suivants pour souligner leur
importance. Pour votre sécurité, suivez toujours les instructions indiquées par ces symboles.
Symbole Contenu
AVERTISSEMENT Le non-respect des instructions signalées par ce symbole peut entraîner
des blessures graves, voire mortelles.
MISE EN GARDE Le non-respect des instructions signalées par ce symbole peut entraîner
des blessures ou des dégâts matériels.
Symbole de
risque
biologique
Symbole
A
VERTISSEMENT

Consignes de sécurité
13
!AVERTISSEMENT
1. Ne pas démonter.
Le démontage de ce produit peut provoquer une électrocution ou un dysfonctionnement. Les
dysfonctionnements et les dommages dus au démontage ne sont pas garantis. Ne démontez aucune
pièce à moins d'y être invité dans ce manuel. Si vous rencontrez des problèmes avec le produit,
contactez votre représentant Nikon le plus proche.
2. Lisez attentivement les instructions.
Pour des raisons de sécurité, lisez attentivement ce manuel et les manuels des autres équipements à
utiliser avec ce produit. Veillez notamment à respecter les avertissements et les mises en garde
figurant au début des manuels.
3. Tension d'entrée, adaptateur secteur, câble d'alimentation
L'adaptateur secteur pour l'alimentation de ce produit peut être utilisé avec 100 à 240 VCA, de 50 à
60 Hz. Utilisez uniquement l'adaptateur secteur et le câble d'alimentation spécifiés dans « Chapter 7
Specifications ». L'utilisation d'un autre adaptateur secteur ou câble d'alimentation peut entraîner un
dysfonctionnement ou un incendie.
• Évitez d'utiliser le produit dans un environnement où la tension d'alimentation peut fluctuer
excessivement.
• L'adaptateur secteur pour ce produit est catégorisé en classe I pour la protection contre
l'électrocution. Veillez à le connecter à une borne de terre de protection.
• Si l'adaptateur secteur est couvert ou si des éléments sont placés sur l'adaptateur secteur, la
dissipation de la chaleur peut être limitée, ce qui risque d'entraîner une surchauffe anormale.
4. Manipulation de solvants inflammables
Les solvants inflammables suivants sont utilisés avec le produit :
• Huile d'immersion (huile d'immersion Nikon pour les objectifs à immersion d'huile)
• Alcool absolu (alcool éthylique ou alcool méthylique pour le nettoyage des pièces optiques)
• Essence de pétrole (pour essuyer l'huile d'immersion)
• Alcool médical (pour la désinfection du microscope)
Ne tenez jamais une flamme à proximité de ces solvants. Si vous avez recours à un solvant, veillez à
l'utiliser de manière correcte et sûre en lisant attentivement les instructions fournies par le fabricant
du solvant.
Lorsque vous utilisez un solvant avec ce produit, prenez les précautions suivantes :
• Tenez les solvants à l'écart du produit et de son environnement lorsque vous
branchez/débranchez l'adaptateur secteur ou le câble d'alimentation.
• Veillez à ne pas renverser les solvants.
5. Échantillons dangereux
Ce microscope est principalement destiné à l'observation microscopique d'un échantillon tel que des
cellules et des tissus fixés sur une lame.
Lorsque vous manipulez un échantillon, vérifiez si celui-ci est dangereux. Manipulez les échantillons
dangereux conformément à la procédure standard de votre laboratoire. Si l'échantillon est de nature
infectieuse, portez des gants en caoutchouc pour éviter toute infection et veillez à ne pas toucher
l'échantillon.
Si un échantillon de ce type entre en contact avec le microscope, décontaminez la partie contaminée
conformément à la procédure standard de votre laboratoire.

Consignes de sécurité
14
!AVERTISSEMENT
6. Notes sur le fonctionnement des curseurs de la partie condenseur
Un curseur pour microscope a deux positions définies. Il est fixé à la partie condenseur et utilisé pou
r
changer les méthodes d'observation ou les grossissements en changeant la position définie. La
lumière vive peut atteindre le tube d'oculaire lorsque vous déplacez le curseur pour modifier la
position définie.
Retirez vos yeux des binoculaires ou éteignez l'éclairage diascopique lorsque vous opérez un
curseur.
En particulier dans la microscopie par fluorescence diascopique, un éclairage très lumineux est
utilisé, de sorte que des flashes intenses peuvent atteindre le tube d'oculaire lorsque vous opérez le
curseur.
7. Sécurité photobiologique
Ce produit est conçu et fabriqué conformément à la norme de sécurité CEI 62471 « Sécurité
photobiologique des lampes et des appareils utilisant des lampes ».
L'éclairage près de la platine et la lumière provenant de la partie binoculaire du tube oculaire ou de la
tête d'enseignement, et la lumière provenant du port de caméra du tube trinoculaire sont classés
dans le groupe de risque suivant. La distance (distance de sécurité) par rapport à la platine ou à la
partie binoculaire du tube d'oculaire ou de la tête d'enseignement, ou à l'ouverture du port de caméra,
où la classification du groupe de risque est équivalente au groupe exempté qui ne cause pas de
blessure photobiologique, est la suivante.
Classification du groupe
de risques
Distance de
sécurité
Risques pour la rétine liés à la
lumière bleue Groupe de risque 3 36 m
Danger de rayonnement infrarouge
pour les yeux Groupe de risque 3 127 m
L'éclairage des appareils du groupe de risque 3 peut être dangereux. Faites attention au réglage de
la luminosité à l'aide du bouton de réglage correspondant et évitez de regarder une source forte de
lumière pendant une période prolongée.
• La source lumineuse à LED se situe sous le microscope. La lumière d'éclairage de l'objectif de
champ traverse le condenseur et illumine l'échantillon. Ne regardez pas l'objectif du condenseur,
l'échantillon ou la périphérie de l'échantillon et ne regardez pas dans l'objectif de champ.
• Ne regardez pas la lumière intense de la partie binoculaire du tube d'oculaire ou de la tête
d'enseignement.
• Ne retirez pas les oculaires de la partie binoculaire lorsque l'éclairage est allumé.
• Ne regardez pas la lumière puissante du port de caméra directement par au-dessus.
• Si vous ne branchez pas la caméra, mettez en place le capuchon fourni sur le port de caméra.

Consignes de sécurité
15
!AVERTISSEMENT
8. Ne regardez dans la section d'éclairage.
L'étiquette d'avertissement suivante indiquant le risque le plus élevé (groupe de risque 3) pour la
sécurité photobiologique est apposée sur le côté poignée de la platine afin de rappeler à l'utilisateur
les précautions suivantes. (Pour connaître l'emplacement de cette étiquette, reportez-vous à la figure
dans « Chapter 1 Nomenclature of Each Part »).
AVERTISSEMENT (Groupe de risque 3)
Une lumière infrarouge et potentiellement dangereuse est émise du port de caméra lorsque
le tube trinoculaire est utilisé.
Ne regardez jamais dans le port de caméra.
MISE EN GARDE (Groupe de risque 2)
Une lumière potentiellement dangereuse est émise par l'objectif du condenseur lorsque
l'éclairage diascopique est utilisé.
Ne regardez pas la lumière émise. Elle peut être dangereuse pour les yeux.
AVIS (Groupe de risque 1)
Une lumière potentiellement dangereuse est émise par les objectifs de l'oculaire lorsque
l'éclairage diascopique est utilisé.
Évitez les observations microscopiques de longue durée avec un éclairage puissant.

Consignes de sécurité
16
MISE EN GARDE
1. Assemblage du microscope
• Assemblez le microscope lorsque l'adaptateur secteur n'est pas connecté.
• Veillez à ne pas vous pincer les doigts ni les mains.
2. Maintenez le produit à l'abri de l'humidité et ne laissez pas pénétrer de corps étrangers.
Maintenez le produit à l'abri de l'humidité afin d'éviter tout dysfonctionnement, surchauffe ou
électrocution.
Si de l'eau ou d'autres liquides sont accidentellement renversés sur le produit, débranchez
immédiatement le câble d'alimentation de l'adaptateur secteur. Essuyez ensuite le liquide à l'aide
d'un chiffon sec.
La pénétration de corps étrangers peut également entraîner un dysfonctionnement. Si des liquides
ou des corps étrangers pénètrent dans le produit, cessez d'utiliser le produit et contactez votre
représentant Nikon le plus proche.
3. Déplacement du produit
• Le microscope est doté de poignées de transport.
Deux poignées des deux côtés de la base et deux
poignées sur le bras à l'arrière du microscope.
Lorsque vous transportez le microscope, tenez-le
fermement par ces poignées.
• La pièce de stockage à l'arrière du microscope
n'est pas une poignée. Ne tenez pas cette pièce
car elle permet de ranger l'adaptateur secteur et
le câble d'alimentation.
• Lorsque vous déplacez le produit, ne le tenez pas
par les boutons de mise au point, le tube
d'oculaire, la platine, etc. Les pièces peuvent se
détacher et provoquer des dysfonctionnements.
Tenir deux poignées. Tenir les poignées.
4. Mise au rebut du microscope
Pour éviter tout risque biologique, mettez le microscope au rebut comme un équipement contaminé,
conformément aux procédures standard de votre établissement.
Poignée
(deux côtés)
Poignées

Precauciones de seguridad
17
Precauciones de seguridad
Aunque el proceso de diseño y fabricación de este producto garantiza su uso seguro, si lo utiliza de forma
incorrecta o no sigue las instrucciones de seguridad indicadas se pueden producir lesiones personales o
daños materiales. Para garantizar su uso correcto, lea atentamente este manual antes de utilizar el producto.
No deseche este manual y manténgalo a mano para facilitar su consulta.
Significado de los símbolos utilizados en el producto
Los símbolos que aparecen en el producto indican que debe usar el producto con precaución en todo
momento. Consulte siempre el manual de instrucciones y lea las instrucciones correspondientes antes de
manipular cualquier pieza en la que se haya colocado el símbolo.
Símbolo Explicación
Peligro biológico
Este símbolo se puede encontrar en el cuerpo del
microscopio (platina derecha) y advierte de lo siguiente:
• ADVERTENCIA: El producto puede llegar a ser un
peligro biológico si se derrama una muestra sobre el
producto.
• Para evitar la exposición al peligro biológico, no toque
las piezas contaminadas sin guantes.
• Descontamine las piezas contaminadas de acuerdo
con los procedimientos habituales de su centro.
Cuerpo del microscopio
(lado del asa de la platina)
ADVERTENCIA (seguridad fotobiológica)
Este símbolo se puede encontrar en el cuerpo del
microscopio (platina derecha) y advierte de lo siguiente:
• Clasificación de grupo de riesgo fotobiológico de
iluminación diascópica
• No mire directamente a la luz diascópica.
Para obtener más información, consulte
ADVERTENCIA, "7. Seguridad fotobiológica" y "8. No
mire directamente a la fuente de iluminación."
Símbolos DE ADVERTENCIA y PRECAUCIÓN
Las instrucciones de seguridad de este manual están marcadas con los siguientes símbolos para destacar su
importancia. Para garantizar su seguridad, siga siempre las instrucciones marcadas con estos símbolos.
Símbolo Explicación
ADVERTENCIA Si no se tienen en cuenta las instrucciones que indica este símbolo, pueden
producirse lesiones graves o la muerte.
PRECAUCIÓN Si no se tienen en cuenta las instrucciones que indica este símbolo, pueden
producirse lesiones o daños materiales.
Símbolo de
peligro
biológico
Símbolo de
A
DVERTENCIA

Precauciones de seguridad
18
!ADVERTENCIA
1. No desmonte el producto.
Si desmonta este producto, se pueden producir descargas eléctricas o es posible que dicho producto
no funcione correctamente. Las averías y los daños ocasionados debidos al desmontaje del producto
no están cubiertos por la garantía. No desmonte ninguna pieza a menos que se indique en este
manual. Si tiene problemas con el producto, póngase en contacto con el representante de Nikon más
cercano.
2. Lea las instrucciones detenidamente.
Para garantizar la seguridad, lea detenidamente este manual y los manuales del resto de equipos
que va a utilizar con este producto. En concreto, asegúrese de seguir las advertencias y las
precauciones que aparecen al principio de los manuales.
3. Tensión de entrada, adaptador de CA y cable de alimentación
El adaptador de CA que suministra alimentación a este producto se puede utilizar con entre 100 y
240 V de CA y a entre 50 y 60 Hz. Utilice únicamente el adaptador de CA y el cable de alimentación
indicados en el "Chapter 7 Specifications." El uso de un adaptador de CA o cable de alimentación
diferentes puede provocar una avería o un incendio.
• No utilice el producto en un entorno en el que la tensión de alimentación pueda fluctuar
demasiado.
• El adaptador de CA de este producto es de Clase I en lo que respecta a la protección contra
descargas eléctricas. Conecte siempre el producto a un terminal con puesta a tierra.
• Si el adaptador de CA está cubierto o hay algún componente sobre el adaptador de CA, la
disipación del calor puede verse obstaculizada, lo que provoca que se caliente demasiado.
4. Manipulación de disolventes inflamables
Se utilizan los siguientes disolventes inflamables con el producto:
• Aceite de inmersión (aceite de inmersión Nikon para objetivos de inmersión en aceite)
• Alcohol absoluto (alcohol etílico o alcohol metílico para limpiar los componentes ópticos)
• Bencina de petróleo (para eliminar el aceite de inmersión)
• Alcohol de uso médico (para desinfectar el microscopio)
No sostenga nunca una llama cerca de estos disolventes. Si utiliza un disolvente, lea detenidamente
las instrucciones proporcionadas por el fabricante para asegurarse de que lo usa de manera segura
y correcta.
Si utiliza un disolvente con este producto, aplique las siguientes precauciones:
• Cuando vaya a enchufar/desenchufar el adaptador de CA o el cable de alimentación, mantenga
los disolventes alejados del producto y de la zona circundante.
• No derrame los disolventes.
5. Muestras peligrosas
Este microscopio se utiliza principalmente en la observación microscópica de muestras, como
células y tejidos adheridos a un portaobjetos.
Si va a manipular una muestra, compruebe si es peligrosa. Manipule las muestras peligrosas de
acuerdo con el procedimiento habitual de su laboratorio. Si la muestra es infecciosa, use guantes de
goma para evitar infecciones y no toque la muestra.
Si dicha muestra entra en contacto con el microscopio, descontamine la parte contaminada de
acuerdo con el procedimiento habitual de su laboratorio.
This manual suits for next models
1
Table of contents
Languages:
Other Nikon Microscope manuals

Nikon
Nikon N-STORM User manual

Nikon
Nikon Epiphot 300 User manual

Nikon
Nikon C1si User manual

Nikon
Nikon Multizoom AZ100 User manual

Nikon
Nikon Eclipse E600 User manual

Nikon
Nikon YS100 User manual

Nikon
Nikon SMZ645 User manual

Nikon
Nikon ECLIPSE Ni-E User manual

Nikon
Nikon ECLIPSE E200 POL User manual

Nikon
Nikon SMZ-1B User manual

Nikon
Nikon T1-FM User manual

Nikon
Nikon ECLIPSE Ni-E User manual

Nikon
Nikon 50i User manual

Nikon
Nikon ECLIPSE 80i User manual

Nikon
Nikon P-400R User manual

Nikon
Nikon ECLIPSE 80i User manual

Nikon
Nikon Eclipse Ni-U User manual

Nikon
Nikon OPTIPHOT-2 User manual

Nikon
Nikon Eclipse E400 User manual

Nikon
Nikon SMZ-1 User manual