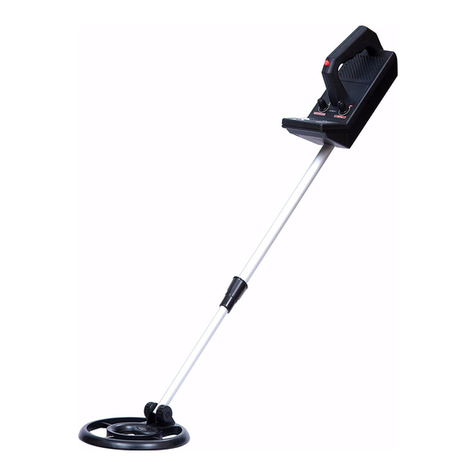
Nokta Golden King User manual

TECHNICAL MANUAL

Equipment Safety
Waterproofness
Proper Use
Accessories and Batteries
Especially during transportation, do not forget that this is an electronic device and do
not expose it to harsh impacts.
The system box of the equipment is not completely waterproof. It should not be exposed to
rain or soaked into water.
The accessories and connection components used on the equipment should be
connected and removed .
Only use such batteries, headphones, camera recorder, gas sensor, cable and connection
components that are approved by Nokta Engineering. Use of any unapproved accessory
may damage your unit.
carefully
Please don't keep the system box over the search coil.
The depth of the system is excessive. Therefore it can
sense the system box as a target. Keep the system box
away from the .search coil
x
xPlease keep your away from
your shoes. The system can sense the metals in
your shoes as a target.
search coil
Please do not apply force to the input
connector with your hand when the system is operating.
Do not stretch the cable, do not apply force to the
connection socket. In order to interpret the target signal
accurately you must follow the warnings.
search coil
x
Important
warnings
If these warnings are not
duly observed, your
equipment may get damaged.
For consumers within the European Union: Do not dispose of this
equipment with the general household waste. The crossed wheeled bin
symbol on this equipment indicates that this unit should not be disposed
of with the general household waste but rather be recycled in compliance
with the local government regulations and the environmental requirements.
During each power-up, the Golden King
Deep Processor Radar system should be
held as shown in the picture. The 'ON' key
should be pressed in this position.
After pressing the 'ON' key, keep your
position still for approximately 20
seconds. Then lower the search coil to
the normal searching height, press
'RESET' and release.
When the above process is finished you can
do the ground balancing and start your
search. During this process, the system
adopts itself to the surrounding conditions
and makes all the necessary reference
adjustments for better searching.
The quality of the received signal is related directly to its cleanness. The received
signal might be affected from many environmental factors like mineral intensive
soils, cold/hot weather, magnetic (electrical) noises etc. These factors cause the
received signal to be distorted. For this reason, we have developed a new
system called D.I.S.S that can clean the received signal no matter what the
reason of distortion is. What we get is always a clean sinusoid that is easy to
process.

Operation of the Unit
Environmental Effects
Hot and Cold
Use
Authorized Service
Do not start searching before doing ground balancing.
Results obtained without ground balancing will not be accurate.
Do not let any other detector or unit that emits magnetic waves
closer than 10 meters to your device.
Do not expose your device and search coils directly to fire. Do not
keep them in a very cold environment for a long period of time.
Protect your device against external impacts.
Only authorized personnel may repair your device. If the unit is
opened by the user, any third party or a repairman for any reason,
the equipment will no longer be covered under warranty.
Special Regulations
Battery
Installation
Comply with the law and the regulations applicable to any given place.
Do not use the device at the protected areas and the military zones.
You should definitely inform the concerned authorities of any
cultural findings you may find during your search.
If you use another type of battery instead of that prepared by
Nokta Engineering which is equipped with protection circuits,
your unit may get damaged. Use the battery according to
the instructions written in the user’s manual prepared by
Nokta Engineering. Do not expose the battery to heat.
Your equipment is electronic and manufactured with high
technology. Because it is a sensitive device, do not attempt to install
or operate it before reading the user’s manual.
Important Note: If the lithium polymer battery used on the
system is exposed to high heat or direct sunlight, it may get
damaged. Never leave it inside a car in hot weather. Short
circuiting of the lithium polymer battery may also cause
it to get damaged.

Monitor
Construction
Ergonomics
Smart Detection Heads
On the Golden King Deep Processor Radar system,
a 7’ TFT screen with 800 X 480 resolution,
262.000 colors and 16-bit color depth is used.
The Golden King Deep Processor Radar is constructed with
thermoset engineering plastic. It has very high durability
and is affected by extreme hot and cold weather
conditions at a minimum level.
Golden King Deep Processor Radar is designed ergonomically
for easy carriage and is appropriate for the human body.
On the Golden King Deep Processor Radar, there are 3 types
of search coils suitable for every purpose. The search coils
detect every move of the user and minimize the negative
results due to wrong usage of the device.
Features of the Equipment
Language Selection
Operating Manual
Volume Setting
Brightness Setting
Sensitivity
The
10 different languages: Turkish, English, Greek, Persian,
Bulgarian, French, Spanish, German, Russian and Arabic.
The Golden King Deep Processor Radar contains an
operating manual. The user can access the warnings about
the equipment, correct usage and other useful information by
selecting the operating manual from the settings menu.
A stereo audio system is used on the Golden King
Deep Processor Radar.
On the Golden King Deep Processor Radar system, you can
set the TFT screen brightness through the brightness
setting menu.
You can use the Golden King Deep Processor Radar
system at any depth you desire by setting the sensitivity
levelthrough the sensitivity menu.
Golden King Deep Processor Radar can operate in

Camera Recorder
Saving
Signs
Information
The Golden King Deep Processor Radar is equipped with
a special camera recorder attachable accessory which
operates at a very high display quality even 30 meters under
water, has night vision, thus allowing use both on
land and under water.
With the Golden King Deep Processor Radar system,
you can save the result screens and the videos you have
recorded and you can access them anytime for review
purposes.
It is a menu which you can access through the signs menu
on the Golden King Deep Processor Radar where 406 signs
and symbols prepared by the experts are described, allowing
you to interpret the meanings of signs and symbols you may
come across during your search.
On the Golden King Deep Processor Radar, whichever
menu or section you are in, when you press the info button,
you canaccess the description about that menu or section.
as an
Ferrous Setting
Interface Selection
Ground Balance
Gas Sensor
During your search with the Golden King Deep
Processor Radar, you can search by switching
the ferrous setting to OFF to avoid ferrous metals
(iron, nail, beverage bottle caps, etc.).
When searching with the Golden King Deep Processor Radar,
you can select either the digital detection or the gauge
detection interface, whichever is more suitablefor your needs.
On the Golden King Deep Processor Radar, two alternatives
of ground balancing are provided. These are automatic and
manual ground balance menus.
Due to the gas sensor available on the Golden King Deep
Processor Radar system, you can check whether the
confined areas (caves, tunnels, cisterns, shelters) contain
methane gas or not that may adversely affect the human
health.
Features of the Equipment

Contents
Unpacking
Make sure all the parts are present.
Equipment
Keys - features and locations
Starting
Initial steps to operate the equipment
Preparing and charging the equipment
Assembly
On / Off Switch
Keys and screen
Accessing the menu functions
Detection
Saving detections
Use of Additional Features
Start to use the camera recorder, the gas sensor, the search coils
and the headphones.
Use of the camera recorder
Use of the gas sensor
Use of the headphones
Use of the search coils
Ways and speed of detection
Ground balance
Detection functions
Digital detection
Gauge detection
Result screen
1
1-2
3
3
4
5
5-7
8
8
9-11
11
11-13
15-16
17
17-19
19
20
Ground balance 20-23
23
24-25
Interface selection 23
25-26
27
Technical specifications 27
Menu descriptions 28-29
Sample use 30-36

Unpacking Equipment
Make sure all the parts are present.
• System box
• Extension pipe
• Battery box
• Charger
• Leather case
• Surface search coil
• General search coil
• Deep search coil (optional)
• Camera Recorder (optional)
• Gas sensor (optional)
• Headphones
(optional)
All these parts can be obtained from the
dealers of Nokta Engineering.
Please do not use any external or any
other branded item.
System box
Clamping apparatus
to adjust the monitor
angle
Multi-functional keypad
Speakers
Search coils
socket input
Gas sensor
socket input
1
7” TFT monitor

System Box
2
Equipment
Headphones socket input
Camera recorder input
Battery
compaction apparattus
Search coil socket input
Gas sensor socket input
Battery
Battery
compaction apparattus

Starting
3
Initial steps to operate the equipment
Preparing and charging the equipment
You are required to charge the battery before initial use.
The battery should be charged for about 3-4 hours.
Under normal conditions, the battery should allow 5-6 hours of operation.
For soils containing high density of minerals, this term reduces down
to 4-5 hours.
Note: The battery charger used on the system is equipped with a special
software. Due to this software, the battery is charged in sequence.
For the first several charging operations, the duration of the operation
will be shorter than the normal values. When it is charged again and again,
it will reach to the values indicated above.
BATTERY BOX CHARGER
The battery box is removed by opening the clamping apparatus on the
system box. The socket of the charger is plugged into the charger input
on the battery box. The plug of the charger is inserted into the wall socket.
Plug it into a 220V wall socket.
System On Off Buttons: When battery protection switch is ON your battery is
ready to operate / charge. If the battery will not be used for a long time the battery
protection switch should be switched to «OFF» position. This way you will avoid
the battery to consume any power. If the battery protection switch is left «ON»
when it is not used, it will both degrade the life of the battery and the
charge/discharge performance. Keep battery protection switch «OFF» when
you are not using your battery.
Warning Leds: There are 3 different colored LEDs on your battery.
Flashing of the yellow LED indicates that the battery charge is low and the
system will shut itself down. You need to charge your battery to continue.
The constant lighting indicates that the battery is charging. When the
battery is full, the flashing of the green LED indicates that the charging operation is
completed.
When the battery is charging, if overheating occurs, the red LED will light
upand charging will be stopped in order to protect your battery. When it reaches
normal conditions the red LED will stop lighting and it will continue to charge again.
If the red LED does not go off for a long time, this means that there is an error or
short circuit in the system. Please call our technical service.
the ,
the
on the
position
the on
Yellow LED:
Green LED:
Red LED:
System On/Off Buttons
Charger input The system
is active
System
Warning
Battery
Full

Starting
Assembly
After the battery is taken out of the bag, it is installed in its
place on the system box by the connection screws.
The extension bar to which the armlet and the joystick are connected
is removed from the bag. The search coil is attached to the bobbin
connection component on the extension bar with the bobbin clamping
screws. The connector at the end of the extension bar is inserted in its
place on the search coil and the connector next to the armlet is inserted
in its place on the system box.
Connector
Armlet
Joystick
Connector Search coil
System Box
After completion of these steps, adjust the length of the detection
system to your height by using the sleeves on the extension bar.
Now the system is ready for use. 4

Starting Keys and Screen
Standby Key
It is the key to turn off the entire system.
Back Key
The function of the back key is to return to the previous
menu or to exit the current operation.
Camera Recorder Key
After the camera recorder’s socket is inserted into the
camera recorder’s input jack, the camera recorder can be
used by pressing this key.
Recording Key
When this key is pressed, recording and archive screens
appear. You can record the result screens and the videos on
this screen. Furthermore, you can use the archive section to
access the previously recorded information.
Gas Sensor Key
After the gas sensor’s socket is inserted into the gas
sensor jack on the system box, press this button to take
advantage of the gas sensor function.
Info Key
Whichever menu or section you are in, w
you will view detailed information about that
section or menu. Also in this section, the user will be
informed about the following steps.
hen you press
the info key,
5
On / Off Switch
After charging the battery, turn the system
off by pressing the OFF button and place the
battery box in its place on the system box.
Then, in order to turn on the system,
press the ON button on the battery box.
In order to turn off the system, first you need
to press the STANDBY button on the keypad.
Then you need to press the OFF button on the
battery.
System On/Off Buttons

Starting
Ground Balance Key
This key is used to access the ground balance menu.
You can select either the automatic or the manual
option from the ground balance menu when needed.
Brightness Setting
Once the brightness setting key is pressed, it brings up
the brightness setting menu. In this menu, you can set
the screen brightness to any level you need.
Sunlight Mode Key
When the sunlight is intensive and it affects the screen
image, you will see the sunlight mode of this screen
come up when this key is pressed which minimizes the
effect of the sunlight. The system switches to this mode.
Up Direction Key
It is the up direction key to go up the options on the
menu screens.
Down Direction Key
It is the down direction key to go down the options
on the menu screens.
OK Key
It is the key to confirm the operations made on the
menu screens.
Minus Key
It is used to change the effect of the ground in the
negative direction in the manual ground balance screen.
Left Direction Key
It is the left direction key to go leftward on the options
on the menu screens.
Right Direction Key
It is the right direction key to go rightward on the
options on the menu screens.
Delete Key
It is used to delete previously made recordings.
Furthermore, it is used to delete any wrong letter or
number typed during recording.
Confirm Button
The confirm button on the joystick is used to confirm
the operations the system warns the user for.
6
Plus Key
It is used to change the effect of the ground in the
positive direction in the manual ground balance screen.

Starting
It is the multi-functional section
of the keypad. Especially at the
time of recording, it lets you
enter the Date / Region / Name
and the Time. Press the key
until the character you desire
appears on the screen. You can
delete any letter or number by
using the DEL key. After
entering a text or a number,
press the OK key to save.
Numeric Keys
Screen
7” TFT
262.000 Colors
800 X 480 Resolution
16-Bit Color Depth
Anti Glare
Brightness 450cd/m²
Contrast Rate 400:1
Do not expose your monitor to fire directly.
Your monitor is fragile, please handle it gently.
Your monitor can get scratched, please handle it gently.
Protect your monitor against excessive hot,
excessive cold or rain.
7

Starting
Accessing Menu Functions
There are 2 methods to access the menu functions of the Golden King
Deep Processor Radar.
Method 1: Is the multi-functional keypad on the system box.
You can access the menu functions by using the keys here.
Method 2: Is to access the menu functions by using the buttons on the
settings menu, the directional arrows, the “OK” key and the “BACK” key.
You can navigate among the menus by using the up/down direction keys in
the settings menu; enter the menu by using the “OK” key; navigate among
the options by using the right - left direction keys, and access the functions
of the option you have selected by using the “OK” key. When you want to
go back from the menus and the options you are in, you can return to the
previous menu by pressing the “BACK” key.
LANGUAGE SELECT
Detection
To search with the Golden King Deep Processor Radar, you should
select one of the two interface options.
Select one of the options - DIGITAL or GAUGE - and activate the
option you have selected by pressing the “OK” key. This selection is kept in
memory at the initial use and it is used as the default detection interface
unless it is changed by the user.
NOTE: You can learn how to search using the interfaces by following
the directions in the operating manual of the Golden King Deep
Processor Radar or by reading the technical manual.
8
GAUGEDIGITAL
GOLD
6830
METAL MINERAL
INTERFACE SELECTION
TECHNICAL MANUAL

Starting
If you do not want to save the result screen, press the “BACK” key and
return to the ground balance selection screen. When you press the
“SAVE” key, the following window will appear on the screen. You should
enter the required information on the window.
PLEASE ENTER DATE / NAME / REGION
INFO BY USING LETTERS AND NUMBERS
ON THE KEYPAD.
DATE NAME REGION
_ _ /_ _ /_ _ _ _ _ _ _ _ _ _ _ _ _ _ _ _ _ _ _ _ _ _
AFTER COMPLETION OF NAMING,
PRESS “OK” KEY.
9
Saving detections
You can save the findings obtained by the Golden King Deep Processor
Radar as well as the result screen reports and graphs. In order to save
the result screens, you can use the save key on the keypad.
After digital or gauge detection, if you wish to save the result screens press
the save key on the keypad.

101010101001010101
101010101001010101
101010101001010101
101010101001010101
101010101001010101
101010101001010101
101010101001010101
101010101001010101
101010101001010101
101010101001010101
101010101001010101
101010101001010101
101010101001010101
101010101001010101
101010101001010101
101010101001010101
101010101001010101
101010101001010101
101010101001010101
101010101001010101
101010101001010101
101010101001010101
101010101001010101
101010101001010101
101010101001010101
101010101001010101
101010101001010101
101010101001010101
3D
RESULT
CAMERA
ARCHIVES SCREEN
Starting
10
Accessing the stored data
In order to access the «3D RESULT» and the «CAMERA» recordings
press the «SAVE» key on the keypad. The archives screen will appear on
your monitor.
There are two tabs in the archive menu. These are the “3D RESULT” tab and
the “CAMERA” tab. Using the right/left direction keys, you can
select one of these tabs and you can access the «CAMERA» or the
«3D RESULT» records when you press the «OK» key.
After selecting one of the records using the up/down direction keys and by
pressing the «OK» key, you can watch the video that you have recorded.
Please use the «BACK» key in order to exit this window. Please use the
«DEL» key in order to delete any of the entries after selecting it with the
up/down direction keys.
CAMERA
CAMERA MENU: You can watch the videos you have
recorded in the Golden King Deep Processor Radar
system. In order to watch a video , please press the «SAVE»
key on the keypad. Using the right/ direction keys
you can select the «CAMERA» tab and press the «OK» key.
previously
left
DATE NAME REGION
0 2 /0 4 /2 0 0 8 R E C O R D 1 I S T A N B U L
You may view any saved record by selecting it
through up/down keys and press OK key.
0 5 /0 4 /2 0 0 8 R E C O R D 2 A D A N A _ _
1 1 /0 4 /2 0 0 8 R E C O R D 3 B I T L I S _ _
2 9 /0 4 /2 0 0 8 R E C O R D 5 E D I R N E _
1 6 /0 4 /2 0 0 8 R E C O R D 4 H A T A Y _ _

DATE NAME REGION
0 2 /0 4 /2 0 0 8 3D R E C O R D 1 I S T A N B U L
You may view any saved record by selecting it
through up/down keys and press OK key.
0 5 /0 4 /2 0 0 8 3D R E C O R D 2 A D A N A _ _
1 1 /0 4 /2 0 0 8 3D R E C O R D 3 B I T L I S _ _
2 9 /0 4 /2 0 0 8 3D R E C O R D 5 E D I R N E _
1 6 /0 4 /2 0 0 8 3D R E C O R D 4 H A T A Y _ _
Starting
Use of Additional Features
Using the Camera Recorder
The Golden King Deep Processor Radar system is equipped with a special
camera recorder with night vision that can be used 30 meters under water, is
resistant up to 4 bars of pressure and that can record at a high display quality.
The camera recorder can also operate on land with the same display quality.
During your search in difficult areas such as wells and caves filled with water,
lakes, sea, brooks, water-filled cisterns and tunnels, you will get clear images
due to your high quality camera recorder. Also on land, you will conveniently
view the inside of tunnels, caves and cisterns without having to enter them.
Use
The camera recorder with its 30m cable comes with your device,ready
for use. After you remove the camera recorder from its bag, insert the
socket at the end of the cable into the camera recorder’s input jack. Then,
press the camera recorder key located on the keypad. Within seconds,
your system will sense the camera recorder and transfer the image to the
monitor. After this step, your camera recorder is ready to operate.
?Pick-up Device:1/4" 1/3" SONY Super HAD CCD
?Picture Element: PAL:500(h)X582(v)
?NTSC: 510(H)X492(V)
?TV Systems: PAL / NTSC
?Horizontal Resolution: 480-420 TV lines
?Minimun Illumination: IR or 0 Lux
?S/N Ratio: More than 48dB
?Gamma Characteristic: 0,45
?Back Light Compensation: Auto
?Synchronous System: Internal Synchronization
?Lens Mount: Board lens: 3,6/6/8/12mm
?Video Output: 1,0Vp-p,75W,BNC Connector
?Infrared Lamps irradiation distance: 15m
?Auto White Balance: Auto
?Auto Gain control:Auto
11
3D
RESULT
After selecting one of the records using the up/down direction keys, press
the «OK» key to view the 3D result screen. Please use the «BACK» key
in order to exit this window. Please use the «DEL» key in order to delete
any of the entries after selecting it by the up/down direction keys.
3D RESULT: You can view the 3D result screens you have
saved in the Golden King Deep Processor Radar
system. To view the 3D result screens, please press the
«SAVE» key on the keypad. Using the right/ direction
keys, you can select the «3D RESULT» tab and press the
«OK» key.
previously
left

PLEASE ENTER DATE / NAME / REGION
INFO BY USING LETTERS AND NUMBERS
ON THE KEYPAD.
DATE NAME REGION
_ _ /_ _ /_ _ _ _ _ _ _ _ _ _ _ _ _ _ _ _ _ _ _ _ _ _
AFTER COMPLETION OF NAMING,
PRESS “OK” KEY.
Use of Additional Features
12
After the camera’s socket is inserted into the camera recorder’s input
jack, press the camera key on the keypad. Approximately within 15-20
seconds, the interface below will come up. Here the camera is in the
preview mode and it will show the current view.
PLAY
REC
PLAY BUTTON
PLAY
In order to watch the videos you have recorded please select the «PLAY»
button with the up/down direction keys and press the «OK» button. When
you press the «PLAY»button all the videos you have recorded will appear
on the screen.
REC BUTTON
REC
When the “REC” button is pressed, the camera is switched from the preview
mode to the record mode. By selecting the “REC” button with the up/down
direction keys and by pressing the “OK” key, the record window below will
appear on the screen.
After entering the date, name and the region information and pressing the
«OK» key, the recording starts. In order to stop the recording, you can use
the «STOP» button. You can use the «BACK» key in order to quit without
recording and to return to the preview mode.

Use of Additional Features
13
PAUSE
PAUSE BUTTON
PAUSE
PAUSE
STOP
½ X
¼ X
Pausing the video
The user can select the desired video with the up/down direction keys.
«OK» key.Then, the video can be watched by pressing the
PAUSE
STOP
½ X
¼ X
DATE NAME REGION
0 2 /0 4 /2 0 0 8 R E C O R D 1 I S T A N B U L
You may view any saved record by selecting it
through up/down keys and press OK key.
0 5 /0 4 /2 0 0 8 R E C O R D 2 A D A N A _ _
1 1 /0 4 /2 0 0 8 R E C O R D 3 B I T L I S _ _
2 9 /0 4 /2 0 0 8 R E C O R D 5 E D I R N E _
1 6 /0 4 /2 0 0 8 R E C O R D 4 H A T A Y _ _
When viewing the saved videos, you can pause any moment
of the video indefinitely by using the “PAUSE” button. This way,
you can view the videos you have recorded in more detail. By pressing
the “PAUSE” button again, you can continue watching the video.

Use of Additional Features
14
½ X
½ X ½ X BUTTON ¼ X ¼ X BUTTON
Slow motion of the video at
speed
½ of the
normal
PAUSE
STOP
½ X
¼ X Slow motion of the video at ¼ of the
normal speed
PAUSE
STOP
½ X
¼ X
¼ X
When viewing the videos you have recorded, your system is designed to
display 30 frames per second (fps). This frame speed is the standard video
format. When you want to watch the video in slow motion, the system offers
two alternatives to the user. First is the “½ X” button. With the up/down
direction keys, select the “½ X” button and activate it with the “OK”
key. The video will now play at half of the normal speed.
If slower viewing is needed, press the “¼ X” button to watch the video
recorded on 30 fps as 7 fps.
The video will now play at 1/4 of the normal speed.
Other manuals for Golden King
1
Table of contents
Other Nokta Metal Detector manuals

Nokta
Nokta GOLDEN SENSE User manual

Nokta
Nokta MAKRO NMS20 User manual

Nokta
Nokta FORS Gold User manual

Nokta
Nokta Velox one User manual

Nokta
Nokta FORS Gold User manual

Nokta
Nokta SCORE User manual

Nokta
Nokta GOLDEN SENSE User manual

Nokta
Nokta Velox one User manual

Nokta
Nokta Pointer User manual

Nokta
Nokta 107 TB User manual
Popular Metal Detector manuals by other brands

Whites
Whites Goldmaster Amphibian TR-8 operating instructions

Minelab
Minelab Goldseekers 15000 instruction manual

Accurate Locators
Accurate Locators XL16 IMAGER user guide

Garrett
Garrett Treasure Hound CX owner's manual

Minelab
Minelab PRO-FIND 40 Getting started guide

Fisher Research Labs
Fisher Research Labs Gold Bug owner's manual