manuals.online logo
Brands
  1. Home
  2. •
  3. Brands
  4. •
  5. Nordson
  6. •
  7. Paint Sprayer
  8. •
  9. Nordson Encore LT Reference guide

Nordson Encore LT Reference guide

EncorerAutomatic
Powder Spray Guns
Customer Product Manual
Part 1098185-17
Issued 03/19
NORDSON CORPORATION AMHERST, OHIO USA
For parts and technical support, call the Industrial Coating
Systems Customer Support Center at (800) 433-9319 or
contact your local Nordson representative.
This document is subject to change without notice.
Check http://emanuals.nordson.com for the latest version.
Part 1098185-17 E2019 Nordson Corporation
Contact Us
Nordson Corporation welcomes requests for information, comments, and
inquiries about its products. General information about Nordson can be
found on the Internet using the following address:
http://www.nordson.com.
Address all correspondence to:
Nordson Corporation
Attn: Customer Service
555 Jackson Street
Amherst, OH 44001
Notice
This is a Nordson Corporation publication which is protected by copyright.
Original copyright date 2010. No part of this document may be
photocopied, reproduced, or translated to another language without the
prior written consent of Nordson Corporation. The information contained
in this publication is subject to change without notice.
Trademarks
Encore, Nordson and the Nordson logo are registered trademarks of
Nordson Corporation.
All other trademarks are the property of their respective owners.
Change Record i
Part 1098185-17
E2019 Nordson Corporation
Change Record
Revision Date Change
06 01/14 Page 34 and 37 - Added electrode assembly, flat spray
Page 42 - Added conical nozzle kit and conical electrode assembly
07 05/14 Page 43 - Added angled spray extension options
08 06/14 New socket head screws, new nozzle P/N’s
09 07/14 New flat and conical electrode holders
10 08/14 New mount tube part number
11 09/14 Bar mount adapter assembly drawing revision
12 01/16 Revised for use with Encore XT controllers
13 10/16 Nozzle part number change and ion collector plug added
14 2/18 Added label changes.
15 9/17 Change part number 1003572 to 1612462.
16 7/18 Added Encore XD electrode support option. Change part number
1606985 to 1606986., updated power supply resistance test
17 3/19 Page 34 - New part numbers for 5-foot tube-mount spray guns
Change Record
ii
Part 1098185-17 E2019 Nordson Corporation
Table of Contents iii
Part 1098185-17
E2019 Nordson Corporation
Table of Contents
Safety 1.................................................
Qualified Personnel 1...................................
Intended Use 1.........................................
Regulations and Approvals 1.............................
Personal Safety 2.......................................
Fire Safety 2...........................................
Grounding 3...........................................
Action in the Event of a Malfunction 3.....................
Disposal 3.............................................
Description 4............................................
Specifications 5........................................
Encore Automatic Spray Guns 6.......................
Dimensions and Weights 7............................
Installation 8............................................
Tube-Mount Guns 8.....................................
Bar-Mount Guns 8.......................................
Gun Connections 9.....................................
Ion Collector Installation 10...............................
Bar Mount Gun 10.....................................
Tube-Mount Gun 11....................................
Adjusting the Ion Collector Rod 11.......................
Operation 13.............................................
Changing Flat Spray Nozzles 14...........................
Changing Optional Deflectors and Conical Nozzles 15........
Maintenance 16...........................................
Daily Maintenance 16.....................................
Troubleshooting 18.......................................
General Troubleshooting Chart 18..........................
Power Supply Resistance Test 21..........................
Electrode Assembly Resistance Test 22....................
Cable Continuity Tests 22.................................
Gun Receptacle Harness 22...........................
Gun Extension Cable 22...............................
Gun Cable 24........................................
Repair 25.................................................
Powder Wear Parts Replacement 25.......................
Tube-Mount Gun Repair 26...............................
Tube-Mount Gun Disassembly 26........................
Tube-Mount Gun Assembly 29..........................
Bar-Mount Gun Repair 30.................................
Bar-Mount Gun Disassembly 30.........................
Bar-Mount Gun Assembly 32...........................
Table of Contents
iv
Part 1098185-17 E2019 Nordson Corporation
Parts 33..................................................
Tube-Mount Gun Parts 33................................
Standard 5-Foot Tube-Mount Gun Parts List 34...........
Bar-Mount Gun Parts 36..................................
Bar-Mount Gun Parts List 37............................
Options 39...............................................
Six-Foot Tube Mount Gun 39..............................
Hose Hanger 39.........................................
Cables 39..............................................
Flat Spray Nozzles 40....................................
Cross-Cut Nozzles 40....................................
45-Degree Corner-Spray Nozzle 40.........................
45-Degree In-Line Flat-Spray Nozzle 41....................
Conical Nozzle, Deflectors and Electrode Assembly Parts 42...
Conical Nozzle and Deflectors 42........................
Conical Nozzle Kit 42...................................
Conical Electrode Assembly 43..........................
XD Electrode Support 43..................................
Encore Angled Spray Extensions 44........................
Tube-Mount Gun Mounting Assemblies 45...................
Standard Mount Assembly 45...........................
Pivot Mount Assembly 45...............................
Extrusion Mount Assembly 46...........................
Gun Bar for Bar-Mount Guns 47...........................
Ion Collector Kit 48.......................................
EncorerAutomatic Powder Spray Guns 1
Part 1098185-17
E2019 Nordson Corporation
EncorerAutomatic Powder Spray Guns
Safety
Read and follow these safety instructions. Task- and equipment-specific
warnings, cautions, and instructions are included in equipment
documentation where appropriate.
Make sure all equipment documentation, including these instructions, is
accessible to all persons operating or servicing equipment.
Qualified Personnel
Equipment owners are responsible for making sure that Nordson equipment
is installed, operated, and serviced by qualified personnel. Qualified
personnel are those employees or contractors who are trained to safely
perform their assigned tasks. They are familiar with all relevant safety rules
and regulations and are physically capable of performing their assigned
tasks.
Intended Use
Use of Nordson equipment in ways other than those described in the
documentation supplied with the equipment may result in injury to persons
or damage to property.
Some examples of unintended use of equipment include
Susing incompatible materials
Smaking unauthorized modifications
Sremoving or bypassing safety guards or interlocks
Susing incompatible or damaged parts
Susing unapproved auxiliary equipment
Soperating equipment in excess of maximum ratings
Regulations and Approvals
Make sure all equipment is rated and approved for the environment in which
it is used. Any approvals obtained for Nordson equipment will be voided if
instructions for installation, operation, and service are not followed.
All phases of equipment installation must comply with all federal, state, and
local codes.
EncorerAutomatic Powder Spray Guns
2
Part 1098185-17 E2019 Nordson Corporation
Personal Safety
To prevent injury follow these instructions.
SDo not operate or service equipment unless you are qualified.
SDo not operate equipment unless safety guards, doors, or covers are
intact and automatic interlocks are operating properly. Do not bypass or
disarm any safety devices.
SKeep clear of moving equipment. Before adjusting or servicing any
moving equipment, shut off the power supply and wait until the
equipment comes to a complete stop. Lock out power and secure the
equipment to prevent unexpected movement.
SRelieve (bleed off) hydraulic and pneumatic pressure before adjusting or
servicing pressurized systems or components. Disconnect, lock out,
and tag switches before servicing electrical equipment.
SObtain and read Material Safety Data Sheets (SDS) for all materials
used. Follow the manufacturer’s instructions for safe handling and use
of materials, and use recommended personal protection devices.
STo prevent injury, be aware of less-obvious dangers in the workplace
that often cannot be completely eliminated, such as hot surfaces, sharp
edges, energized electrical circuits, and moving parts that cannot be
enclosed or otherwise guarded for practical reasons.
Fire Safety
To avoid a fire or explosion, follow these instructions.
SDo not smoke, weld, grind, or use open flames where flammable
materials are being used or stored.
SProvide adequate ventilation to prevent dangerous concentrations of
volatile materials or vapors. Refer to local codes or your material SDS
for guidance.
SDo not disconnect live electrical circuits while working with flammable
materials. Shut off power at a disconnect switch first to prevent
sparking.
SKnow where emergency stop buttons, shutoff valves, and fire
extinguishers are located. If a fire starts in a spray booth, immediately
shut off the spray system and exhaust fans.
SClean, maintain, test, and repair equipment according to the instructions
in your equipment documentation.
SUse only replacement parts that are designed for use with original
equipment. Contact your Nordson representative for parts information
and advice.
EncorerAutomatic Powder Spray Guns 3
Part 1098185-17
E2019 Nordson Corporation
Grounding
WARNING: Operating faulty electrostatic equipment is hazardous and can
cause electrocution, fire, or explosion. Make resistance checks part of your
periodic maintenance program. If you receive even a slight electrical shock
or notice static sparking or arcing, shut down all electrical or electrostatic
equipment immediately. Do not restart the equipment until the problem has
been identified and corrected.
Grounding inside and around the booth openings must comply with NFPA
requirements for Class II Division 1 or 2 Hazardous Locations. Refer to
NFPA 33, NFPA 70 (NEC articles 500, 502, and 516), and NFPA 77, latest
conditions.
SAll electrically conductive objects in the spray areas shall be electrically
connected to ground with a resistance of not more than 1 meg ohm as
measured with an instrument that applies at least 500 volts to the circuit
being evaluated.
SEquipment to be grounded includes, but is not limited to, the floor of the
spray area, operator platforms, hoppers, photo eye supports, and
blow-off nozzles. Personnel working in the spray area must be
grounded.
SThere is a possible ignition potential from the charged human body.
Personnel standing on a painted surface, such as an operator platform,
or wearing non-conductive shoes, are not grounded. Personnel must
wear shoes with conductive soles or use a ground strap to maintain a
connection to ground when working with or around electrostatic
equipment.
SOperators must maintain skin-to-handle contact between their hand and
the gun handle to prevent shocks while operating manual electrostatic
spray guns. If gloves must be worn, cut away the palm or fingers, wear
electrically conductive gloves, or wear a grounding strap connected to
the gun handle or other true earth ground.
SShut off electrostatic power supplies and ground gun electrodes before
making adjustments or cleaning powder spray guns.
SConnect all disconnected equipment, ground cables, and wires after
servicing equipment.
Action in the Event of a Malfunction
If a system or any equipment in a system malfunctions, shut off the system
immediately and perform the following steps:
SDisconnect and lock out electrical power. Close pneumatic shutoff
valves and relieve pressures.
SIdentify the reason for the malfunction and correct it before restarting the
equipment.
Disposal
Dispose of equipment and materials used in operation and servicing
according to local codes.
EncorerAutomatic Powder Spray Guns
4
Part 1098185-17 E2019 Nordson Corporation
Description
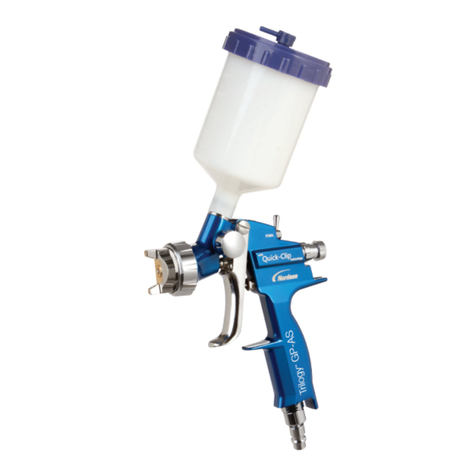
Encorerautomatic electrostatic powder spray guns are available in
tube-mount or bar-mount versions. The 152.4 cm (5-ft) tube-mount gun is
standard; an optional 182.8 cm (6-ft) tube-mount gun is available. The
bar-mount gun includes a swivel mount that fits into the end of the optional
gun bar.
The guns are equipped with a 100 kV integral voltage multiplier and
electrode air-wash to prevent powder from collecting on the electrode. The
guns have a straight-through powder path to minimize impact fusion and a
quick-disconnect powder hose connector for quick color change.
The guns can be used with the Nordson iControlrsystem or Encore LT
automatic controllers, which provide electrostatic voltage control, electrode
air-wash air, and powder pump air.
Flat spray nozzles with 2.5 and 4-mm slots are shipped with the guns.
Optional equipment includes:
S8, 12, and 16-meter (26, 39, 52-ft) control cables
SStandard, pivoting, and fixed extrusion gun mounts for tube-mount guns
SGun bar with 4-foot (121-cm) bar and clamp for 25-mm (1-in.) mounting
bars
SAngled spray extensions
SIon collector kit
SA variety of flat, conical, and cross-cut nozzles
Tube-Mount Gun
Bar-Mount Gun
Figure 1 Bar-Mount and Tube-Mount Guns
EncorerAutomatic Powder Spray Guns 5
Part 1098185-17
E2019 Nordson Corporation
Specifications
Input Rating Output Rating
+/−19 VAC, +/−1 A (Peak) 100 KV, 100 μA
SAir Quality: <5μparticulates, dew point <10 _C (50 _F)
SMax Relative Humidity: 95% non-Condensing
SAmbient Temperature Rating: +15 to +40 _C (59−104 _F)
SHazardous Location Rating for Applicator: Zone 21 or Class II, Division 1
EncorerAutomatic Powder Spray Guns
6
Part 1098185-17 E2019 Nordson Corporation
Specifications (contd)
Encore Automatic Spray Guns
Applicator Certification Label
1098182
CUS
APPROVED
For Electrostatic Finishing Applications
Class II Spray Material
FOR USE WITH ENCORE iCONTROL WHEN CONFIGURED
IN ACCORDANCE WITH 1107770, ENCORE iCONTROL 2
WHEN CONFIGURED IN ACCORDANCE WITH 10012067
OR ENCORE XT MANUAL CONTROLS WHEN
CONFIGURED IN ACCORDANCE WITH 1084547
FM11ATEX0056X EN 50050−2
II 2 D 2mJ1180
Serial Number Label
NOTE: The gun serial number contains the location, year, and month it was
manufactured. The serial number starts with “AA10A”. The “AA” means the
product was built in Amherst, Ohio, the “10” meaning the year 2010. The
“A” means the month of January, “B” would be February, and so on.
1098182
ENCORE
PATENT
PENDING
NORDSON CORPORATION, AMHERST, OHIO, U.S.A.
P/N: XXXXXXXY
S/N: XXXXXXXXX
MAX. OUTPUT: 100KV
OO
Ta: +15 C TO +40 C
Special Conditions for Safe Use
SThe Encore automatic applicator shall only be used with the associated
Encore LT controllers, Encore iControl 2, or Encore XT controllers over
the ambient temperature range of +15_C to +40_C.
SThe equipment must be installed in accordance with standard EN50177.
SWhen used with the Encore XT controllers, equipment may only be used
in areas of low impact risk.
SCaution should be taken when cleaning plastic surfaces of the
controllers. There is a potential for static electricity buildup on thees
components.
EncorerAutomatic Powder Spray Guns 7
Part 1098185-17
E2019 Nordson Corporation
Dimensions and Weights
7.6 cm (2.99 in.)
14 cm (5.51 in.)
4.9 cm (1.93 in.)
1.0 cm (0.39 in.)
5.8 cm (2.28 in.)
8.9 cm (3.50 in.) to pivot center
43.4 cm (17.10 in.)
36.2 cm (14.25 in.)
39.7 cm (15.62 in.)
4.9 cm (1.3 in.)
6.60 cm (2.60 in.)
165.9 cm (65.31 in.)
155.6 cm (61.25 in.)
to end of tube mount
185.6 cm (73.07 in.)
to end of tube mount
195.9 cm (77.12 in.)
5-ft Tube Mount Gun
Weight: 2.02 kg (4.45 lbs)
6-ft Tube Mount Gun
Weight: 2.37 kg (5.23 lbs)
Bar-Mount Gun
Weight: 651 grams (1.44 lbs)
Figure 2 Encore Automatic Gun Dimensions and Weights
EncorerAutomatic Powder Spray Guns
8
Part 1098185-17 E2019 Nordson Corporation
Installation
Tube-Mount Guns
See Figure 3. Mount the tube-mount gun on a fixed gun stand, oscillator, or
reciprocator using one of the mounting kits as shown below. Refer to page
45 for the tube mount assembly part numbers.
3
1
2
4
5
A
3
1
2
4
5
A
B
Standard Tube Mount Pivoting Tube Mount
T-Slot Extrusion Mount 3
4
7
8
6
9
10
5
Figure 3 Tube-Mount Gun Mounting Assemblies
1. Mounting bar 25.4-mm (1-in.)
2. Clamp
3. Clamping screw
4. Mounting sleeve
5. Gun mounting tube
6. M8 x 30 screws
7. Support plate
8. 3/8-16 x 1-in. long screws
9. T-slot nuts
10. T-slot extrusion (see Note)
A. Clamping handle
B. Pivot handle
Note: Not included in kit.
Bar-Mount Guns
See Figure 4. Install the gun bar-mount adapter (3) into the end of the
adjusting rod (9) and secure it by tightening the set screw (11) with a 4-mm
hex key. Refer to page 47 for the gun bar part number.
STo move the gun tip from side to side, loosen the right button screw (1).
STo tilt the gun tip up or down, loosen the tilt knob (4).
STo rotate the adjusting bar on the locking body (8) axis or in the locking
body, loosen the rotate handle (5).
EncorerAutomatic Powder Spray Guns 9
Part 1098185-17
E2019 Nordson Corporation
Bar-Mount Guns (contd)
To mount the gun on a fixed gun stand, oscillator, or reciprocator, position
the clamp (7) on a 1 inch mounting bar and tighten the clamp handle (6).
56
9
7
8
1
2
3
4
Adapter rotated 90 degrees
10
11
3
Figure 4 Bar-Mount Gun Mounting
1. Button screws
2. Tilt bracket
3. Bar-mount adapter
4. Tilt knob
5. Rotate handle
6. Clamp handle
7. Clamp
8. Locking body
9. Adjusting rod
10. Ball
11. Set screw
Gun Connections
See Figure 5.
1. Connect the powder feed hose to the hose connector (2). The
connector can be disconnected from the gun by unscrewing and pulling
back on the retainer nut (1).
2. Connect 4-mm clear electrode air-wash tubing to the barbed fitting (3)
(bar-mount gun) or tubing union (4) (tube-mount gun).
3. Connect the gun cable to the receptacle (5) and tighten the cable nut
securely.
EncorerAutomatic Powder Spray Guns
10
Part 1098185-17 E2019 Nordson Corporation
Bar-Mount Gun Tube-Mount Gun
11
22
34
55
Figure 5 Gun Connections −Bar Mount and Tube-Mount Guns
1. Retainer nut
2. Hose connector
3. Barbed fitting
4. Tubing Union (4-mm)
5. Gun cable receptacle
Ion Collector Installation
The ion collector can improve the smoothness and appearance of cured
powder coatings. It collects ions emitted from the gun’s charging electrode
instead of allowing them to deposit on the part. This reduces the rate of
charge buildup in the powder deposited on the part, which may reduce
defects in the cured coating such as pin−holing and orange peel.
Refer to page 48 in the Parts section for the kit part number.
The ion collector kit can be used on both the bar-mount and tube-mount
guns. After installing the ion collector, adjust the collector rod position for
best results as described in Adjusting the Ion Collector Rod.
Bar Mount Gun
1. See Figure 6. Insert the collector rod (1) into the grounding plate and
secure it with the M5 x 8 set screw (6) included in the ion collector kit.
2. Attach the multi-point tip (7) to the collector rod with the M3 x 8
screw (8).
1
6
78
Figure 6 Ion Collector Installation −Bar Mount Gun
EncorerAutomatic Powder Spray Guns 11
Part 1098185-17
E2019 Nordson Corporation
Tube-Mount Gun
NOTE: The mounting hole must remain plugged for optimal performance.
If the ion collector is removed, replace it with the appropriate plug. The
mounting plug part number is listed in the Parts section of this manual.
NOTE: The ion collector mounting hole must be installed towards the front
of the gun as shown in Figure 7. If the ion collector hole is installed towards
the far rear, it must be reversed to allow access to the grounding plate in the
rear body assembly. Perform Steps 1−7 of the tube-mount dis-assembly
procedure on page 26 to remove the tube, then turn it around and
re-assemble the gun.
1. Remove the plug from the mounting hole (5) if applicable.
2. Secure the post (2) to the grounding plate with the socket head
screw (3).
3. Insert the collector rod (1) into the post and secure it with the M10 x 10
nylon-tipped set screw (4).
4. Attach the multi-point tip (7) to the collector rod with the M3 x 8
screw (8).
1
8
7
2
3
4
5
Figure 7 Ion Collector Installation −Tube Mount Gun
1. Collector rod
2. Post
3. Socket-head screw
4. M10 x 10 set screw
5. Ion collector mounting hole
6. M5 x 8 set screw
7. Multi-point tip
8. M3 x 8 pan-head screw
Adjusting the Ion Collector Rod
The ion collector rod should be mounted so that the tip at the end of the rod
is the optimum distance from the tip of the electrode for the application.
SIf the tip at the end of the rod is too far away from the tip of the
electrode, the ion collector will not collect any ions or improve the
appearance of the cured coating.
SIf the tip of the end of the rod is too close to the tip of the electrode,
powder particles may not be charged efficiently and the powder transfer
efficiency may be reduced.
EncorerAutomatic Powder Spray Guns
12
Part 1098185-17 E2019 Nordson Corporation
Use this procedure to position the end of the ion collector rod.
1. Remove the rod and multi-tip point from the gun, then coat several
parts. Note the current (μA) shown on the control unit display when
coating the parts. Cure the coatings.
2. Install the rod and multi-point tip on the gun.
3. Loosen the set screw (4 or 6) and move the end of the rod far away from
the front end of the gun.
4. Turn on the electrostatic voltage and spray powder with a part in front of
the gun. Slide the rod forward until the current shown on the control unit
display is 5 to 7 μA higher than that displayed in step 1. Tighten the set
screw.
5. Cure the coating on the test parts. Compare the surface finish on these
parts with the finish on the parts coated in step 1 (before the ion
collector kit was installed).
6. If the desired improvement in the surface finish has not been obtained,
loosen the set screw and slide the rod forward approximately 1-in.
Tighten the set screw.
7. Repeat steps 5 and 6 until the desired improvement in surface finish is
obtained.
EncorerAutomatic Powder Spray Guns 13
Part 1098185-17
E2019 Nordson Corporation
Operation
WARNING: Allow only qualified personnel to perform the following tasks.
Follow the safety instructions in this document and all other related
documentation.
WARNING: This equipment can be dangerous unless it is used in
accordance with the rules laid down in this manual.
Automatic and manual control of electrostatic output, air-wash air flow, and
pump air flow, are provided by the Nordson iControl system or the Encore
LT automatic controllers. Gun triggering and positioning are provided by the
iControl system, a Nordson axis controller, or a PLC supplied either by
Nordson or the customer.
Refer to your controller manual for programming information and
instructions.
EncorerAutomatic Powder Spray Guns
14
Part 1098185-17 E2019 Nordson Corporation
Changing Flat Spray Nozzles
WARNING: Turn off the spray gun and ground the electrode before
performing this procedure. Failure to observe this warning could result in a
severe electrical shock.
1. See Figure 8. Unscrew the nozzle nut (1) counterclockwise.
2. Pull the flat spray nozzle (2) off the electrode assembly (3).
NOTE: It is not necessary to remove the electrode assembly. If the
electrode assembly comes out of the gun when you pull the nozzle off,
clean it with compressed air before re-installing it. Do not bend the
electrode. The electrode holder (3A) screws into the assembly. Both the
holder and the electrode are replaceable.
3. Install a new nozzle on the electrode assembly, being careful not to
bend the electrode. The nozzle is keyed to the electrode assembly.
4. Install the nozzle nut over the nozzle and screw it onto the gun body
clockwise until the face of the nozzle nut bottoms against the shoulder of
the gun body.
NOTE: The tapered electrode holder of the electrode assembly has been
designed for optimized cleaning during color changes on systems using flat
spray nozzles. This tapered electrode holder will not accept conical
deflectors.
1
2
3
3A
Figure 8 Flat Spray Nozzle Removal and Installation

Other manuals for Encore LT

4

Other Nordson Paint Sprayer manuals

Nordson NPE-LF10 Reference guide

Nordson

Nordson NPE-LF10 Reference guide

Nordson Trilogy User manual

Nordson

Nordson Trilogy User manual

Nordson A7AA Reference guide

Nordson

Nordson A7AA Reference guide

Nordson A7A Reference guide

Nordson

Nordson A7A Reference guide

Nordson Vantage Reference guide

Nordson

Nordson Vantage Reference guide

Nordson Iso-Flo User manual

Nordson

Nordson Iso-Flo User manual

Nordson Encore HD User manual

Nordson

Nordson Encore HD User manual

Nordson MEG II Reference guide

Nordson

Nordson MEG II Reference guide
Nordson HORIZON 200 User manual

Nordson

Nordson HORIZON 200 User manual

Nordson ColorMax User manual

Nordson

Nordson ColorMax User manual

Nordson Encore LT User manual

Nordson

Nordson Encore LT User manual

Nordson Encore HD Reference guide

Nordson

Nordson Encore HD Reference guide

Nordson kinetix User manual

Nordson

Nordson kinetix User manual

Nordson Encore LT User manual

Nordson

Nordson Encore LT User manual

Nordson Trilogy Reference guide

Nordson

Nordson Trilogy Reference guide

Nordson Sure Coat Series Reference guide

Nordson

Nordson Sure Coat Series Reference guide

Nordson Trilogy User manual

Nordson

Nordson Trilogy User manual

Nordson A7A User manual

Nordson

Nordson A7A User manual
Nordson Tribomatic II Reference guide

Nordson

Nordson Tribomatic II Reference guide

Nordson Encore XT Reference guide

Nordson

Nordson Encore XT Reference guide

Nordson Versa-Spray User manual

Nordson

Nordson Versa-Spray User manual

Nordson ColorMax 2 Reference guide

Nordson

Nordson ColorMax 2 Reference guide

Nordson Trilogy GP Reference guide

Nordson

Nordson Trilogy GP Reference guide

Nordson Mastic Gun Reference guide

Nordson

Nordson Mastic Gun Reference guide

Popular Paint Sprayer manuals by other brands

Clarke CHHSB1 Operating & maintenance instructions

Clarke

Clarke CHHSB1 Operating & maintenance instructions

AG SPRAY FS-ATV-15 owner's manual

AG SPRAY

AG SPRAY FS-ATV-15 owner's manual

Hardi New NAVIGATOR 1100 Operator's manual

Hardi

Hardi New NAVIGATOR 1100 Operator's manual

Graco 24H685 operation & maintenance

Graco

Graco 24H685 operation & maintenance

BorMann PRO BBP4015 manual

BorMann

BorMann PRO BBP4015 manual

Smithco Sprayer Star 3180 SmarTrax MD installation manual

Smithco

Smithco Sprayer Star 3180 SmarTrax MD installation manual

Sagola 475XTECH instruction manual

Sagola

Sagola 475XTECH instruction manual

Benchmark 1282-113 manual

Benchmark

Benchmark 1282-113 manual

Graco LineLazer 3400 Repair

Graco

Graco LineLazer 3400 Repair

YEAZ CYCLONE user manual

YEAZ

YEAZ CYCLONE user manual

Smith Performance Sprayers 190450 quick start guide

Smith Performance Sprayers

Smith Performance Sprayers 190450 quick start guide

SMA 800-UTL60BL owner's manual

SMA

SMA 800-UTL60BL owner's manual

AIRLESSCO SL user guide

AIRLESSCO

AIRLESSCO SL user guide

King Canada 8180 instruction manual

King Canada

King Canada 8180 instruction manual

Norac UC5 Topcon X30 installation manual

Norac

Norac UC5 Topcon X30 installation manual

Husky CAT851 Operations & parts manual

Husky

Husky CAT851 Operations & parts manual

YATO YT-82553 manual

YATO

YATO YT-82553 manual

Parkside PABK 60 A1 Operation and safety notes

Parkside

Parkside PABK 60 A1 Operation and safety notes

manuals.online logo
manuals.online logoBrands
  • About & Mission
  • Contact us
  • Privacy Policy
  • Terms and Conditions

Copyright 2025 Manuals.Online. All Rights Reserved.