STEP 4
TRANSMITTER ADJUSTMENTS
STEP 2
MOUNTING INSTRUCTIONS
For proper speed control operation and programming
set the transmitter adjustments as follows:
1. Set HIGH ATV or EPA to maximum setting.
[Controlsamount of throw fromneutral to full throttle]
2. Set LOW ATV, EPA, or ATL to maximum setting.
[Controlsamount of throw from neutral to fullbrakes]
[Reduce this after ESC adjustment to reduce amount of brakes]
3. Set EXPONENTIAL to zero setting.
[Controls the linearity of the throttle channel]
4. Set THROTTLE CHANNEL TRIM to middle setting.
[Adjusts the neutral position of speed control]
[Increase or decrease after ESC adjustment to adjust coast
brakes––to give braking in neutral trigger position]
5.
Set
THROTTLE CHANNEL REVERSING SWITCH
to
either position.
[Do not change switch position after programming]
6. Set ELECTRONIC TRIGGER THROW ADJUSTMENT to
50% throttle and50% brake/reverse throw (or 5:5).
[Adjustspistol-grip transmitter’sthrottle trigger throw
on electronic/digital transmitters]
7. Set MECHANICAL TRIGGER THROW ADJUSTMENT
to 1/2 throttle and 1/2 brake/reverse throw.
[Adjustspistol-grip transmitter’sthrottle trigger throw
on mechanical/analog transmitters]
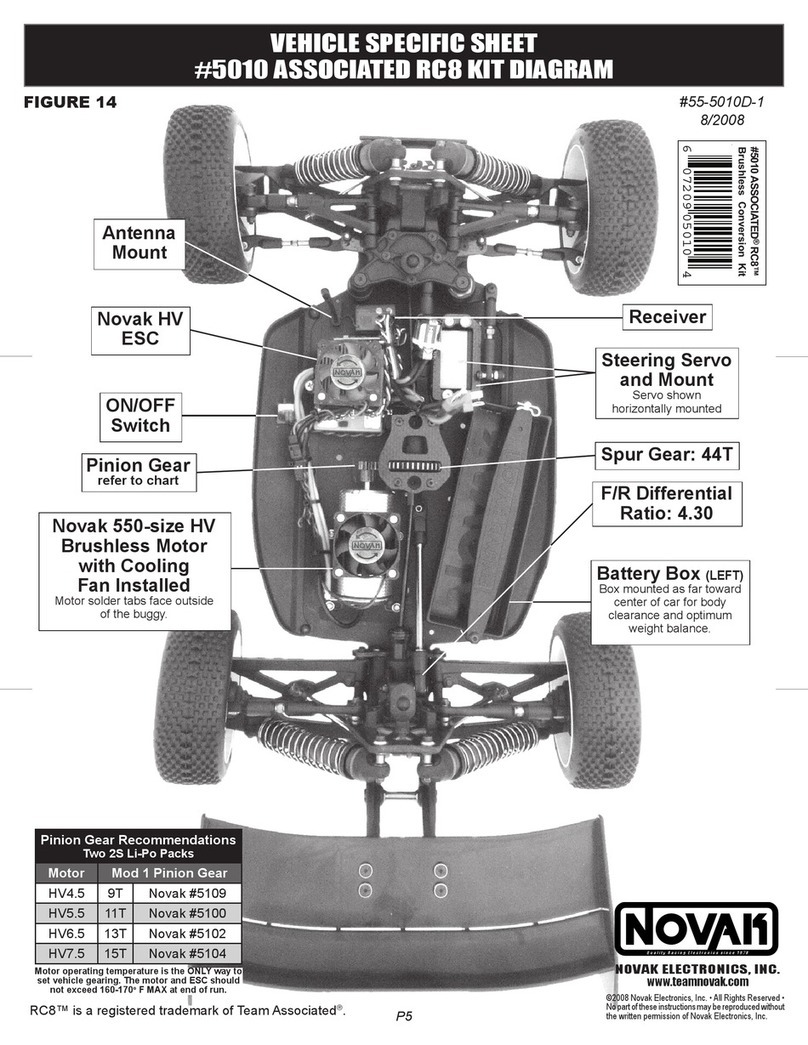
1. DETERMINE BEST ESC MOUNTING LOCATION
The ESC should be positioned away from receiver
and antenna as shown in the Set-Up photo on the
front. Choose a mounting position that will keep
the power wires clear from obstructing movement
of the suspension or the motor pod.
Remember,cooler operatingtemperaturesmean higher
efficiency. So, choose a mounting position
that allows
maximum airflow through the heat sinks.
2. INSTALL SPEED CONTROL
Use the included double-sided tape to mount the ESC.
3. INSTALL ON/OFF SWITCH
Choose a convenient place to mount the switch
where it will be easy to get to. Mount switch using
apiece of double-sided tape or with a screw
through
the hole in the base of the switch housing.
4. INSTALL RECEIVER
Mount the receiver as far from the motor, power
wires, battery, and servo as possible. All of these
components emit radio noise when the throttle is
being applied. On graphite or aluminum, place the
receiver on edge with the crystal and antenna
as
farabovethechassis as possible. Mount the antenna
close to the receiver and trail any excess wire off
the top of the antenna.
STEP 1
HEAT SINK INSTALLATION
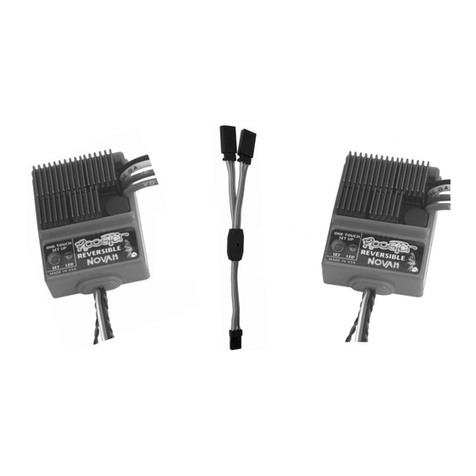
Heat sinks are required with the Reactor Reversible
for
optimumperformanceand power handling.
Included
with the Reactor are heat sinks to fit onto the ESC’s
three separate transistor tab banks.
1. INSTALL THE HEAT SINKS
Place ESC on a flat surface and press one heat sink
ontoeach of the individual transistortab banks. Each
bank is separated by a plastic divider and is on a
different level than the adjacent banks.
Theheatsinksshould press onto the transistors with
a snug fit. If installed upside-down (longer fins up) or
shifted to one side, they will be too loose.
NOTE: Do not use too much force when installing the heat sinks
because you can damage the transistors or other components
on the PC board. Never use a vise or pliers to install heat sinks.
2. DO NOT USE GLUE
Do not use glue or adhesives to attach the heat sinks to
the transistors.
3. DO NOT SHORT CIRCUIT HEAT SINKS
Each bank of heat sinks should never contact each
otheror other conductive objects (metal, etc.), or they
will short circuit and damage the ESC.
STEP 3
HOOK-UP INSTRUCTIONS
Refer to Set-Up photo on front page
1. INSTALL MOTOR CAPACITORS
Electric motors generate radio noise that can interfere
withyour receiver and cause radioproblems. Included
in the ESC accessory kit are three 0.1µF (50V) non-
polarized,ceramic capacitors. These capacitors must
beinstalledon everymotortohelp reduce the noise
generated by the motor and to prevent ESC damage.
Solder 0.1µF (50V) capacitors between:
• POSITIVE(+) motortab & NEGATIVE(-)motor tab.
• POSITIVE (+) motor tab & GROUND tab*.
• NEGATIVE (-) motor tab & GROUND tab*.
*If your motor does not have a ground tab, solder the capacitor
leads to the can of the motor as shown below.
Negative (-) motor tab
0.1µF Capacitors
Positive (+) motor tab
Ground / motor can
Extra0.1µFcapacitors areavailable inNovak kit #5620
2. IMPORTANT NOTE ABOUT SCHOTTKY DIODES
NO SCHOTTKY DIODES
Schottkydiodes must NOT be used withreversiblespeed
controls. Using a Schottky diode will damage the speed
control and will void the warranty.
3. CONNECT SPEED CONTROL TO THE RECEIVER
Afterthe proper input plug plastic has beeninstalled
tomatch the receiver (Seefront page), plug the speed
controlintotheTHROTTLE CHANNEL of the receiver.
4.
CONNECT SPEED CONTROL TO THE BATTERY PACK
Plug the JST/Tamiya connector from the speed control
into a 6 or 7 cell battery pack (1.2 volts DC/cell).
5. CONNECT SPEED CONTROL TO THE MOTOR
Plug the bullet connector on the YELLOW wire of
the speed control to motor positive.
Plug the bullet connector on the BLUE wire of the
speed control to motor negative.
TIP: Twist BLUE & YELLOW motor wires once or twice as they go
tothe motor toreduce any radionoise emitted frompower wires.
STEP 5
SPEED CONTROL PROGRAMMING
Speed control should be connected to receiver and to
a charged battery pack, and the transmitter adjusted.
1. TURN ON THE TRANSMITTER
2. TURN ON THE SPEED CONTROL
3. PRESS AND HOLD THE ESC’S ONE-TOUCH BUTTON
With transmitter throttle at neutral, press and hold
the speed control’s One-Touch button until the sta-
tus LED turns solid red.
4.
RELEASE ESC ONE-TOUCH BUTTON WHEN LED IS RED
5. PULL THROTTLE TO FULL-FORWARD POSITION
Hold it there until the status LED turns solid green.
NOTE:the motor will not run during programmingeven
if it is connected to the speed control.
6. PUSH THROTTLE TO FULL-REVERSE POSITION
Hold it there until the status LED blinks green.
7. RETURN TRANSMITTER THROTTLE TO NEUTRAL
Status LED will turn solid red, indicating that throttle is
atneutral and proper programming hasbeen completed.
8. CHECK OPERATION OF THE SPEED CONTROL
With no throttle or brake applied the status LED
should be solid red and the motor should not be
running.At full-throttle position the status LED should
be solid green and the motor running full speed. At
full-reverse position the status LED should be green
andthemotor should be running full speed in reverse.
OPTIONAL SETTING FOR ESC WHEN REVERSE IS DISABLED
SET THE COAST BRAKE AT TRANSMITTER
Adjust
THROTTLE CHANNEL TRIM
on the transmitter
to
get more or less coast brake. This is accomplished
by
slightly shifting the neutral position. After adjustment
be
sure that the status LED is still green at full throttle.
Speed control is programmed & ready to run!
If transmitter settings are changed, it will be necessary to complete
the
programming sequence once again.
If you experience any problems during programming, turn off the
speed control and repeat the programming process.
STEP 6
REVERSE DISABLE PROGRAMMING
Speed control should be connected to receiver and to
a charged battery pack, and the transmitter adjusted.
1. TURN ON THE TRANSMITTER
2. TURN ON THE SPEED CONTROL
3. PRESS AND HOLD THE ESC’S ONE-TOUCH BUTTON
Press and hold the speed control’s One-Touch button
untilthestatus LED turns from solid red to solid green.
4.
RELEASE ESC ONE-TOUCH BUTTON WHEN LED IS GREEN
5.
PRESS ONE-TOUCH BUTTON TO ENABLE/DISABLE REVERSE
SLOW red flash =reverse ENABLED
FAST red flash =reverse DISABLED
NOTE: You must press the One-Touch button very soon
after the LED begins flashing red (slow or fast).
6. LED WILL TURN GREEN THEN EXIT PROGRAMMING
GreenLED indicates ESC is exitingprogrammingmode.
CUSTOMER SERVICE
CUSTOMER SERVICE HOURS (PST)
Monday-Thursday: 8:00am-5:00pm
Friday: 8:00am-4:00pm
(closed every other Fri.)
(949) 833-8873 • FAX (949) 833-1631
©1998 Novak Electronics, Inc. • All Rights Reserved
No part of these operating instruction may be reproduced without
the written permission of Novak Electronics, Inc.
All Novak speed controls are designed and manufactured in the U.S.A.
Reactor Reversible, HYPERFET III, Polar Drive Technology, Radio Priority
Circuitry, One-TouchSet-Up,SmartBrakingCircuitry,Digital Anti-Glitch
Circuitry,Reverse Disable Circuitry,and Input Plug System are all trade-
marks of Novak Electronics, Inc.
Printed in the U.S.A. 11/98 • #IM-1810-1
TROUBLE-SHOOTING GUIDE
ESC Will Not Program Properly
•
Too little transmitter throw––Increase ATV/EPA setting.
•
Make sure ESC is plugged into the throttle channel of
receiver. Check throttle channeloperation with a servo.
• ESCOne-Touchbuttonnot heldlong enough––Press
and hold One-Touch button during programming
until status LED turns solid red.
ESC Will Not Go In Reverse
• Reverse circuitry disable––Refer to Step 6 to enable.
Steering Channel Works But Motor Will Not Run
•
Speed control has thermally shut down––Allow ESC to
cooldown––Use milder motor or smaller piniongear.
• Checkmotor connections.Checkmotor andbrushes.
• Make sure ESC is plugged into the throttle channel
of receiver. Check throttle channel operation with a
servo. Check the wiring color sequence & metal
socket insertion of receiver harness.
•
Possibleinternal damage––Refer to ServiceProcedures.
Receiver Glitches/Throttle Stutters On Acceleration
•
Motor capacitors broken or missing––Refer to Step 3.
• Receiver or antenna too close to speed control,
power wires, battery, or motor––Refer to Step 2.
• Bad connections––Check wiring and connectors.
• Motor brushes worn––Replace brushes.
• Excessive current to motor––Use a milder motor or
a smaller pinion gear.
Motor and Steering Servo Do Not Work
• Checkwires,receiver signal harness wiring and color
sequence, radio system, crystals, battery and motor
connectors, and battery pack.
•
Possibleinternal damage––Refer to ServiceProcedures.
Motor Runs Slowly / Slow Acceleration
•
Checkmotor and batteryconnectors––Replaceif needed.
•
Badbatteryormotor––Check operation with another.
• Incorrect transmitter or speed control adjustment––
Refer to Steps 4 and 5.
Motor Runs Backwards
• Motor wired backwards––Check wiring and reverse.
• Backwards motor timing––Reverse motor end bell.
ESC Melted Or Burnt/ESC Runs With Switch Off
• Internal damage––Refer to Service Procedures.
*Formore help check our website or call our CustomerService Dept.
SERVICE PROCEDURES
Before sending in your Reactor for service, review the
Trouble-Shooting guide and the instructions. The ESC
may appear to have failed when other problems exist.
PLEASE NOTE: Speed controls that operate normally
when received will be charged a minimum service
fee and return shipping costs.
WHAT TO SEND: Fill out all of the information
requestedon the enclosed
REVERSIBLEESC SERVICE CARD
(also available onour website) and return it with your ESC.
WARRANTYWORK:For warranty work, you
MUSTCLAIM
WARRANTY
on the
REVERSIBLE ESC SERVICE CARD
and
includea valid cash register receipt withpurchasedate,
oran
invoicefrompreviousservice work. If warranty pro-
visions have been voided there will be a service charge.
SERVICE COSTS: Customer is responsible for all service
costs (parts, labor, and shipping/handling charges). See
REVERSIBLE ESC SERVICE CARD for payment and ship-
ping options.
ADDITIONAL NOTES:
• Hobby dealers or distributors are not authorized to
replace speed controls thought to be defective.
•
If a hobby dealer returns your speed control for service
,
submit a completed REVERSIBLE ESC SERVICE CARD
to the dealer and make sure it is included with the ESC.
• NovakElectronics,Inc. does not make any electronic
components
(transistors,resistors, etc.)
available for sale.
• To provide the most efficient service possible to our
customers, it is not our policy to contact customers
by phone or mail.
PRODUCT WARRANTY
NovakElectronics, Inc.guarantees theReactor Reversible
ESC
to be free from defects in materials and workmanship for a
period of 120 days from original date of purchase
(verified
by dated, itemized sales receipt)
. Warranty does not cover
incorrectinstallation, components worn byuse, damage from
using fewer than 6 or more than 7 cells
(1.2 volts DC/cell)
input voltage, short-circuiting heat sinks, cross-connection
of battery/motor, reverse voltage application, damage from
use of an external Schottky diode or incorrect installation of
FET servo or receiver battery pack, damage from
excessive
force while installing heat sinks or pushing One-Touch but-
ton, not installing
three 0.1µF (50V) capacitors on motor,
splices to switch or receiver signal harnesses, using same
type and gender battery and motor connectors, damage
from
disassembling case, tampering with internal electron-
ics,
allowing water, moisture, or any other foreign material
to enter
ESC or get onto PC board, incorrect installation of
alternate
inputplug plastic, allowingexposed wiring toshort-
circuit, or any damage caused by a crash.
In no case shall our liability exceed product's original cost. We
reserve the right to modify warranty provisions without notice.
Because Novak Electronics, Inc. has no control over connection
and use of the ESC, no liability may be assumed nor will be
accepted for damage resulting from the use of this product.
Every ESC is thoroughly tested and cycled before leaving our
facility and is, therefore, considered operational. By the act of
c
onnecting/operating ESC, the user accepts all resulting liability.

