manuals.online logo
Brands
  1. Home
  2. •
  3. Brands
  4. •
  5. NOVAK
  6. •
  7. Accessories
  8. •
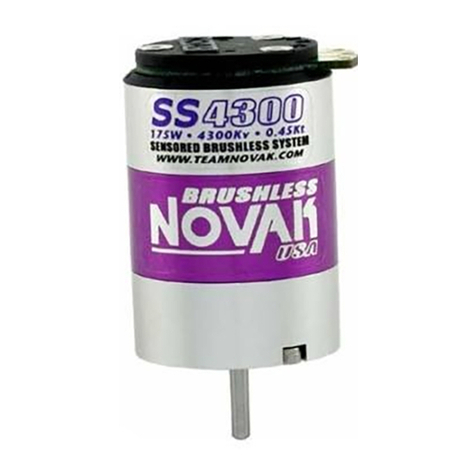
  9. NOVAK SS4300 - PROGRAMMING & GEARING User manual

NOVAK SS4300 - PROGRAMMING & GEARING User manual

The ESC is equipped with 6 user-selectable Throttle Profiles to choose from
,
as shown below.
For basic operation, there’s no need to change from Profile #1.
SUPER SPORT PLUS THROTTLE PROFILES
BRUSHLESS BRUSHLESS BRUSHLESS BRUSH-MODE
(unlimited) Sportsman
Marine-Mode
(unlimited)
12 3 4 5 6
RPM**
unlim. unlim. 24000 24000 unlim. unlim.
Acceleration* unlim. unlim. limited limited unlim. unlim.
Programmable
yes yes yes yes no yes
w/Reverse
yes no yes no yes no
Reverse%
100 0 100 0 25 n/a
**Unlimited RPM in Brushless Profiles is based upon the motor’s Kv rating. For example,
the SS5800 motor is a 5800Kv motor and produces 41760 RPM @ 7.2 VDC.
*Unlimited acceleration refers to acceleration only being limited by quality of batteries used.
Due to lower Kv rating, the Novak SS4300 motor will not reach RPM limit in programs 3 & 4.
NOTE: Super Sport Plus is factory set to Profile #1.
selecting brushless profilselecting brushless profileess
::
all LEDs
With ESC on & connected to a charged battery
(transmitter ON or OFF)
:
1. IF TRANSMITTER IS OFF, DISCONNECT ESC FROM RECEIVER
To avoid possible radio interference from other transmitters, remove
the ESC’s input signal harness from the receiver.
2. PRESS & HOLD THE ESC’S ONE-TOUCH SET BUTTON
Continue to hold SET button on ESC until all 4 LEDs turns on.
Note: you will continue holding past the Blue, Blue & Amber, Blue & Green,
and then the Amber LED programming indicators in the ESC’s software.
3. RELEASE SET BUTTON AS SOON AS ALL 4 LEDs COMES ON
Once released, the 4 status LEDs will flash to indicate what Throttle
Profile is currently selected. The number of times the LEDs flash
indicates the Brushless Throttle Profile selection (1 of 5).
4. QUICK PRESS
(& release)
SET BUTTON TO CHANGE SELECTION
Each press will change to the next consecutive Throttle Profile. (After
Profile 5 in Brushless-Mode, the sequence begins again at Profile 1)
Note: there is a time constraint during this selection process.
5.
ESC STORES SELECTION & BEGINS TO EXIT PROGRAMMING
If SET button is not pressed for 3 seconds, ESC stores selected Profile in
memory, exits to neutral & is ready to go.
(LEDs turn off in a rolling motion
left to right, until just Red LED is on--Red & Green if no transmitter signal present).
REMEMBER: Whenever One-Touch set-up is performed, ESC automatically
reverts to
factory default settings & the Throttle Profile reverts to #1 when in Brushless-Mode.
ATTENTION: Proper gearing is essential to get the best performance from your Super
Sport Plus brushless motor system when operating in the Brushless-Mode.
profile selection
&
proper geariNg
P5
proper gear selection
throttle profile selection
2-2005#55-1705P-1
When using with SS5800 Motor
With the SS5800 motor on 6 cells, start with 2 teeth lower pinion gear
than you would use with a 27 turn “stock” brush-type motor. 3 teeth
lower pinion when using 7-cell.
When using with SS4300 Motor
With the SS4300 motor on 6 cells, start with 3 teeth lower pinion gear
than you would use with a 27 turn “stock” brush-type motor. 4 teeth
lower pinion for 7-cell.
Because of the broad power band of brushless, you can go 1 to 3 teeth
higher pinion than the above recommendations for more top speed, but
remember that going 3 or more teeth higher will produce excessive ESC
heating. Be sure to check the operating temperature of the ESC after making
any gearing adjustments--the Super Sport Plus ESC is designed to operate
comfortably from160ºF-180ºF (warmer than typical brush-type ESC).
If you had a low turn modified brush-type motor in vehicle before switching to the
Super Sport Plus system, and you do not change gearing, you will be under-geared
and the vehicle will be slow at top speed!
You will want the final drive ratio in the vehicle to be:
7.30 : 1 for Touring Cars
9.00 : 1 for Off-Road Buggies
12.30 : 1 for Off-Road Stadium Trucks
Higher final drive ratios will give longer run time at the expense of top speed. Lower ratios will
result in higher ESC temperatures--too low may result in overheating & thermal shut-down.
VEHICLE SPUR
SS5800 PINION
SS4300 PINION
Losi XXX-BK2 Buggy
78 22-23 21-22
Losi XXX Buggy
78 21-22 20-21
Losi XXX-4 Buggy 94 21-22 20-21
Losi XXX-TMF2 Truck 86 18-19 17-18
Losi XXX-T Truck 86 17-18 16-17
Assoc. TC3 Sedan 72 24-25 23-24
Assoc. B4 Buggy 81 22-23 21-22
Assoc. B3 Buggy 81 21-22 20-21
Assoc. T4 Truck 87 18-19 17-18
Assoc. T3 Truck 87 17-18 16-17
Traxxas Rustler Truck 84 18-19 17-18
Traxxas Stampede Truck
84 17-18 16-17
Traxxas Bandit Buggy 78 22-23 21-22
Traxxas 4-Tec Sedan 87 24-25 23-24
Note: Above chart shows basic starting points for gearing on larger tracks with 6-cell
battery packs & standard size tires--See our website for extended gearing chart.
switching between brushless-mode & brush-mode
switching from brushless to brush-modEswitching from brushless to brush-modE::
With ESC off & connected to a charged battery
(transmitter ON or OFF)
:
1. REMOVE BRUSHLESS 6-WIRE SENSOR HARNESS FROM ESC
2. DISCONNECT BRUSHLESS MOTOR FROM ESC
3. PRESS & HOLD ESC’S ONE-TOUCH/SET BUTTON
4. TURN ON THE SPEED CONTROL’S POWER
While still pressing
SET button, slide ESC’s ON/OFF switch to ON position.
5. CONTINUE PRESSING UNTIL BLUE & RED LEDs COMES ON
Note: you will continue holding past the Red LED One-Touch indicator.
6. RELEASE BUTTON AS SOON AS BLUE & RED LEDs COMES ON
Blue & Red LEDs flash 9 times, then turn on solid after a few seconds.
7. QUICK PRESS
(& release)
SET BUTTON WHILE LEDs ON SOLID
ESC changes modes, and the Green LED will flash for a few seconds (with
Blue & Red LEDs still on solid) to let you know you have changed modes.
Note: there is a time constraint during this selection process.
8. ESC EXITS MODE SELECTION & RETURNS TO NEUTRAL
9. REPLACE BRUSHLESS MOTOR WITH BRUSH-TYPE MOTOR
Refer to BRUSH-TYPE MOTOR portion of STEP 3 on main instructions
(pg.3)
for wiring.
switching from brush to brushlEss-modEswitching from brush to brushlEss-modE::
With ESC off & connected to a charged battery
(transmitter ON or OFF)
:
1. KEEP BRUSHLESS SENSOR HARNESS REMOVED FROM ESC
2. DISCONNECT BRUSH-TYPE MOTOR FROM ESC (*IMPORTANT*)
3. PRESS & HOLD ESC’S ONE-TOUCH/SET BUTTON
4. TURN ON THE SPEED CONTROL’S POWER
While still pressing
SET button, slide ESC’s ON/OFF switch to ON position.
5. CONTINUE PRESSING UNTIL BLUE & RED LEDs COMES ON
Note: you will continue holding past the Red LED One-Touch indicator.
6. RELEASE BUTTON AS SOON AS BLUE & RED LEDs COMES ON
Blue & Red LEDs flash 9 times, then turn on solid after a few seconds.
7. QUICK PRESS
(& release)
SET BUTTON WHILE LEDs ON SOLID
ESC changes modes, and the Green LED will flash for a few seconds.
8. ESC EXITS MODE SELECTION & RETURNS TO NEUTRAL
Green LED will flash continuously at neutral (w/Red on solid) indicating
that sensor harness for the brushless motor is disconnected from ESC.
9. RE-CONNECT BRUSHLESS 6-WIRE SENSOR HARNESS TO ESC
Refer to BRUSHLESS MOTOR portion of STEP 3 on main instructions
(pg.2)
for wiring.
IMPORTANT PRECAUTION: Never connect a brushless motor’s 6-wire sensor harness to ESC when wired to a brush-type motor!
If ESC is powered on while in Brushless-Mode, and is connected to Brush-type motor {phase wires shorted together} & a battery pack, a 6-wire
brushless motor’s sensor harness is connected to ESC, and ESC receives a transmitter’s throttle signal, severe ESC damage will occur.
Throttle Profiles 1, 2, 3, 4, & 6 can be independently customized
to
fine tune the speed control to feel just the way you like it.
The Super Sport Plus lets you tune the following items:
•Minimum Brake/Drag Brake Percentage--1 of 10 settings.
•Braking Type--1 of 2 types of braking styles (standard Constant Force
braking or DRAG BRAKING where braking is applied during neutral).
•Dead Band--1 of 5 Dead Band settings from 2 to 6%
.
•Minimum Drive Percentage--1 of 5 settings from 2 to 12%
.
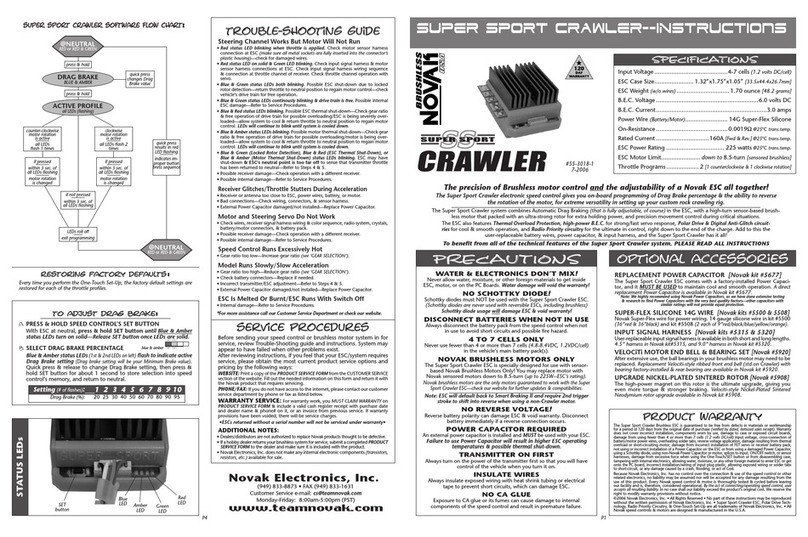
super sport plus soFtware Flow chartsuper sport plus soFtware Flow chart::
advanced
--
CUSTOM programmiNG
PLEASE NOTE: This page contains optional Advanced Programming items!
• These programming items are STRICTLY OPTIONAL--No further adjustments are required •
(but don’t worry, you can always reset factory defaults by performing the One-Touch programming again, so go ahead & experiment--that’s why the programming is in there, right?)
P6
to customizing profilesto customizing profiles 11--44oror 66::
With ESC on & connected to a charged battery
(transmitter ON or OFF)
:
1. IF TRANSMITTER IS OFF, DISCONNECT ESC FROM RECEIVER
Remove input signal harness from receiver to avoid radio interference.
2. MAKE SURE THROTTLE PROFILE 1-4 OR 6 IS ACTIVE
If you are not sure what profile is selected, follow the procedures in
‘Throttle Profile Selection’ to check or select desired profile.
Remember that you can not access the Brush-Mode
(Profile #6)
without disconnecting the brushless sensor harness from the ESC.
Note: there is no time constraint during selection process of custom parameters.
to adjust minimum braketo adjust minimum brake::
(or re-activate std-style brakes)
aa
aa
a
..
..
.PRESS & HOLD SPEED CONTROL’S SET BUTTON
With ESC at neutral, press & hold SET button until the Blue status
LED turns on solid---Release ESC’s SET button once LED is on solid.
bb
bb
b
..
..
.SELECT MINIMUM BRAKE PERCENTAGE
blue
Blue status LED
(1st LED on left)
flashes to indicate active Minimum
Brake setting. Quick press & release to select desired setting.
cc
cc
c
..
..
.PRESS & HOLD SET BUTTON TO STORE SELECTION
When SET button is pressed & held for about 1 second, the new selection
is stored in ESC’s memory--The 4 status LEDs will scroll back & forth to
indicate you are exiting programming & the Red LED will turn on solid
(Red & Green if no transmitter signal present)
--ESC is at neutral & ready to go.
to activate & adjust drag braketo activate & adjust drag brake::
aa
aa
a
..
..
.PRESS & HOLD SPEED CONTROL’S SET BUTTON
With ESC at neutral, press & hold SET button until Blue & Amber
status LEDs turn on solid---Release SET button once LEDs are solid.
bb
bb
b
..
..
.SELECT DRAG BRAKE PERCENTAGE
blue & amber
Blue & Amber status LEDs
(1st & 2nd LEDs on left)
flash to indicate active
Drag Brake setting
(Drag brake setting will be same as Minimum Brake setting)
.
Quick press & release to change Drag Brake/Minimum Brake setting,
then press & hold SET button for about 1 second to activate drag
braking, store selection into ESC’s memory, and return to neutral.
Note: To re-activate the standard style of braking
(no drag brakes during
neutral)
, repeat Minimum Brake adjustment as described above.
to adjust dead bandto adjust dead band::
aa
aa
a
..
..
.PRESS & HOLD SPEED CONTROL’S SET BUTTON
With ESC at neutral, press & hold SET button until Blue & Green
status LEDs turn on solid---Release SET button once LEDs are solid.
bb
bb
b
..
..
.SELECT DEAD BAND PERCENTAGE
blue & green
Blue & Green status LEDs flash to indicate active Dead Band setting.
Quick press & release to change setting, then press & hold SET
button for about 1 second to store selection and return to neutral.
to adjust minimum driveto adjust minimum drive::
aa
aa
a
..
..
.PRESS & HOLD SPEED CONTROL’S SET BUTTON
With ESC at neutral, press & hold SET button until Amber status
LED turns on solid---Release SET button once LED is on solid.
bb
bb
b
..
..
.SELECT MINIMUM DRIVE PERCENTAGE
amber
Amber status LED flashes to indicate active Minimum Drive setting.
Quick press & release to change setting, then press & hold SET
button for about 1 second to store selection and return to neutral.
restoring factory defaultrestoring factory defaultss::
Every time you perform the One-Touch Set-Up, the factory default settings are
restored for each of the throttle profiles.
@NEUTRAL
RED or RED & GREEN
MIN. BRAKE
BLUE
DRAG BRAKE
BLUE & AMBER
ACTIVE PROFILE
all LEDs (flashing)
DEAD BAND
BLUE & GREEN
MIN. DRIVE
AMBER
press & hold
press & hold
press & hold
press & hold
press & hold
quick press
results in red
LED flashing
––––––
indicates
improper
button press
sequence
LEDs roll off
––––
exit programming
continue holding ESC’s SET button to skip steps here
Setting
(# of flashes)
:12345678910
Minimum Brake
(%)
:20 25 30 35 40 45 50 55 60 65
Setting
(# of flashes)
:12345678910
Drag Brake
(%)
: off 25 30 35 40 45 50 55 60 65
Setting
(# of flashes)
:12345
Dead Band
(%)
:23456
Setting
(# of flashes)
:12345
Minimum Drive
(%)
:235812
if Brush-Mode
is active
––––––
all LEDs
flash 6 times
@NEUTRAL
RED or RED & GREEN
if Brushless-Mode
is active
––––––
# of flashes equals
active profile (1-5)
if pressed
––––––
within 3 sec. of
all LEDs flashing
––––––
active profile
changed
if not pressed
––––––
within 3 sec. of
all LEDs flashing

This manual suits for next models

3

Other NOVAK Accessories manuals

NOVAK XBR SPORT - PROFILE & GEARING GUIDE User manual

NOVAK

NOVAK XBR SPORT - PROFILE & GEARING GUIDE User manual

NOVAK SS4300 MOTOR User manual

NOVAK

NOVAK SS4300 MOTOR User manual

NOVAK XRS SPORT REVERSIBLE User manual

NOVAK

NOVAK XRS SPORT REVERSIBLE User manual

NOVAK RACER-EX User manual

NOVAK

NOVAK RACER-EX User manual

NOVAK STUTTER STOPPER User manual

NOVAK

NOVAK STUTTER STOPPER User manual

NOVAK VELOCITI 5.5R User manual

NOVAK

NOVAK VELOCITI 5.5R User manual

NOVAK SMART-STOP LI-PO CUT-OFF MODULE User manual

NOVAK

NOVAK SMART-STOP LI-PO CUT-OFF MODULE User manual

NOVAK PRO SC - TRACK GUIDE User manual

NOVAK

NOVAK PRO SC - TRACK GUIDE User manual

NOVAK THE DIG - 7-2009 User manual

NOVAK

NOVAK THE DIG - 7-2009 User manual

NOVAK REACTOR REVERSIBLE User manual

NOVAK

NOVAK REACTOR REVERSIBLE User manual

NOVAK PRO SC User manual

NOVAK

NOVAK PRO SC User manual

NOVAK BEC - 2-2008 User manual

NOVAK

NOVAK BEC - 2-2008 User manual

NOVAK SS4300 - INSTRUCTION ADDENDUM User manual

NOVAK

NOVAK SS4300 - INSTRUCTION ADDENDUM User manual

NOVAK ROOSTER E-MAXX COMBO User manual

NOVAK

NOVAK ROOSTER E-MAXX COMBO User manual

NOVAK RC8 - 8-2008 User manual

NOVAK

NOVAK RC8 - 8-2008 User manual

NOVAK SLYDR DRIFT ESC User manual

NOVAK

NOVAK SLYDR DRIFT ESC User manual

NOVAK ROOSTER CRAWLER ESC - BASIC SETUP GUIDE V2... User manual

NOVAK

NOVAK ROOSTER CRAWLER ESC - BASIC SETUP GUIDE V2... User manual

NOVAK SUPER DUTY XR User manual

NOVAK

NOVAK SUPER DUTY XR User manual

NOVAK SPY User manual

NOVAK

NOVAK SPY User manual

NOVAK XBR SPORT Manual

NOVAK

NOVAK XBR SPORT Manual

NOVAK BRAKE LIGHT KIT User manual

NOVAK

NOVAK BRAKE LIGHT KIT User manual

NOVAK Super Rooster User manual

NOVAK

NOVAK Super Rooster User manual

NOVAK ROOSTER 12T User manual

NOVAK

NOVAK ROOSTER 12T User manual

NOVAK SUPER SPORT User manual

NOVAK

NOVAK SUPER SPORT User manual

Popular Accessories manuals by other brands

SR Research EyeLink Portable Duo user manual

SR Research

SR Research EyeLink Portable Duo user manual

Bruce Goldsmith Design SNUG owner's manual

Bruce Goldsmith Design

Bruce Goldsmith Design SNUG owner's manual

Atmel QTouch AT42QT1040 Operations

Atmel

Atmel QTouch AT42QT1040 Operations

GE 868 GEN2 installation instructions

GE

GE 868 GEN2 installation instructions

skywalker sports SSFG9 user manual

skywalker sports

skywalker sports SSFG9 user manual

Leuze electronic CML 730i Original operating instructions

Leuze electronic

Leuze electronic CML 730i Original operating instructions

Polar Electro G Series instruction manual

Polar Electro

Polar Electro G Series instruction manual

Emerson Rosemount 225 Reference manual

Emerson

Emerson Rosemount 225 Reference manual

SunSynk LIFELYNK MINI user manual

SunSynk

SunSynk LIFELYNK MINI user manual

S+S Regeltechnik HYGRASGARD ESFF Series Operating Instructions, Mounting & Installation

S+S Regeltechnik

S+S Regeltechnik HYGRASGARD ESFF Series Operating Instructions, Mounting & Installation

Galvin Engineering CliniMix CMV2 Product installation guideline

Galvin Engineering

Galvin Engineering CliniMix CMV2 Product installation guideline

KoolMore MDR-2GD-35C instruction manual

KoolMore

KoolMore MDR-2GD-35C instruction manual

Steren CCTV-2121 manual

Steren

Steren CCTV-2121 manual

Omron E8M - datasheet

Omron

Omron E8M - datasheet

Genius Media Pointer T905 user manual

Genius

Genius Media Pointer T905 user manual

DURKOPP ADLER 0791 867708 Fitting instructions

DURKOPP ADLER

DURKOPP ADLER 0791 867708 Fitting instructions

Suttle 8-Port Voice Module SAM-V8M user guide

Suttle

Suttle 8-Port Voice Module SAM-V8M user guide

OBO Bettermann UDHOME 2 G Mounting instructions

OBO Bettermann

OBO Bettermann UDHOME 2 G Mounting instructions

manuals.online logo
manuals.online logoBrands
  • About & Mission
  • Contact us
  • Privacy Policy
  • Terms and Conditions

Copyright 2025 Manuals.Online. All Rights Reserved.