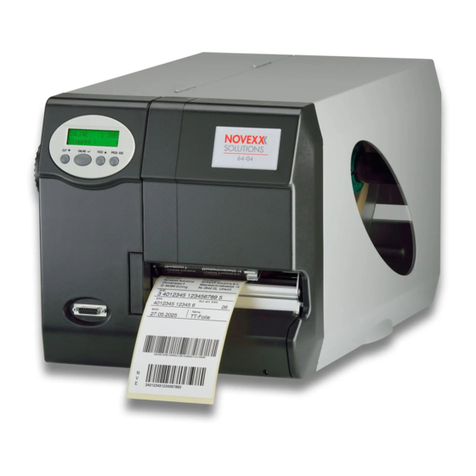
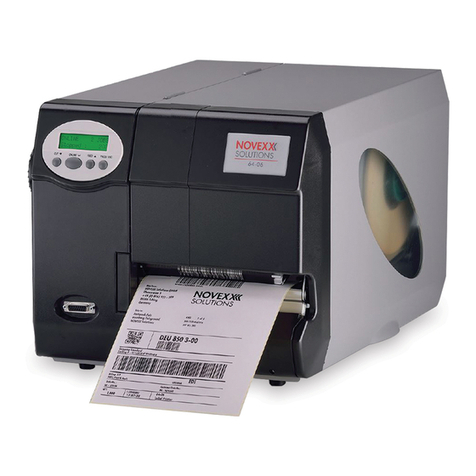
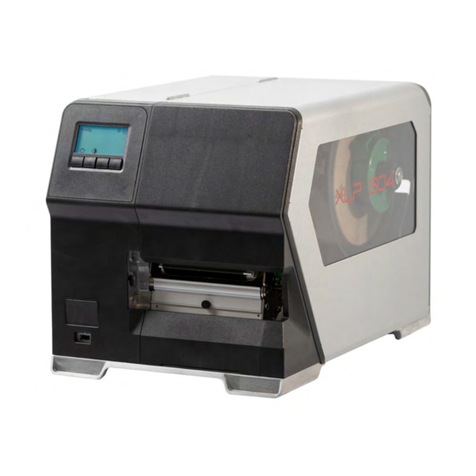
Novexx Solutions XLP 504 User manual

Edition 9 - 5/2018 - Translation of original version
SERVICE MANUAL
XLP 504 / XLP 506
Label printer


Service manual XLP 504 / XLP 506
05/2018 3Content
Content
Please note -7
General notes -7
Validity of this manual and required compliance -7
How information is represented -8
Notes about service work -9
Special key combinations -9
Serial numbers -9
Factory Settings -10
Servicing data -10
For your safety -11
Intended use -11
Safety notes -11
Technical Data -14
Technical data -14
Dimensions -14
Performance Data -14
Label Stock -18
Thermotransfer Ribbon -19
Connections, device data -19
Interfaces -19
Electronic Configuration -19
Specifications for dispenser -20
Ambient Conditions -20
Certificates and Markings -20
(XLP 506) Print width limitations -20
Service Mechanics -22
Housing components -22
Overview -22
Front hood -23
Rear hood -23
Front left housing -24
Bottom housing sections front/rear side -25
XLP 504: Ribbon mandrels -26
Exploded drawings -26
Replacing the ribbon core adapters -27
Ribbon unwinding mandrel -28
Ribbon rewinding mandrel -30
Setting the braking torque -31
XLP 506: Ribbon mandrels -32
Exploded drawings -32
Replacing the ribbon core adapters -33

Service manual XLP 504 / XLP 506
05/2018 4Content
Ribbon unwinding mandrel -34
Ribbon rewinding mandrel -37
Setting the braking torque -39
Printing unit -40
Replacing the print head -40
Print head pressure shaft -40
Closing lever sensor -42
Material transport -43
Adjusting the friction of the material guide -43
Replacing the material unwinder -44
Replacing the feed motor -45
Label sensor -46
XLP 504: Label sensor for very short labels -47
Internal rewinder / dispenser -50
Replacing the pinion -50
Replacing the motor -51
Retrofitting the internal rewinder -52
Installing the dispensing edge -55
Installing the baffle plate -56
Dispensing edge sensor -57
Parameter settings -58
Replacing Electronic components -60
Important information -60
Control panel board -60
CPU board -61
Output stage of stepper motor -62
Output stage of BLDC motor -63
I/O board -64
Power supply -65
Service Electronics -67
Handling Boards -67
ESD protection -67
Handling -67
CPU board -68
Connections -68
Interfaces -70
Sensor connections -72
Lithium Battery -72
Output stage board M4A for stepper motor -74
Connections, settings -74
XLP 504: Output stage board M5A for stepper motor -75
Application notes -75
Connections, settings -75
Jumper settings -76
Pin assignments -76

Service manual XLP 504 / XLP 506
05/2018 5Content
Output stage board for BLDC motor -78
Notes -78
Connections, settings -78
I/O-board -80
Connections, settings -80
Application -80
Setting the Interface Parameters -81
Signal interface -81
Serial interfaces -86
Operation panel -89
Connections -89
XLP 504: Power switch for 600 dpi print head -90
Notes -90
Connections / LEDs -90
Power supply -91
Connections -91
Specifications -92
Interface for peripheral devices -93
Sensor test -94
General notes -94
Sensors on the CPU board -95
Sensors on the stepper motor output stage board -96
Sensors on the BLDC motor output stage board -96
Sensors on the I/O board -96
Settings -98
Sensor settings -98
Setting sensors -98
Setting the material end sensor -101
Adjusting the imprint position -102
Prerequisites -102
Compensating length misalignment -102
Compensating impression misalignment -103
Parameter Menu -104
Overview -104
Alphabetical Parameter list -107
Parameter Reference -109
Malfunctions -179
Status Reports -179
General information about status reports -179
Reference of status reports -181
Fault location -219
Notes about fault location -219
Data transmission -219
Display -219

Service manual XLP 504 / XLP 506
05/2018 6Content
Gap detection -219
Material transport -220
Ribbon, ribbon guide -220
Print roller -220
Position of the print image -221
Print quality -221
External memory media -222
Cut function, cutter -222
Reading out diagnostic data -223
General notes -223
Storing diagnosis data -223
Reading out via serial interface -224
Storing on memory card -226
Firmware -227
Notes About Firmware -227
Please note -227
Detecting the firmware version in the printer -227
Updating firmware -228
Notes about the update procedure -228
Update from a memory medium -228
Update via data interface -229
Forced bootloader start -230
Appendix -231
Setup file for XLP 504 -231
Wiring diagrams -238
XLP 504 basic -239
XLP 504 basic 600 dpi -240
XLP 50x basic dispenser -241
XLP 504 peripheral -242
XLP 504 peripheral 600 dpi -243
XLP 50x peripheral dispenser -244
Installing a generic printer under Windows 7 -245

Service manual XLP 504 / XLP 506
05/2018 | 08 7Please note
Please note
GENERAL NOTES
Validity of this manual and required compliance
Contents
The complete operating manual for the label printers XLP 504 and XLP 506 consists of the following
parts:
This service manual refers exclusively to the machine types listed above. It is to be referred to for
correct installation, set-up and adjustment of the label dispenser as well as for undertaking of re-
pairs. In the description of repair, only the replacement of high-wear components is covered. If other
components need to be replaced, e.g. after being damaged due to the effects of an external force,
please consult the servicing technician at our sales partner.
Technical release
Technical release: 4/2018
Software version: 7.75
Liability
NOVEXX Solutions assumes no liability for damages resulting from improper adjustments or re-
pairs of the machine. It is assumed that only knowledgeable and appropriately qualified persons
are to perform installation, adjustment, or repairs.
Copyright
NOVEXX Solutions retains all rights to this manual and its appendices. Reproduction, reprint or any
other type of duplication, including parts of the manual, are permitted only with written approval.
Printed in Germany
Manufacturer
Novexx Solutions GmbH
Ohmstrasse 3
D-85386 Eching, Germany
Tel.: +49-8165-925-0
Fax: +49-8165-925-231
www.novexx.com
Manual Target group Medium Availability
Quick reference guide,
Safety notes Operating personnel Printed Delivery with the machine
User manual
PDF file www.novexx.comService manual Service personnel
Spare parts catalog

Service manual XLP 504 / XLP 506
05/2018 | 08 8Please note
How information is represented
Abbreviations of printer names
XLP 50x = XLP 504/XLP 506 (description counts for both printer types)
Text sections, which only count for one of the two printer types, are preceded by the printer name
in brackets.
Explanation of symbols
To enhance readability and make information easier to find, different types of information are iden-
tified:
Instruction with no order of tasks assigned
1. Numbered instructions introduced by preceding text
2. The specified order must be followed!
Special note for action that must be performed.
Explanation of an error cause in the reference of error messages.
• Enumeration of features
• Other feature
The Experts symbol identifies activities that are reserved exclusively for qualified and spe-
cially trained personnel.
The information symbol identifies notes and recommendations as well as additional infor-
mation.
Notes about hazards and risks
Important instructions that must absolutely be followed are specially highlighted:
Illustrations
Illustrations appear in the text where required. References to these illustrations are shown in
[square brackets] containing the number of the illustrations. Uppercase letters after an illustration
number, for example [12A], refer to the corresponding item within the illustration.
Normally the machine is shown as the right version. The left version is only shown if there is a need
to make a distinction.
Parameters
Parameters in the parameter menu are represented in the format Menu name > Parameter name in grey
type.
WARNING!
A warning symbol refers to risks that can result in severe or fatal injuries! The note contains safe-
ty measures to protect affected persons.
Instructions must be followed without exception.
CAUTION!
A caution symbol refers to risks that can result in property damage or personal injury
(minor injuries). The note contains instructions for preventing damage.
Instructions must be followed without exception.
Service manual XLP 504 / XLP 506
05/2018 | 08 9Please note
NOTES ABOUT SERVICE WORK
Special key combinations
Access to some of the printer functions is reserved for specially authorised service technicians.
Therefore, these functions are not otherwise accessible. In order to use these functions, the printer
must be restarted while simultaneously pressing a special key combination for a few seconds.
Serial numbers
Some assemblies were subject to one or more constructive changes and can therefore be ordered
in several versions. The spare parts catalog notes in those cases the serial number or the produc-
tion month/year of the machine, which is required to be compatible with the respective assembly.
The serial number can be found on the rating plate of the machine as illustrated below [1].
[1] Rating plate of an XLP 504. The printer bears the serial number 106378.
Printer state Key
combination Function
Startup
1+2+3 Start without motion control
3+4 Enter access code after startup, see chapter Access authoriz.
on page 136
1+4 Start bootloader, see chapter Forced bootloader start on
page 230
„Home“ screen
1+3+4 Enter access code, see chapter Access authoriz. on page 136
3+4
Measuring the label pitch automatically, see user manual, chap-
ter „Operation“ > „Setting and monitoring the printer“ > „Settings
in parameter menu“ > „Label pitch“
2+3 Slow material feed
1+2 Eject material (backwards)
Always
1+2+3+4 DebugDump, see chapter Reading out diagnostic data on
page 223
1+2+3 Reset
2+4 Standalone mode, see user manual, chapter „Special Applicati-
ons“ > „Standalone Operation“
[Tab. 1] Special key combinations for authorised service technicians.

Service manual XLP 504 / XLP 506
05/2018 | 08 10 Please note
Factory Settings
At the factory, all of the parameters are set to device-specific default values. These factory settings
can be restored at any time by executing System > Factory settings = „Factory defaults“.
Alternatively, the parameters can be set to customer settings instead of factory settings (System >
Factory settings = „Custom defaults“). Precondition: The customer settings were stored before with
System > Custom defaults.
Servicing data
The “Service Status” printout lists the most important service data of the printer. Some of the coun-
ters contained therein, such as the meterage of the print head, are incremented automatically. Oth-
er counters, such as the number of print head replacements, must be manually incremented by the
service technician. This is done by opening the corresponding parameter (Tab. 2).
Reset all counters: Open Tools > Service > Serv. data reset.
Menu Parameters Run to
Tools > Service
Service done Increase “Customer Service Deployments” counter
Head exchange Increase “Head Number” counter
Roller exchange Increase “Feed Roller Number” counter
Cutter change Increase “Cutter Number” counter
Serv. data reset Reset all counters to initial values
[Tab. 2] Those parameters increase the corresponding counters on the “Service Status” info printout.

Service manual XLP 504 / XLP 506
05/2018 | 03 11 Please note
FOR YOUR SAFETY
Intended use
The label printers XLP 504 and XLP 506 are designed for printing label material, using the thermal
or thermal transfer printing process. In addition, the dispenser version of the two printers can dis-
pense self-adhesive labels and can rewind the remaining backing paper (ar alternatively the com-
plete label material). It is possible to use a wide range of label materials and thermal transfer
ribbons. Label stock must be in roll shape or fan-folded. The label web can optionally be pulled-in
from outside the printer through the slots in the rear side or bottom plate.
Observe the technical specifications of the printer, see Technical data on page 26. Any other type
of or more extensive application will be considered abnormal use.
NOVEXX Solutions shall assume no liability for damage resulting from non-intended use of the ma-
chine.
Safety notes
Follow the instructions
Safe and efficient operation of the printer can only be guaranteed if you observe all necessary in-
formation.
• Before operating the printer, read the operating instructions and all other notes carefully.
• Observe the additional safety and warning notes on the printer.
Qualifications required
• Trained staff is required for inserting and changing foils and material.
• Users need to be instructed in the use of the printer so they can work safely and independently.
• Users should be able to resolve minor operational issues and faults by themselves.
• At least two users should be instructed.
Requirements for safe operation
• Only use the printer in enclosed areas with environmental conditions matching the values given
in the technical specifications!
• Only operate the printer on a plane, solid support.
• Make sure that the power supply socket for the printer is readily accessible!
• Only trained and authorized personnel should operate the printer!
• During operation, the print head can become hot! Care should be taken when touching the print
head!
• Do not make any modifications or any additional casing for the printer!
• Do not allow any liquids to enter into the printer!
• Repairs to the printer may only be performed by authorized specialists who are aware of the
risks involved!
• Lay the power supply cable, data cables and compressed air hoses (if applicable) in a way that
nobody can stumble over it.
• In case of emergency, switch off the printer and disconnect the power supply cable!
• Only use original accessories!

Service manual XLP 504 / XLP 506
05/2018 | 03 12 Please note
Protection against injuries by electrical current
• Only operate the printer using the system voltage indicated on the nameplate!
• Only connect the printer to a grounded power socket fitted to authorized standards!
• Connect only devices to the interfaces at the printer that fulfil SELV (safety extra-low voltage)
circuit requirements according to EN 60950!
Protection against injuries by mechanical action
• Only operate the printer when the cover is closed!
• Don´t wear loose long hair (if necessary, wear a hairnet).
• Keep loose jewellery, long sleeves, etc. away from rotating parts of the printer!

Service manual XLP 504 / XLP 506
05/2018 | 03 13 Please note
Warning notes on the machine
[2] Warning notes on the XLP 504.
CAUTION!
Warning notes on the printer provide important information for the operating personnel.
Do not remove warning notes.
Replace missing or illegible warning notes.
Warning note Meaning Article no.
The ´Pinch point´ warning note warns you of the danger po-
sed by the machine´s rotating parts; they can trap items and
draw them in.
A5346
The "Hot surface" symbol warns of a burn hazard if the sur-
face is touched. Allow the device to cool off before touching it. A5640
The blue label ´Read manual´ demands that operators read
the user manual. A5331
[Tab. 3] Meaning of the warning notes.

Service manual XLP 504 / XLP 506
05/2018 | 04 14 Technical Data
Technical Data
TECHNICAL DATA
Dimensions
Measures
(XLP 504) 275 x 266 x 463 mm (H x W x D)
(XLP 506) 275 x 336 x 463 mm (H x W x D)
[3] Dimensions of the XLP 504 (H=Height, W=Width, D=Depth).
Weight
Performance Data
Print head
•Print Technology: Thermodirect and thermotransfer printing
•Print head Type: „Flat Head“ Type (ceramic thin film flat head)
Printer Weight
XLP 504 basic / peripheral 14.0 kg
XLP 504 basic dispenser / peripheral dispenser 14.7 kg
XLP 506 basic / peripheral 15.5 kg
XLP 506 basic dispenser / peripheral dispenser 16.5 kg
406
(463)
57
3
98
3.50
153
12
25 315
267
(275)
191
(266)
53
6

Service manual XLP 504 / XLP 506
05/2018 | 04 15 Technical Data
•Print head characteristics:
Label sensor
The dark/light change at the reflex sensor is taken as the label beginning (= end of the reflex
mark)
[4] Measures and setting range of the punch / reflex mark.
Max. print length
The maximum print length depends on the following:
• Print head resolution
• Firmware version
• Memory allocation (see info printout „Memory Status“)
Zero line
Offset of the material zero line to the print zero line: 1 mm (what means that a stripe of 1 mm width
at the inner label margin is unprintable)
Printer Resolution
(Dot/mm)
Resolution
(dpi)
Printspeed
(mm/s)
Printspeed
(inch/s)
Max. printwidth
(mm)
XLP 504
8.0 203 50-254 2-10 104
11.8 300 50-200 2-8 105.7
23.6 600 50-150 2-6 105.6
XLP 506 8.0 203 50-200 2-8 168
11.8 300 50-150 2-6
CAUTION!
Hazard of malfunction of the power supply and restart of the printer (XLP 506).
Take into account the limitations regarding print contrast and print width, see chap-
ter (XLP 506) Print width limitations on page 20.
Sensor type Setting range
(Size c)
Punch length
(Size b) Punch width (Size a)
Transmission sensor
(Standard) 0–60 mm 0.8–14 mm min. 4 mm
Reflex-sensor
(optional) 6–66mm 4mm
(recommended)
12 mm
(recommended)
[Tab. 4] Required punch measures.
a
b
c
Z0211.cdr
Punch / Reflex markPunch sensor Label web

Service manual XLP 504 / XLP 506
05/2018 | 04 16 Technical Data
Fonts
• 17 Fixsize fonts , including OCR-A and OCR-B
• 3 scalable fonts (Speedo fonts)
• Truetype fonts are supported (also Unicode)
• Optionally can Truetype, Speedo and Fixsize fonts be stored on SD card
Modifying Fonts
• Up to factor 8 scaling in x/y direction
• Rotation by 0, 90, 180 and 270 degrees
Impression accuracy
[5] The impression accuracy depends on the print position on the label: the longer the distance to the gap is, the lower is
the impression accuracy. The maximum impression accuracy is at the gap position with +/- 1 mm.
Reading examples:
A: Print positioin 1 is located 50 mm behind the gap position. The maximum possible deflection from
the theoretical print position is +/- 1.5 mm.
B: Print positioin 1 is located 250 mm behind the gap position. The maximum possible deflection
from the theoretical print position is +/- 3.5 mm.
A
A
B
B

Service manual XLP 504 / XLP 506
05/2018 | 04 17 Technical Data
Those values are empirical for typical applications with common label stock / foil combinations.
Since the deflection of the print position strongly depends on the applied label stock / foil combina-
tion, it can turn out higher if unfavorable combinations are used.
Image formats
BMP, PCX, JPEG, TIFF, GIF, Easy Plug logos
Bar codes
All bar codes scalable in 30 different width and in the height.
2-dimensional bar codes
GS1 Databar & CC bar codes
Reduced Space Symbology (GS1 Databar) and Composite Component (CC) bar codes:
Printer emulation
Easy Plug
Codabar Code 128 A, B, C
Code 128 Code 128 UPS
Code 128 pharmacy ITF
Code 2/5 matrix MSI
Code 2/5 interleaved EAN 8
Code 2/5 5-line EAN 13 add-on 2
Code 2/5 interleaved ratio 1:3 EAN 13 add-on 5
Code 2/5 matrix ratio 1:2,5 EAN 128
Code 2/5 matrix ratio 1:3 Postcode (guide and identity code)
Code 39 UPC A
Code 39 extended UPC E
Code 39 ratio 2,5:1 Code 93
Code 39 ratio 3:1
Data Matrix Code (code according to ECC200)
Maxi Code
PDF 417
Codablock F
Code 49
QR matrix code
GS1 Databar-14 UPC-A + CC-A/CC-B
GS1 Databar-14 truncated UPC-E + CC-A/CC-B
GS1 Databar-14 stacked EAN 13 + CC-A/CC-B
GS1 Databar-14 stacked omnidirectional EAN 8 + CC-A/CC-B
GS1 Databar limited UCC/EAN 128 + CC-A/CC-B
GS1 Databar expanded UCC/EAN 128 + CC-C

Service manual XLP 504 / XLP 506
05/2018 | 04 18 Technical Data
Label Stock
Material Types
Thermodirect material, thermotransfer material, synthetic ribbons: PE, PP, PVC, PA in rolls or fan-
folded.
Material Thickness
•Self-adhesive labels: 60 - 160 g/m2
•Cardboard labels: (XLP 504) max. 240 g/m2; (XLP 506) max. 190 g/m2
Material Width
Label Length
Gap size
Gap size between the labels on the backing material:
• min.: 1.0 mm
• max.: Label length -15 mm
Label Roll
•Winding Direction: Labels facing inward or outward, internal rewinder: labels facing outwards
•Roll diameter:
•Core diameter: 38.1 mm (1.5“), 76.2 mm (3“) oder 101.6 mm(4“); cores with 76.2 (3“) or
101.6 mm (4“) can be applied with the core adapter supplied with the printer.
Printer type Material width
XLP 504 15 - 120 mm
XLP 504 dispenser 30 - 110 mm a
a) The material passage width is limited by the dispensing sen-
sor, which is mounted at the side. If a dispensing edge
without a sensor is applied (foot switch operation), the passa-
ge width is as large as at the standard printer.
XLP 506 50-185 mm
XLP 506 dispenser 50-170 mm a)
[Tab. 5] Overview material width.
Printer Min. length Max. length
XLP 50x 5 mm max. print width a
a) See Max. print length on page 15.
XLP 50x dispenser 30 mm b
b) (XLP 504) For label length less than 35 mm, the optional label sensor for short labels is recommended
200 mm
XLP 504 dispenser (With optional label sensor for short labels) 5 mm 200 mm
[Tab. 6] Overview label length.
Roll / Conditions Roll Ø
Label roll for normal printing operation max. 210 mm
Label roll for dispensing operation (with 100 mm core-Ø) max. 190 mm
Take-up roll for winding/dispenser operation max. 120 mm
[Tab. 7] Diameter of material and winding roll

Service manual XLP 504 / XLP 506
05/2018 | 04 19 Technical Data
Thermotransfer Ribbon
Ribbon Roll
•Winding Direction: Colour-side rolled inwards or outwards
•Roll dimensions:
Connections, device data
Interfaces
Electronic Configuration
External Ø max. 80 mm a
a) Corresponds for example to 450 m standard ribbon type Novexx 4903
Core Ø 25 mm (1”)
Width b
b) Generally counts: The thermal transfer ribbon must overlap the label
2 mm on each side.
For labels width > max. print width count the foil width: (XLP 504)
110 mm, (XLP 506) 172 mm.
(XLP 504) 25 -110 mm
(XLP 506) 54-172 mm
Protection class I
Mains Voltage 100-240 V (AC)
Mains Frequency 60/50 Hz
Power Consumption Max. 320 W
In standby mode depending on the equipment 30-40 W
Current Consumption 3.0 -1.5 A
RS-232 Baud: 1200-115200, 8- bit; suitable connection cord: 1:1 D-Sub 9 extension
lead (connector-jack)
RS-422/485 On optional I/O board, D-Sub 15, Baud: 1200-115200, 8-bit
Ethernet 10/100 Base T with TCP/IP, LPD, RawIP printing, DHCP, HTTPD, FTPD,
SNMP
USB (V1.1) USB-A host port, USB-B device port, Transmission rate 12 Mbps
Signal interface On optional I/O board, D-Sub 15
CPU 32 bit (NetLogic)
RAM 64 MB SDRAM
ROM 4 MB Flash
Memory card SD
Realtime-clock Present
Control Panel 4 buttons
LCD graphics display with 128x64 pixels, illuminated

Service manual XLP 504 / XLP 506
05/2018 | 04 20 Technical Data
Specifications for dispenser
Ambient Conditions
Certificates and Markings
CE, TÜV-Mark, CTÜVUS-Mark, FCC, EAC, CCC
The regulation EN 55032 demands for class A devices the following text to be printed in the manual:
„WARNING: This is a class A product. In a domestic environment this product may cause radio in-
terference in which case the user may be required to take adequate measures.“
(XLP 506) Print width limitations
If the max. values given in the following tables are exceeded, malfunction of the power supply will
be most probably the consequence, followed by a restart of the printer.
203 dpi printhead
Speed, while the rewinding-Ø is calculated: 75 mm/s (3“/s)
Speed, while the material is fed back: 75 mm/s (3“/s)
Distance dispensing edge - print zero line: 25 mm
Distance punch sensor - print zero line: 71 mm
Max. admissible outer diameter of the rewound backing paper roll: 120 mm
Installation location • Inside buildings
• Protected from wind and spray water
•Dry
• Not in areas with potentially explosive atmosphere
Operating Temperature 5 to 35°C
Storage Temperature -4 to 60°C
Relative Humidity 35-75% (non-condensing)
Protection category IP 21
Noise < 70dB(A)
Sea level Operation to max. 2000 m above sea level
Print speed Limitations
mm/s Inch/s
51 2 Max. admissible print contrast: 120%
76/102 3/4 Max. admissible print contrast at print width > 100 mm: 110%
Max. admissible print width at print contrast > 110%: 100 mm
127/152 5/6 Max. admissible print contrast at print width > 75 mm: 85%
Max. admissible print width at print contrast > 85%: 75 mm
178/203 7/8 Max. admissible print contrast at print width > 55 mm: 67%
Max. admissible print width at print contrast > 67%: 55 mm
[Tab. 8] XLP 506: Print width limitations for 203 dpi printheads.
Other manuals for XLP 504
1
This manual suits for next models
1
Table of contents
Other Novexx Solutions Label Maker manuals

Novexx Solutions
Novexx Solutions ALS 20 series User manual

Novexx Solutions
Novexx Solutions AP 5.4 User manual

Novexx Solutions
Novexx Solutions XLP 514 User manual

Novexx Solutions
Novexx Solutions ALX 92x User manual

Novexx Solutions
Novexx Solutions LA-BO Series User manual

Novexx Solutions
Novexx Solutions XLS 20x User manual

Novexx Solutions
Novexx Solutions LA-BO XPA 934 LH User manual

Novexx Solutions
Novexx Solutions ALS/XLS 204 User manual

Novexx Solutions
Novexx Solutions 64- series User manual

Novexx Solutions
Novexx Solutions 64-04 User manual