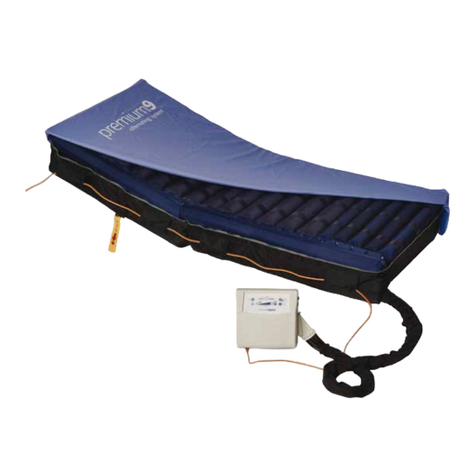
Novis ProCair Trio User manual

pressure care and patient handling specialists
novis.com.au /1300 738 885
StaticModeProgrammingOption
ProCairTrio
User Guide

2
Before operating this medical equipment, it is
important to read this User Guide and understand
the operating instructions and safety precautions.
Failure to do so could result in patient injury and/or
damage to the product.
We recommend you keep the
User Guide near the product.
Therapeutic devices and/or medical equipment
should only be used in accordance with
manufacturer’s instructions and under the consent,
supervision and management of a suitably
qualified health professional.
If you have any questions, please contact
Novis Healthcare on 1300 738 885.
Novis Healthcare has a policy of continuous
product improvement and reserves the right to
amend specifications presented in this guide.
Information correct at time of production
(September 2020) .
© 2020 Novis Healthcare. All rights reserved.
Definition of Symbols Used
The following symbols may appear in this User
Guide, on the product, or on its accessories.
Some of the symbols represent standards and
compliances associated with the control unit and
its use.
Important information
Caution
Electrical hazard
Infection control
Do not...
Class II Protection against Electric Shock
Type BF Applied part
Alternating Current
Manufacturer
Manufacturing Date
Serial Number
Refer to Manual
Disposal: Do not dispose of this product
as unsorted municipal waste. Collection
of such waste separately for special
treatment is necessary.
Protection against foreign object
and vertically falling water drops.
Important Notice
~

3
ProCair Trio User Guide
Contents
Impo r tan t Noti ce 2
Co nte nts 3
S ys tem O ver v iew 4
In ten de d Us e 5
S afe t y P re cau ti ons 7
S ys tem P rep ara tio n 9
Patie nt S e t Up 12
Operation - Control Panel 13
Op eration - Mode 16
Operation - Pull Cap CPR Release 17
Operation - Deflation / S tor ag e 18
Care an d Cl eanin g 19
Troubles ho oting 21
Technical Specifica tions 2 3
EM I/ EM C S tate me nt and M an ufa cturer ’s Dec laration 25
Wa r ra nt y S t a te m en t 3 0
SOFT GOODS
3 YEAR WARRANTY
CONTROL UNIT
3 YEAR WARRANTY

4
The ProCair Trio is an alternating mattress
replacement system for the prevention and
treatment of skin breakdown and pressure injuries
in patients of high to very high risk. It is designed
to replace your existing bed mattress on either a
standard or profiling electric bed frame.
The system is constructed from transverse air cells
that cyclically inflate and deflate in an alternating
pattern, providing gentle and dynamic support.
Cyclic alternation of pressure prevents arterial and
venous capillary occlusion in the patient’s surface
tissue – maintaining and stimulating the flow of
blood and lymphatic fluids through these tissues
to provide essential oxygen and remove metabolic
waste.
The system consists of the following components:
Mattress replacement with umbilical air
hoses and CPR release
Controlunit
Power cord
User Guide
Wheeled bag
It is recommended that all packing materials and
User Guides be kept in the carry bag provided, for
ease of storage and/or transport.
Part Numbers of this system are:
APMPC-R05
APMPC-R05K
System Overview
RAPID RELEASE
CPR VALVE
CONTROL
UNIT
UMBILICAL
CORD
BED EXIT ALARM SENSOR PAD
CONSTANTLY INFLATED
STATIC SIDE BOLSTER
7X INDIVIDUALLY
DISCONNECTABLE
NARROW FOOT CELLS
CORD RETENTION FLAP

5
ProCair Trio User Guide
Indications
The ProCair Trio mattress replacement systems
are indicated for the prevention and treatment of
skin breakdown and pressure injuries in patients of
high to very high risk.
Contraindications
This product should not be applied to
patients suffering from polytrauma with
fractures of spine, pelvis, extremities
and skull. Patients with neurological
impairments and missing body perception
need their physician’s prescription.
Alternating pressure should not be applied
to pain or pain-sensitive patients.
People who suffer from allergies against
any of the substances used for mattress or
cells body should not be positioned on the
mattress. This product is designed for users
whose age is above 12 years.
Intended Care Setting
Intended care settings for the ProCairTrio mattress
replacement systems are Home healthcare and
Professional healthcare.
Working Environment
Control Unit:
Tempe r a t u r e : 15 ° C to 35 ° C (59° F t o 95° F )
Humidity: 30% to 75% non-condensing
Shipping/ Storage
Environment
Control Unit:
Tempe r a t u r e : 5 °C to 6 0°C (41° F to 14 0° F )
Humidity: 30% to 90% non-condensing
Mattress:
Temperature: -10°C ~ 40°C
Humidity: 10% to 90%
Warning and Cautions
Keep the control unit and mattress away from
open flame.
Ke e p th e m a t tre s s a way f r o m s h a r p o b j e cts.
Do not place a heating device close to the
mattress system.
We i g h t g u i d e s s h o u l d b e u s e d fo r g u i d a n c e
only, professional judgement should be used
at all times.
The Alternating System should always be used in
accordance with your Institutions pressure care
guidelines.
Re-positioning of the patient is always
recommended when using an Alternating
Pressure Air Mattress (APAM).
The Control unit can only be repaired by an
authorised technician.
The P u m p s h o u l d o n l y b e r e p a i r e d b y a n
authorised professional.
No modification of this equipment is
allowed.
Do not drop the control unit or store it in direct
sunlightor extremecold conditions.
Intended Use

6
Intended Use
Do not use the system in the presence of
any flammable gases (such as Anesthetic
Agents).
Power cable & pump shall be placed at the
foot-side of the patient to prevent any risk of
strangulation due to cable.
Battery is installed inside device. Battery can
only be re p lace d by an au t h o r ise d tec h n i c ian.
This dev i c e sh o u l d b e n o t b e us e d a d j a c e n t
to or stacked with other equipment.
The d evice sho uld b e p o s i tion e d w h e r e i t
can be easi l y d i s c o n n ec ted from mai n p ower
outlet.
Do not obstruct the mains plug or position the
equipment where the connection to the mains line
can be accidentally disconnected.
If pain, irritation, numbness, swelling, or redness
occurs discontinue use and contact a healthcare
professional.
Close supervision is necessary when the product is
used by, on, near children or physically challenged
individuals.
This device can be used in home healthcare and
professional healthcare environment.
Medical electrical equipment needs special
precautions regarding EMC and needs to be
installed according to the EMC information
provided.
This device should not be used adjacent to or
stacked with other equipment.
Connecting S ystem to Other
Devices
There are no other devices necessary for normal
operation.
The ProCair Trio mattress replacement can
befit t e d t o m os t s t a n d a r d h o s p i t a l o r s i n g l e
bedbases.
The ProCair Trio mattress replacement can
befitted to most king single sized hospital or
king single bed bases.
The ProCair Trio control unit can be fitted to the foot
board of most hospital or aged care beds.
Therapeutic devices should only be used in
accordance with manufacturer’s instructions and
under the consent, supervision and management
of a suitably qualified health professional.
Novis Healthcare accepts no liability for any use,
change or assembly of the product other than that
stated in this User Guide. Refer to our Warranty
Statement for more details.

7
ProCair Trio User Guide
Safety Precautions
General Safety Precautions
Read all instructions before using this
medical device
This system must be used on top of an
appropriate sized bed frame and the
appropriate operating environment as stated
in this User Guide.
Before commencing set up or installation,
ensure the power is switched off and
disconnect the power cord from the control
unit. Novis Healthcare recommends using
the cord retention loops on either side of the
mattress replacement where possible and
attaching it to an electrical outlet by the head
of the bed.
Minimise layers between patient and
mattress and secure bed sheets loosely
so as not to affect the alternating cell
movement. As part of a sensible pressure
injury prevention strategy, avoid wearing
clothing that may cause areas of localised
damage due to creases, seams, objects in
pockets, etc.
Never use sharp objects or electrically heated
blankets on or under the system.
Product top cover may present a suffocation
risk. It is the responsibility of the caregiver to
ensure that the patient can use this product
safely.
Avoid blocking the air intakes of the control
unit, located at the rear of the unit. Do not place
items such as blankets over the control unit.
Bed frames used with the systems can vary
greatly depending on the specific healthcare
setting (ie hospitals, aged care, home care,
etc). It is the responsibility of the caregiver to
take the necessary precautions to ensure the
safety of the patient. This includes, but is not
limited to, the appropriate use of side rails to
prevent falls.
Only the control unit and mattress combination
as indicated by Novis Healthcare should be
used, otherwise the correct function of the
product cannot be guaranteed.
User Capacity
The maximum recommended patient weight
for this system is 250 kilograms.
The minimum recommended patient weight
for this system is 40 kilograms.
Do not exceed this safe working load or you
risk injury to the patient or carer and damage to
the product.
The purpose of the following safety precautions are to direct attention to possible dangers. The safety symbols
and their explanations require careful attention and understanding.
The safety warnings by themselves do not eliminate any danger. The instructions or warnings they give are not
substitutes for proper accident prevention measures.
For your own safety and the safety of equipment, always take the following precautions.

8
Protection Against Hazards
Fluids
Avoid spilling fluids on any part of the control unit.
If spills do occur:
Turn off control unit power and disconnect
the unit from mains electricity supply.
Immediately clean fluids from the casing
by wiping with a soft cloth.
Ensure there is no moisture in or near the
power inlet, control handset and power cord
before reconnecting the power supply.
Check the operation of controls and other
components around the spill area.
Fluid or liquid remaining on the electronic
controls can cause corrosion that may
cause the electronic components to fail.
Component failures may cause the unit
to operate erratically, possibly producing
potential hazards to patient and carers.
Explosion Hazard
Equipment is not suitable for use in the presence of
a flammable anaesthetic mixture with air, oxygen
or nitrous oxide.
Do not use in the presence of smoking
materials or openflame – air flowing through
the mattress will support combustion.
Do not open the control unit – risk of
electrical shock. Refer servicing to qualified
service personnel.
Disposal
Dispose of all components (control unit including
batteries, air filter, air cells, mattress cover
and base) according to local procedures and
regulations or contact Novis Healthcare for advice.
Power Cord
The system should never be operated with a worn
or damaged power cord. Keep the cord away from
heated surfaces. Should the power cord be found
to be worn or damaged, contact Novis Healthcare
for a replacement.
Interference
Although this equipment conforms to the
intent of directive IEC 60601-1-21in relation to
Electromagnetic Compatibility, all electrical
equipment may produce interference. If
interference is suspected, move equipment
away from sensitive devices or contact Novis
Healthcare.
1 IEC 60601-1-2. Medical Electrical Equipment - Part
1: General Equipments for Safety, Amendment
No. 2. Collateral Standard. Electromagnetic
CompatibilityRequirements and Test).
Safety Precautions

9
ProCair Trio User Guide
System Preparation
Carefully unpack the system and inspect each item for any damage that may have occurred during transit and
handling. Any damage or missing components should be reported to Novis Healthcare as soon as possible.
Confirm there are no sharp objects in the
immediate area which may risk damage to the
mattress replacement.
1Remove your existing mattress and place
the mattress replacement on top of your
bed – printed top cover facing upwards and
umbilical cord towards the base of the bed.
2Attach to the bed by securing the adjustable
straps, located on the underside of the
mattress base under each bed end. On a
profiling bed, secure the straps around the
moveable sections of the base. Ensure the
buckles are securely fastened and straps are
pulledtight.
Do not secure mattress straps to bed side rails
– straps will tear.
Ensure that straps do not interfere with the
operation of the bed, and that the mattress is
properly secured. Failure to do so could result
in patient injury or equipment damage.
3Check CPR sealing valve is closed – the
turning tab and the arrows must be aligned to
‘CLOSED’ position.
Indicator CLOSED indicator arrows should
align with CPR indicator arrow.
UMBILICAL CORD
BED BASE

10
System Preparation
4Check that the foot cell internal quick
release air hose connectors are securely
connected. Open the top cover by unzipping
the CPR-side of the mattress (zipper located
at foot end), check each foot cell connector
is secure by pushing the air hose connectors
to g e th e r ( the r e s h o u l d b e n o m ove me nt). I f a
connection is open, a click will be heard once
connector is firmlyclosed.
5Hang the control unit over the foot end of the
bed, using the inbuilt spring loaded hanging
hooks. Pull the hooks by the rubber tabs to
prevent accidentally trapping your fingers.
Ensure it is secure before use; failure to do so
could result in equipment damage.
6Connect the umbilical connectors to the
sockets on side of the control unit. Listen
for a click as confirmation the connector is
locked in place.
Ensure the correct control unit is used.The
mattress is not compatible with other control
unit which looks similar.
Straighten any twists in the umbilical cord
air hoses to ensure uninterrupted air flow
between the control unit and mattress.
Ensure the umbilical cord is not trapped
between the mattress and bed. Failure to do
so could result in an under inflated mattress
leading to patient injury.

11
ProCair Trio User Guide
System Preparation
7Feed power cord through the cord retention
flaps along either side of the mattress
base. Ensure all press studs are fastened.
Inse r t p o we r c o r d p l u g i n t o th e side of t h e
control unit, then connect to an appropriate
electrical outlet and switch on mains power.
TheStandbyindicator on the control unit will
glow amber, confirming the control unit is
connected to a power source.
Ensure the power cord is not under strain; is
free from obstruction; and is secured safely so
as not to be a trip hazard.
8On the control unit, press and hold the
Power button for a minimum of three
seconds. The Power indicator will
glow green to indicate the system is
operational and automatically inflating.
Whileinflating, the Pressure
Setting indicators will flash blue
and the Max Inflate indicator
will flash green. Allow up to 20 minutes for
completeinflation.Do not lie a person (or any
weight) on the mattress during initial inflation.
Do not place a person (or any item) on the
mattress during initial inflation.
9When initial inflation is complete, the
Pressure Setting and MaxInflate indicators
will extinguish, to indicate the system is
ready for use. The system automatically
defaults to Alternating Mode at start up,
with AutoCair feature (automatic weight
detection) always in operation to select an
appropriate pressure for patient support
according to mattress load, unless
overriddenmanually.
CPR RELEASE
POWER
STANDBY
ALTERNATE
STATIC
PRESSURE
SETTING
ProCair Trio
LOCATED AT
MATTRESS
HEAD END -
TWIST TO OPEN
NORMAL
<30%
FLAS HING: CHARGIN G
FLASHING: LOW B ATT
FLASHIN G
SERVICE DUE
LOW PRESSURE
SOFTER NORMAL FIRMER
HIGH PRESSURE
STARTUPFAILURE
ALTERNATION
FAILURE
SENSOR
DISCONNECTED
ALARM GUIDE
LOCKED
ON
AUTO
FOWLER
BED EXIT ALARM
see alarm guide on left
ALARM INDICATORS
BATT.
IN USE
POWER
3 SEC
3 SEC

12
Patient Set Up
Once initial inflation is
complete, a patient may be
placed on the system.
1Once the mattress is fully inflated, bedding
can be replaced.
Secure sheets looselyenough to ensure
they do not interfere with cell alternation.
2Place the patient on to the ProCair Trio
mattress.
The system will automatically set an
optimum pressure for the patient’s weight
(weight range from 40 to 250 kg) and will
continuously alternate over a 15 minute
cycle.
3Pe r for m a ‘ b o t to m i n g o u t ’ tes t (a te s t to
ensurethepatient is adequately suspended
away from the base).
“Bottoming Out” Test
1 Check system is in alternation mode by
ensuring the ALTERNATE indicator is
illuminated ,and that three out of every four
air cells is inflated while the fourth cell is
deflated.
You may need to unzip the cover to feel the
cells for inflation.
2With the patient lying supine, unzip one
side of the top cover just past sacral region
(lowerspine).
3Slide your hand underneath the patient and
feel for a deflated cell under the patient’s
lower spine. The inner static cell will remain
inflated, however your hand should easily
slide between patient and base.
4If your hand can pass under the patient,
thenpatientis adequatelysuspended.If
not, manually adju s t pre s s u r e t o ‘ firmer’
and wait at least one cycle (15 minutes)
for pressure to increase before repeating
step3.
If m a n u a l p r e s s u r e a d j u s t m e n t f a i l s ,
press Max Inflate to force mattress to
full inflation. Wait at least one cycle (15
minutes) for pressure to reach maximum
pressure, then press Alt to return to an
alternation cycle. Wait at least one more
cycle (15 minutes) for pressure to increase
before repeating step 3.
5We recommend repeating the Bottoming
Out test at least 15 minutes after any
manual pressure readjustment and
regularly every 2 hours during the system in
operation.

13
ProCair Trio User Guide
Operation - Control Panel
APressure Setting - FineTuning
The control unit constantly monitors mattress
loading to automatically adjust to the optimal
pressure setting.
For individual comfort or therapy needs, slight
adjustments to the automatic pressure setting can
be made. These arrows allow optimal pressure
setting to be fine tuned softer or firmer.
“Normal” light illuminates to indicate standard
weight detection is functioning.
The control unit would not allow the pressure
setting to go below the safe lower limit for the
patient according to mattress load
BPressure Setting Display
Displays pressure setting range selected.
CMode
Pressing the Mode button toggles between
Alternate mode and Indefinite Static mode (all cells
inflated with no dynamic alternation) Indefinite
Static mode allows for constant low pressure
therapy and user adjustable pressure settings.
The selected mode is indicated by an LED indicator.
DAlarm Indicator
The three amber LEDs light up in 5 different
patterns to indicate different faults the system
may be experiencing, this is accompanied by an
audible beeping signal. Refer to the alarm guide
on the left side on the control panel to look up the
fault indicated, also refer to the corresponding
troubleshooting guide (page 21) for detail, alarms
include:
LOW PRESSURE - possible loss of pressure
CPR RELEASE
POWER
STANDBY
ALTERNATE
STATIC
PRESSURE
SETTING
ProCair Trio
LOCATED AT
MATTRESS
HEAD END -
TWIST TO OPEN
NORMAL
<30%
FLASHING : CHARGING
FLASHING: LOW BATT
FLASHING
SERVICE DUE
LOW PRESSURE
SOFTER NORMAL FIRMER
HIGH PRESSURE
STARTUP FAILURE
ALTERNATION
FAI LURE
SENSOR
DISCONNECTED
ALARM GUIDE
LOCKED
ON
AUTO
FOWLER
BED EXIT ALARM
see alarm guide on left
ALARM INDICATORS
BATT.
IN USE
A
B
C
D D
E
F
G
JH
I
K
Press the left arrow
to select a softer
pressure pressure
range
Press the right
arrow to select a
firmer pressure
pressure range

14
Operation - Control Panel
HIGH PRESSURE - mattress pressure too high
STARTUP FAILURE - system has failed to reach
optimal working pressure from startup
ALTERNATION FAILURE - mattress has failed to
alternate
SENSOR DISCONNECTED - umbilical connector not
plugged in properly or not detected
E Alarm Mute/Panel Lock
Pressing the button briefly turns audible alarm off
temporarily. Alarm will reactivate in 20 minutes if
the issues has not been resolved, or immediately if
new fault detected.
Long-press the button for a minimum of 3 seconds
locks or unlocks the control unit panel to prevent
unintended interference (e.g. by unauthorised
personnel).
The “LOCKED” light will be lit when the control panel
is locked.
FMax Inflate
Rapidly inflates mattress to maximum pressure
in Static mode. All pressure setting indicators
will illuminate. No other pressure setting can be
selected when the system is in Max Inflate mode.
System will automatically return to Alternating
mode after 20 minutes.
GAutomatic Fowler Boost Indicator
Automatic Fowler Boost mode is activated when
the mattress backrest detected to be inclined
by 30° or more, to increase mattress pressure to
accommodate extra loading in the sacral region.
This feature helps to prevent the risk of bottoming
out.
A green “AUTO FOWLER” light illuminates when this
function is active. It is automatically deactivated
when the mattress backrest is profiled below 5°.
H Power/Standby and Service Indicator
Press and hold the Power button for at least 3
seconds to turn the system power on and off. A
green light above the button is lit when the control
unit is switched on and running.
The “Standby” light is lit to indicate unit is
connected to mains electricity but not switched on.
When periodical servicing is required, the amber
Standby light will flash. Please contact Novis
Healthcare for system maintenance.
IBattery In Use Indicator
When mains power is disconnected either
intentionally or unintentionally (e.g. during a power
outage), the control unit will automatically switch
to backup battery power to provide up to three
hours of continued operation.
The BATT. IN USE light will flash, accompanied by
an audible beeping alarm to indicate the control
unit has switched to battery power, in case the user
needs to take corrective action.
Once the audible alarm has been silenced by
pressing the MUTE button, it will not sound again
until mains power is restored and disconnected
again.
When the “ Battery In Use” Indicator is illuminated,
please check if mains power is disconnected
unintentionally.
J Battery Charge Indicator
Lights up in green or amber in the following
patterns to indicate battery charging status:

15
ProCair Trio User Guide
Operation - Control Panel
CONTINUOUS GREEN-normal
FLASHING GREEN - charging
CONTINUOUS AMBER - 30% remaining power
or less
FLASHING AMBER (with audible alarm) - 10%
remaining power or less
When the light is fla s h i n g i n a m b e r, i m m e di a te
connect control unit to mains power to avoid
interruption to therapy due to power failure
Note: It will take 16-20 hours to fully charge the
battery.
KBed Exit Alarm
Pressing the button turns Bed Exit Alarm on and off.
The ON light above button illuminates to indicate the
function is active.
When Bed Exit Alarm is active, as soon as the sensor
in the sacral area of the mattress detects patient
egress, it will sound an audible beeping alarm and
the BED EXIT ALARM light will flash.
The alarm may be silenced by pressing the mute
button, when sensor pad detects patient presence or
when the alarm is turned off.

16
Mode
In Alternating Mode, alternate
mattress cells inflate and deflate
following a fixed cycle time of 15 minutes, with the
exception of static head cells.
Alternating mode is used for normal therapeutic
function.
In Indefinite Static Mode, all mattress
cells remain inflated, with adjustable
pressure allowing for constant low pressure
therapy benefits.
The system will operate in Indefinite Static Mode
until manually changed to Alternating Mode.
In Indefinite Static Mode, all mattress cells remain
inflated, with adjustable pressure allowing for
constant low pressure therapy benefits.
The system will not automatically revert
to Alternating mode from Indefinite Static
mode.
Auto Fowler Boost
Fowler Boost mode will automatically
become active whenever the head
of the mattress is inclined to a 30° or
greater angle.
This mode increases air pressure to the cells, to
compensate for the additional load of a seated
patient. This automatic safety measure allows
patients to remain in a seated position while
minimising the risk of bottoming out.
Once the head of the mattress is brought back to
a reclined position (or below a 5° angle), Fowler
Boost mode will automatically disengage.
Backup Battery
The lithium-ion backup battery is designed to
provide temporary uninterrupted therapy when
mains power is unavailable eg during patient
transfer or in a power outage.
The control unit automatically switches to battery
power when mains power is disconnected during
operation (when system is switched on and
running).
An alarm will sound to alert users that the control
unit has switched to battery operation in case
the change was unintended, so that mains power
can be reconnected if necessary. Press MUTE to
disable the audible alarm, which will not sound
again until mains power has been restored and
disconnected again.
Up to 3 hours of continuous operation can be
expected from a new, fully charged battery,
however battery capacity will decrease with use
as it ages.
The backup battery automatically recharges when
mains power is connected. The control unit does
not need to be switched on to recharge the battery.
Recharge Time:
Control Unit OFF - up to 6 hours
Control Unit RUNNING - up to 24 hours the
BATTERY CHARGE INDICATOR light will flash in
green during charging.
When the system is not in use for extended periods,
it is recommended that the battery be charged
every 6 months to maintain its condition.
The battery unit is a consumable part and has a
usable life of up to 3 years and should be replaced
by an authorised Novis repair agent.
Operation - Mode
AL
TERN
AT
E
ST
A
TIC
FOWLER

17
ProCair Trio User Guide
Operation - Pull Cap CPR Release
CPR Release
Rapid deflation of the mattress may be required
for emergency treatment (or to decommission the
unit).
The Rapid CPR valve is located at the top of the
mattress, to the right of the patient’s head.
If emergency treatment is required, turn the CPR
valve to the ‘OPEN’ position.This will rapidly deflate
the entire system, including static head cells in 10
seconds.
To reinflate the system after the Rapid CPR valve
has been released, remove patient from mattress,
turn the cap in either direction by one notch to the
‘CLOSED’ position. Ensure control unit is switched
on, press MAX INFLATE and wait for the system to
regain pressure.
Return patient to mattress, then select Alternation
mode to continue therapy.
Transport Function
To prepare for patient transport, press
the Max Inflate button and wait 15
minutes to ensure all cells are fully
inflated.
Remove the umbilical air connector from the
control unit and firmly place cap over connector
until two clicks are heard. Air will remain in the
system for up to 24 hours, depending on patient
and environmental circumstances.
Specialised Heel Therapy
The specialised HeelCair zone enables the seven
narrow alternating air cells in the heel zone to be
disconnected, to remove all pressure on a patient’s
heels without interruption to mattress alternation.
To disconnect each of the seven heel zone cells,
unzip the top cover and locate the top air hose
connector of each heel cell. Press the grey tab and
remove the male connector from the air supply
line. A one-way air valve will protect the rest of
the system from deflation and the heel cell will
immediate deflate.
Bed Exit Alarm
When activated this feature constantly monitors
for patient presence and signals to indicate the
patient has left the mattress.
To activate the CairAlert function, lay patient on
the mattress and press Bed Exit – the ON indicator
glows green to confirm function is active.
If the patient leaves the mattress, an audible alarm
sounds and the BED EXIT ALARM light will flash.
To reset, press Alarm Mute and return patient to the
mattress, the alarm will reset once patient weight
is detected.
To deactivate the alarm, press BED EXITbutton
again, the ON light will extinguish to indicate the
alarm is off.

18
Operation - Deflation / Storage
Deflation and Storage
1
Press the power button for a minimum of three
seconds to switch off the control unit.
2Switch off mains power and unplug the power
cord from the mains outlet.
3Open CPR release to release air and deflate
all cells.
4Press the two locking tabs on the umbilical
cord connector to detach the connector from
the control unit.
5Once air has been released from the system,
detach the mattress from the bed by
unfastening the straps, then fold and roll
the mattress from head end to foot end for
storage.
6Return all items to the custom carry bag for
safe keeping
CPR RELEASE
POWER
STANDBY
ALTERNATE
STATIC
PRESSURE
SETTING
ProCair Trio
LOCATED AT
MATTRESS
HEAD END -
TWIST TO OPEN
NORMAL
<30%
FLAS HING: CHARGING
FLAS HING: LOW BATT
FLASHIN G
SERVICE DUE
LOW PRESSURE
SOFTER NORMAL FIRMER
HIGH PRESSURE
STARTUP FAILURE
ALTERNATION
FAI LUR E
SENSOR
DISCONNECTED
ALARM GUIDE
LOCKED
ON
AUTO
FOWLER
BED EXIT ALARM
see alarm guide on left
ALARM INDICATORS
BATT.
IN USE

19
ProCair Trio User Guide
Cleaning and Infection Control
It is recommended that the ProCairTrio
system is cleaned every two weeks if in
constant use.
Top Cover Cleaning
Unzip and remove the top cover from the base
before washing (refer page 18 for instructions).
For basic care and cleaning, wipe down with warm
water containing PH neutral detergent.The top
cover can also be machine washed at a maximum
of 95° C (203° F) using neutral detergents.
Refer to the top cover wash tag for detailed
cleaning instructions.
Do not use system without top cover.
Base and Cells Cleaning
Swab the mattress base and cells with a solution
of sodium hypochlorite or similar (up to 10,000
ppm available chlorine). Dry thoroughly before
reassembly.
Do not machine wash or tumble dry the air cells or
mattress base.
If cleaning or disinfection is required, do not
allow fluid to enter air cells and air hoses.
Control Unit Cleaning
Disconnect control unit from mains power before
cleaning. Gently wipe down the external case with
a soft cloth.
Soak the cloth in warm water containing mild pH
neutral detergent, and wring any excess water
before gently wiping all external controls. Repeat
the process with a dry cloth to remove excess
moisture. A soft bristled nylon brush can be used to
gently clean crevices.
Ensure the control unit is disconnected from
mains power before cleaning.
Do not spray disinfectant directly on to the
control unit, or immerse the unit in water or
other fluid.
Disinfection
The mattress, top cover and control unit may
be decontaminated by a solution of sodium
hypochlorite or similar (up to 10,000 ppm available
chlorine). Dry thoroughly before use.
For infection control, swab with a solution of
sodium hypochlorite or similar (up to 10,000
ppm available chlorine). Dry thoroughly before
reattaching and use.
Care and Cleaning
To prevent cross contamination, the mattress should be examined and disinfected between patient use.
Clean the mattress in accordance with local infection control policy and government regulations. Failure
to do so could cause patient or personal injury.
The mattress is not protected against excessive amounts of fluid. Do not immerse the control unit in fluid.
Switch off and disconnect the control unit from mains power supply before cleaning. Failure to do so
could result in equipment damage or electric shock.
Do not use high temperature autoclave steam cleaning devices or phenolic based products for cleaning.
This could result in damage to the equipment and may result in damage to the polyurethane coating, or
negate the biocompatibility properties of the fabric.

20
Top Cover Removal
1Raise the waterfall skirt and locate the zippers at
the foot end of the mattress.
2Starting with either zipper, run the zipper along
the side of the mattress towards the centre of the
head end.
3Repeat with other zipper. The top cover can now
be de t ac h e d f r o m t h e m a t tr e s s b a se.
To reattach the top cover to the mattress base,
first reattach the zipper running in the opposite
direction to the CPR.
Second reattach the zipper running towards the
CPR. Then close both zippers by zipping towards
the foot end of the mattress.
Air Cell Disconnection
1Switch off power supply to the control unit and
disconnect the air hoses and power cord.
2Place the control unit face down on a soft, flat
surface with back panel uppermost (use a soft
cloth to prevent scratches).
3Use a small screwdriver to carefully remove the
air filter cover. Clean the dust from the filteror
discard and replace with a new filter.
4Refit the air filter cover to the control unit before
use. It is recommended that the air filter be
replaced each year. Replacement air filters are
available.
Service Due
To ensure optimum performance and minimise potential
safety risk, Novis or its authorised service agent should
perform Preventative Maintenance Service check
annually for the mattress system.
Care and Cleaning
Note: This does not indicate any component of
sub-assembly is defective.
The Service Due amber light will be lit when the
mattress is running for approx. 12 months (8760
hrs).reactivate if the fault is not rectified or if a
new fault is detected.
Refer to Novis full instructions.
This manual suits for next models
3
Table of contents
Other Novis Medical Equipment manuals
