manuals.online logo
Brands
  1. Home
  2. •
  3. Brands
  4. •
  5. Novis
  6. •
  7. Medical Equipment
  8. •
  9. Novis Sileo User manual

Novis Sileo User manual

Sileo Aged Care Bed – Back Up Battery
INSTALLATION
A rechargeable battery designed for a single
operation in the event of a power failure.
Please read these instructions before installation
Disconnect from mains power before install or uninstall Back Up Battery
Back Up Battery cannot be serviced
The battery must be charged for at least 10 hours every 4-5 months.
Battery will recharge when bed is connected to a mains power source.
Warranty
Novis Healthcare Pty Ltd warrants
this product for a period of 12 months.
Please refer to the Sileo Aged Care
Bed Warranty Statement for full
details.
4To connect the Back Up Battery
to the Control Box, plug the
power cord into the appropriate
slot (indicted with the black
battery icon: )
5To avoid a trip hazard or damage
to the cord, wrap and tie any
excess cord with a cable tie.
No tools are required to fit the
Back Up Battery 1To access the cradle that holds
the Back Up Battery, use the hand
controller to raise theleg rest, then
fully extend the heel platform by
manually lifting upwards.
2Locate the Back Up Battery
cradle, positioned underneath
the foot rest panel.
3Slide the Back Up Battery into
the bracket and push until an
audible ‘click’ is heard.
The battery only fits into the
cradle one way.
Storage
Store in a cool, dry location
out of direct sunlight
To remove battery (for replacement
or cleaning) unplug the Back Up
Battery from the control box.
Press the two clips on the side of the
Battery (through the bracket)
and pull up the battery upwards.
pressure care and patient handling specialists
novis.com.au /1300 738 885
Sileo Aged Care Bed – Head and Foot Panels
INSTALLATION
Replacement head
and foot panels.
Please read these instructions
before installation
Warranty
Novis Healthcare Pty Ltd warrants
this product for a period of 2 years.
Please refer to the Sileo Aged Care
Bed Warranty Statement for full
details.
Removal
To remove head and foot panels,
release the locks and remove each
panel carefully.
No tools are required to fit or remove
Head and Foot Panels. 1Release the two locks on the
inside of the panel by lifting the
lever (as indicated by the green
arrow)
2With locks facing inwards, hook
the top clip on each side of the
panel into the corresponding
holes on the bed frame.
3Once secure, push down hard
on each lock until an audible
click is heard, and the locking
mechanism is secure.
Storage
Store in a warm, dry location out of
direct sunlight.
Cleaning
Clean as per instructions included
with the Sileo Aged Care Bed User
Guide (page 14).
pressure care and patient handling specialists
novis.com.au /1300 738 885
Sileo Aged Care Bed – Self Help Pole
INSTALLATION
Support pole to aid patient
repositioning while lying in bed.
Connect the handle to the pole and
insert into the round hole at either side
of the head end of the bed.
Please read these instructions before installation and use
Warranty
Novis Healthcare Pty Ltd warrants
this product for a period of 2 years.
Please refer to the Sileo Aged Care
Bed Warranty Statement for full
details.
No tools are required. 1Insert the base of the pole into
the inbuilt bracket located at the
head-end of the bed frame.
The Self Help Pole has a notch to
prevent the pole from swinging
sideways during transfer. To
rotate the position of the pole,
lift slightly, turn and reinsert.
Storage
Store in a cool, dry location out of
direct sunlight.
Cleaning
Refer to the Sileo Aged Care Bed User
Guide (page 14).
The height of the handle can be
adjusted to suit the individual use.
For ideal height, the patient should
be able to reach the handle from a
reclined position.
To shorten or
raise the handle
Pull down on
the strap ‘tail’
To lengthen or
lower the handle
Lift the metal buckle
until horizontal, then
push the ‘tail’ through
the buckle towards the
handle.
Safety
⬡Do not exceed the Safe Working
Load (SWL) of 75kg
⬡Ensure the pole is swung out of
the way when not in use or when
seated on the side of the bed
⬡Use caution with existing upper
limb pain or injuries
⬡Donot hang other itemsothe pole
pressure care and patient handling specialists
novis.com.au /1300 738 885
Sileo Aged Care Bed – Collapsible Side Rails
INSTALLATION
Collapsible metal side rail system
attaches securely to side of the
bed frame.
Please read these instructions before installation and use
Minimum height from top of mattress to top of rail must be 220 mm.
Warranty
Novis Healthcare Pty Ltd warrants
this product for a period of 2 years.
Please refer to the Sileo Aged Care Bed
Warranty Statement for full details.
5Repeat this process at the head
end, securing both star knobs
until firm.
1 With the side rails upright (the un-
collapsed position), align the rail
alongside the bed frame in the correct
orientation – the smaller bracket with
the securing pin at the foot end; the
larger bracket to the head end.
Storage
Store in a warm, dry location out of
direct sunlight
< FOOT END
SECURING PIN
To lower the rail, release the locking
pin located at the foot end of the rail by
pulling outwards. Once disengaged,
gently push the rail downwards
towards the foot of the bed.
To raise the rail, lift the rail upwards
until the lock pin engages (an audible
click will be heard).
Always ensure the rail lock is secure.
Cleaning
Refer to the Sileo Aged Care Bed
User Guide (page 14).
Safety
Do do sit on or place heavy loads on
the side rails.
pressure care and patient handling specialists
novis.com.au /1300 738 885
3
At the foot end, align the bracket
hole with the nut hole welded to
the frame. Insert the star knob and
turn clockwise to tighten.
4
Locate the second star knob
positioned underneath the
bracket, and turn clockwise to
tighten.
2
Connect the side rail onto the bed
by securing the brackets over the
side of the frame.
Note, bracket hook and second star
knob will be positioned downwards.
FIRST STAR KNOB >< FIRST STAR KNOB
SECONDARY STAR KNOB >< SECONDARY STAR KNOB
HEAD END >

Other Novis Medical Equipment manuals

Novis BetterLiving BL1097 Manual instruction

Novis

Novis BetterLiving BL1097 Manual instruction

Novis Premium 8 Setup guide

Novis

Novis Premium 8 Setup guide

Novis ProCair Prime User manual

Novis

Novis ProCair Prime User manual

Novis ProCair User manual

Novis

Novis ProCair User manual

Novis ProSling User manual

Novis

Novis ProSling User manual

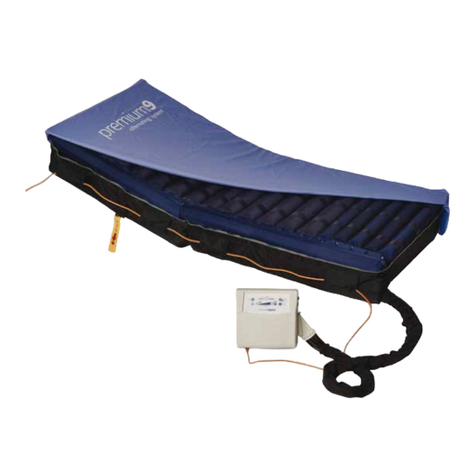
Novis Premium9 User manual

Novis

Novis Premium9 User manual

Novis ProCair Trio User manual

Novis

Novis ProCair Trio User manual

Novis Molift RAISER PRO Operating manual

Novis

Novis Molift RAISER PRO Operating manual

Popular Medical Equipment manuals by other brands

Ultrasonix Sonix MDP Service manual

Ultrasonix

Ultrasonix Sonix MDP Service manual

ARJO HUNTLEIGH Akron Streamline 2211 Instructions for use

ARJO HUNTLEIGH

ARJO HUNTLEIGH Akron Streamline 2211 Instructions for use

I-care ic100 instruction manual

I-care

I-care ic100 instruction manual

Emfit QS IP-9360 quick guide

Emfit

Emfit QS IP-9360 quick guide

Dorel Juvenile Group Safety 1st Hospital's Choice IH417 instructions

Dorel Juvenile Group

Dorel Juvenile Group Safety 1st Hospital's Choice IH417 instructions

Empi Select user manual

Empi

Empi Select user manual

Pro-tec ECOMAX Operation manual

Pro-tec

Pro-tec ECOMAX Operation manual

GI Supply RenovaRP operating manual

GI Supply

GI Supply RenovaRP operating manual

COOK Medical Extraction Balloon Instructions for use

COOK Medical

COOK Medical Extraction Balloon Instructions for use

Abbott Whitestar Signature Operator's manual

Abbott

Abbott Whitestar Signature Operator's manual

Otto Bock Kimba Instructions for use

Otto Bock

Otto Bock Kimba Instructions for use

RICHTECH V2 Pro user manual

RICHTECH

RICHTECH V2 Pro user manual

Pedigo 500 Installation & operation manual

Pedigo

Pedigo 500 Installation & operation manual

Emfit SafeBed Instructions for use

Emfit

Emfit SafeBed Instructions for use

Getinge Maquet SERVO-i user manual

Getinge

Getinge Maquet SERVO-i user manual

iProven OXI-27 instructions

iProven

iProven OXI-27 instructions

Braun Aesculap Technical description

Braun

Braun Aesculap Technical description

Airial MQ3200 user manual

Airial

Airial MQ3200 user manual

manuals.online logo
manuals.online logoBrands
  • About & Mission
  • Contact us
  • Privacy Policy
  • Terms and Conditions

Copyright 2025 Manuals.Online. All Rights Reserved.