manuals.online logo
Brands
  1. Home
  2. •
  3. Brands
  4. •
  5. NSA
  6. •
  7. Fan
  8. •
  9. NSA TF-31RC User manual

NSA TF-31RC User manual

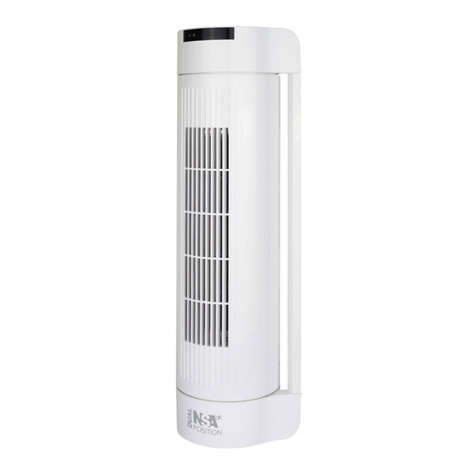
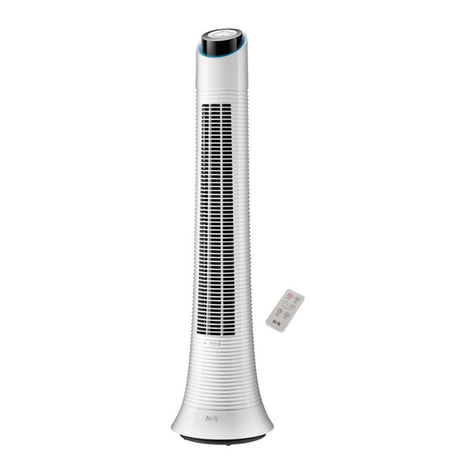
Electronic Tower
Fan
w. LCD display & RC
Model TF-31RC
Instruction manual
(July 2016)
Electronic Fan ith LCD
3 Speeds
8hr timer
Remote Control
Breeze & Sleep Modes
Oscillation
Carry Handle
88.4cm tall
Footprint 28cm dia.
Self-assembly (no tools required)
Please keep safe for future reference
Safety Instructions
Thank you for purchasing this To er Fan ith LCD Screen, 8hr Timer and Remote
Control. Please read this instruction manual before using your To er Fan for the first
time. Keep safe for future reference.
CAUTION:
Use the fan only as described in this manual. Misuse may cause a fire or an electric shock.
1. Check the household voltage to
ensure it matches the fans rated
specification before using.
2. Al ays check the device for visible
damage before use.
3. Al ays use this devise in
accordance ith the instructions.
4. Close supervision is necessary hen
this fan is used near children & pets.
5. Do not allo children to play ith
any product packaging, such as
plastic bags.
6. This appliance is not intended for
use by persons (including children)
ith reduced physical, sensory or
mental capabilities, or lack of
experience and kno ledge, unless
they have been given supervision or
instruction concerning use of the
appliance by a person responsible
for their safety. Children should be
supervised to ensure that they do
not play ith the appliance.
7. Repairs may only be carried out by
an authorised repair centre;
incorrect handling and faulty repairs
may lead to danger and invalidate
arranty.
8. Arrange the po er cord a ay from
an area here it may be tripped
over.
9. Never position the fan in an area
here it may fall into a bath or
other ater container.
10.Never place the po er cord
under a carpet or rug.
11.This fan is not intended for use in
et or damp locations or for
temperatures over 40°C.
12.Do not use the equipment if it has
any damaged parts, or if it has
fallen into ater. Return the
product to a service centre for
examination and repair.
13.Do not insert any object into the
grille hilst the fan is operating. It
may cause damage to persons or
property.
14.Do not operate the fan near an
open flame, cooking or heating
appliance or hot surface.
15.Al ays use your fan on a firm, dry,
level surface a ay from curtains
and soft furnishings.
16.Disconnect the unit from the
electrical outlet before cleaning,
moving or storing.
17.To disconnect from the po er
supply, s itch off the po er, grip
the plug and pull from the po er
socket. Never pull by the cord.
18.This product has been designed
for domestic use only. Any
commercial use, inappropriate
use or failure to comply ith the
instructions, the manufacturer
accepts no responsibility and the
guarantee ill not apply.
2
Parts Description
FI . 10 ~ Remote Control
A. On / Off
B. 8hr timer
C. 3 Speeds (Lo / Med / High)
D. 2 Modes ~ Breeze (Variation) &
Sleep (Gradual Slo Do n)
E. Oscillation
FI . 9 ~ Parts
1. Control Panel (top)
2. LCD Screen
3. Front Grille (Air outflo )
4. Oscillation Base . Non-slip feet
5. Back Panel (Air intake)
6. Carry handle FI . 11 ~ Manual Controls
Assembly Method
♦Please assemble correctly according to the follo ing sequence.
♦Please keep the original packaging for future storage.
FI . 1 FI . 2
FI . 3 FI . 4
Fig 1 Assemble Base Plate
a. Gently up-end the fan.
b. Remove the butterfly scre s from the base of the fan. Keep safe.
c. Join the front & back base plates together.
d. Make sure the holes of front base correspond ith the holes of rear base, Fig.1
e. Click the t o base plates firmly together as indicated.
Fig 2 Fixing Base Plate to Fan
f. Guide the po er cord from the front, along the groove to ards the back of
the fan, clipping it under the lugs on the inside of the oscillation pillar.
g. Feed the po er lead through the hole in the base plate.
Fig 3 h. Arrange the base plate ith the po er cord hole at the back and align notch
on fan base ith the grove on the oscillation plate surround.
i. Make sure the base plates are connected firmly ith the butterfly scre s.
Fig 4 j. Place the po er cord into the clip slots of the base plate.
k. Carefully turn fan upright onto its base and plug into the mains supply.
l. Fit batteries into the remote control & keep safe for use hen required.
3
4
Control Panel & Operation uide
A. On/Off ~ Press once to turn on the unit and press again to turn
off. For control panel diagrams, refer to Figs 10 & 11 on Page 7.
B. Timer ~ You can set the run time for 1, 2, 4 or 8 hours duration.
Press the Timer button to move through the timer options.
The LCD display ill indicate the time selected. If there is no
number sho ing next to the clock symbol then the timer is off
and operation ill be continuous until the fan is manually
po ered off.
C. Speed ~ Press to select Lo , Medium and High fan speeds, press
the button until the red LED light indicates the desired speed.
See Fig. 7 for LCD display symbols.
D. Modes ~ Press once to select Breeze mode (Speed Airflow
Variation), press a second time to select Sleep mode
(Speed Airflow Reduction), press again to turn off the mode
function. Use in conjunction ith the timer or oscillation
function. More details on page 5 & LCD symbols in Fig. 7.
BREEZE MODE ~ AIRFLOW VARIATION
Random speed / breeze (96 sec cycles) +
SLEEP MODE ~ AIRFLOW REDUCTION
Speed steps down every 30 minutes
FI . 5 FI . 6
Operation uide (cont’d)
BREEZE
D. Breeze Mode ~ Airflow Variation (Fig. 5):
This mode imitates the rhythms and tempo of a natural breeze
and ill fluctuate at random speed cycles of c. 96 secs
depending on the fan speed set. Use in conjunction ith the
1, 2, 4 or 8hr timer and oscillation function.
Hi speed ill cause the fan rhythms to be mostly High to Med
speed ith occasional lulls of Lo speed or no speed.
Med speed ill alternate mostly bet een Med, Lo and Stop ith
occasional gusts of High speed.
Low speed ill fluctuate bet een Lo , Med and stop ith an
intermittent, short gust of high speed.
SLEEP
D. Sleep Mode ~ radual Airflow Reduction (Fig. 6):
This mode ill use the set fan speed and step do n through the
speeds every 30 minutes ~ eg:
If High speed is selected, then the fan ill start in High speed for 30
mins. Then the fan speed ill drop to Med speed for 30mins and
then drop to Lo speed. The fan ill remain at Lo speed
indefinitely until manually po ered off or the set time is reached.
When Med fan speed is selected, Sleep mode ill start in Med
speed for 30 mins. Then it ill drop to Lo speed here it ill
remain indefinitely, unless the timer is set or the fan is manually
po ered off.
Select Sleep mode plus Low fan speed and the fan ill remain at
this speed until the unit is manually po ered off or the set time is
reached.
E. Oscillation (OSC) ~ Press once to activate the oscillation feature,
for ide distribution of air. Press OSC button again to stop
oscillation function.
LCD Digital Display (Fig. 7)
W. Breeze Mode ~ Airflo Variation
X. Sleep Mode ~ Airflo Reduction
Y. 3 Speeds (Lo / Med / High)
Z. 1, 2, 4, 8hr timer
FI . 7
6
5
Accessory: Remote Control
The fan can be operated either manually by the control
panel on the fan unit itself or by the remote control supplied
ith the product.
♦Be sure to direct the remote control to ard the receiver on
the control panel.
♦Use the remote control ithin 6 metres from the receiver. If
the remote control is not directed to ards the receiver; the
effectiveness ill be reduced.
♦Do not place any obstacle bet een the receiver and remote control.
♦Please treat your remote control ith care. Knocking or dropping ill reduce its
reliability.
♦Please store the remote control safety hen not in use.
♦Whenever a command is issued to the control panel, the fan beeps.
How to install the battery of the Remote Control:
1. Open the cover of battery compartment according to the direction sho n.
2. Install the batteries (2xAAA) into the battery compartment. Take care of the
polarity of each battery, hich is indicated inside the compartment.
3. Close the battery cover.
NB Please dispose of used batteries responsibly.
FI . 8
Cleaning & Care
♦Unplug the appliance before cleaning.
♦Do not use any chemical-based solutions for cleaning surfaces.
♦Slightly moisten a cloth and then ipe off the surfaces of the fan.
♦In order to remove the dust from the protective fan grille use a vacuum cleaner
upholstery attachment.
♦Ensure fan is completely dry before storage or reconnecting to the electrical
supply.
♦Never immerse the fan or fan motor in ater or other liquid.
♦If the fan is not used for long periods, protect ith a suitable cover after
cleaning, then store in a dry place.
♦Remove the batteries from the remote control before storage.
Compliance
For your safety, this appliance complies ith the applicable standards and
regulations (Lo Voltage Directive, Electromagnetic Compatibility, Environmental
directives). We reserve the right to make technical changes ithout prior notice.
Recycling & Disposal
The packaging of your ne fan has a recycle mark on it. Please
dispose of it as recycled paper or by using the “Dual System”.
The symbol on the product or on its packaging indicates that this product
may not be treated as general household aste. Instead it should be handed over
to the applicable collection point for the recycling of electrical and electronic
equipment. By ensuring this product is disposed of correctly, you ill help prevent
potential negative consequences for the environment and human health, hich
could other ise be caused by inappropriate aste handling of this product. For
more detailed information about the recycling of this product, please contact your
local council office, your household aste disposal service or the store here you
purchased the product.
UK guarantee
12 months arranty valid only in respect of defects found to be due to faulty
orkmanship or material. Proof of purchase is required to validate the guarantee.
This guarantee is no longer valid if the damage has been caused by a fall,
alteration or repair by any unauthorised persons or if the product has been resold.
This guarantee in no ay affects your statutory rights.
Technical Data
Model No: TF-31RC
Rated Po er: 40W
Voltage: 220-240V ~ 50Hz
Ref: IM/TF31/1607/GU86AA
Product Dims: 884 x 280 x 280 mm (H*W*D)
N.W. 4.15kg
G.W. 4.9kg
© 2016 Ne ton Stovold Assocs Ltd GU8 6AA
.nsauk.com .
7
Please Recycle
8

Other NSA Fan manuals

NSA DF-5110 User manual

NSA

NSA DF-5110 User manual

NSA TF-21RC User manual

NSA

NSA TF-21RC User manual

NSA FC-300BP User manual

NSA

NSA FC-300BP User manual

NSA SF-4072 User manual

NSA

NSA SF-4072 User manual

NSA SF-1616-MPC User manual

NSA

NSA SF-1616-MPC User manual

NSA TF-67RC User manual

NSA

NSA TF-67RC User manual

NSA MTF-30 User manual

NSA

NSA MTF-30 User manual

NSA FFRDC-24RC User manual

NSA

NSA FFRDC-24RC User manual

NSA MTFDC-84RC User manual

NSA

NSA MTFDC-84RC User manual

NSA SFC-200B User manual

NSA

NSA SFC-200B User manual

NSA DF15-R31-AC User manual

NSA

NSA DF15-R31-AC User manual

NSA SFDC-4091RC User manual

NSA

NSA SFDC-4091RC User manual

NSA TF-31RC User manual

NSA

NSA TF-31RC User manual

NSA DF-3032 User manual

NSA

NSA DF-3032 User manual

NSA SFDC-30128RC User manual

NSA

NSA SFDC-30128RC User manual

NSA SFC-200B User manual

NSA

NSA SFC-200B User manual

NSA TFDC-60RC User manual

NSA

NSA TFDC-60RC User manual

NSA DF-1214-MPC User manual

NSA

NSA DF-1214-MPC User manual

NSA SFDC-30213RC User manual

NSA

NSA SFDC-30213RC User manual

NSA TFDC-46RC User manual

NSA

NSA TFDC-46RC User manual

NSA MTF-18 User manual

NSA

NSA MTF-18 User manual

NSA TFRDC-50RC User manual

NSA

NSA TFRDC-50RC User manual

NSA Antique DF-1214-BRZ User manual

NSA

NSA Antique DF-1214-BRZ User manual

NSA SFDC-4057RC User manual

NSA

NSA SFDC-4057RC User manual

Popular Fan manuals by other brands

Hunter 98000-01-002 Parts guide

Hunter

Hunter 98000-01-002 Parts guide

emerio FN-114499.2 instruction manual

emerio

emerio FN-114499.2 instruction manual

Canarm DUAL MOUNT series installation instructions

Canarm

Canarm DUAL MOUNT series installation instructions

ALORAIR Zeus 900 owner's manual

ALORAIR

ALORAIR Zeus 900 owner's manual

Akai QUADRO9 instruction manual

Akai

Akai QUADRO9 instruction manual

Villager VCF 3020 Original instruction manual

Villager

Villager VCF 3020 Original instruction manual

minkaAire GF567 instruction manual

minkaAire

minkaAire GF567 instruction manual

Rupp Air CFA-D150 installation manual

Rupp Air

Rupp Air CFA-D150 installation manual

Monte Carlo Fan Company Mach One Series owner's manual

Monte Carlo Fan Company

Monte Carlo Fan Company Mach One Series owner's manual

Craftmade Decorator's Choice DCF52 installation guide

Craftmade

Craftmade Decorator's Choice DCF52 installation guide

Hunter Santorini installation manual

Hunter

Hunter Santorini installation manual

Big Air ICF84 Installation operation maintenance warranty manual

Big Air

Big Air ICF84 Installation operation maintenance warranty manual

Fanimation Belleria FP4320 Series owner's manual

Fanimation

Fanimation Belleria FP4320 Series owner's manual

Star Fans Start propeller user manual

Star Fans

Star Fans Start propeller user manual

ALPATEC VT 23 user manual

ALPATEC

ALPATEC VT 23 user manual

Munters WM36 K CB Series instruction manual

Munters

Munters WM36 K CB Series instruction manual

Exodraft GSV 009 Installation and operation manual

Exodraft

Exodraft GSV 009 Installation and operation manual

Ebmpapst W2E250-HL06-01 operating instructions

Ebmpapst

Ebmpapst W2E250-HL06-01 operating instructions

manuals.online logo
manuals.online logoBrands
  • About & Mission
  • Contact us
  • Privacy Policy
  • Terms and Conditions

Copyright 2025 Manuals.Online. All Rights Reserved.