manuals.online logo
Brands
  1. Home
  2. •
  3. Brands
  4. •
  5. NSA
  6. •
  7. Fan
  8. •
  9. NSA TF-67RC User manual

NSA TF-67RC User manual

Power
Fan
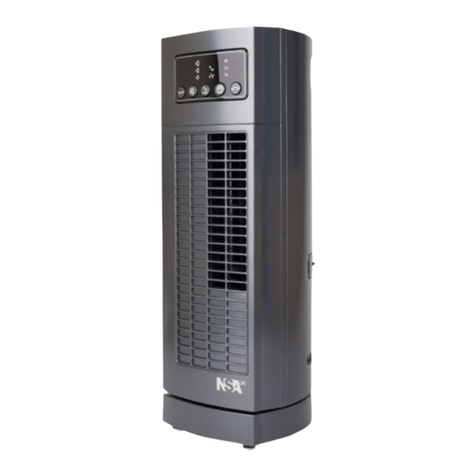
for larger living spaces
w. RC & 15hr timer
Model: TF- 7RC
Instruction manual
(Mar 2017)
Designed for maximum cooling effect
through concentrated movement of air
3 Speeds
Manual Louvres for directional airflow
Oscillation
15hr Timer (On & Off)
Remote Control (1x CR2032 battery)
Touch Controls
Sleep & Breeze Modes
Carry Handle w. RC storage recess
87.5cm tall
Please keep safe for future reference
Introduction
Thank you for purchasing the Power Tower Fan with Remote Control TF- 7RC. This elegant
tower fan is ideal for any location ~ home or office or conservatories. It combines stylish good
looks with exceptional cooling performance, suitable for large areas.
The equipment bears the CE mark indicating its conformity with the provision of EC regulations.
Safety Instructions
Please read this instruction manual before using your Tower Fan for the first time and keep safe
for future reference.
CAUTION: Use the fan only as described in this manual.
1. Check the household voltage to
ensure it matches the fans rated
specification before using.
2. Always use this devise in accordance
with the instructions.
3. Close supervision is necessary when
this fan is used near children and pets.
4. Do not allow children to play with any
product packaging, such as plastic
bags.
5. Always check the device for visible
damage before use.
. Repairs may only be carried out by an
authorised repair centre; incorrect
handling and faulty repairs may lead
to danger and invalidate warranty.
7. This fan is not intended for use in wet
or damp locations.
8. Never position the fan in an area
where it may fall into a bath or other
water container.
9. Do not use the equipment if it has any
damaged parts, or it has fallen into
water. Return the product to a service
centre for examination and repair.
10. Do not insert any object into the
louvres whilst the fan is operating. It
may cause damage to persons or
property.
11. This fan is intended for indoor,
domestic & light commercial use only
and is not to be operated outside.
12. Always use both hands to carry this
product.
13. Do not operate the fan near an open
flame, cooking or heating appliance
or hot surface.
14. Always use your fan on a firm, dry,
level surface.
15. Disconnect the unit from the electrical
outlet before cleaning, moving or
storing.
1 . To disconnect from the power supply,
switch off the power, grip the plug
and pull from the power socket.
Never pull by the cord.
17. Arrange the power cord away from
an area where it may be tripped over.
18. Never place the power cord under a
carpet or rug.
19. This appliance is not intended for use
by persons (including children) with
reduced physical, sensory or mental
capabilities, or lack of experience
and knowledge, unless they have
been given supervision or instruction
concerning use of the appliance by a
person responsible for their safety.
Children should be supervised to
ensure that they do not play with the
appliance.
20. Keep the remote control in a safe
place when not in use. There is a
recess in the carry handle for this
purpose
Parts Description
1Control Buttons
2Air Outlet / Manual Louvres
3Front Cover
4Remote control
5Oscillation Base Plate
Air Intake (Back Panel)
7Carry Handle w. RC recess
(not visible – see below)
OSC MODE TIMER / SPEED LIGHTS ON/OFF
PRESET
Control Panel & Digital Display Remote Control
2 3
4
Assembly ethod
♦Please assemble correctly according to the following sequence.
♦Please keep the original packaging for future storage.
FIG 1 FIG 2
Fig 1 Assemble Base Plate
a. Gently up-end the fan.
b. Remove the screws from the fan base.
Fig 2 Fixing Base Plate to Fan
a. Place the power cord into the clip slot on top of base plate.
b. Align notch on fan base with groove on base plate.
c. Secure butterfly screws firmly.
d. Carefully place fan upright on its base and plug into the mains supply.
e. Open louvres from the bottom before turning on the fan.
Accessory: Remote Control
♦Be sure to direct the remote control toward the receiver on the control panel.
♦Use the remote control within 5 metres from the receiver. If the remote control is not
directed towards the receiver; the effectiveness will be reduced.
♦Do not place any obstacle between the receiver & remote control.
♦Please treat your remote control with care. Knocking or dropping will reduce its reliability.
♦Please store the remote control safely when not in use.
How to install the battery of the Remote Control:
1. To open the cover of battery compartment, press the lock to the right and
simultaneously pull the battery compartment open.
2. Install the 3V CR2032 Lithium battery into the battery compartment. Take care of the
polarity of the battery, which is indicated on the battery caddie.
3. Close the battery cover and ensure it clicks closed.
NB Please dispose of used batteries responsibly.
Operating Instructions
The fan can be operated either manually by the control panel on the
fan unit itself or by the remote control supplied with the product.
Ensure the louvres on the front panel are opened before turning on the
fan. Gently lift from the bottom and tilt to the desired angle. The
louvres can be tilted when the fan is on but turn off oscillating function
before doing so.
Do not operate the fan with the louvres closed.
ON/OFF Using either the manual controls on top of the fan or the remote control,
press once to switch on the unit and press again to stop the fan from running.
Ensure louvres are open before use. Also, see note on Timer/Preset Timer below.
SPEED: The fan will start in low speed. Press the speed button on the fan or the
remote control to increase or decrease the fan speed to the desired level. The
red LED symbols will light on display panel to indicate the fan speed selected.
PRESET TI ER: With power OFF, Press TIMER button to select 1 to 15 hours delayed
start, keep pressing TIMER in 1hr increments until the desired time is indicated on
the control panel.
TI ER: With power ON, Press TIMER button on the top of the fan or by the remote
control to set the timer from 1 to 15 hours to turn off. Use in conjunction with the
Mode settings on page 7.
Oscillation (OSC) ~ Press once to activate the oscillation feature, for wide
distribution of air. Press OSC button again to stop oscillation function.
LIGHTS: Press the Lights button on the manual controls or remote control to turn
off the display panel indicators. Press again to reactivate the display.
5
4
Operating Instructions (continued)
ODE: This is the air selection button.
Press the button once to operate the natural breeze mode;
Press for a second time to operate sleep mode;
Press for a third time to turn-off the wind mode function.
BREEZE ODE: This mode has three types of air cycles: high, medium and gentle
breeze, which simulates natural wind cycles or rhythms and varies according to
the set fan speed ~ press Mode once for Natural breeze, then select fan speed –
high, medium or low. The breeze sequences are shown below:
SLEEP ODE: This mode has three types of air cycles: strong, medium and gentle
breeze ~ press Mode twice for Sleep setting and then select fan speed High,
Medium or Low. The sequences are described below:
1. At high setting, strong wind will operate for 30 mins, then will step down to
medium wind for 30 mins, then to gentle breeze and finally to a halt, then it will
start the cycle again and will carry on continuously or until the timer switches off.
2. At medium setting, medium wind will operate at first then will step down to
gentle breeze, to a halt and will return to medium wind; this cycle will continue
until the timer switches off.
3. At low setting, a gentle wind will operate at first, then the fan will stop, then
return to gentle wind again. This cycle will continue indefinitely until manually
powered off or the timer duration is reached.
Cleaning & Care
♦Unplug the appliance before cleaning.
♦Do not use any chemical-based solutions for cleaning fan surfaces.
♦In order to remove the dust from the protective grille on the air intake panel, either use
a vacuum cleaner upholstery attachment or remove the grille completely and gently
wash in warm soapy water. Ensure the grille is totally dry before re-fixing to the fan.
♦Slightly moisten a cloth and then wipe off the surfaces of the fan.
♦Ensure fan is completely dry before storage or reconnecting to electrical supply.
♦Never immerse the fan or fan motor in water or other liquid.
♦If the fan is not used for long periods, protect with a suitable cover after cleaning, then
store in a dry place, preferably in its original packaging.
♦Always store the fan with the louvres closed flat.
This appliance complies with both the low voltage and electromagnetic compatibility
directives. Its construction complies with current safety standards. We reserve the right to
make technical changes without prior notice.
Recycling & Disposal
The packaging of your new fan has a recycle mark on it. Please dispose
of it as recycled paper or by using the “Dual System”.
The symbol on the product or on its packaging indicates that this product may not
be treated as general household waste. Instead it should be handed over to the
applicable collection point for the recycling of electrical and electronic equipment. By
ensuring this product is disposed of correctly, you will help prevent potential negative
consequences for the environment and human health, which could otherwise be caused
by inappropriate waste handling of this product. For more detailed information about the
recycling of this product, please contact your local council office, your household waste
disposal service or the store where you purchased the product.
UK guarantee
For 24 months warranty in respect of defects found to be due to faulty workmanship or
material. Proof of purchase is required to validate the guarantee. This guarantee is no
longer valid if the damage has been caused by a fall, alteration or repair by any
unauthorised persons.
This guarantee in no way affects your statutory rights.
Technical Data
Model No: TF- 7RC
Voltage: 220-240V ~ 50Hz
Power: 0W
Ref: IM/TF 7/1703/GU8 AA
Dimensions: 875 (H) x 370 (W) x 305 (D) mm
Weight: N.W. 5.78kg
G.W. 7.23kg
Class II Product
© 2017 Newton Stovold Assocs Ltd, GU8 AA
www.nsauk.com
6
4
Please Recycle
7

Other NSA Fan manuals

NSA SFC-200B User manual

NSA

NSA SFC-200B User manual

NSA TF-47RC User manual

NSA

NSA TF-47RC User manual

NSA SFDC-4057RC User manual

NSA

NSA SFDC-4057RC User manual

NSA SFDC-30213RC User manual

NSA

NSA SFDC-30213RC User manual

NSA SFC-200B User manual

NSA

NSA SFC-200B User manual

NSA SF-4072 User manual

NSA

NSA SF-4072 User manual

NSA DF15-R31-AC User manual

NSA

NSA DF15-R31-AC User manual

NSA TFRDC-50RC User manual

NSA

NSA TFRDC-50RC User manual

NSA FFRDC-24RC User manual

NSA

NSA FFRDC-24RC User manual

NSA MTF-30 User manual

NSA

NSA MTF-30 User manual

NSA DF-5110 User manual

NSA

NSA DF-5110 User manual

NSA TFDC-60RC User manual

NSA

NSA TFDC-60RC User manual

NSA MTFDC-84RC User manual

NSA

NSA MTFDC-84RC User manual

NSA SFDC-30128RC User manual

NSA

NSA SFDC-30128RC User manual

NSA TF-31RC User manual

NSA

NSA TF-31RC User manual

NSA SF-1616-MPC User manual

NSA

NSA SF-1616-MPC User manual

NSA TFDC-46RC User manual

NSA

NSA TFDC-46RC User manual

NSA Antique DF-1214-BRZ User manual

NSA

NSA Antique DF-1214-BRZ User manual

NSA DF-1214-MPC User manual

NSA

NSA DF-1214-MPC User manual

NSA MTF-18 User manual

NSA

NSA MTF-18 User manual

NSA TF-21RC User manual

NSA

NSA TF-21RC User manual

NSA SFDC-4091RC User manual

NSA

NSA SFDC-4091RC User manual

NSA FC-300BP User manual

NSA

NSA FC-300BP User manual

NSA TF-31RC User manual

NSA

NSA TF-31RC User manual

Popular Fan manuals by other brands

Stelpro SQBF070 installation guide

Stelpro

Stelpro SQBF070 installation guide

Ruck Ventilatoren MPS Series Assembly instruction

Ruck Ventilatoren

Ruck Ventilatoren MPS Series Assembly instruction

Progress Lighting Airpro P250073 installation manual

Progress Lighting

Progress Lighting Airpro P250073 installation manual

Termozeta AIRZETA TRICICLO instruction manual

Termozeta

Termozeta AIRZETA TRICICLO instruction manual

Lift Bridge Kitchen & Bath DSQR70BNOR Installation manual and user's guide

Lift Bridge Kitchen & Bath

Lift Bridge Kitchen & Bath DSQR70BNOR Installation manual and user's guide

Greenheck APEX-200 Assembly instructions

Greenheck

Greenheck APEX-200 Assembly instructions

Vornado flippi Series owner's guide

Vornado

Vornado flippi Series owner's guide

PowerPac PPFS70 quick start guide

PowerPac

PowerPac PPFS70 quick start guide

Casablanca M8511-01W owner's manual

Casablanca

Casablanca M8511-01W owner's manual

IRULU MS380A manual

IRULU

IRULU MS380A manual

KDK 15WUF 07 Installation and operating instructions

KDK

KDK 15WUF 07 Installation and operating instructions

Aisin YOSHI AWS E1J TWIN installation manual

Aisin

Aisin YOSHI AWS E1J TWIN installation manual

TURNTIDE VES-Artex 55" ECV Storm Assembly & instruction manual

TURNTIDE

TURNTIDE VES-Artex 55" ECV Storm Assembly & instruction manual

Saneo MH-MF40B manual

Saneo

Saneo MH-MF40B manual

Hunter Type 2 Series Owners and installation manual

Hunter

Hunter Type 2 Series Owners and installation manual

WilTec toboli Operation manual

WilTec

WilTec toboli Operation manual

Polar Air Coanda Series Installation, operation and service manual

Polar Air

Polar Air Coanda Series Installation, operation and service manual

Kogan KADCCRFAN8A user guide

Kogan

Kogan KADCCRFAN8A user guide

manuals.online logo
manuals.online logoBrands
  • About & Mission
  • Contact us
  • Privacy Policy
  • Terms and Conditions

Copyright 2025 Manuals.Online. All Rights Reserved.