CAUTION
CAUTION
CAUTION
CAUTION
Fig.1
Fig.2
Fig.3
Fig.4
Fig.5
Head Mounting Ring
Marked Screw
Joint Cover
Marked Screw
Joint Cover
Fig.6
Fig.7
"D" shaped cutout
Fig.8
Fig.9 Fig.10
PHATELUS Spray Nozzle
PANA-SPRAY Plus / PANA-SPRAY
PHATELUS AIR MOTOR
PTL-SDN/PTL-CD/PTL-CR
OM-M0020E
002
• When operating the handpiece, always consider the safety of patient.
• This handpiece is designed only for dental clinic use.
• Check instrument and accessories before use.
• Should the handpiece function abnormally, cease operation immediately and return the handpiece to the dealer for
repair.
• Depressing the push-button while handpiece bur is in rotation will result in OVERHEATING of the handpiece head.
Special caution must be exercised during use to keep cheek tissue AWAY from the push-button of the handpiece.
Contact with cheek tissue may cause the push-button to depress and burn injury to the patient may occur.
• Always use clean burs. Uncleaned burs may cause unwanted amount of pressure on the chuck.
• Do not attempt to disassemble the handpiece nor tamper with the mechanism.
• Do not drop the handpiece.
4. Mounting and removal of the bur
When mounting a bur, be sure to mount the head onto the motor first.
(1) NPB-PTL and NPBG-PTL
Insert a latch bur into the head and gently turn the bur to find a position at
which its "D" shaped section is aligned with its counterpart in the bur tube.
Insert it further into the head (Fig.6).
When the bur is further inserted in that aligned position, it will lock with a
clicking sound.
To remove the bur, first make sure that the motor is to stop completely. Push the push
button to release the bur (Fig.8).
(2) NFB-PTL and NFBG-PTL
Insert a FG bur into the head to a depth of 2mm to 3mm, then push the push button
with the tip of your thumb and insert the bur into the chuck. After mounting the bur, be
sure to push and pull the bur to make sure it is completely installed (Fig.9).
Pushing and pulling of the bur increases its grip force.
To remove the bur, push the push button with the tip of your thumb. Remove the bur
(Fig.10).
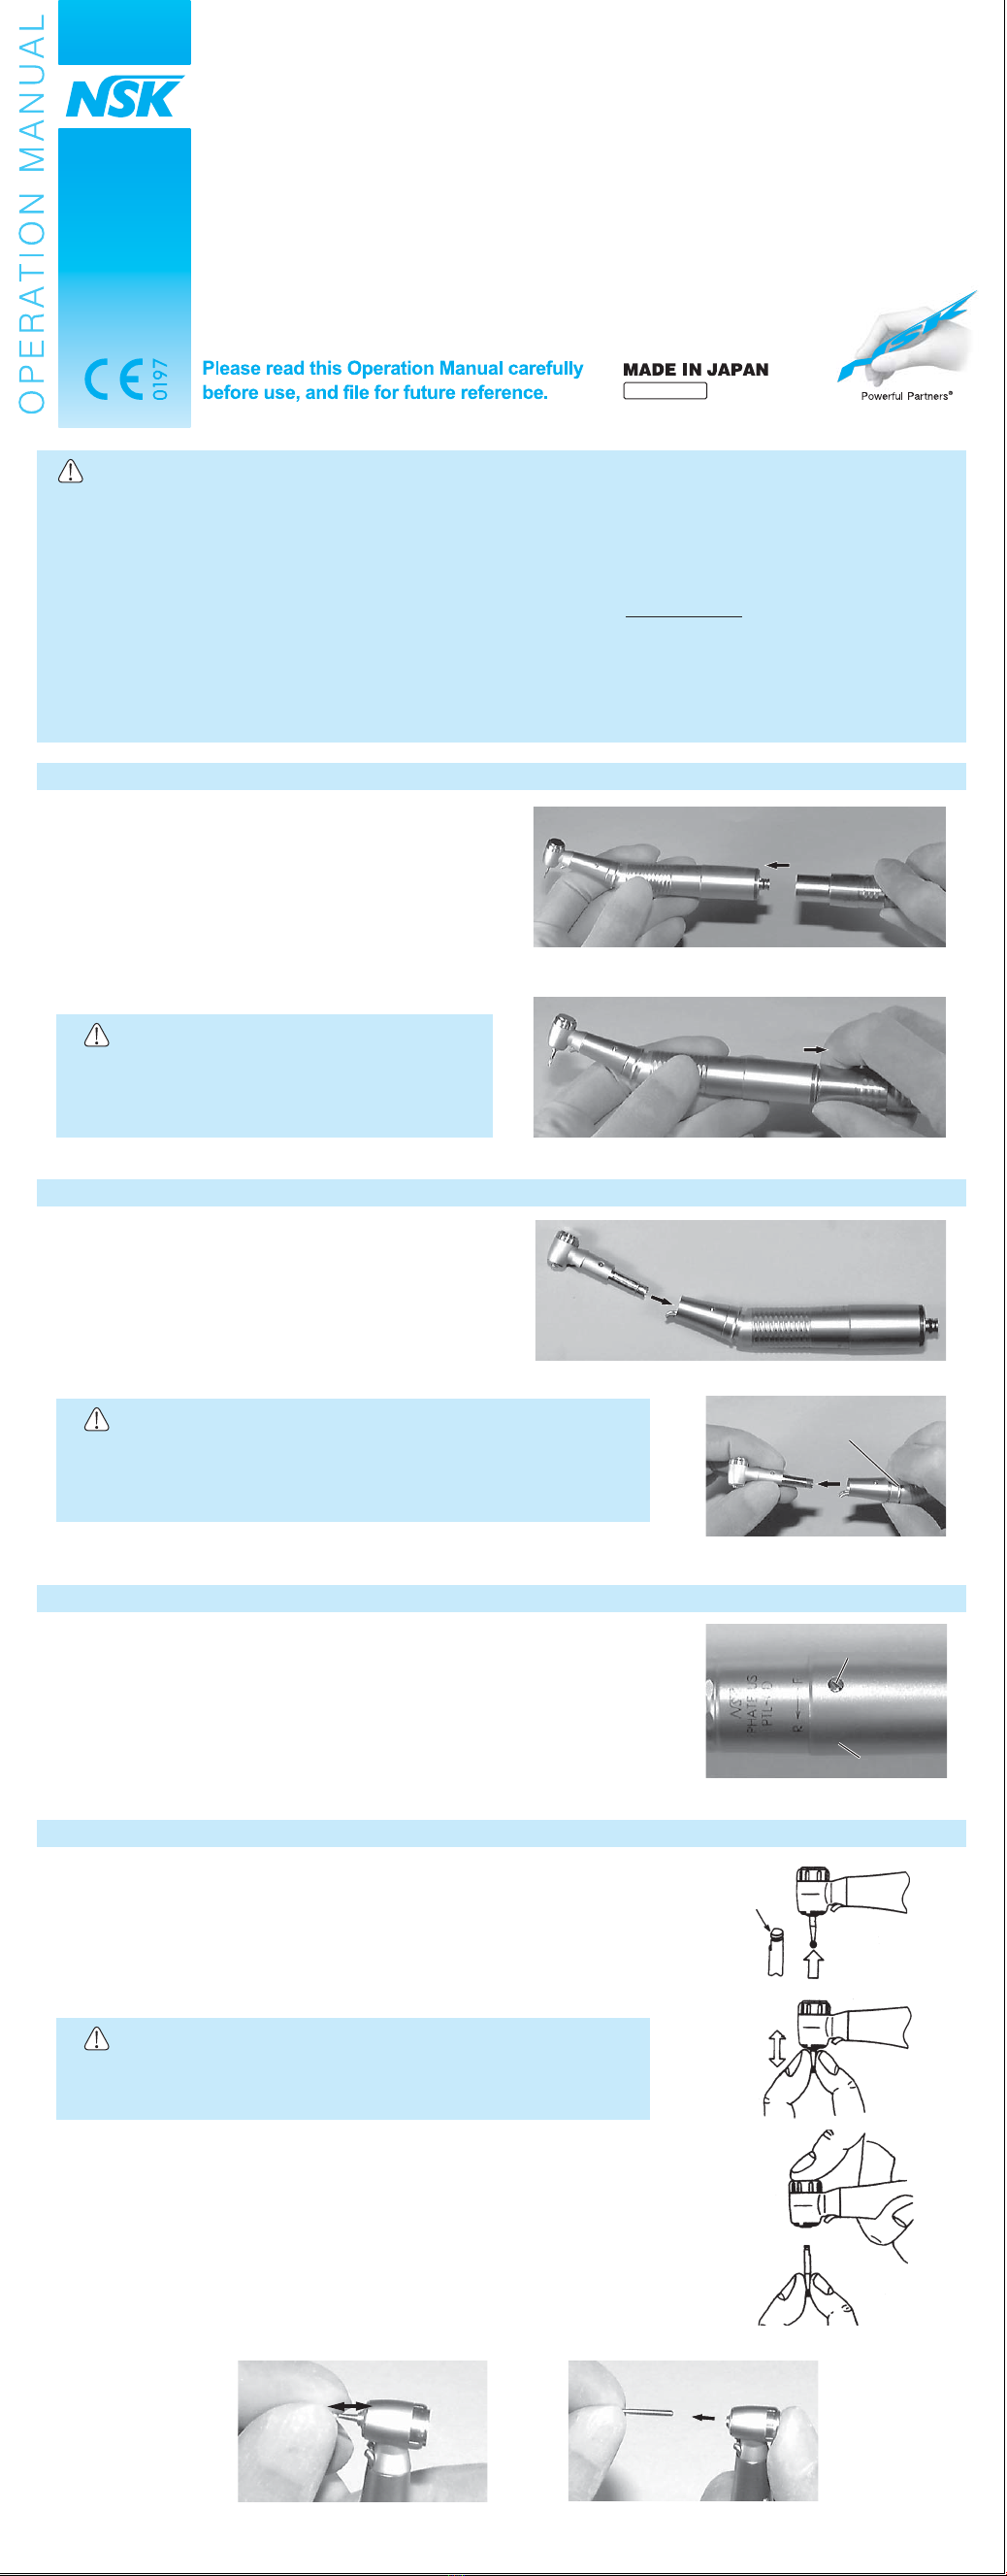
3. Changing the direction of rotation of the air motor
The air motor will rotate in the normal direction when the marked screw on
the joint cover is turned to the "F" position, and in the reverse direction when
it is turned to the "R" position.Rotation of the air motor can be stopped by
positioning the screw to the middle position between "F " and "R" (Fig.5).
2. Installation and Removal of the head
To install the head, align the fiber optic pipes with the
corresponding slots of the head and insert the head
straight into the motor (Fig.3).
To remove the head, pull the head mounting ring toward
the hose and pull the head straight out (Fig.4).
1. Mounting the air motor
If PHATELUS or MACH-LITE handpiece is now in use with
NSK swivel coupling, the air motor will be ready for use
only when the air turbine has been replaced with a
PHATELUS motor at the coupling joint (Fig.1).
The same supply air pressure as for the air turbine can be
used. To remove the air motor from the coupling, pull
back the connector ring toward the hose, in the same
way as for the turbine (Fig.2).
Before using the handpiece, pull out the bur gently to make sure that
the bur is securely seated and locked (Fig.7).
When the head is removed, take care not to bend the exposed fiber
optic pipes.
Keep the head installed even when the air motor is not in use.
Do not pull back the connector ring when the air
pressure is applied, as the motor will be ejected by
the air pressure.


