1
Thank you for purchasing VIVA ace Scaler Kit.
Please read this Operation Manual and the VIVA ace Basic Set Operation Manual carefully before use for
operating instructions and care and maintenance guidelines so that you can use it for many years to come
through a correct use.
Keep this Operation Manual within easy reach of users for future reference.
Contents
*This product is used by connecting to VIVA ace Basic Set.
1. User and Indications for Use .....................2
2. Precautions for handling and
operation ..................................................2
3. Package Contents.....................................5
4. Preparation for Use...................................6
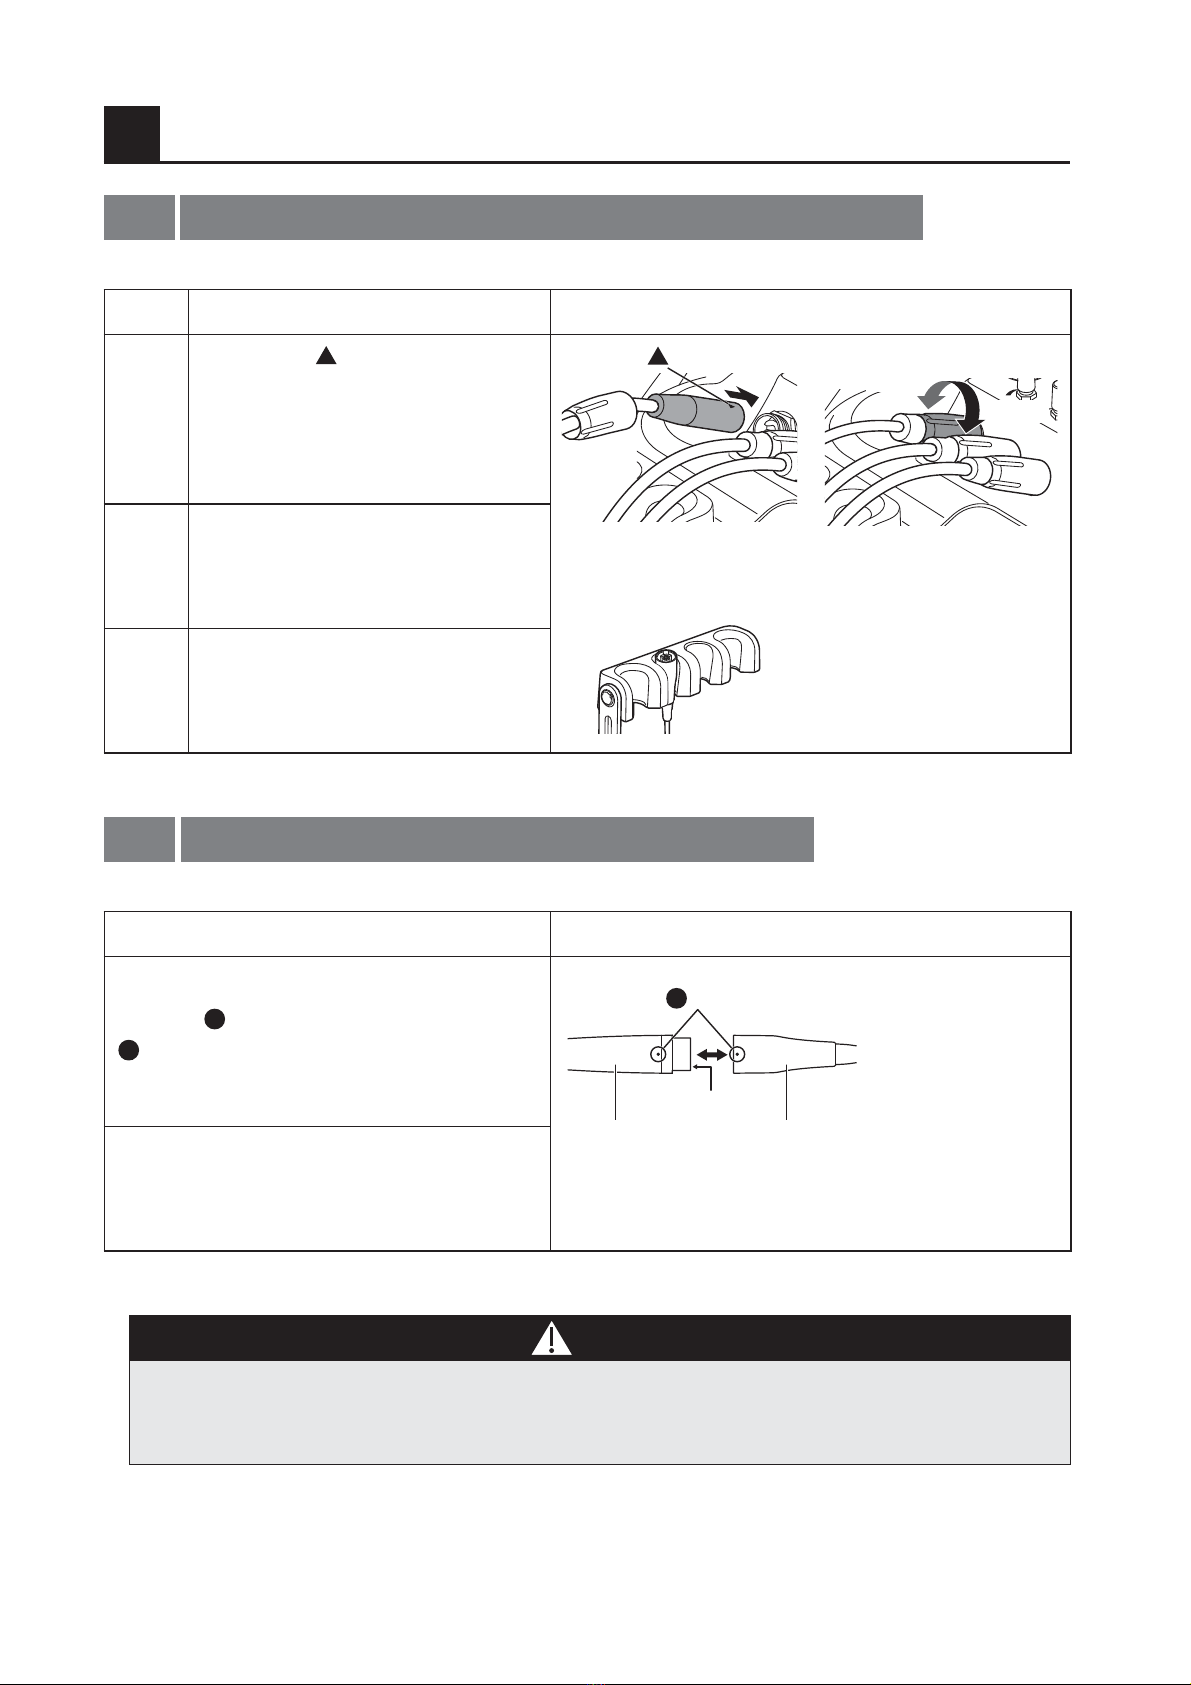
4-1 Connecting the Scaler Cord and VIVA ace
Control Unit .......................................................... 6
4-2 Connecting and Disconnecting
the Handpiece ...................................................... 6
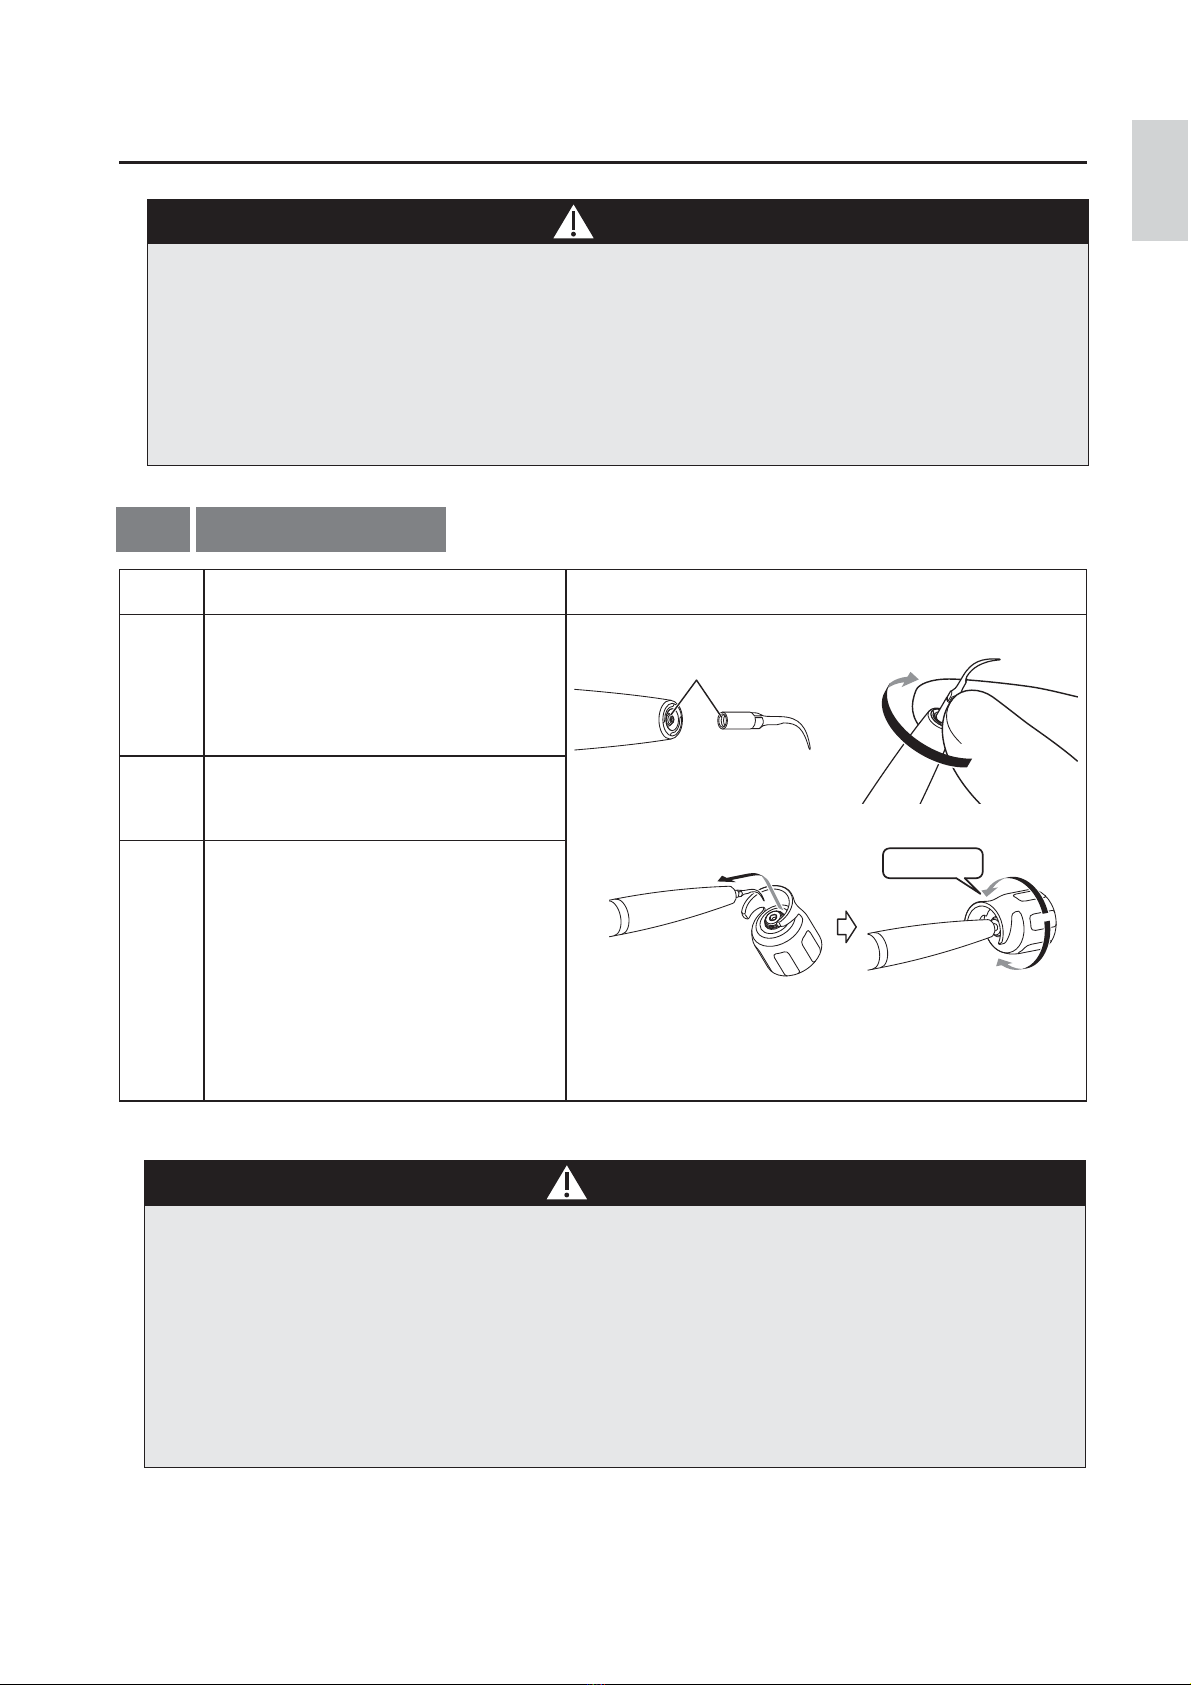
4-3 Mounting the Tip ..................................................7
4-4 Using the Tip Card................................................ 9
4-5 Check before treatment...................................... 10
5. Operation Procedure...............................10
6. Post-use Maintenance............................10
6-1 Preparation for Maintenance............................... 10
6-2 Maintenance for between each patient................ 12
6-3 Maintenance after close ..................................... 13
6-4 Sterilization ........................................................29
6-5 Maintenance of the Water Line of the
Scaler Handpiece and the Scaler Cord ....................
(In case of Connecting the Control Unit) ..............31
7. Maintenance.......................................... 34
7-1 Replacing the O-ring ..........................................34
7-2 Periodical Maintenance Checks ..........................35
8. Troubleshooting..................................... 35
8-1 Problems and Solutions ......................................35
9. Specifications ....................................... 38
9-1 Specifications.....................................................38
9-2 Classification of Equipment.................................38
9-3 Operation Principle.............................................38
9-4 Symbol ..............................................................39
10. After-sales Service ................................ 39
10-1 Warranty ..........................................................39
10-2 Disposing Product ............................................39
Operation procedure of this product is introduced in a movie.
Check the following URL or the QR code.
URL
http://www.nsk-dental.com/support/videos/
English