54 PIPA lite lx Instructions PIPA lite lx Instructions
EN
EN
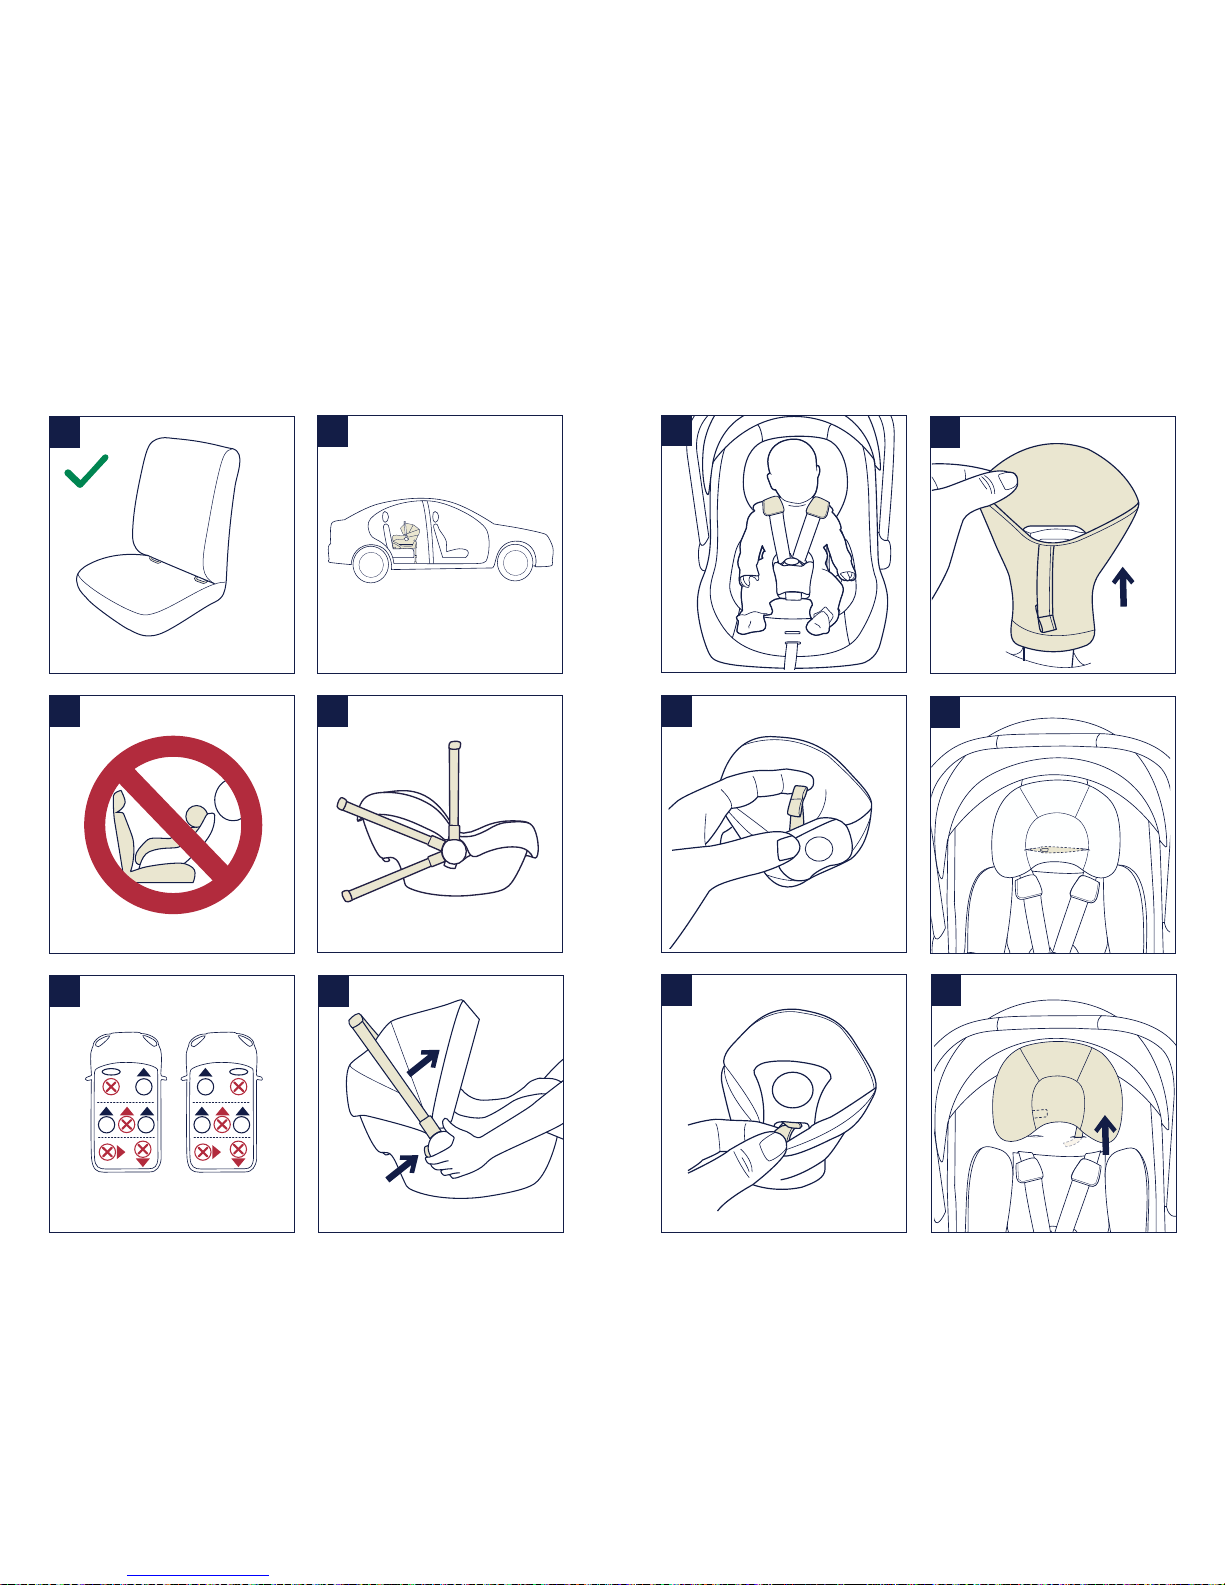
For use
with base
The infant child restraint with Base is a “Semi-
Universal Child Restraint” and should be fitted
using at 3 point adult seat belt approved to UN
ECE regulation 16 or the ISOFIX connections.
For Installation with 3-point-belt
It will fit vehicles fitted with 3-point retractor
safety-belts. Seat positions in other cars may also
be suitable to accept this child restraint. If in doubt,
consult either the child restraint manufacturer or
the distributor.
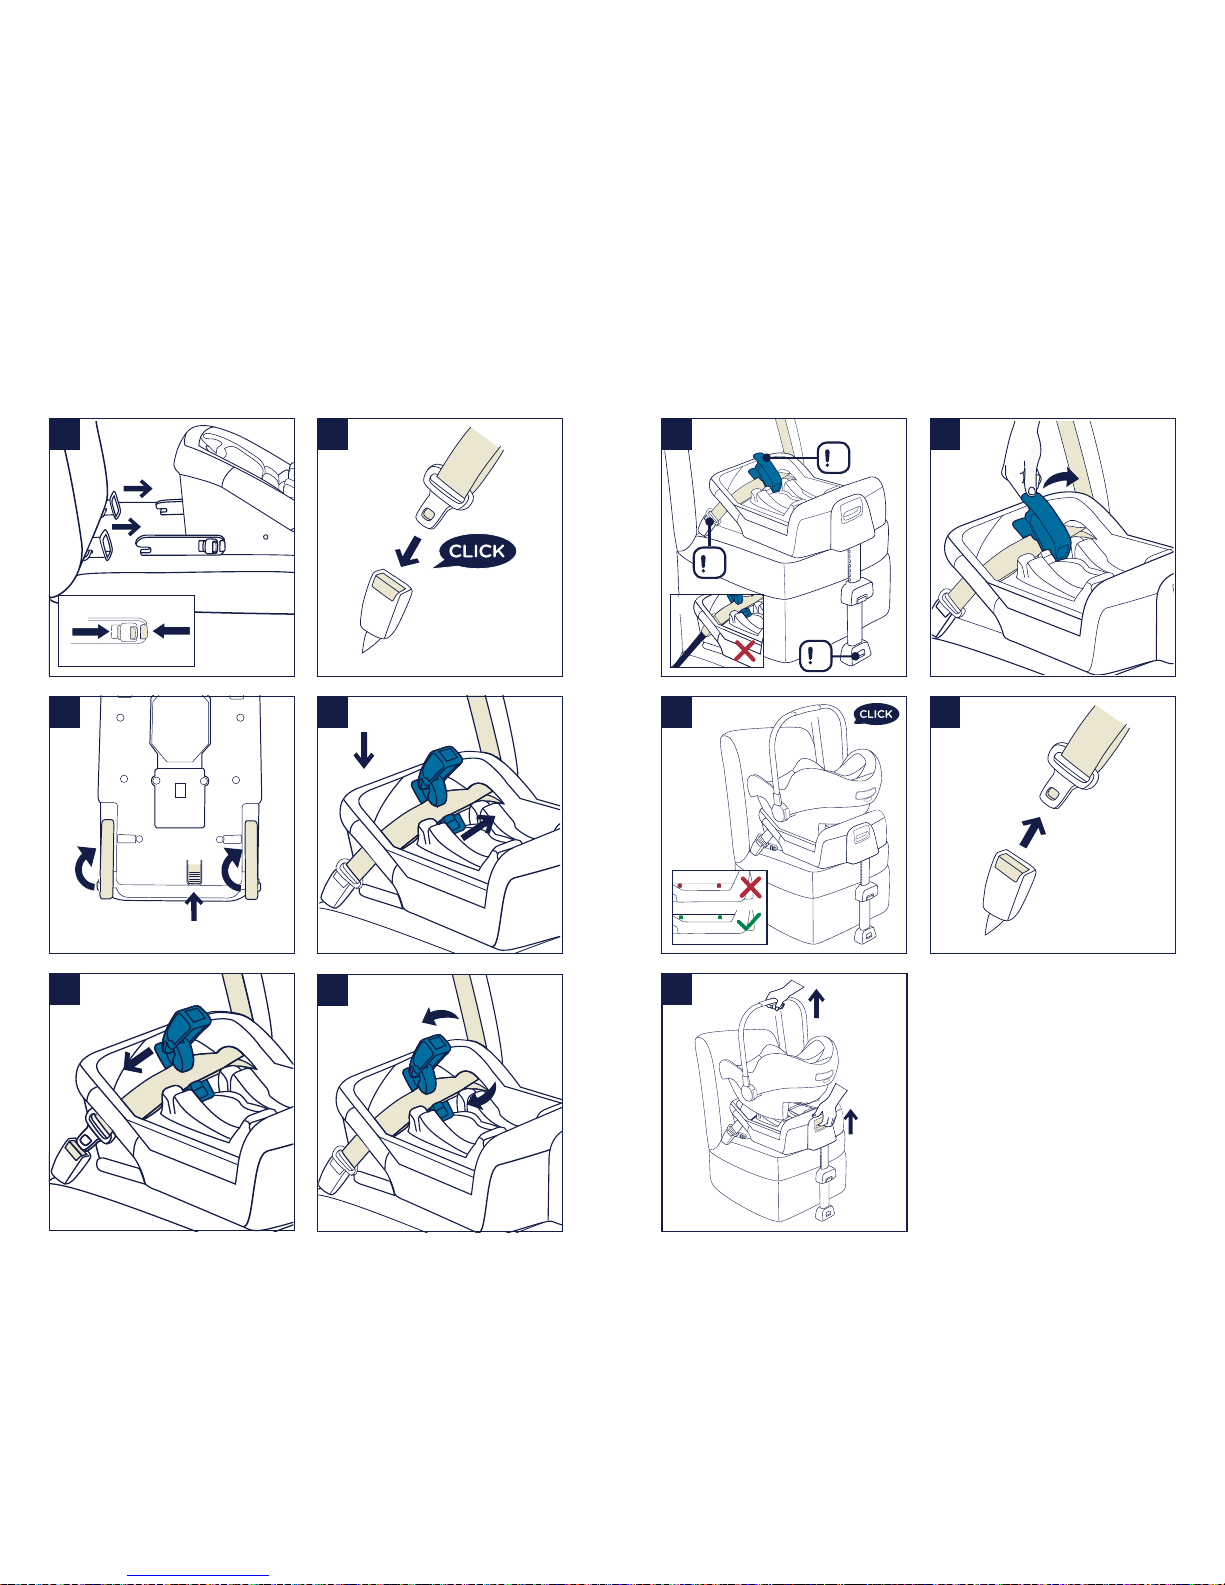
For Installation with ISOFIX System
This is an ISOFIX CHILD RESTRAINT SYSTEM.
It is approved to Regulation NO. 44, 04 series of
amendments for general use in vehicles fitted with
ISOFIX anchorages systems.
It will fit vehicles with positions approved as ISOFIX
positions (as detailed in the vehicle handbook),
depending on the category of the child seat and
of the fixture. If in doubt, consult either the child
restraint manufacturer or vehicle manufacturer.
The ISOFIX size class for which this device is
intended is C and D.
WARNING
Always secure child in child restraint,
even on short trips, as this is when most
accidents occur.
Any straps holding the restraint to the
vehicle should be tight, that any straps
restraining the child should be adjusted
to the child’s body, and that straps should
not be twisted.
After your child is placed in this infant child
restraint, the safety belt must be used
correctly, and ensure that any lap strap is
worn low down, so that the pelvis is firmly
engaged.
Be sure that the child restraint is installed
in such a way that no part of it interferes
with movable seats or in the operation of
vehicle doors.
Before carrying the infant child restraint by
hand, ensure that the child is fastened with
the safety harness, and that the handle is
correctly locked in a vertical position.
Consult the distributor for issues
concerning maintenance, repair and part
replacement.
Frequently check the ISOFIX guides for
dirt and clean them if necessary. Reliability
can be effected by ingress of dirt, dust,
food particles etc.