NUUO SCB-C31A POS User manual

The Intelligent Surveillance Solution
SCB-C31A
User Manual
Ver. 1.0.130726.00

The Intelligent Surveillance Solution
NUUO NVR/DVR/Hybrid NDVR System
- 1 -
TABLE OF CONTENTS
TABLE OF CONTENTS............................................................................................................................. 1
1. SPECIFICATIONS ................................................................................................................................ 3
2. NETWORK DEPLOYMENT DIAGRAM .............................................................................................. 3
3. HARDWARE SETUP............................................................................................................................. 4
3.1 Connect C31A to NVRmini2................................................................................................................................... 4
3.2 Setup POS .................................................................................................................................................................. 6

The Intelligent Surveillance Solution
NUUO NVR/DVR/Hybrid NDVR System
- 2 -
1.Introduction
C31A is an I/O converter to intermediate the communication between a surveillance server and multiple
peripherals. It joins up all the major components in your surveillance network to deliver your prospective
management and protection over your property.
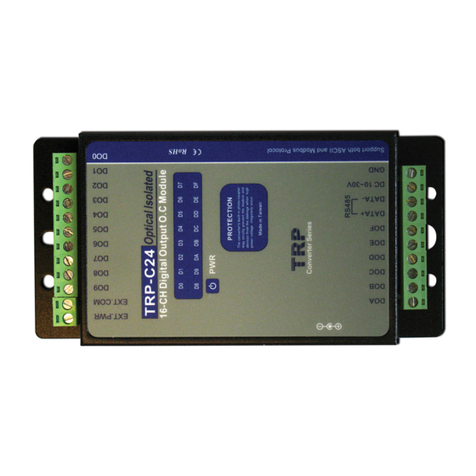
This manual combs the hardware/software setup for C31A. Hardware-wise C31A needs box (C24/C26/C28),
and software-wise the server relies on a piece of surveillance recording product,
Mainconsole/NVRmini2/NVRsolo/Titan NVR, to bring all the peripherals under control.
Easy-to-mount and flexible in communication, C31A will be the pivot in your surveillance network. Thank you
for choosing C31A.

The Intelligent Surveillance Solution
NUUO NVR/DVR/Hybrid NDVR System
- 3 -
1. Specifications
To apply C31A to your surveillance system, get to know it first. C31A is Ethernet-RS485 converter. Further, the
C31A box can not be used for POS and converter at the same time.
2. Network Deployment Diagram
This diagram shows how server, converter (C31A), I/O box (C24/C26/C28) are deployed within the
surveillance network to work. Take NVRmini2 structure for example:
Fig. 1. Network Deployment Diagram
C31A
IP camera
NVRmin2
CMS
User

The Intelligent Surveillance Solution
NUUO NVR/DVR/Hybrid NDVR System
- 4 -
3. Hardware Setup
This chapter combs through the necessary setup for the major components in the surveillance network
including:
1. peripherals,
2. converter C31A,
3. I/O box C24/C26/C28,
4. Windows-based server PC.
3.1 Connect C31A to NVRmini2
Here take C31A and NVRmini2 as example:
Step 1: Connect SCB-C31A with power source and with internet by RJ45 LAN cable.
Step 2: Connect I/O Box with power source.
Step 3: Connect SCB-C31 and I/O Box with cable, positive connection (TX+/D+ and DATA+) and negative
connection (TX-/D- and DATA-).
Take SCB-C31A with I/O Box SCB-C28 for example as below:
Step 4: Setup IP address and port of the C31A
Step 5: Open Internet Explorer to setup SCB-C31. The default IP address is 192.168.1.1.
Step 6: Setup IP address and port.

The Intelligent Surveillance Solution
NUUO NVR/DVR/Hybrid NDVR System
- 5 -
Note: If the IP has been changed, use TRP-C3X manager tool to search the device. To change the IP address
or port…etc, double click on the device found and configure. The serial port mode must be RS485H
-C31A search tool is downloadable at www.nuuo.com > Download
Step 7: Setup address/ID of the I/O box

The Intelligent Surveillance Solution
NUUO NVR/DVR/Hybrid NDVR System
- 6 -
Execute C31A Config tool (IOConfig.exe), type in the IP address and port of SCB-C31A, and click
the Scan button. When the I/O Box is discovered, click on the item and change the ID from the New
Address field. Click the Update device button to activate the settings.
-C31A Config tool is downloadable at www.nuuo.com > Download
-
Step 8: Setup on NVRmini web setting page
Step 9: Open Internet Explorer and log in to the NVRmini 2.
Step 10: Click POS & I/O -> I/O Settings -> I/O Box Settings.
Step 11: Enter the information of C31A & I/O box. Click the Create button, and the information will be
updated in I/O Box List.
3.2 Setup POS
Here take C31A and Mainconsole as example:
To connect Cash Register, Printer, and SCB-C31A POS data capture converter together, please follow below
steps:
Step 1: Please refer the user manual to setup Cash Register and printer.
Step 2: Using a “Y-shape” DB-9 cable, one DB-9 female connect to POS system and one DB-9 male connect
to the receipt printer Y-shape (provided by Printer vendor).
Step 3: Using another DB-9 female connect to SCB-C31A POS Data Capture R232/Ethernet converter with
Null modem.

The Intelligent Surveillance Solution
NUUO NVR/DVR/Hybrid NDVR System
- 7 -
Note: There are two kinds of serial cable: Straight pass-through and Null-Modem.
The connection between SCB-C31 POS Data capture box and Y-cable must be null modem (in
package).
Step 4: Check the system switch of the SCB-C31A is switched to OFF-OFF position.
Step 5: Connect SCB-C31A with power source.
Step 6: Connect SCB-C31A with internet port by RJ45 LAN cable.
Software Installation –SCB-C31A
Step 1: Use IE-browser to setup SCB-C31A, the default IP address is 192.168.1.1
Step 2: Setup IP address and password in Server page, and click the Save button.
Note: Each time you switch the page of the web, please click Save at first. If you leave this page without
saving, all changes will be ignored.
Step 3: Setup Password if needed. Password is only using to activate a security feature on the serial server.
Once a password is entered it will be required to access the menu and make change of configuration when
access.
Please write down the Serial number and MAC address, these two parameters are necessary when user
forget your password.
Note: Please write down the Serial number and MAC address, these two parameters are necessary when
user forget your password.
Step 4:Go to "Serial Port" page, and make sure you are using "RS-232" in "Serial port mode".
The Intelligent Surveillance Solution
NUUO NVR/DVR/Hybrid NDVR System
- 8 -
2. Mainconsole POS setup
Step 1: Open Main Console -> General Settings -> Metadata Application -> Insert a new Metadata Type as
POS and select the Source Type as SCB-C31A.
Step 2: Input the IP address (as same as the IP of Main console, local server) and the POS port.
Note: The Port you may find in "Operation" page in C31A's web.
Step 3: Test connection to confirm the Metadata Server is available.
Step 4: Click “Fake C31A” and New a Tag Filter.

The Intelligent Surveillance Solution
NUUO NVR/DVR/Hybrid NDVR System
- 9 -
Step 5: Press connect and press disconnect once to receive the transaction data as a template from POS.
(we need to make a tag filer according to the template transaction data)
Step 6: Create the tags according to the below setting. (ex: mark the text “<0a>” and set it as “New Line”)
Step 7: Press ok to accomplish the tag setting.
Step 8: To associated cameras which would like to display the transaction data and press OK.

The Intelligent Surveillance Solution
NUUO NVR/DVR/Hybrid NDVR System
- 10 -
Step 9: Then you should be able to see POS data on associated camera channel.
Other manuals for SCB-C31A POS
3
Table of contents
Other NUUO DVR manuals

NUUO
NUUO NV-2040 User manual

NUUO
NUUO NS-8160 User manual

NUUO
NUUO SCB-IP-P04 User manual

NUUO
NUUO NVRsolo NS1080 User manual

NUUO
NUUO NVRsolo User manual

NUUO
NUUO Crystal CT-8000EX User manual

NUUO
NUUO 7100 SERIES User manual

NUUO
NUUO Titan User manual

NUUO
NUUO CT-8000IP User manual

NUUO
NUUO NVR User manual