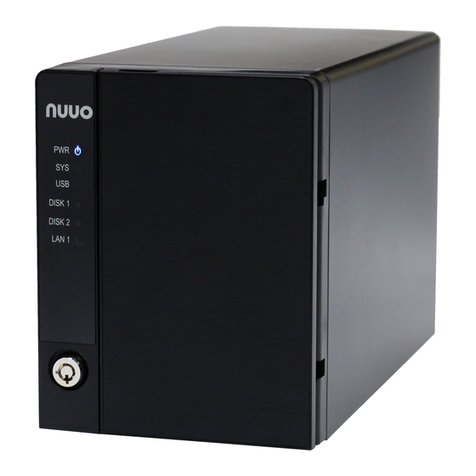
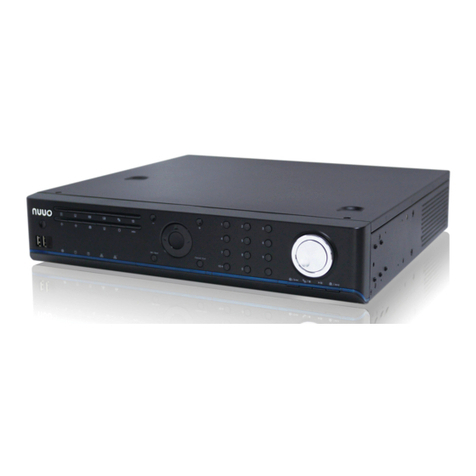
NUUO NAS NVRmini User manual

The Intelligent Surveillance Solution
NAS NVRmini
Quick Start Guide

1
Table of Contents
English..............................................................................................................2
Čeština ...........................................................................................................12
Deutsch..........................................................................................................21
Français.........................................................................................................31
Ialiano............................................................................................................41
Español..........................................................................................................50
Pусский..........................................................................................................60
日本語............................................................................................................70
繁體中文 ........................................................................................................80
한국어 ............................................................................................................89
Polski..............................................................................................................99
Srpski............................................................................................................109

2
Step 1: Unpacking the Unit
This package contains the following items:
The unit
Quick Start Guide
Screws for disk drives (1 package)
Power cord
Warranty card
12V DC power transformer (2 bay unit)
CD with Install Wizard, Backup, Live View, and Playback
application, user manual, and quick start guide
Warning
The electronic components within the unit can be damaged by
Electro-Static Discharge (ESD). Please take precautions at all
times when handling the unit or its sub-assemblies.
Important
To configure the unit, you must install the software onto a
desktop/ laptop running Windows XP-SP3, 2003-SP2, Vista-SP2,
Windows 7.
2 bay unit front view
English
Ethernet Activity
LED
Drive Activity LED
Power Button
System Status LED
Disk Drive
Drive Carrier
Drive Status LED

3
2 bay unit rear view
4 bay unit front view
Disk Drive
Drive Carrier
Drive Status LED
Drive Activity LED
Ethernet Activity LED
Power Button
System Status LED
Cooling Fan
USB Connection
RJ45 Network Connection
Power Connection

4
4 bay unit rear view
4 bay unit front view (S-series)
Cooling Fan
RJ45 Network
Connection
USB Connections
Power Supply Fan
Power Connection
English
Disk Drive
Drive Carrier
Drive Status LED
Drive Activity LED
System Status LED
Ethernet Activity LED

5
4 bay unit rear view (S-series)
Step 2: Installing Disk Drives
You can populate this unit with SATA1.5 Gb/s or 3.0 Gb/s disk drives. For
optimal performance, install disk drives of the same model and capacity.
Your disk drives will become a RAID Volume on this unit.
1. Open the lid on the front of the unit enclosure.
2. Pull a disk drive carrier from the enclosure. See the front view figure.
3. Carefully lay the disk drive into the drive carrier, making sure that the
screw holes on the sides of the carrier align with the screw holes in the
drive.
4. Insert the screws through the holes in the drive carrier and into the sides
of the disk drive.
Install only the counter-sink screws supplied with the unit.
Install four screws per disk drive.
Make sure each screw is securely tightened, but be careful not to
over-tighten.
5. Reinstall the drive carrier into the unit enclosure.
6. Repeat step 2 through 5 for the other disk drives.
Power Button
RJ45 Network
Connection
Cooling Fan
USB Connections
eSATA Connection
Power Connection

6
Step 3: Connecting to the Network
1. Attach one end of the network cable to the RJ45 network connection.
See the rear view figure.
2. Attach the other end of the network cable to your Ethernet hub or
switch.
Important
If there are multiple networks at your facility, note the network to
which you connect the unit. You will need this information during
the setup process.
Step 4: Connecting the Power
1. Attach the power cord from the power source to the power adapter.
2. Connect the power adapter to the back of the unit enclosure. See the
rear view figure.
3. On the front of the unit, press the power button. See the front view
figure.
Important
Before pressing the power button, please make sure the two
ends of the network cable are attached to the unit and the
Ethernet router, respectively. Please also enable the DHCP
function within the network, as the unit will retrieve an IP address
through DHCP by default.
It takes about a minute for the unit to fully power up. Once it is powered up:
The System Status LED turns green. See the front view figure.
The buzzer beeps one time.
Step 5: Installing the Software
1. Insert the CD into your CDROM.
2. Double-click Setup.exe to begin installation.
3. Click the Next button to continue with the installation.
English

7
4. Click the “I accept the terms of the license agreement” option, and then
click the Next button.
5. Insert your “User Name” and “Company Name”, and then click the Next
button.
6. Select the setup type, and then click the Next button.
7. Click the Install button to proceed with installation.
8. When the above-mentioned installation processes are finished, a final
installation screen appears. Click the Finish button to close the installer.
Step 6: Setting up the Unit
The software Install Wizard performs the setup procedures on your unit.
After the procedure, you can begin using this unit.
1. Go to Start > NUUO NVRmini > Install Wizard.
2. This program will show the default language setting and initiation mode.
3. Choose your preferred language and initiation mode, and then click the
Next button.
Express Mode: you don’t need to set the date, time, network settings,
and RAID level. (After step 5, jump to step 9 directly.)
Advance Mode: you need to set your specific date, time, and
network settings.
4. The Install Wizard program will search for all the units on the internet
right now. Choose one of them, and then click the Next button.

8
5. Type in the password, and then click the OK button.
Note
The default Administrator password is “admin”.
6. Set the time zone, date, and time, and then click the Next button.
English

9
7. Select the network settings, and then click the Next button.
Obtain network settings automatically from DHCP server or
wizard: apply all settings which are automatically generated by the
DHCP server, such as IP, netmask, gateway, and DNS.
Make network settings manually: select your preferred settings one
by one.
8. If you need to set a new disk(s), check the “Create new storage” option.
After checking, click the Next button.

10
Data Protection: set the RAID level to RAID 1 (2 bay). Set the RAID
level to RAID 5 (4 bay).
Maximum Capacity: set the RAID level to RAID 0 (2 bay). Set the
RAID level to RAID 0 (4 bay).
9. Review your settings. If the settings are correct, click the Finish button
to exit the settings procedure and activate the system.
Caution
Once the “Finish” button is clicked, the unit will start working. In
order to ensure the stability of your unit, never pull any disks out
when the system is running.
English

11
10.After setting up the unit, log in to the system by entering its IP address
in the browser (Internet Explorer 7 or above). When connecting, choose
your language, enter the user name and password, and then begin
using this system.
Remote PC Minimum Requirements
Model
2 bay
4 bay
OS Supported
Windows XP/ 2003/ Vista/ Win7
CPU
Intel Core 2 Duo, 2.6GHz
RAM
1GB
User Interface
1. HTTP Web browser - Internet Explorer 7 or above
2. Client Application Program

12
Krok 1: Rozbaleníjednotky
Baleníobsahuje následující součásti:
Vlastní přístroj
Příručku rychlého startu
Šrouby pro diskovou jednotku (1 balení)
Síťová (napájecí) šňůra
Záruční list
12V DC napájecítransformátor (2 zásuvková jednotka)
CD s aplikacemi pro instalaci, zálohování, “Live View” a přehrávání,
uživatelský manuál a příručkou rychlého startu
Upozornění
Elektronické součásti uvnitř jednotky jsou citlivé a mohou být
poškozeny elektrostatickým výbojem. Prosíme, učiňte příslušná
opatření po celou dobu zacházení s jednotkou nebo jejími
součástmi.
Důležité
Ke konfiguraci jednotky musíte instalovat software na
desktop/laptop počítač běžící pod OS Windows Vista, 2003, XP
Professional, nebo Windows 7.
2 zásuvková jednotka přední pohled
Disková jednotka
Diskový pohon
Stavová LED
LED aktivity jednotky
LED aktivity
ethernetu
Tlačítko napájení
Systémová LED
Čeština

13
2 zásuvková jednotka zadnípohled
4 zásuvková jednotka přední pohled
Disková jednotka
Diskový pohon
Stavová LED
LED aktivity jednotky
LED aktivity
ethernetu
Napájecí tlačítko
Systémová LED
Chladícíventilátor
Konektor USB
Konektor síťového připojení (RJ45)
Napájecíkonektor

14
4 zásuvková jednotka zadnípohled
4 zásuvková jednotka přední pohled (S-series)
Čeština
Disková jednotka
Diskový pohon
Stavová LED
LED aktivity jednotky
Systémová LED
LED aktivity
ethernetu
Chladícíventilátor
Konektor síťového
připojení (RJ45)
USB konektor
Ventilátor
napájecího zdroje
Napájecíkonektor

15
4 zásuvková jednotka zadnípohled (S-series)
Krok 2: Instalace diskových jednotek
Tuto jednotku můžete osadit diskovými jednotkami SATA 1,5 Gb/s nebo 3,0
Gb/s. Pro dosažení optimálního výkonu instalujte diskové jednotky
stejného typu a kapacity. Vaše diskové jednotky se stanou diskovým polem
RAID.
1. Otevřete víko v přední části krytu jednotky.
2. Táhněte upínací šachtu diskové mechaniky z uzávěru. Viz obrázek
pohledu „ze předu“.
3. Opatrně položte diskovou jednotku do upínací šachty diskové
mechaniky, nastavte otvory pro šrouby na stranách mechaniky tak, aby
byly zarovnány s otvory na jednotce.
4. Vložte šrouby skrz otvory v upínací šachtě diskové mechaniky a do
stran diskové jednotky.
Použijte pouze zahlubovací šrouby dodané s jednotkou.
Použijte 4 šrouby na jednu diskovou jednotku.
Pečlivě utáhněte každý šroub. Buďte opatrní, nepřekruťte šroub.
5. Vložte upínací šachtu do krytu jednotky.
6. Opakujte krok 2 až 5 pro každou diskovou jednotku.
7. Uzavřete víko v přední části jednotky.
Krok 3: Připojení k síti
1. Připojte jeden konec síťového kabelu do konektoru RJ45 v jednotce.
Napájecí tlačítko
eSATA konektor
Chladícíventilátor
USB konektor
Konektor síťového
připojení (RJ45)
Napájecíkonektor

16
Viz obrázek zadního pohledu.
2. Připojte druhý konec síťového kabelu k připojení Ethernet (hub nebo
switch).
Důležité
Máte-li vícenásobné připojení k ethernetu, poznamenejte si, ke
které síti byla jednotka připojena. Tuto informaci budete
potřebovat během procesu instalace.
Krok 4: Připojení k napájení
1. Připojte napájecí šňůru ze zásuvky (zdroj 230 V) k napájecímu
adaptéru.
2. Zapojte napájecí adaptér do konektoru na zadní straně krytu jednotky.
Viz obrázek zadního pohledu.
3. Na přední straně jednotky stiskněte tlačítko napájení. Viz obrázek
předního pohledu.
Důležité
Před spuštěním jednotky se ujistěte, že jsou připojeny oba konce
síťového kabelu do konektoru na jednotce a do připojení
k Ethernetu. Prosíme, rovněž umožněte funkci DHCP v síti,
jednotka získá defaultně IP adresu od DHCP.
Bootování jednotky může trvat několik minut. Po úplném nabootování:
Systémová LED svítí zeleně. Viz obrázek předního pohledu.
Bzučák jedenkrát pípne.
Krok 5: Instalace software
1. Vložte instalační CD do vaší CDROM.
2. Dvojím kliknutím na Setup.exe spustíte instalaci.
3. Kliknutím na tlačítko Dalši pokračujte v instalaci.
4. Klikněte na “I accept the terms of the license agreement” a poté klikněte
na tlačítko Dalši.
5. Vložte vaše “User Name” (uživatelské jméno) „Company Name” (jméno
Čeština

17
společnosti), poté klikněte na tlačítko Dalši.
6. Zvolte „setup type“ (typ instalace) a poté klikněte na tlačítko Dalši.
7. Klikněte na tlačítko Install a pokračujte v instalaci.
8. Po dokončení výše uvedeného procesu se zobrazí finální okno
instalace. Stiskněte tlačítko Dokoncit k uzavření instalátoru.
Krok 6: Nastaveníjednotky
Software Install Wizard provedl setup-procedury ve vaší jednotce. Po této
proceduře můžete začít vaši jednotku používat.
1. Zvolte Start > NUUO NVRmini > Install Wizard.
2. Tento program zobrazí defaultní jazykové nastavení a iniciační mód.
3. Zvolte preferovaný jazyk a iniciační mód a stiskněte tlačítko Dalši.
Expresni rezim : nepotřebujete-li nastavit datum, čas, síť a stupeň
RAID (Po kroku 5 skočí přímo ke kroku 9).
Pokrocily rezim : potřebujete-li nastavit datum, čas a síť.
4. Program Install Wizard bude ihned vyhledávat všechny jednotky na
internetu. Zvolte jednu z nich a klikněte na tlačítko Dalš.

18
5. Vložte Heslo a klikněte na tlačítko Potvrdit.
Poznámka
Defaultníheslo administrátora je “admin”.
6. Nastavte zónu času, datum a čas a klikněte na tlačítko Dalš.
Čeština

19
7. Proveďte nastavení sítě a klikněte na tlačítko Dalš.
Ziskat sitova nastaveni automaticky z DHCP serveru nebo
Wizardu: aplikuje nastavení IP, masku sítě, bránu, DNS získané z
DHCP serveru.
Nastavit sitova nastaveni rucne : provede vaše specifické
nastavení.
8. Potřebujete-li nastavit nový disk(y), zvolte volbu “Create new storage”.
Po volbě klikněte na tlačítko Dalš.
Other manuals for NAS NVRmini
2
Table of contents
Languages:
Other NUUO Security System manuals

NUUO
NUUO NAS NVRmini User manual

NUUO
NUUO NVRsolo User manual

NUUO
NUUO NVRmini 2 User manual
NUUO
NUUO Crystal User manual

NUUO
NUUO NVRsolo NS-8060 User manual

NUUO
NUUO SCB-C24 User manual

NUUO
NUUO NVRsolo User manual

NUUO
NUUO NVRmini 2 User manual
NUUO
NUUO NVRmini 2 User manual

NUUO
NUUO DigiPlayer LDP1601 User manual
Popular Security System manuals by other brands

alerta
alerta Detect Motion instruction manual

Teletek electronics
Teletek electronics CA824 user manual

Pulsar
Pulsar 7/TRZ40/SATEL/GRADE Assembly instructions

Honeywell
Honeywell Gamewell-FCI MS-95 manual

Paradox
Paradox K07C Reference and installation manual

Delta
Delta AlertMaxx DMS-270 Installation & operating instructions