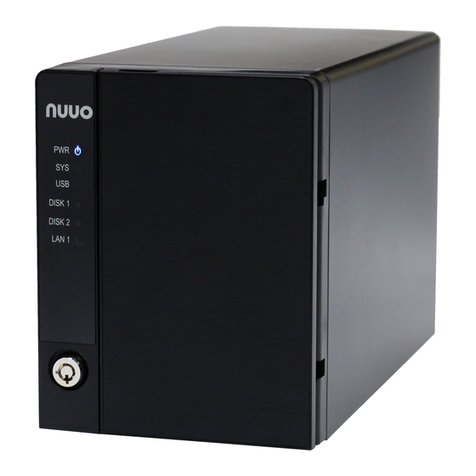
NUUO DigiPlayer LDP1601 User manual

Copyright ©2009 Lorex Technology Inc. www.lorexcctv.com
INSTRUCTION MANUAL
English Version 1.0
DIGIPLAYER
16-CHANNEL INTELLIGENT
SURVEILLANCE SOLUTION
NOTE: This software is a basic version of a professional application by
Nuuo™. Some elements of this manual may not be applicable.
MODEL:
LDP1601

Intelligent Surveillance Solution
Table of Contents
page-1
T
TA
AB
BL
LE
E
O
OF
F
C
CO
ON
NT
TE
EN
NT
TS
S
TABLE OF CONTENTS ..............................................................................................1
HARDWARE REQUIREMENTS..................................................................................5
SOFTWARE REQUIREMENTS....................................................................................5
INSTALLATION..........................................................................................................6
QUICK START..........................................................................................................10
1. MAIN CONSOLE................................................................................................14
1.1 Start ..............................................................................................................16
1.2 Information Window ..................................................................................18
1.3 PTZ Camera Control...................................................................................18
1.3.1 Preset/ Go.............................................................................................18
1.3.2 Zoom......................................................................................................19
1.3.3 Focus .....................................................................................................19
1.3.4 Patrol .....................................................................................................19
1.4 On Screen Menu........................................................................................20
1.4.1 Enable Move........................................................................................20
1.4.2 Enable Talk ...........................................................................................20
1.4.3 Connect/ Disconnect.........................................................................20
1.4.4 Show Camera......................................................................................20
1.4.5 Delete Camera....................................................................................20
1.4.6 Enable Digital PTZ ................................................................................20
1.4.7 Fix Aspect Ratio: ..................................................................................20
1.4.8 Snapshot...............................................................................................20
1.4.9 Manual Record....................................................................................20
1.4.10 Toggle Full Screen .............................................................................20
2. PLAYBACK .........................................................................................................21
2.1 Information Window ..................................................................................23
2.2 Audio Volume Control...............................................................................23
2.3 Screen Division............................................................................................23
2.4 Browse Mode..............................................................................................23
2.5 Open Record..............................................................................................23
2.5.1 Date Time Panel ..................................................................................24
2.5.2 Record Display Window.....................................................................24

Intelligent Surveillance Solution
Table of Contents
page-2
2.5.3 Date Time Period.................................................................................24
2.5.4 Video Preview......................................................................................25
2.5.5 Event Type............................................................................................25
2.5.6 Time Table.............................................................................................25
2.5.7 To Withdraw the Record ....................................................................26
2.6 Search Mode..............................................................................................27
2.6.1 Unusual Event-General Motion.........................................................27
2.6.2 Unusual Event-Foreign Object...........................................................28
2.6.3 Unusual Event-Missing Object ...........................................................28
2.6.4 Unusual Event-Lose Focus/ Camera Occlusion..............................29
2.7 Enhancement.............................................................................................29
2.7.1 General Setting....................................................................................29
2.7.2 Filter Setting ..........................................................................................29
2.8 Save Video..................................................................................................30
2.9 Save Image.................................................................................................31
2.10 Print.............................................................................................................31
2.11 Backup.......................................................................................................32
2.12 Log Viewer ................................................................................................33
2.12.1 Unusual Event.....................................................................................33
2.12.2 System Log..........................................................................................34
2.12.3 Counting Application.......................................................................35
2.12.4 Counting Application (Diagram)....................................................35
2.12.5 POS Log...............................................................................................36
2.12.6 Export...................................................................................................36
2.13 Setting........................................................................................................37
2.13.1 Record Display...................................................................................37
2.13.2 Play......................................................................................................37
2.13.3 Capture Image..................................................................................37
2.13.4 OSD Setting ........................................................................................38
2.13.5 POS Overlay Setting..........................................................................38
2.14 Remote Server..........................................................................................39
2.14.1 Add Remote Playback Site .............................................................39
2.14.2 Access Remote Playback Site ........................................................39
3. SCHEDULE..........................................................................................................40
3.1 Day Mode ...................................................................................................41
3.2 Load Preset Modes....................................................................................41
3.3 Insert a New Schedule Manually.............................................................42
3.4 Copy Schedule...........................................................................................43
3.5 Week Mode ................................................................................................43
3.5.1 Default...................................................................................................44

Intelligent Surveillance Solution
Table of Contents
page-3
3.5.2 Holiday..................................................................................................44
3.5.3 Custom..................................................................................................44
3.6 Adjust the Scheduled Setting...................................................................44
3.7 Encoding Option Panel.............................................................................45
3.7.1 Always Record.....................................................................................47
3.7.2 Record on Event..................................................................................47
3.7.3 Record on Motion ...............................................................................47
3.7.4 Pre-record/ Post-record Time ............................................................47
4. CONFIGURATION..............................................................................................48
4.1 Setting – General........................................................................................49
4.1.1 Startup...................................................................................................49
4.1.2 Automatically Popup Event Report..................................................49
4.1.4 Audio Preview......................................................................................51
4.1.5 Status Display .......................................................................................52
4.1.6 Auto Reboot.........................................................................................52
4.2 Setting - Camera........................................................................................53
4.2.1 Add Camera........................................................................................53
4.2.2 Camera Parameter.............................................................................54
4.2.3 OSD Setting...........................................................................................54
4.2.4 IP Camera / Video Server Setting panel .........................................55
4.3 Setting - I/O Device ...................................................................................56
4.4 Setting - PTZ Config....................................................................................57
4.5 Setting – Hotline..........................................................................................58
4.6 Setting - User Account...............................................................................59
4.7 Setting - Address Book...............................................................................60
4.8 Setting – Monitor Display...........................................................................61
4.9 Setting – Joystick ........................................................................................62
4.10 Save/ Load Configuration......................................................................64
4.11 Counting Application..............................................................................65
4.12 POS Application.......................................................................................66
4.13 Log Viewer ................................................................................................66
4.13.1 Log Viewer – Unusual Event.............................................................66
4.13.2 Log Viewer – System Log..................................................................67
4.13.3 Log Viewer - Counting Application................................................68
4.13.4 Log Viewer - Counting Application (Diagram) ............................69
4.13.5 POS Log...............................................................................................69
4.13.6 Log Viewer - Export...........................................................................70
4.14 Backup.......................................................................................................71
4.14.1 Backup................................................................................................71
4.14.2 Delete Recorded Information from the System ...........................74

Intelligent Surveillance Solution
Table of Contents
page-4
4.15 Network Service........................................................................................75
4.15.1 Live Streaming Server........................................................................75
4.15.2 Remote Playback Server..................................................................79
4.15.3 3GPP Service......................................................................................83
4.15.4 Remote Desktop................................................................................84
4.15.5 Central Management Service ........................................................85
4.16 About Main Console ...............................................................................86
4.17 Video Source............................................................................................86
5. REMOTE LIVE VIEWER .......................................................................................87
5.1 Setup Panel.................................................................................................88
5.1.1 Setup Panel—Server............................................................................88
5.1.2 Setup Panel—Group...........................................................................89
5.1.3 Setup Cameras OSD...........................................................................90
5.1.3 Setup Remote Joystick Control.........................................................90
5.2 Show Camera(s) On the Display Screen................................................90
6. WEB VIEW...........................................................................................................92
6.1 Server IP .......................................................................................................92
6.2 Remote Live Viewer...................................................................................93
6.3 Remote Playback ......................................................................................93
7. DB TOOL.............................................................................................................94
7.1 Repair Database........................................................................................95
7.2 Export Configurations................................................................................99
APPENDIX A.........................................................................................................100
APPENDIX B .........................................................................................................101

Intelligent Surveillance Solution
System Requirements
page-5
H
HA
AR
RD
DW
WA
AR
RE
E
R
RE
EQ
QU
UI
IR
RE
EM
ME
EN
NT
TS
S
System 16-channel 8-channel 4-channel
CPU Intel Pentium D 930 Intel P4 2.8 GHz
Intel P4 2.8 GHz
RAM 1 GB 512 MB 512 MB
Motherboard Intel 945, 965 chip or above, Intel Chipset and ASUS Vender
recommended
Display ATI Radeon 9200, nVIDIA GeForce FX-5200, Intel 945 / 965, or
above (ATI recommended)
Ethernet 100 BaseT or Above, Gigabit LAN Recommended
Hard Disk 80 GB or above
S
SO
OF
FT
TW
WA
AR
RE
E
R
RE
EQ
QU
UI
IR
RE
EM
ME
EN
NT
TS
S
Item Description
Operating
System Windows Vista Premium and Windows Vista Professional /
Windows XP Professional Service Pack 2
Browser Internet Explorer 5 or later (Internet Explorer 7 supported)
Note: All cameras should be updated with the latest firmware. Please visit our
website to download the latest firmware.

Intelligent Surveillance Solution
Installation
page-6
I
IN
NS
ST
TA
AL
LL
LA
AT
TI
IO
ON
N
Note: The following describes an installation on Windows Vista. If you are using a
different operating system, certain steps and images may not apply.
Step 1: Insert the Software CD into your computer’s CD/DVD-R drive. Open the
folder DIGIPLAYER. Double-click setup.exe
Step 2: Select the language (by default, English) and click Next. From the Install Shield
window, click Next.
Step 3: Accept the license agreement and click Next.
Step 4: Under Custom Info, enter your name, company name, and serial number
and then click Next.
Note: You can find the serial number on the sleeve of the software CD. Include
capital letters and dashes/hyphens when entering the serial number. If you have
downloaded the software, you can obtain the serial number from the confirmation
email.
Step 5: Under Setup Type, select Complete installation and click Next. If you are
an advanced user, see page 8 for Custom installation.
Note: It is highly recommended to select Complete installation. Custom installation is
only suggested for advanced users.
Note: If you have
downloaded the software
from the website, open the
folder called DIGIPLAYER
and double-click
setup.exe

Intelligent Surveillance Solution
Installation
page-7
Step 7: Click Install to begin the installation. As installation finishes, you will
prompted to install additional components.
ATTENTION: When installation finishes, you will be prompted with the following:
Click OK to close the window. You will then be prompted to install the MB5 monitoring
system. DO NOT INSTALL THIS APPLICATION.
Click No.
The MBM5 component WILL NOT be installed.
Note: If you do happen to click Yes, the software component will not be installed.
Go to step 8 on page 9.

Intelligent Surveillance Solution
Installation
page-8
C
CU
US
ST
TO
OM
M
S
SE
ET
TU
UP
P:
:
Install the system to a preferred directory. Select whichever features you
wish to install.
Check the option “Custom”.
Select which program features you
want to install. This is recommended
for advanced users.
Select folder where setup will install files.
Select the features setup will install.
Hint: For example, select only Playback
and LiveView for installation. Install and
use only these features on multiple re-
mote sites at home or anywhere with a
PC.
Note: As installation finishes, you will be
prompted to install additional components. See
page 7.

Intelligent Surveillance Solution
Installation
page-9
Step 8: Click Finish to restart your computer and complete the installation.

Intelligent Surveillance Solution
Quick Start
page-10
Q
QU
UI
IC
CK
K
S
ST
TA
AR
RT
T
Launching DigiPlayer
With DigiPlayer installed, open DigiPlayer from the desktop icon or the Start menu.
Note: You should run the discovery tool/application included with your IP cameras to
make sure your IP cameras are properly connected to your network and fully
functioning.
To launch DigiPlayer:
Step 1: Double-click the DigiPlayer Main Console icon on the desktop or
select Start>Programs>DigiPlayer IP Surveillance System>Main Console.
Step 2: At the login window, enter your User Account (by default, admin) and password
(by default, [leave BLANK]. Confirm your password and click OK
Quitting DigiPlayer
Closing DigiClient lets you quit the application or log out the current user.
To quit DigiPlayer:
Click from the DigiPlayer main window.
From the Exit MainConsole window, select Exit the Main Console from the drop-down
menu and click OK.
From the Exit Main Console window,
select Log out [current user] and
click OK if you want to log off but not
quit the application.
Note: It is unsecure to leave the
password blank. Once you log in
to DigiPlayer, you should change
the login password (see page 59).
Make sure to remember your new
password

Intelligent Surveillance Solution
Quick Start
page-11
I
IN
NS
ST
TA
AL
LL
L
I
IP
P
C
CA
AM
ME
ER
RA
A(
(S
S)
)
Step 1: Setup the IP camera(s) following by the instruction manual
provided by the manufacturer.
Step 2: Check the network between the IP camera(s) and the system.
Step 3: Add the IP camera(s) to the system following below steps.
A
AD
DD
D
I
IP
P
C
CA
AM
ME
ER
RA
A(
(S
S)
)
Note: You must have the IP address or
DDNS URL of the camera before you
can add a camera to DigiPlayer. See
page 49 for DDNS settings.
Step 1: Go to Start > All Programs >
System > Main Console.
Step 2: Type in user name and password and log on to the system.
Step 3: In Main Console, go to Config >
Setting to obtain the Setting
panel.
Step 4: Go to Camera tab.
Step 8: Click “Insert” to insert the IP
cameras.
Step 9: Enter the IP address or domain
name (check the “Use DNS”
option), Http Port, Username,
and Password.
Step 10: Click “Auto Detect”
Step 11: Click OK to add the camera.
Step 4 Step 3

Intelligent Surveillance Solution
Quick Start
page-12
Step 12: Click OK to exit the Setting panel.
S
SE
ET
T
S
SC
CH
HE
ED
DU
UL
LE
E
Step 1: Go to Start > All Programs > SYSTEM >
Main Console.
Step 2: Type in user name and password
and log on to the system.
Step 3: In the Main Console, go to
Schedule.
Step 4: By default, when inserting a
camera to the system, the
recording schedule is
automatically set to be 24 hours a day, always record.
Step 5: Click Configure on the selected camera schedule or double click
on any schedule bar to modify the recording mode.
Step 6: When satisfied with the schedule setting, click OK to update the
recording schedule.
Step 7: Click OK again to go back to the Main Console.
Step 3
Step 4 Step 5
Step 9
Step 10
Step 11
Note: "Fortress" will be detected
for the following models:
DNP5220E, DNP5320E,
DNB6300V, DND7220V.

Intelligent Surveillance Solution
Quick Start
page-13
P
PL
LA
AY
YB
BA
AC
CK
K
Step 1: Go to Start > All Programs > SYSTEM > Main Console.
Step 2: Type in user name and password and log on to the system.
Step 3: In the Main Console, go to Playback.
Step 4: In the Playback window, click on the
Open Record Icon.
Step 5:
In the time table,
recorded files are
displayed in color bars.
Highlight any color
bars to select
playback section.
Click OK to return to
Playback Console.
Step 6:
The recorded files are
ready to view now.
Step 3
Step 4Step 5

Intelligent Surveillance Solution
1. Main Console
page-14
1. Main Console
This is the main operation system - to activate, schedule
recording, setup smart guard and configure system setting.
NOTE: This software is a basic version of a professional
application by Nuuo. Some elements of this manual may not
be applicable.

Intelligent Surveillance Solution
1. Main Console
page-15
E
EX
XI
IT
T:
: Shut down the Surveillance
System or log out current user.
M
MI
IN
NI
IM
MI
IZ
ZE
E:
: Minimize the Main Console
window.
S
SC
CR
RE
EE
EN
N
D
DI
IV
VI
IS
SI
IO
ON
N:
:
Allocate the sub-screen display by clicking on the
desired layout icon. To switch to single camera display, double click on a
particular sub-screen. Double click on the screen again to regain previous
screen division layout.
Exit
Minimize
Screen Division
Divide into
1 screen(s) Divide into
4 screen(s) Divide into
6 screen(s) Divide into
9 screen(s)
Divide into
10 screen(s) Divide into
13 screen(s) Divide into
16 screen(s) Divide into
N screen(s)
Divide into
13 screen(s) Divide into
17 screen(s) Switch to
Full screen Rotate all
screens

Intelligent Surveillance Solution
1. Main Console
page-16
Start
1
1.
.1
1
S
St
ta
ar
rt
t
S
ST
TA
AR
RT
T:
: Click on the Start icon and select from the drop down menu to
activate/ deactivate: (a) Recording Schedule System, (b) Smart Guard
System, or (c) Counting Application. Select Start/Stop Monitor All to
activate/ deactivate all the functions at once.
You may also enable secondary display, open event report, open E-map
window and lock the system here. See page 61 for more details about
secondary display.
Note: When activating any of the monitor functions, system considers the
current screen status as normal. Therefore, if you want to, for example,
detect Missing Object, be sure the object needed to be protected is in its
position at the moment you click Start button.

Intelligent Surveillance Solution
1. Main Console
page-17
Playback Schedule
P
PL
LA
AY
YB
BA
AC
CK
K:
:Click on the icon to get Playback Console. You can watch
recorded video, search recorded video, adjust image of the stored data,
save video/ pictures, print images, check log information and event
records, and set up recording function configuration. See Playback on
page 2s for details.
S
SC
CH
HE
ED
DU
UL
LE
E:
:Organize recording time schedule and setup recorder
configuration. See Schedule on page 4140 for details.
G
GU
UA
AR
RD
D:
:Add/edit type(s) of events that you want to detect; setup
reaction(s) responding to events. Not available on DigiPlayer by Nuuo.
C
CO
ON
NF
FI
IG
G:
:Select from the drop down menu to modify general setting,
save/ load configuration settings, start counting application, access log
viewer, start POS application, and backup files, or setup network services.
See Config on page 68 for details.
Guard Config

Intelligent Surveillance Solution
1. Main Console
page-18
1
1.
.2
2
I
In
nf
fo
or
rm
ma
at
ti
io
on
n
W
Wi
in
nd
do
ow
w: Display date, time, free HD space, CPU
temperature, fan speed, and customized text. To customize Information
about window’s setting, go to Config > General Setting > General
1
1.
.3
3
P
PT
TZ
Z
C
Ca
am
me
er
ra
a
C
Co
on
nt
tr
ro
ol
l: Control the movement of PTZ cameras. With
cameras that support PTZ control, you can move, zoom, patrol, adjust the
focus, and set preset points of the cameras.
1.3.1 Preset/ Go: Adjust the camera view until you are satisfied. Click on
the Set icon and set up the view as the preset point 01. Adjust the camera
view again and set up the preset point 02. Repeat the process until finish
setting up all preset points. You can enter any names you like to instead of
the preset point 01, preset point 02, preset point 03, etc.
Click on the Go icon and view the result of your setting.
Note: If you are trying to
control the Digimerge
camera DNZ9320W, please
make sure the camera is set
up with the following
settings:
a. log in to the camera
using your Internet browser
(need IP address)
b. Select Settings,
Preferences and choose
the DNZ9320 PTZ Type.
PTZ Camera
Control
Information
Window

Intelligent Surveillance Solution
1. Main Console
page-19
1.3.2 Zoom: Click on the + and – signs to zoom in and zoom out the view.
1.3.3 Focus: You can select to have the camera focused near or far. To
focus near means objects that are closer will be clearer than the objects
that are further away. On contrast, to focus far means objects that are
further will be clearer than the objects that are closer.
Click on the Focus icon and select auto focus if you want the system to
decide the focus point for you.
1.3.4 Patrol: Go to Patrol > Set Patrol to obtain the Patrol Setup dialog.
From the left window, select the cameras that you would like to have in
the patrol group. Align the cameras in order in the right window and
adjust the time. Rename the group name if you want. After completing
the setup, check the Active option, and then click OK.
You can setup up to four groups of auto patrol. To start or stop, click on
the Patrol icon in the Main Console, and select Start Patrol or Stop Patrol.
Table of contents
Other NUUO Security System manuals

NUUO
NUUO NVRmini 2 User manual

NUUO
NUUO NVRmini 2 User manual

NUUO
NUUO NVRsolo User manual

NUUO
NUUO 6000S SERIES User manual

NUUO
NUUO NVRsolo NS-8060 User manual

NUUO
NUUO Titan NVR User manual

NUUO
NUUO NAS NVRmini User manual

NUUO
NUUO G3 Card Mounting instructions

NUUO
NUUO NVRmini 2 User manual

NUUO
NUUO NAS NVRmini User manual