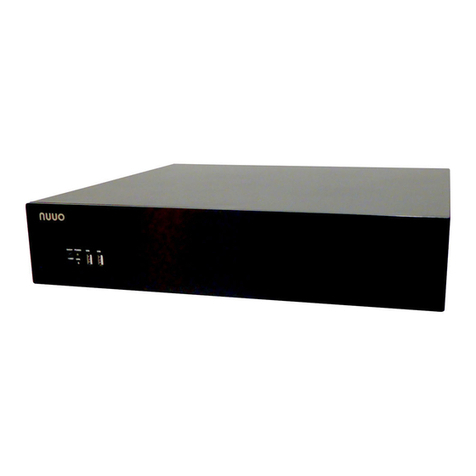
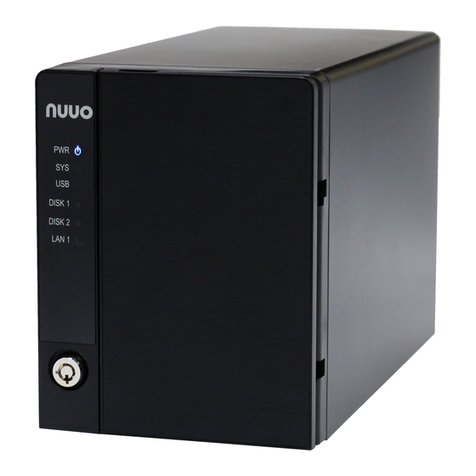
NUUO NAS NVRmini User manual

The Intelligent Surveillance Solution
NAS NVRmini
User Manual

1
Table of Contents
1. Installation.................................................................................................8
1.1 Installation Process.........................................................................8
1.2 LED Status Definitions ..................................................................17
2. Settings...................................................................................................18
2.1 Camera Setup...............................................................................18
2.1.1 Add Cameras by Camera Search.........................................18
2.1.2 Add Cameras Manually ........................................................20
2.1.3 Modify Camera Information ..................................................22
2.1.4 Modify Camera Parameters..................................................22
2.1.5 Set up Lens Settings.............................................................23
2.1.6 Set up 2nd Stream................................................................24
2.1.7 View Camera Status.............................................................25
2.2 Recording & Event Setup..............................................................26
2.2.1 Recording Mode Setup.........................................................26
2.2.2 Recording Schedule / Event Setup.......................................26
2.2.3 Camera Events and Responding Actions Setup...................31
2.2.4 I/O Box Input and RespondingAction Setup.........................33
2.2.5 System Events and Responding Actions Setup....................35
2.2.6 SMTP Server Setup..............................................................36
2.2.7 Add Event Contacts..............................................................37
2.3 RAID & File Settings .....................................................................38
2.3.1 View RAID Volume Status ....................................................38
2.3.2 View Disk Drive Information..................................................38
2.3.3 Migrate a RAID Volume........................................................39
2.3.4 Create a RAID Volume .........................................................40
2.3.5 Designate a Spare Drive.......................................................41
2.3.6 Delete a RAID Volume..........................................................42
2.3.7 Recover................................................................................43
2.3.8 View Protocol Status.............................................................43
2.3.9 Modify the “My Network Places” Protocol Settings ...............43
2.3.10 Modify the FTP Protocol Settings.....................................44
2.4 Auto Backup..................................................................................45
2.4.1 Set up Backup Schedule ......................................................45
2.4.2 Set up Backup Server...........................................................46
2.5 Network Setup ..............................................................................47
2.5.1 View Network Status.............................................................47
2.5.2 Network Settings ..................................................................48

2
2.5.3 Auto Port-Forwarding............................................................50
2.5.4 Network Service Setup.........................................................52
2.5.5 CMS Service Setup ..............................................................53
2.6 Management.................................................................................54
2.6.1 View the List of Users...........................................................54
2.6.2 Create New Users ................................................................54
2.6.3 Modify User Information........................................................55
2.6.4 Change a User’s Password ..................................................56
2.6.5 Delete Users.........................................................................56
2.6.6 Online License Activation......................................................57
2.6.7 Offline License Activation......................................................58
2.6.8 View the Event Log...............................................................60
2.6.9 Save Unit Configuration........................................................60
2.6.10 Load Unit Configuration / Default Settings........................61
2.7 System..........................................................................................63
2.7.1 View System Information......................................................63
2.7.2 View Enclosure Information..................................................63
2.7.3 Upgrade the System.............................................................64
2.7.4 System Date and Time Setup...............................................65
2.7.5 Daylight Saving Time Setup..................................................66
2.7.6 Enable and Disable the Buzzer ............................................66
2.7.7 View UPS Status...................................................................67
2.7.8 UPS Setup............................................................................68
2.7.9 Auto Power On .....................................................................68
2.7.10 Restart the Unit.................................................................69
2.7.11 Shut Down the Unit ..........................................................70
3. POS........................................................................................................71
3.1 Introduction...................................................................................71
3.1.1 System Introduction..............................................................71
3.1.2 Hardware Installation –SCB-C31A.......................................72
3.1.3 Software Installation –SCB-C31A........................................73
3.1.4 Connection via TCP Client....................................................75
3.2 Software Setup..............................................................................75
3.2.1 Activate POS License...........................................................75
3.2.2 NVR POS Setting .................................................................75
3.2.3 Insert POS Setting................................................................77
3.2.4 Delete POS Device...............................................................79
3.2.5 Configure POS Setting .........................................................79
3
3.3 Tag Filter.......................................................................................79
3.3.1 Add New Tag Filter ...............................................................79
3.3.2 Edit Tag Filter........................................................................83
3.3.3 Delete Tag Filter....................................................................83
3.3.4 Import/Export Tag Filter ........................................................83
3.4 POS Display Font .........................................................................83
3.4.1 Live View ..............................................................................83
3.4.2 Remote Live Viewer..............................................................84
3.4.3 Playback...............................................................................85
3.4.4 Playback System..................................................................86
3.5 POS Transaction Data Search......................................................87
3.5.1 Search POS Transaction Data through Playback.................88
3.5.2 Search POS Transaction Data through Playback System ....89
3.6 Playback Video with POS Data.....................................................89
3.6.1 Select Period by POS Search...............................................89
3.6.2 Select Period by Data & Time through Playback ..................90
3.6.3 Select Period by Data & Time through Playback System .....90
3.7 Backup Video with POS Data........................................................90
3.7.1 Backup through Internet Explorer.........................................91
3.7.2 Backup through Playback System........................................91
3.7.3 Backup through Backup System...........................................92
4. I/O...........................................................................................................93
4.1 Introduction...................................................................................93
4.1.1 System Introduction..............................................................93
4.1.2 HW Installation......................................................................93
4.1.3 Software Installation –SCB-C31 ..........................................94
4.1.4 Software Installation –SCB-C24/26/28 ................................95
4.2 Software Setup..............................................................................97
4.2.1 Add I/O Box..........................................................................97
4.2.2 Modify I/O Box Information...................................................98
4.2.3 I/O Pin Setting ......................................................................98
4.3 Relative Configuration and Application..........................................99
4.3.1 Record on Input Trigger........................................................99
4.3.2 Input and Responding Actions..............................................99
4.3.3 I/O Control Panel in Live View..............................................99
5. Live view...............................................................................................100
5.1 Internet Explorer .........................................................................100
5.1.1 Live View Control Panel......................................................100

4
5.1.2 Live View Setting................................................................103
5.1.3 General Setting...................................................................104
5.1.4 Stream Profile Setting.........................................................104
5.1.5 OSD (On-screen display) Setting .......................................105
5.1.6 Monitor Display Setting.......................................................106
5.1.7 Notification..........................................................................107
5.1.8 Set up Joystick Control.......................................................108
5.1.9 Set up Live View Sound on Event.......................................109
5.2 Remote Live Viewer Application..................................................110
5.2.1 Remote Live Viewer Application Control Panel...................110
5.2.2 Unit Connection Setting......................................................112
5.2.3 General Setting...................................................................114
5.2.4 Camera Group Setting........................................................115
5.2.5 Delete/ Rename Camera Groups .......................................116
5.2.6 Stream Profile Setting.........................................................116
5.2.7 OSD (On-screen display) Setting .......................................117
5.2.8 Monitor Display Setting.......................................................118
5.2.9 Notification..........................................................................119
5.2.10 Set up Joystick Control...................................................120
5.2.11 Set up Live View Sound on Event ..................................121
5.2.12 Set up Remote Live Viewer............................................122
6. E-Map...................................................................................................123
6.1 Internet Explorer .........................................................................123
6.1.1 E-Map Control Panel ..........................................................123
6.1.2 Add Map.............................................................................124
6.1.3 Edit Map .............................................................................125
6.1.4 Delete Map.........................................................................125
6.1.5 Add/Rotate Device Indicator...............................................126
6.1.6 Delete Device Indicator.......................................................126
6.1.7 Layout Adjustment..............................................................126
6.1.8 Relative Configuration and Application...............................127
6.2 Remote Live Viewer Application..................................................127
6.2.1 E-Map Control Panel ..........................................................127
7. Playback...............................................................................................128
7.1 Internet Explorer .........................................................................128
7.1.1 Playback Control Panel ......................................................128
7.1.2 Search the Recorded Video................................................130
7.1.3 Play the Recorded Video....................................................131

5
7.1.4 Intelligent Search................................................................132
7.1.5 Recorded Video Enhancement...........................................133
7.1.6 Save a Video ......................................................................134
7.1.7 Save an Image ...................................................................136
7.1.8 Print an Image ....................................................................136
7.1.9 Backup the Recorded Video...............................................137
7.2 Remote Playback System Application.........................................139
7.2.1 Playback System Application Control Panel.......................139
7.2.2 Set up Unit Connections.....................................................139
7.2.3 Search the Recorded Video................................................141
7.2.4 Play the Recorded Video....................................................141
7.2.5 Intelligent Search................................................................142
7.2.6 Recorded Video Enhancement...........................................143
7.2.7 Save a Video ......................................................................144
7.2.8 Save an Image ...................................................................144
7.2.9 Print an Image ....................................................................145
7.2.10 Backup the Recorded Video...........................................145
8. Backup and Delete Records.................................................................147
8.1 The Backup System Application..................................................147
8.2 Backup the Recorded Video through Windows Explorer.............150
8.3 Backup the Recorded Video through FTP...................................150
8.4 Playback the Backup Records ....................................................151
8.4.1 With Playback Application...................................................151
8.4.2 Without Playback Application..............................................151
8.5 Delete the Recorded Video.........................................................151
8.5.1 With Backup Application.....................................................151
8.5.2 Without Backup Application................................................154
9. Verification Tool.....................................................................................155
9.1 Execute Verification Tool.............................................................155
9.2 Verify Image / Video....................................................................156
10. External Storage............................................................................157
10.1 Create a Volume on DAS........................................................157
10.2 Create an External Storage on NAS.......................................157
11. Log out...........................................................................................159
12. Remote PC System Requirements................................................160
13. Troubleshooting.............................................................................161
13.1 Check the System Status LED................................................161
13.2 Check Disk Status LEDs.........................................................161

6
13.3 Replace a Failed Disk Drive....................................................161
13.4 Check RAID Volume Status....................................................162
13.5 Respond to a Critical RAID Volume........................................162
13.6 Respond to an Invalid RAID Volume.......................................162
13.7 Check File System Status.......................................................163
13.8 Rebuild the File System..........................................................163
13.9 Check Enclosure Status..........................................................164
13.10 Restore the Default Administrator’s Password........................164
13.11 Restore All Default Configuration............................................165
13.12 Install ActiveX .........................................................................165
13.13 Upgrade Process When Using Windows Vista .......................166
13.14 Cannot Playback When Applying Windows 2000 ...................168
13.15 Cannot Log in to the Unit with Internet Explorer .....................168
13.16 UAC on Windows Vista...........................................................168
13.16.1 Turn off UAC on Windows Vista .....................................168
13.16.2 Enable Privilege Level of Internet Explorer.....................171
13.17 Install Wizard Issue on Windows Vista ...................................172
13.17.1 FW Upgrade...................................................................172
13.17.2 Workaround....................................................................172
Appendix –RAID System ............................................................................173
Introduction to RAID .............................................................................173
RAID 0 –Stripe.....................................................................................173
RAID 1 –Mirror.....................................................................................174
RAID 5 –Block Striping with Distributed Parity.....................................175
RAID 10 –Mirror / Stripe.......................................................................176
Choosing a RAID Level ........................................................................176
Spare Drives.........................................................................................178
Automatic Rebuilding............................................................................178
RAID Volume Migration ........................................................................179
Appendix –Camera Integration ...................................................................181
Camera Supporting List........................................................................181
Camera Search Tool.............................................................................181
Stream Profile.......................................................................................181

7
GNU General Public License
This product includes copyrighted third-party software licensed under the terms of the GNU
General Public License. Please see the GNU General Public License (GPL) for the exact
terms and conditions of this license at www.gnu.org. The GPL source code incorporated into
the product is available for free download at our web site http://www.nuuo.com/.
Subject to GPL, you may re-use, re-distribute and modify the GPL source code.
Note that with respect solely to the GPL Software, no warranty is provided. We do not offer
direct support for the distribution.

8
1. Installation
1.1 Installation Process
Step 1: Unpacking the Unit
This package contains the following items:
The unit
Quick Start Guide
Screws for disk drives (1 package)
Power cord
Warranty card
12V DC power transformer (2 bay unit)
CD with Install Wizard, Backup, Live View, Playback, and Offline
Tool application, user manual, and quick start guide
Warning
The electronic components within the unit are sensitive to
damage from Electro-Static Discharge (ESD). Please take
precautions at all times when handling the unit or its
sub-assemblies.
Important
To configure the unit, you must install the software onto a
desktop/ laptop running Windows XP-SP3, 2003-SP2, Vista-SP2,
Windows 7.
2 bay unit front view
Disk Drive
Drive Carrier
Drive Status LED
Drive Activity LED
Ethernet Activity
LED
Power button
System Status LED

9
2 bay unit rear view
4 bay unit front view
Disk Drive
Drive Carrier
Drive Status LED
Drive Activity LED
Ethernet Activity
LED
Power button
System Status LED

10
4 bay unit rear view
4 bay unit front view (S-series)
Cooling Fan
RJ45 Network
Connection
USB Connections
Power Supply Fan
Power Connection
Disk Drive
Drive Carrier
Drive Status LED
Drive Activity LED
System Status LED
Ethernet Activity LED

11
4 bay unit rear view (S-series)
Step 2: Disk Drive Installation
You can populate this unit with SATA 1.5 Gb/s or 3.0 Gb/s disk drives. For
optimal performance, install disk drives of the same model and capacity.
Your disk drives will become a RAID Volume on this unit.
1. Open the lid on the front of the unit enclosure.
2. Pull a disk drive carrier from the enclosure. See the front view figure.
3. Carefully lay the disk drive into the drive carrier, making the screw holes
on the sides of the carrier align with the screw holes in the drive.
4. Insert the screws through the holes in the drive carrier and into the sides
of the disk drive.
Install only the counter-sink screws supplied with the unit.
Install four screws per disk drive.
Tighten each screw until snug. Be careful not to over-tighten.
5. Reinstall the drive carrier into the unit enclosure.
6. Repeat step 2 through 5 for the other disk drive.
7. Close the lid on the front of the unit.
Power Button
RJ45 Network
Connection
Cooling Fan
USB Connections
eSATA Connection
Power Connection

12
Step 3: Connecting to the Network
1. Attach one end of the network cable to the RJ45 network connection.
See the rear view figure.
2. Attach the other end of the network cable to your Ethernet hub or
switch. Important
If there are multiple networks at your facility, note the network to
which you connect the unit. You will need this information during
the setup process.
Step 4: Connecting the Power
1. Attach the power cord from the power source to the power adapter.
2. Connect the power adapter to the back of the unit enclosure. See the
rear view figure.
3. On the front of the unit, press the power button. See the front view
figure.
It takes about a minute for the unit to fully power up. After power-up:
The System Status LED turns green. See the front view figure.
The buzzer beeps one time.
Step 5: Software Installation
1. Insert the CD into your CDROM.
2. Double-click Setup.exe to begin installation.
3. Click the Next button to go on installation.
4. Click the “I accept the terms of the license agreement” option, and
then click the Next button.
5. Insert your “User Name” and “Company Name” then click the Next
button.
6. Select the setup type, and then click the Next button.
7. Click the Install button to proceed with installation.
8. When above-mentioned installation processes are finished, a final
installation screen appears. Click the Finish button to close the installer.

13
Step 6: Setting up the Unit
The software Install Wizard performs the setup procedures on your unit.
After the procedure, you can begin using this unit.
1. Startup > NUUO NVRmini > Install Wizard.
2. This program will show the default language setting and initiation mode.
3. Choose preferred language and initiation mode, and then click the Next
button.
Express Mode: you don’t need to set the date, time, network settings,
and RAID level. (After step 5, jump to step 9 directly.)
Advance Mode: you need to set your specific date, time, and
network settings.
4. Install Wizard program will search all the units on the Internet right now.
Choose one of them, and then click the Next button.

14
5. Enter your password, and then click the OK button.
Note
The default Administrator password is “admin”.
6. Set the time zone, date, and time, and then click the Next button.

15
7. Choose the network settings, and then click the Next button.
Obtain network settings automatically from DHCP server or
wizard: apply settings (such as IP, net mask, gateway, DNS) which
are automatically generated by the DHCP server.
Make network settings manually: individually select your specific
settings.
8. If you need to set a new disk(s), check the “Create new storage” option.
After checking, click the Next button.

16
Data Protection: set the RAID level to RAID 1 (2 bay). Set the RAID
level to RAID 5 (4 bay).
Maximum Capacity: set the RAID level to RAID 0 (2 bay). Set the
RAID level to RAID 0 (4 bay).
9. Review your settings. If the settings are correct, click the Finish button
to finish the settings selection process.
Caution
Once you have finished the setting selection process, the unit will
start working. In order to assure the stability of the unit, do not
pull any disks out when the system is running.

17
1.2 LED Status Definitions
System Status LED
Green
Red
Amber
Definition
Healthy
Fail
Critical
Drive Status LED
Green
Red
Amber
Dark
Definition
Healthy
Fail
Rebuilding
Without disk
Drive Activity LED
Blink
No blink
Definition
Activity
No activity
Ethernet Activity LED
Green
Blink
Definition
Link
Accessing

18
2. Settings
After setting up the unit, log in to the system by entering its IP address in
the browser (Internet Explorer 7 or above). When connecting, choose your
language, enter the user name and password, and then begin using this
system.
There are five main functions of this unit: settings, live view, playback, help,
and logout. They will be shown on the top of the page.
2.1 Camera Setup
2.1.1 Add Cameras by Camera Search
The function enables user to automatically search and add cameras in the
same network. There are two search mechanisms, one is UPnP, another is
camera search tool. Before searching UPnP cameras, make sure that the
cameras possess UPnP function.
1. Open Internet Explorer and log in to the unit.
2. Click IP Camera/ Camera Settings.
3. Click the Camera Search tab.
4. Click the Search button.

19
5. The system will list all the currently available cameras. The inserted
cameras are shown in blue. Click the icon to add a camera into your
camera list.
6. After clicking the icon, the camera setting page will pop up. Click the
item to which you want to add a camera.
7. Insert the camera name, user name, and password.
Model Name
Vendor
Other manuals for NAS NVRmini
2
Table of contents
Other NUUO Security System manuals

NUUO
NUUO SCB-C24 User manual

NUUO
NUUO DigiPlayer LDP1601 User manual

NUUO
NUUO NAS NVRmini User manual

NUUO
NUUO Crystal User manual

NUUO
NUUO NAS NVRmini User manual

NUUO
NUUO NVRmini 2 User manual

NUUO
NUUO NVRsolo NS-8060 User manual

NUUO
NUUO NVRsolo User manual

NUUO
NUUO NVRmini 2 User manual

NUUO
NUUO NVRsolo User manual