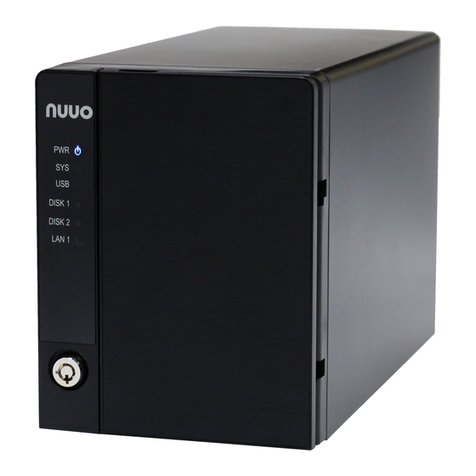
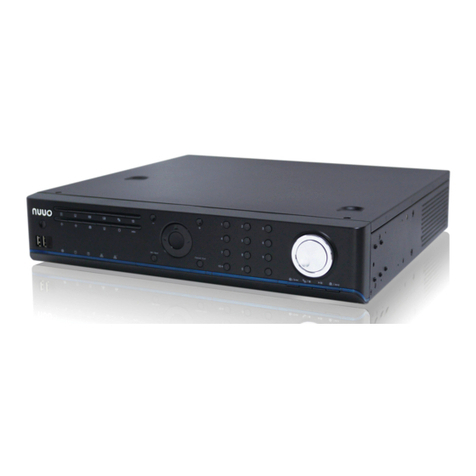
NUUO NVRsolo User manual

The Intelligent Surveillance Solution
NVRsolo
User Manual (Remote)
Ver. 2.1.0.140925.00

1
Table of Contents
1. Installation .................................................................................................8
1.1 Installation Process..............................................................................8
2. Settings .....................................................................................................26
2.1 Camera Setup ......................................................................................26
2.1.1 Add Cameras by Camera Search ...................................26
2.1.2 Add Cameras Manually.......................................................28
2.1.3 Modify Camera Information .............................................29
2.1.4 Modify Camera Parameters ..............................................29
2.1.5 Set up Lens Settings...........................................................30
2.1.6 View Camera Status............................................................31
2.1.7 View Camera Status Details.............................................33
2.2 Recording & Event Setup.................................................................33
2.2.1 Recording Mode Setup .......................................................33
2.2.2 Recording Schedule / Event Setup................................34
2.2.3 Camera Events and Responding Actions Setup........38
2.2.4 I/O Box Input and Responding Action Setup ............40
2.2.5 System Events and Responding Actions Setup ........41
2.2.6 Push Notification...................................................................43
2.2.7 SMTP Server Setup..............................................................45
2.2.8 Add Event Contacts .............................................................46
2.2.9 Set up FTP Server ................................................................47
2.3 RAID & File Settings..........................................................................48
2.3.1 Create a RAID Volume .......................................................48
2.3.2 View RAID Volume Status.................................................50
2.3.3 View Disk Drive Information............................................51
2.3.4 Modify RAID Volume ...........................................................53
2.3.5 Delete a RAID Volume........................................................56
2.3.6 Format ......................................................................................57
2.3.7 Modify the FTP Protocol Settings ...................................58
2.4 Auto Backup .........................................................................................58
2.4.1 Set up Backup Schedule....................................................59
2.5 Network Setup.....................................................................................60
2.5.1 View Network Status...........................................................60
2.5.2 Network Settings..................................................................60
2.5.3 Auto Port-Forwarding..........................................................63
2.5.4 Network Service Setup.......................................................64
2.5.5 CMS Service Setup ..............................................................66

2
2.5.6 ezNUUO ....................................................................................66
2.6 Management.........................................................................................67
2.6.1 View the List of Users.........................................................67
2.6.2 Create New Users.................................................................68
2.6.3 Modify User Information....................................................69
2.6.4 Change a User’s Password................................................69
2.6.5 Delete Users ...........................................................................70
2.6.6 Online License Activation ..................................................70
2.6.7 Offline License Activation ..................................................71
2.6.8 Online License Transfer......................................................73
2.6.9 Offline License Transfer......................................................74
2.6.10 View the Event Log .........................................................75
2.6.11 Save Unit Configuration ................................................76
2.6.12 Load Unit Configuration / Default Settings ...........77
2.7 System....................................................................................................78
2.7.1 View System Information..................................................78
2.7.2 Smart Fan Control................................................................79
2.7.3 Buzzer Configuration...........................................................79
2.7.4 UPS Setup ...............................................................................80
2.7.5 Upgrade the System ...........................................................80
2.7.6 Upgrade Notification............................................................81
2.7.7 System Date and Time Setup .........................................82
2.7.8 Restart the Unit.....................................................................83
2.7.9 Shut down the Unit..............................................................84
3. POS .............................................................................................................86
3.1 Introduction ..........................................................................................86
3.1.1 System Introduction ...........................................................86
3.1.2 Hardware Installation –SCB-C31A ...............................87
3.1.3 Software Installation –SCB-C31A.................................88
3.1.4 Connection via TCP Client .................................................89
3.2 Software Setup....................................................................................90
3.2.1 Activate POS License ..........................................................90
3.2.2 NVR POS Setting...................................................................90
3.2.3 Insert POS Setting ...............................................................91
3.2.4 Delete POS Device ...............................................................93
3.2.5 Configure POS Setting........................................................93
3.3 Tag Filter ................................................................................................93
3.3.1 Add New Tag Filter...............................................................93

3
3.3.2 Edit Tag Filter .........................................................................96
3.3.3 Delete Tag Filter....................................................................96
3.3.4 Import/Export Tag Filter ....................................................97
3.4 POS Display Font ................................................................................97
3.4.1 Live View..................................................................................97
3.4.2 Remote Live Viewer.............................................................98
3.4.3 Playback...................................................................................99
3.4.4 Playback System.................................................................100
3.5 POS Transaction Data Search......................................................101
3.5.1 Search POS Transaction Data through Playback....101
3.5.2 Search POS Transaction Data through Playback
System 102
3.6 Playback Video with POS Data ....................................................102
3.6.1 Select Period by POS Search .........................................103
3.6.2 Select Period by Data & Time through Playback....103
3.6.3 Select Period by Data & Time through Playback
System 103
3.7 Backup Video with POS Data .......................................................104
3.7.1 Backup through Internet Explorer...............................104
3.7.2 Backup through Playback System ...............................105
3.7.3 Backup through Backup System ..................................105
4. I/O.............................................................................................................106
4.1 Introduction ........................................................................................106
4.1.1 System Introduction .........................................................106
4.1.2 HW Installation....................................................................106
4.1.3 Software Installation –SCB-C31 .................................107
4.1.4 Software Installation –SCB-C24/26/28....................108
4.2 Software Setup..................................................................................110
4.2.1 Add I/O Box..........................................................................110
4.2.2 Modify I/O Box Information ...........................................111
4.2.3 I/O Pin Setting.....................................................................111
4.3 Relative Configuration and Application ....................................112
4.3.1 Record on Input Trigger...................................................112
4.3.2 Input and Responding Actions ......................................112
4.3.3 I/O Control Panel in Live View ......................................112
5. Live view.................................................................................................113
5.1 Internet Explorer ..............................................................................113
5.1.1 Live View Control Panel ...................................................113

4
5.1.2 Live View Setting................................................................116
5.1.3 General Setting ...................................................................116
5.1.4 Stream Profile Setting ......................................................117
5.1.5 OSD (On-screen display) Setting.................................118
5.1.6 Monitor Display Setting....................................................118
5.1.7 Notification............................................................................119
5.1.8 Set up Joystick Control ....................................................120
5.2 Remote Live Viewer Application .................................................122
5.2.1 Remote Live Viewer Application Control Panel .......122
5.2.2 Unit Connection Setting...................................................125
5.2.3 General Setting ...................................................................126
5.2.4 Camera Group Setting......................................................128
5.2.5 Delete/ Rename Camera Groups .................................128
5.2.6 Stream Profile Setting ......................................................129
5.2.7 OSD (On-screen display) Setting.................................129
5.2.8 Monitor Display Setting....................................................130
5.2.9 Notification............................................................................131
5.2.10 Set up Joystick Control................................................132
5.2.11 Set up Remote Live Viewer........................................133
6. E-Map.......................................................................................................134
6.1 Internet Explorer ..............................................................................134
6.1.1 E-Map Control Panel..........................................................134
6.1.2 Add Map .................................................................................135
6.1.3 Edit Map .................................................................................136
6.1.4 Delete Map............................................................................136
6.1.5 Add/Rotate Device Indicator..........................................136
6.1.6 Delete Device Indicator ...................................................136
6.1.7 Layout Adjustment ............................................................137
6.2 Remote Live Viewer Application .................................................137
6.2.1 E-Map Control Panel..........................................................137
7. Playback..................................................................................................139
7.1 Internet Explorer ..............................................................................139
7.1.1 Playback Control Panel.....................................................139
7.1.2 Search the Recorded Video ............................................141
7.1.3 Play the Recorded Video..................................................143
7.1.4 Intelligent Search...............................................................143
7.1.5 Recorded Video Enhancement.......................................144
7.1.6 Save a Video ........................................................................145

5
7.1.7 Save an Image ....................................................................146
7.1.8 Print an Image.....................................................................147
7.1.9 Backup the Recorded Video ...........................................148
7.2 Remote Playback System Application ......................................150
7.2.1 Playback System Application Control Panel .............150
7.2.2 Set up Unit Connections ..................................................150
7.2.3 Search the Recorded Video ............................................151
7.2.4 Play the Recorded Video..................................................152
7.2.5 Intelligent Search...............................................................152
7.2.6 Recorded Video Enhancement.......................................153
7.2.7 Save a Video ........................................................................154
7.2.8 Save an Image ....................................................................155
7.2.9 Print an Image.....................................................................155
7.2.10 Backup the Recorded Video.......................................156
8. Backup and Delete Records ............................................................157
8.1 The Backup System Application .................................................157
8.2 Backup the Recorded Video through Windows Explorer ...159
8.3 Backup the Recorded Video through FTP................................160
8.4 Playback the Backup Records......................................................160
8.4.1 With Playback Application...............................................160
8.4.2 Without Playback Application ........................................160
8.5 Delete the Recorded Video ...........................................................160
8.5.1 With Backup Application..................................................160
9. Verification Tool....................................................................................164
9.1 Execute Verification Tool................................................................164
9.2 Verify Image / Video .......................................................................165
10. External Storage..................................................................................166
10.1 Create a Volume on DAS ..........................................................166
10.2 Create an External Storage .....................................................166
11. Log out ....................................................................................................168
12. Remote PC System Requirements ................................................169
13. Troubleshooting....................................................................................170
13.1 Replace a Failed Disk Drive......................................................170
13.2 Respond to a Critical RAID Volume ......................................170
13.3 Respond to a File System Error RAID Volume .................170
13.4 Restore the Default Administrator’s Password .................170
13.5 Restore All Default Configuration ..........................................171
13.6 Install ActiveX ...............................................................................171

6
13.7 Cannot Log in to the Unit with Internet Explorer ...........172
Appendix –RAID System.................................................................................173
Introduction to RAID..................................................................................173
RAID 0 –Stripe............................................................................................173
RAID 1 –Mirror............................................................................................174
RAID 5 –Block Striping with Distributed Parity..............................175
RAID 10 –Mirror / Stripe.........................................................................175
Choosing a RAID Level..............................................................................176
Appendix –Camera Integration ....................................................................178
Camera Support List ..................................................................................178

7
GNU General Public License
This product includes copyrighted third-party software licensed under the terms of the GNU
General Public License. Please see the GNU General Public License (GPL) for the exact terms and
conditions of this license at www.gnu.org. The GPL source code incorporated into the product is
available for free download at our web site http://www.nuuo.com/.
Subject to GPL, you may re-use, re-distribute and modify the GPL source code.
Note that with respect solely to the GPL Software, no warranty is provided. We do not offer direct
support for the distribution.

8
1.Installation
1.1 Installation Process
Step 1: Unpack the Unit
This package contains the following items:
1bay Package
2bay Package
8bay Package
The unit
V
V
V
Remote control, 1.5M
IR extender cable
V
V
V
Disk screws
V (for 2.5” and 3.5”
disk)
V (for 2.5” and 3.5”
disk)
V (for 3.5” disk)
Pad and stand
[Horizontal] foot
pads; [Vertical]
Stand, foot pads and
screws
[Horizontal] foot
pads; [Vertical]
Stand, foot pads and
screws
Foot pads
Power
12V 4A 48W power
adapter, power cord
12V 5A 60W power
adapter, power cord
Power cord
Warranty card, Quick
Start Guide, CD
V
V
V
Rackmount kit, screws
-
-
V
Key
-
-
V
*CD content: Install Wizard,Remote Live Viewer, Playback System, Backup System, Verification Tool and
Offline License Tool application, user manual, and quick start guide
Battery spec is 1.5V, AAA, R03. Two batteries are required for a remote control.
To configure the unit, you must install the software onto a desktop/ laptop running
Windows XP-SP3 32bit, Windows 7 32/64bit, Windows 8 32/64bit.
Front View (1 Bay/2 Bay Unit)
Status LED:
No.
Description
Status Notice
Remark

9
1
Power Status LED
Power-on: blue
Power-off: dark
--
2
System Status LED
Healthy: blue
Unhealthy: orange
Abnormal temperature
status: orange with blinking
Off: dark
1) Orange: System or
RAID is abnormal
2) Orange with
blinking: CPU
temperature/fan
rpm is beyond the
normal range
3) Blinking (200 ms
On/ 200 ms Off)
3
HDD Status LED
Healthy: blue
Failed: orange
No disk: dark
Rebuilding: orange with
blinking
1) LED for all disks
2) Blinking (200 ms
On/ 200 ms Off)
4
Ethernet Status LED
Linking: blue
Accessing: blue with blinking
No linking: dark
1) LED for Ethernet
port (1*output for
detecting
connection status
of switch)
2) Blinking (200 ms
On/ 200 ms Off)
5
Alarm LED
No event happened: dark
Event detected: orange with
blinking
Blinking (200 ms On/
200 ms Off)
External Control and I/O Ports:
No.
Description
1
Power button
6
Remote control IR receiver
7
USB 2.0 connector
Rear View (1 Bay/2 Bay Unit)

10
Status LED:
No.
Description
Status Notice
Remark
5
Ethernet Activity LED
Linking: green
Accessing: green with
blinking
No linking: dark
1) LED for Ethernet
port
2) Blinking (200 ms
On/ 200 ms Off)
External Control and I/O Ports:
No.
Description
1
DC-in power connector
2
3.5 mm mic-in (reserved)
3
3.5 mm audio out (headphone jack)
4
VGA connector
5
RJ-45 LAN ports 1 / 2
6
eSATA connector
7
COM port (RS-232 reserved)
8
USB 2.0 connectors
9
HDMI connector
10
Connection of IR extender
11
3.5 mm line-in (reserved)
12
Reset toggle
Horizontal
Foot pad*4
(horizontal used)
Accessory box

11
Vertical
Front View (8 Bay Unit)
Status LED:
No.
Description
Status Notice
Remark
1
Lock
The lid is locked when first
unpacked.
Vertical stand
Screw*4
Foot pad*4
(vertical used)

12
2
Power Status LED
Power-on: blue
Power-off: dark
--
5
System Status LED
Healthy: blue
Unhealthy: orange
Abnormal temperature
status: orange with
blinking
Off: dark
1) Orange: System is
abnormal (including
RAID)
2) Orange with blinking:
CPU temperature/fan
rpm is beyond the
normal range
3) Blinking (200 ms On/
200 ms Off)
6
HDD Status LED
Healthy: blue
Failed: orange
No disk: dark
Rebuilding: orange with
blinking
1) LED for all disks
2) Blinking (200 ms On/
200 ms Off)
7
Alarm LED
No event happened: dark
Event detected: orange
with blinking
Blinking (200 ms On/ 200 ms
Off)
8
Ethernet Status LED
Linking: blue
Accessing: blue with
blinking
No linking: dark
1) LED for Ethernet port
(1*output for detecting
connection status of
switch)
2) Blinking (200 ms On/
200 ms Off)
External Control and I/O Ports:
No.
Description
1
Lock
2
Power button
3
USB 2.0 connector
4
Remote control IR receiver
9
Plus (+) and
Minus (-) keys
1. Moves between the eight Menus under the Main Menu, i.e. hit these
keys to navigate between these menus:
2. Moves between the available tabs featured by a submenu.
3. Flips up and down the page.
OK / Save key
This key delivers the same function as clicking the OK or Save button on a
tab or dialog. Its functions include:
Quitting a tab saving the change(s).
Applying the change(s) made on a tab
Cancel / Exit
key
This key delivers the same function as clicking the Exit or Cancel button on
a tab or dialog. Its functions include:
Quitting a tab without saving the change(s).
Closing a dialog or a tab.
Enter /
Home
As the Enter key, it makes a selection (check box, radio button or a
selectable item, i.e. the highlight item) onscreen or confirms input.
As the Home key, it turns the video of the focused channel to the preset
Home point.
Hit this key to a selected Video Area to maximize it to full screen. Hit it
again to resize the Video Area. See also Video Area and Video Area.
Left/Right arrow
keys
These keys can be hit to move left and right between the menus of the Main
Menu and the highlighted items on all setting pages.

13
Up/Down arrow
keys
These keys can be hit to move up and down between the submenus of a
menu and the highlighted items on all setting pages.
10
Numeric keypad
Enters numeric characters, or selects a video channel.
Examples: Press key 1 to select video channel 1. Press keys 10+ and 0 to
select video channel 10.
The timeout for 10+ key is 5 seconds.
Keystroke timeout is applicable to 10+ key only.
11
Preset Set
Opens a panel to set or deletes a preset point.
Only one point can be set or deleted at one time.
The panel auto closes after the setting or deletion is done. Or hit the key
once again to close the panel.
This key is only applicable to the Live View screen.
Preset Go
Opens a small panel to jump to the desired preset point or to start/stop
patrol.
The panel auto closes once the action is launched. Hitting the key once
again also closes the panel.
This key is only applicable to the Live View screen.
I/O
Opens a list of the available camera I/O pins.
This key is only applicable to the Live View screen.
Play /
Pause
Delivers different functions in Live View and Playback.
Live View: Starts the Instant Playback
Playback: Starts or halts the playing.
Stop
Stops playing.
This key is only applicable to the Playback screen.
The playback stops by showing the frame where the video starts.
Whether the video is being fast-forwarded or reverse-played at the
moment, press Stop key will restore the playback speed to x1.
Previous
Interval
Hit this key once to bring the playback to the previous interval.
See Playback to know how to set Playback Interval.
Next
Interval
Hit this key once to jump the playback to the next interval.
See Playback to know how to set Playback Interval.
12
Step
Backward
Hit this key once to bring the playback to the previous frame.
Step
Forward
Hit this key once to jump the playback to the next frame.
13
Fast-Forward
Hit once to fast-forward the playback with x2 speed. Hit twice to fast-forward
the playback to x4 speed. Increment the fast-forwarding speed by increasing
your keystrokes. When the fast-forwarding speed is incremented to x16, it
auto-restores to x1 speed.
This key is only applicable to the Playback screen.
Rewind
Hit once to rewind with x-1 speed. Hit twice to rewind with x-2 speed. Taper
the rewinding speed by increasing your keystrokes. When the rewinding
speed is tapered to x-16, it auto-restores to x-1 speed.
This key is only applicable to the Playback screen.
14
Menu
Opens the system’s Main Menu.
See Settings to know all the settings featured by the Main Menu.
This key is only applicable to Live View screen.
Live View
Switches the screen to Live View.

14
Playback
Switches the screen to Playback and opens the Search dialog.
Layout
Switches between different layouts of video channels on the Video Areas.
See also Video Area and Video Area.
Group
Switches the screen to the next camera group.
This key is only applicable to the Live View screen.
Auto Scan
Hit to apply Auto Scan.
See Display for the details about Auto Scan.
Hit again to quit Auto Scan.
Pressing Group, Snapshot, DPTZ, PPTZ, Preset or Go to Preset key
will disable Auto Scan.
This key is only applicable to the Live View screen.
P PTZ
Opens the physical PTZ panel for PTZ operation.
Hit this key again to close the physical PTZ panel.
This key is only applicable to the Live View screen.
D PTZ
Opens the digital PTZ panel for PTZ operation.
Hit this key again to close the digital PTZ panel.
Snapshot
Opens a dialog to capture the current screen.
Press Save button to save the screenshot; or press Cancel button to
quit without capture.
Event
Checks the recent events and notifications.
This key is only applicable to the Live View screen.
Emergency
Record
Enables/disables Always record.
See also Mode tab for more details about the recording modes.
This key is only applicable to the Live View screen.
Auto Setup
Runs auto camera setup.
This key is only applicable to the Live View screen.
Rear View (8 Bay Unit)
Status LED:
No.
Description
Status Notice
Remark
12
Ethernet Activity LED
Linking: green
Accessing: green with
blinking
No linking: dark
1) LED for Ethernet
port
2) Blinking (200 ms
On/ 200 ms Off)
External Control and I/O Ports:

15
No.
Description
1
Power cord connector
2
Cooling fan
3
COM port (RS-232 reserved)
4
Reset toggle
5
Relay output*4, support N.O. / N.C.
3A, 24 VDC/ 120 VAC max
6
Digital input*16, dry contact
7
3.5 mm audio out (headphone jack)
8
3.5 mm line-in (reserved)
9
3.5 mm mic-in (reserved)
10
HDMI connector
11
VGA connector
12
RJ-45 LAN ports 1 / 2
13
USB 2.0 connectors
14
Connection of IR extender
15
eSATA connector

16
Step 2: Install Hard Drives
Refer to compatibility list and install HDDs. For optimal performance
consideration, install disks with the same model and storage capacity. The
available RAID level depends on the amount of disks installed.
1. Open the lid of the unit.
2. Carefully lock the disks into the HDD tray with screws. 4 screws for each
disk. Lock the lid of the unit once you finished.
1 bay unit: install 3.5” HDD
1 bay unit: install 2.5” HDD
HDD bracket
2.5”HDD*2
Screw*8
(2.5”HDD used)
Screw*4
(3.5”HDD used)
HDD bracket
3.5”HDD

17
When installing HDDs on HDD bracket, please mind your hands from scratching.
2 bay unit: Install 3.5” HDD
For 2-bay installation, it is recommended to connect the SATA cable to HDDs
before securing the HDDs to the bracket.
When installing HDDs on HDD bracket, please beware of sharp edges.
8 bay unit: install 3.5” HDD
Insert
Pull out
Screw*8
(3.5”HDD used)
HDD bracket
3.5”HDD

18
Step 3: Connect the Unit and Devices within the Network
1. Connect the unit, cameras, and router/switch.
2. If you need to make the video visible over the Internet, please connect to
a “router”with Internet connection, and the unit will retrieve an IP address
through DHCP by default.
The unit processes built-in DHCP service, which takes the job of router to assign IP
addresses, which is suitable for the pure LAN environment.
Step 4: Connect the Monitor (Local)
1. The unit processes two display interfaces, VGA and HDMI. Connect the
monitor to the unit.
The supporting display resolutions are 1920x1080, 1280x1024, 1280x720, and
1024x768. Please confirm that one of the resolutions is supported by your monitor.
Step 5: Connect the Power
1bay:
1. Attach the power cord from the power source to the power adapter.
2. Connect the power adapter to the back of the unit enclosure. See the rear
view figure.
3. On the front of the unit, press the power button. See the front view figure.
8bay:
1. Connect the power cord directly to the back of the unit. See the rear view
figure.
2. On the front of the unit, press the power button. See the front view figure.
It takes about a minute for the unit to fully power up. Once it is powered up:
The System Status LED turns blue. See the front view figure.
The buzzer beeps one time.
Step 6: Install the Software
Please be noticed that you can choose to start up system on the local side or

19
from the remote side. Here is the introduction of remote startup. If you are
interested in the local part, please refer to “User Manual (Local)”.
1. Insert the CD into your CDROM.
2. Double-click Setup.exe to begin installation.
3. Follow the instruction of Setup.exe, and click the Finish button to close
the installer.
Step 7: Set up the Unit
The software Installation Wizard performs the setup procedures on the unit.
After the procedure, you can begin using it.
1. Go to Start > NUUO NVRsolo > NUUO Installation Wizard.
2. This program will show the default language setting and initiation mode.
3. Choose your preferred language and initiation mode, and then click the
button.
Express Mode: you don’t need to set up the network and RAID level.
Advanced Mode: configure all settings manually: network, license,
camera, Date/Time, upgrade notification, and RAID level.
4. The Installation Wizard program starts searching for all the units on the
internet currently. Choose one of them, and then click the button.
Other manuals for NVRsolo
3
Table of contents
Other NUUO Security System manuals

NUUO
NUUO NAS NVRmini User manual

NUUO
NUUO Crystal User manual

NUUO
NUUO 6000S SERIES User manual

NUUO
NUUO NVRsolo User manual

NUUO
NUUO SCB-C24 User manual

NUUO
NUUO NVRmini 2 User manual

NUUO
NUUO NVRmini 2 User manual

NUUO
NUUO G3 Card Mounting instructions

NUUO
NUUO Titan NVR User manual

NUUO
NUUO DigiPlayer LDP1601 User manual